Understanding the Exposure Triangle – A guide for Beginner Film Photographers
Exposure Triangle Explained: A Complete Guide for Film Photography
Quick Summary
If you’re new to the world of film photography, one of the most fundamental concepts you need to grasp is that of the exposure triangle. This blog post breaks down each element (ISO, Shutter Speed and Aperture) and how these work together to create a well exposed shot.
Key Takeaways:
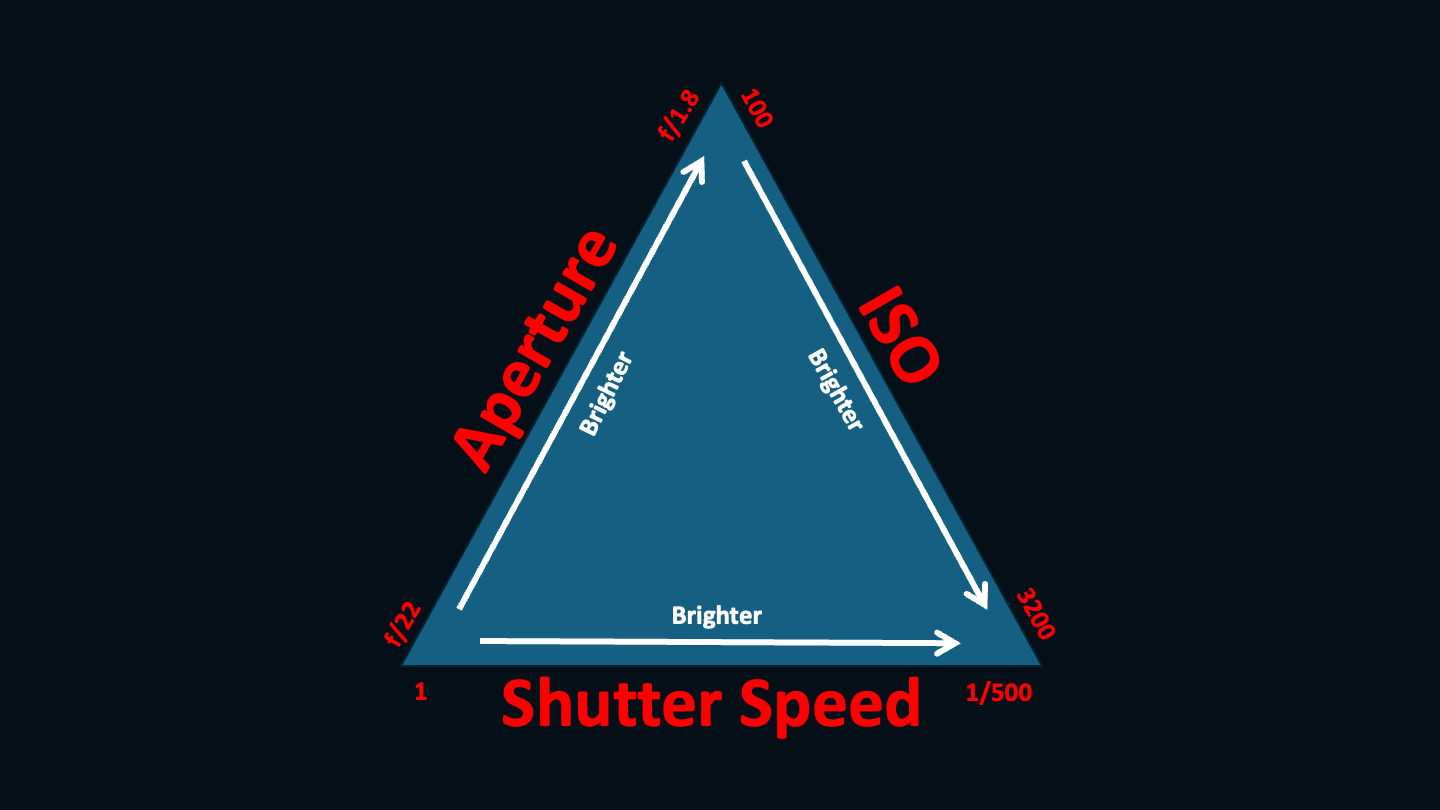
- The exposure triangle consists of three critical elements that work together to control how much light reaches the film: aperture, shutter speed, and ISO (sometimes called ASA).
- Balancing these three aspects is the key to achieving well-exposed images and avoiding your shot coming out too bright (overexposed) or too dark (underexposed).
- Understanding each element will also empower you to make decisions to achieve certain creative effects in your work.
- This blog breaks down each part of the exposure triangle and how they interact with one another to shape your final image.
- Once you understand these, you should familiarise yourself with the Sunny 16 Rule – here’s a dedicated blog just for that!
Mastering Aperture: Controlling Light and Focus
Aperture refers to the opening in your lens that allows light to pass through and reach the film. This is measured in f-stops, such as f/1.8, f/4, or f/11, which are the numbers you’ll likely see on your lens or when reading descriptions of lenses.
Somewhat confusingly, the smaller the f-stop number, the larger the opening (aperture) and therefore more light is let in. Conversely, a higher f-stop number means a small aperture and less light entering the lens.
I find that aperture is often the thing that people struggle to understand, so I’ll share with you the analogy that helped me grasp it better…
Think of aperture like the pupil of your eye. When you’re in a dark room, your pupil expands to let in more light so you can see better. This is similar to a large aperture (low f-stop), which lets in more light to expose your film in low-light conditions.
On the other hand, when you step outside into bright sunlight, your pupil constricts (gets smaller) to reduce the amount of light entering your eye.
This is like using a small aperture (high f-stop), which limits the light entering your lens to prevent overexposure in bright conditions.
Just like your eye adjusts its pupil size to control how much light you see, your camera’s aperture adjusts to control how much light reaches the film, affecting the overall exposure and focus of your image.
Like all elements of the exposure triangle, it’s important to log what aperture you use so you can learn from your own shots – find out how to make an analogue photography log book here.
The Impact Aperture has on Exposure:
- A larger aperture (e.g. f/1.8) allows more light in and is much better for dealing with low-light conditions. However, this also reduces your depth of field. This means only a small portion of your image will be in focus, making larger apertures perfect for portraiture or any shot where you’d like your subject sharp against a blurred background.
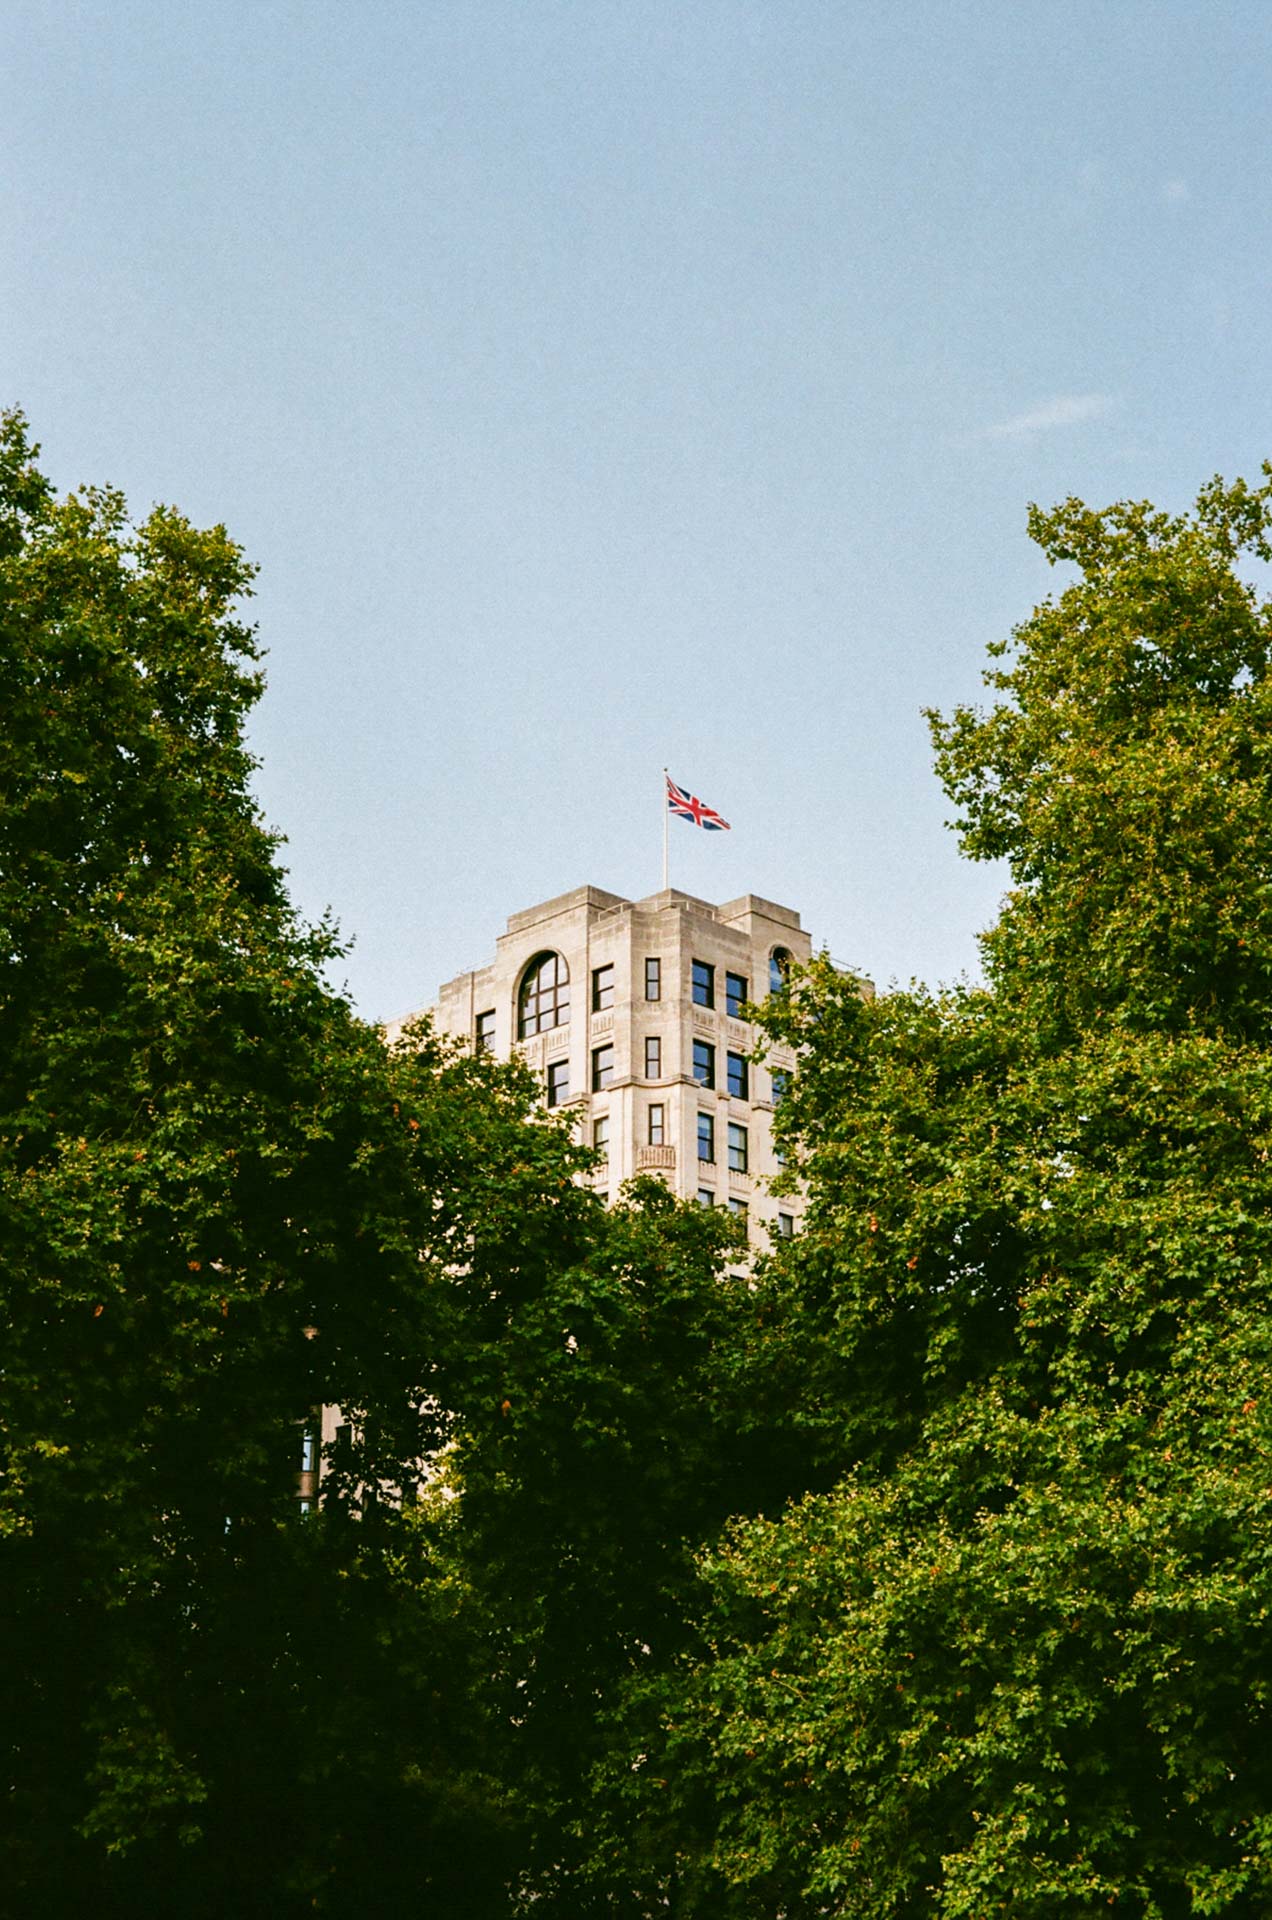
- A smaller aperture (e.g. f/11 or f/16) allows less light in, and is more suited for brighter daylight conditions. This increases your depth of field, so much more of your image will be in focus and therefore typically makes the most sense for landscape or architectural photography.
It is worth reiterating that beyond just controlling light, aperture is an immensely powerful creative tool in photography and dictates how much of your shot is in focus.
Once understood and wielded correctly, this can really help you match your final exposure to the creative vision you have for the shot at hand.
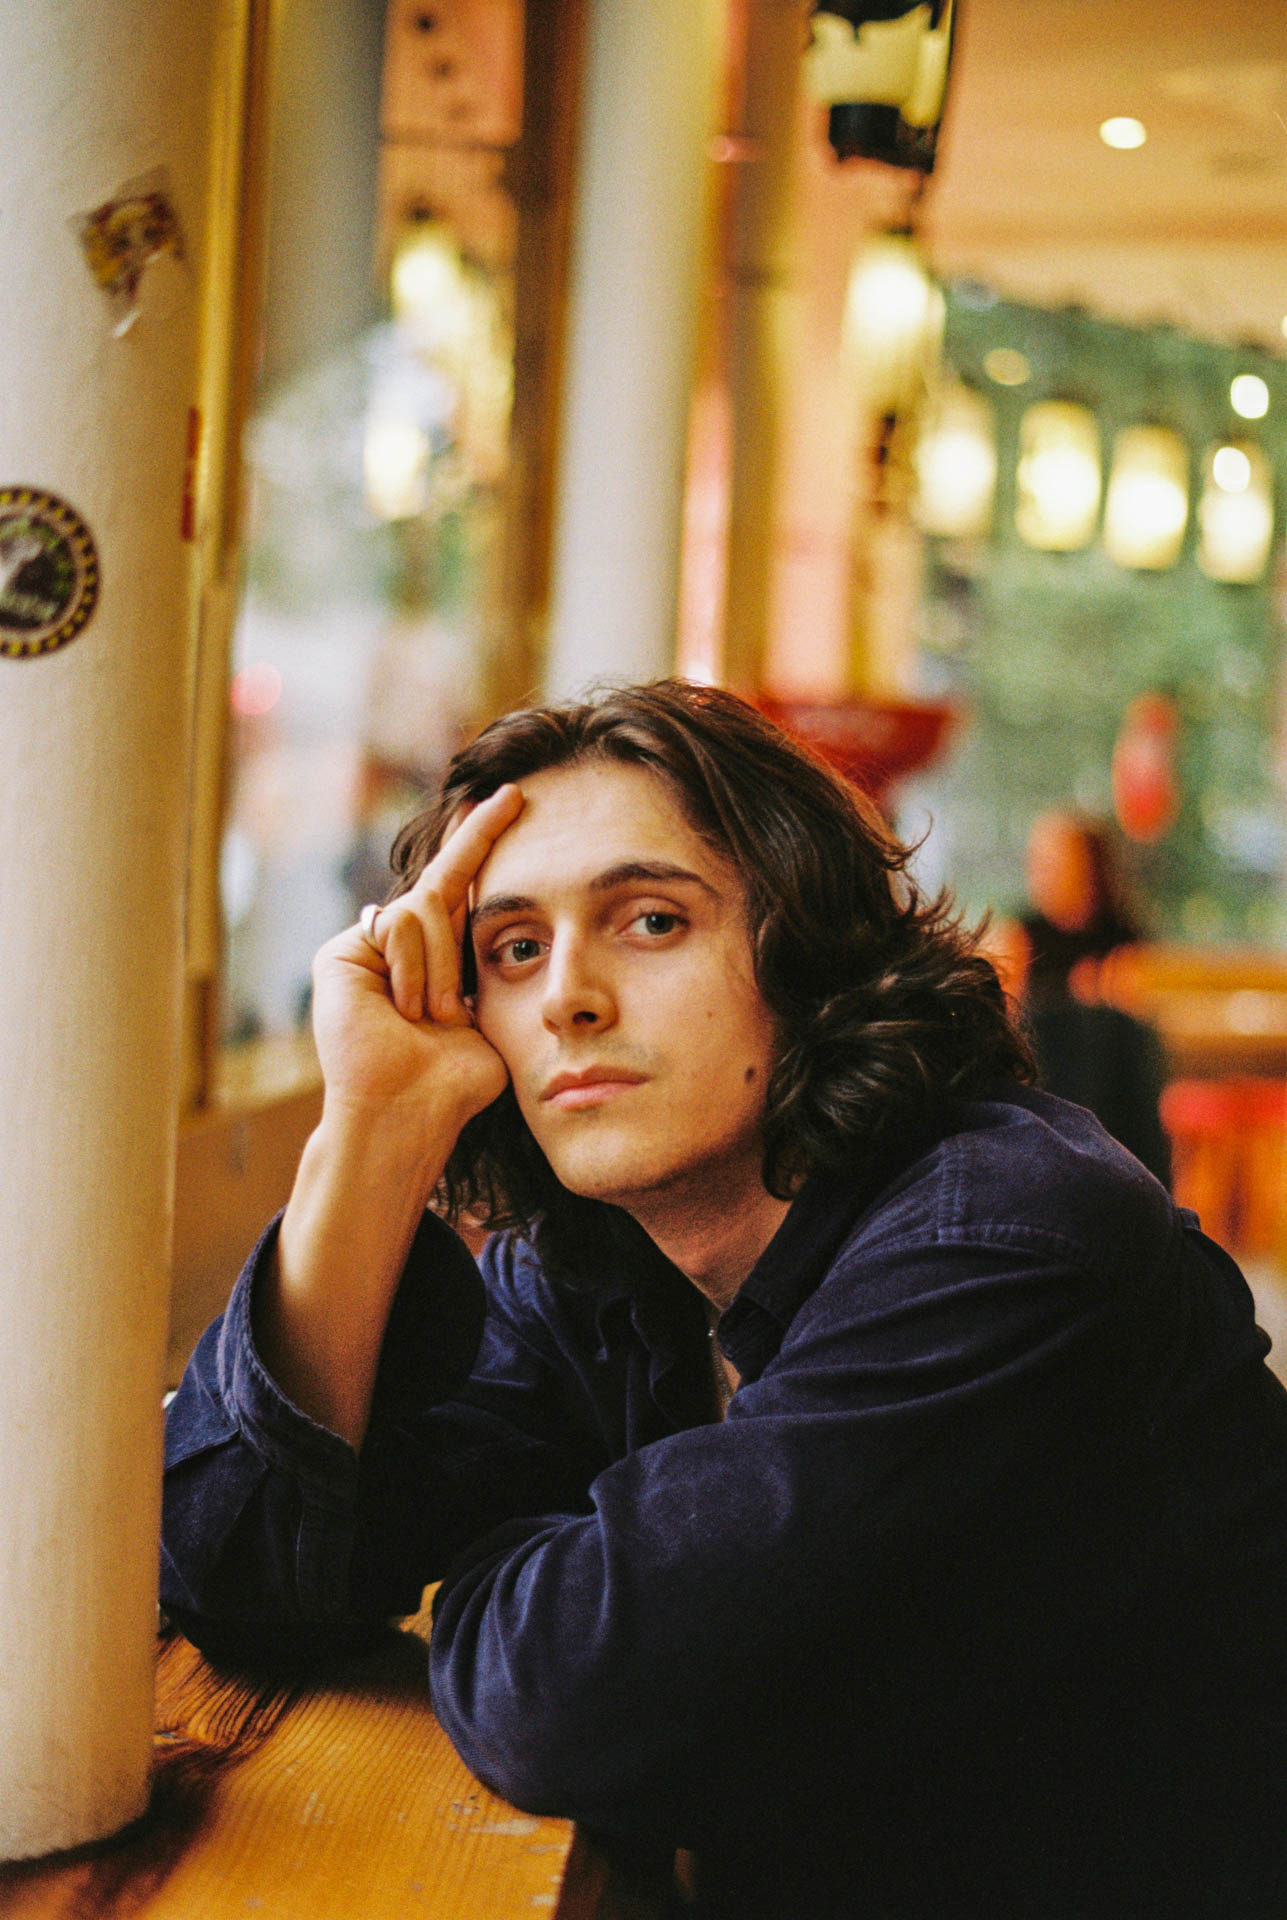
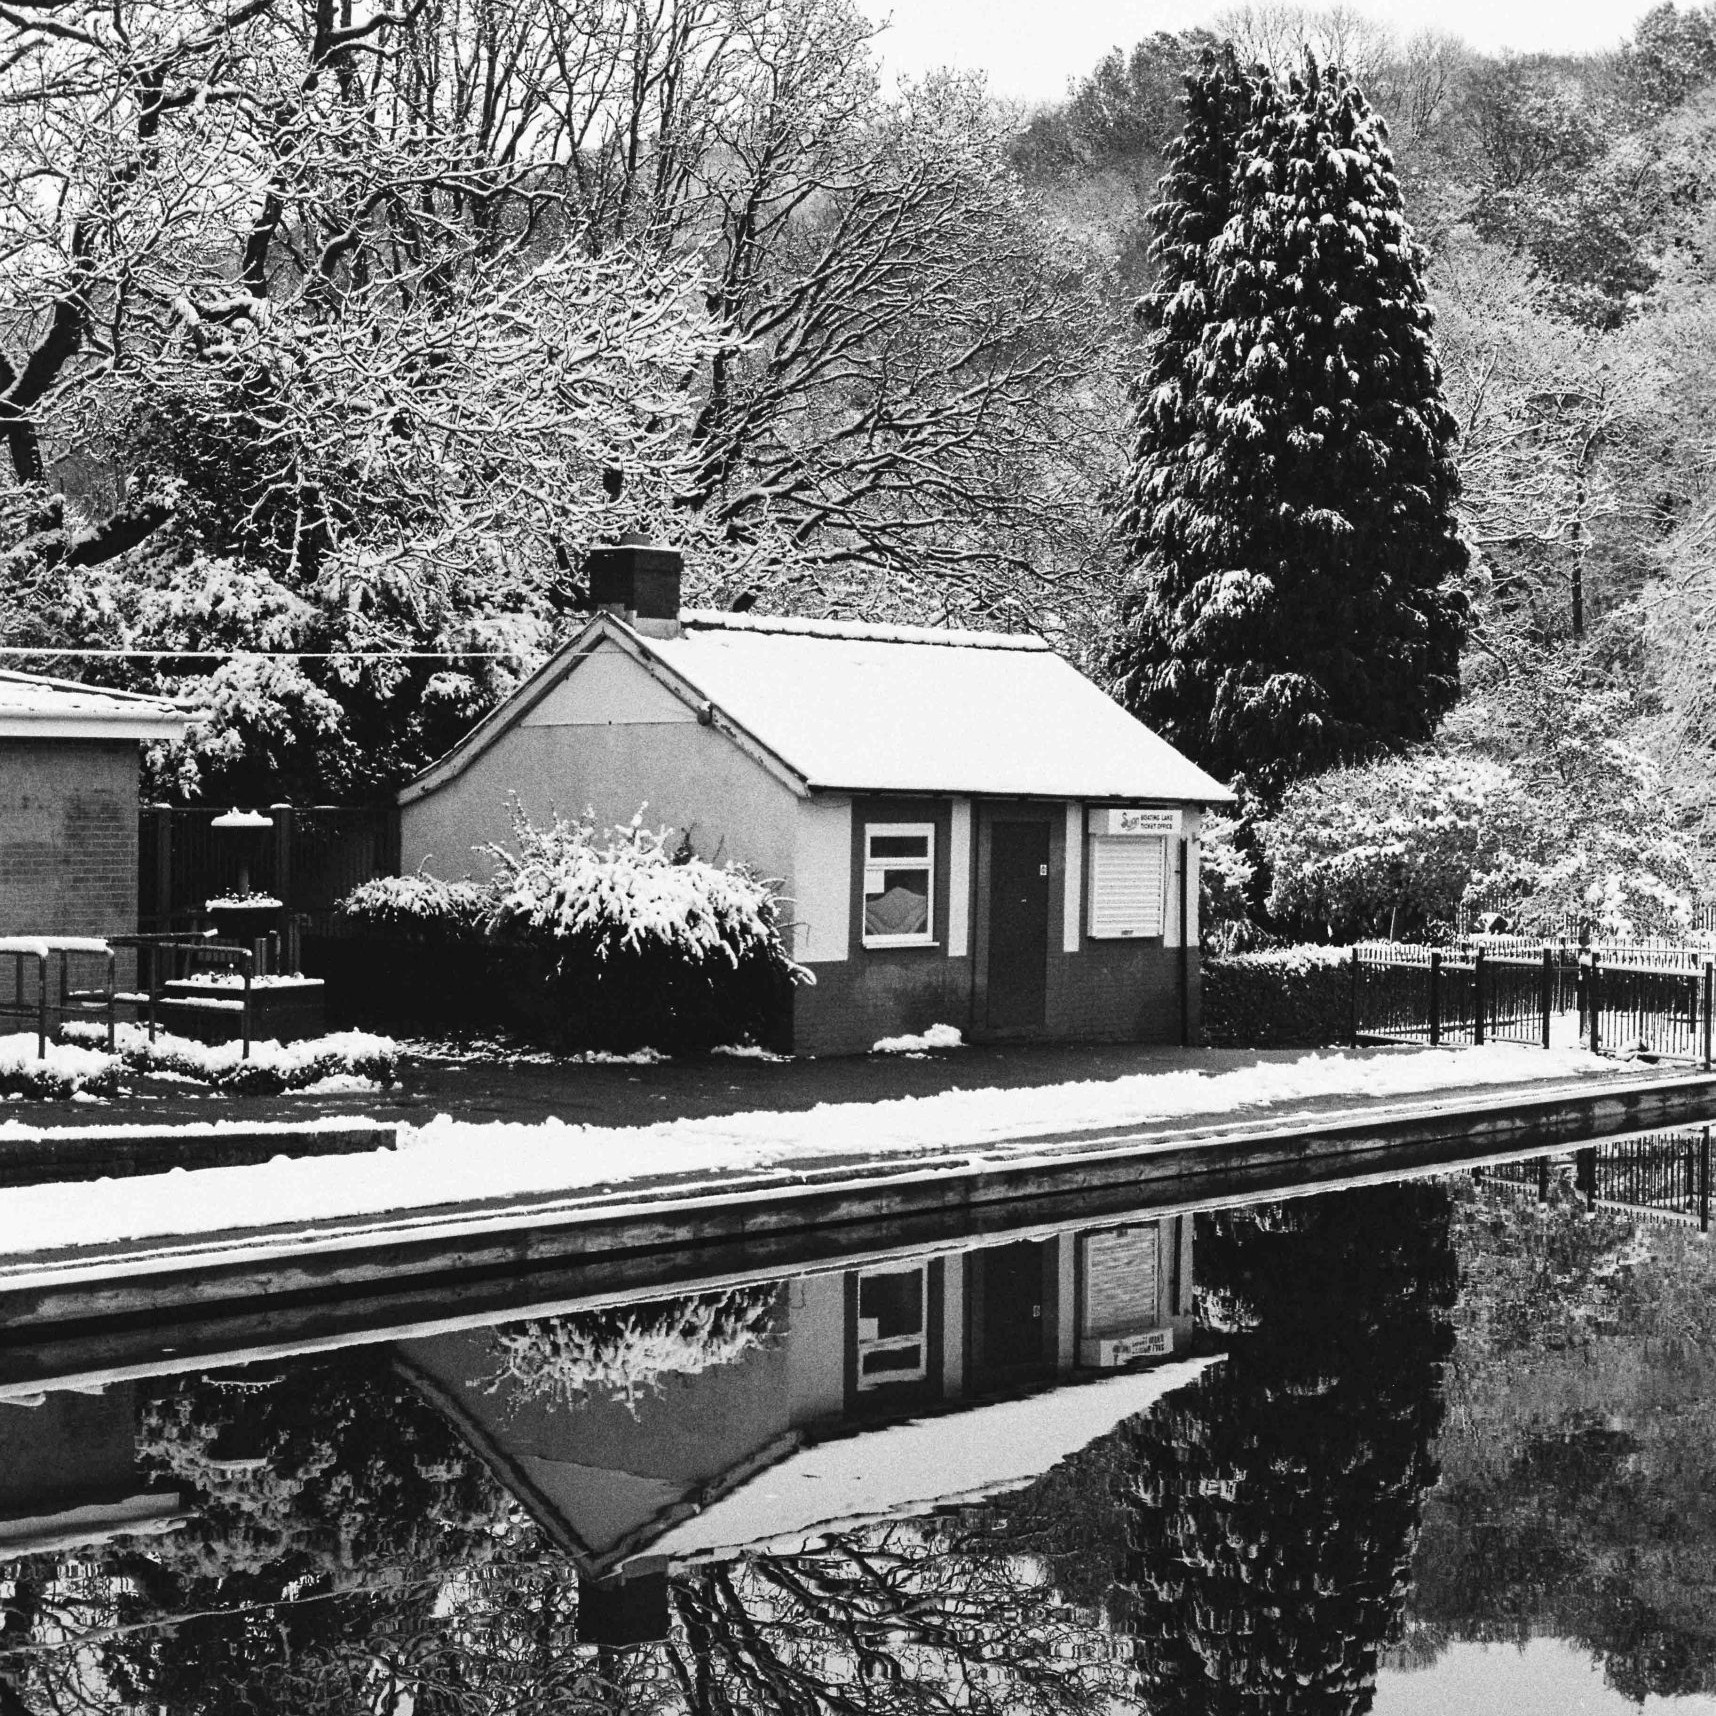
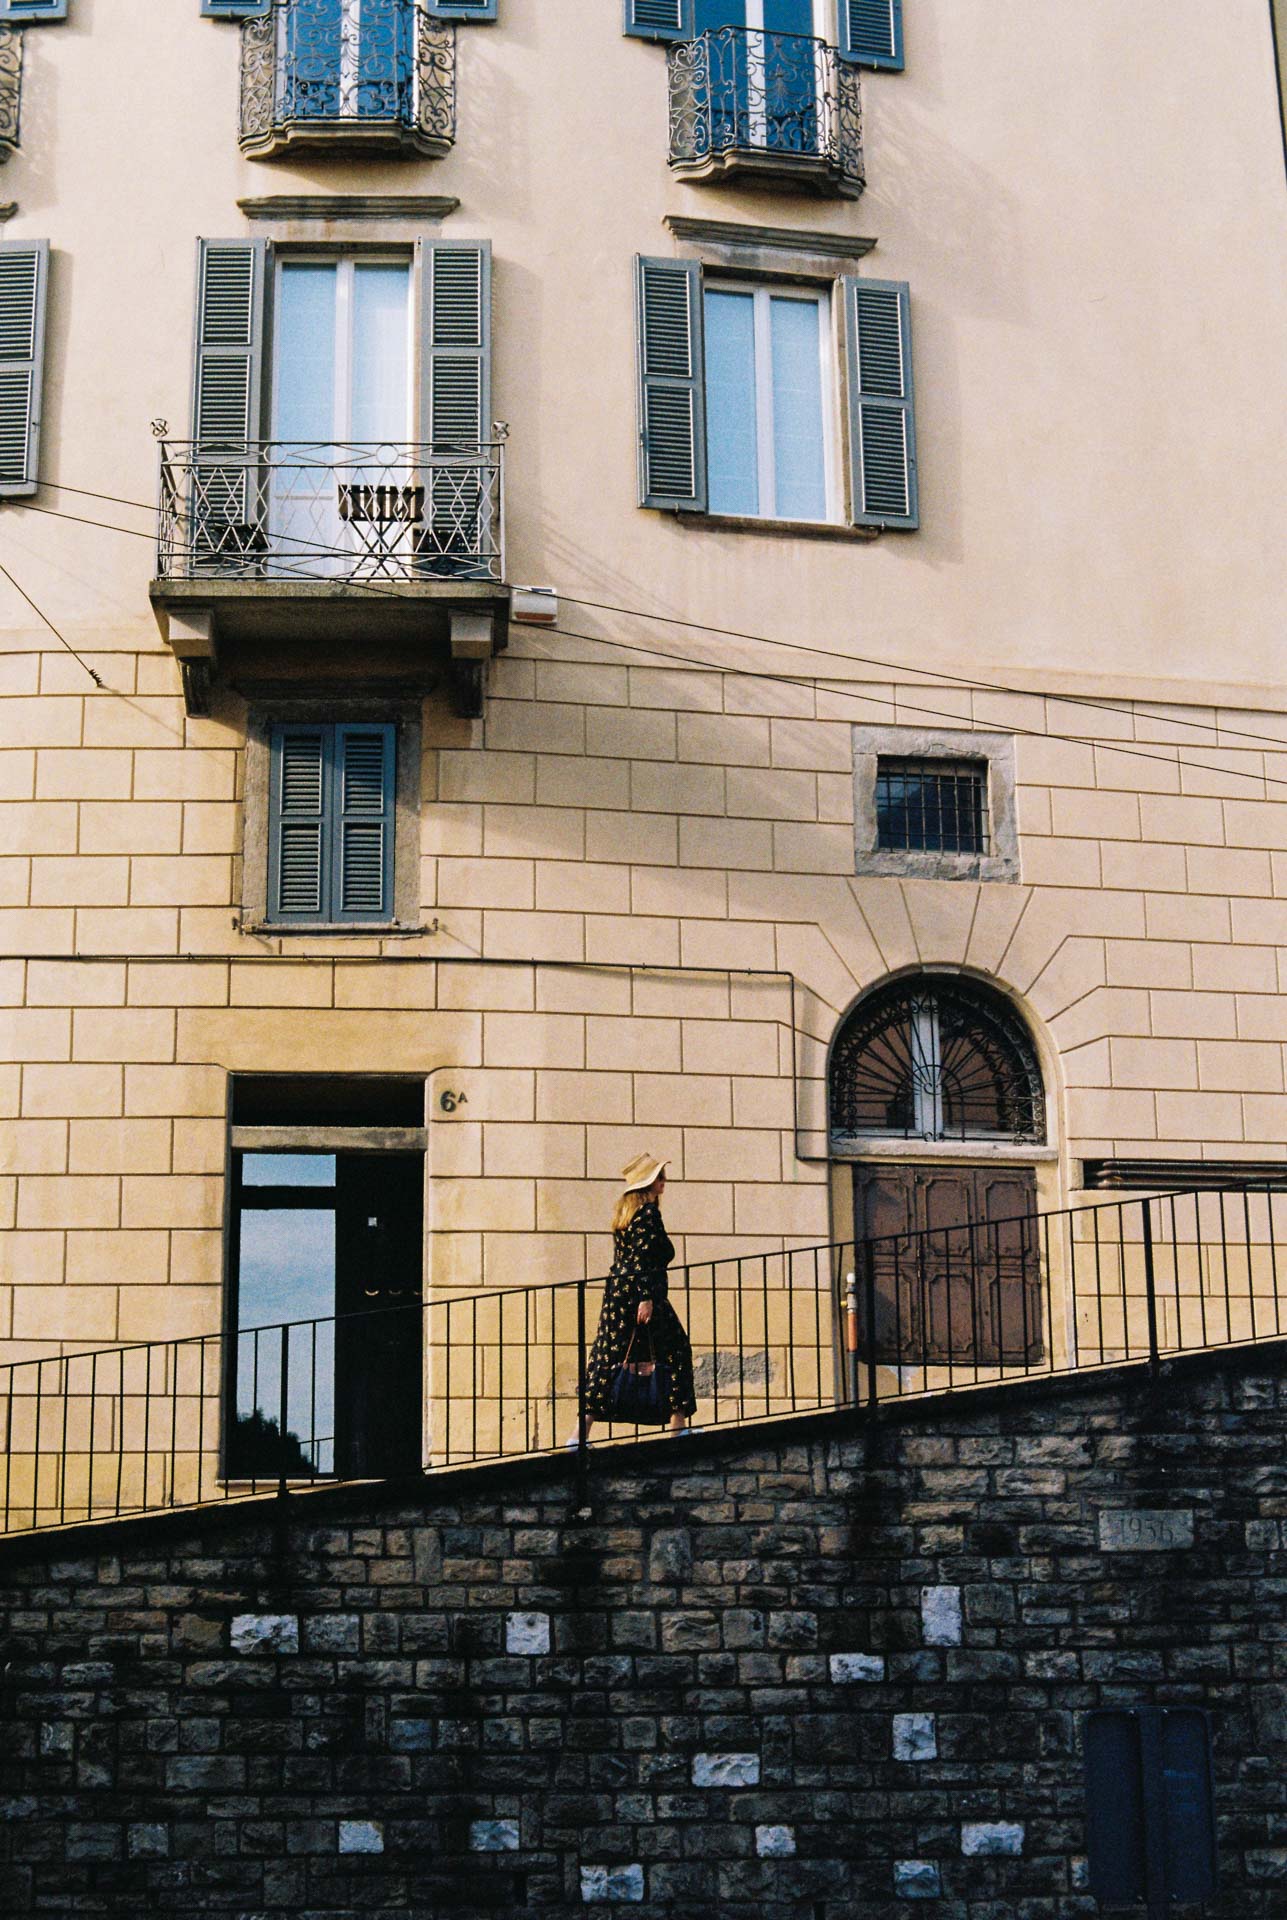
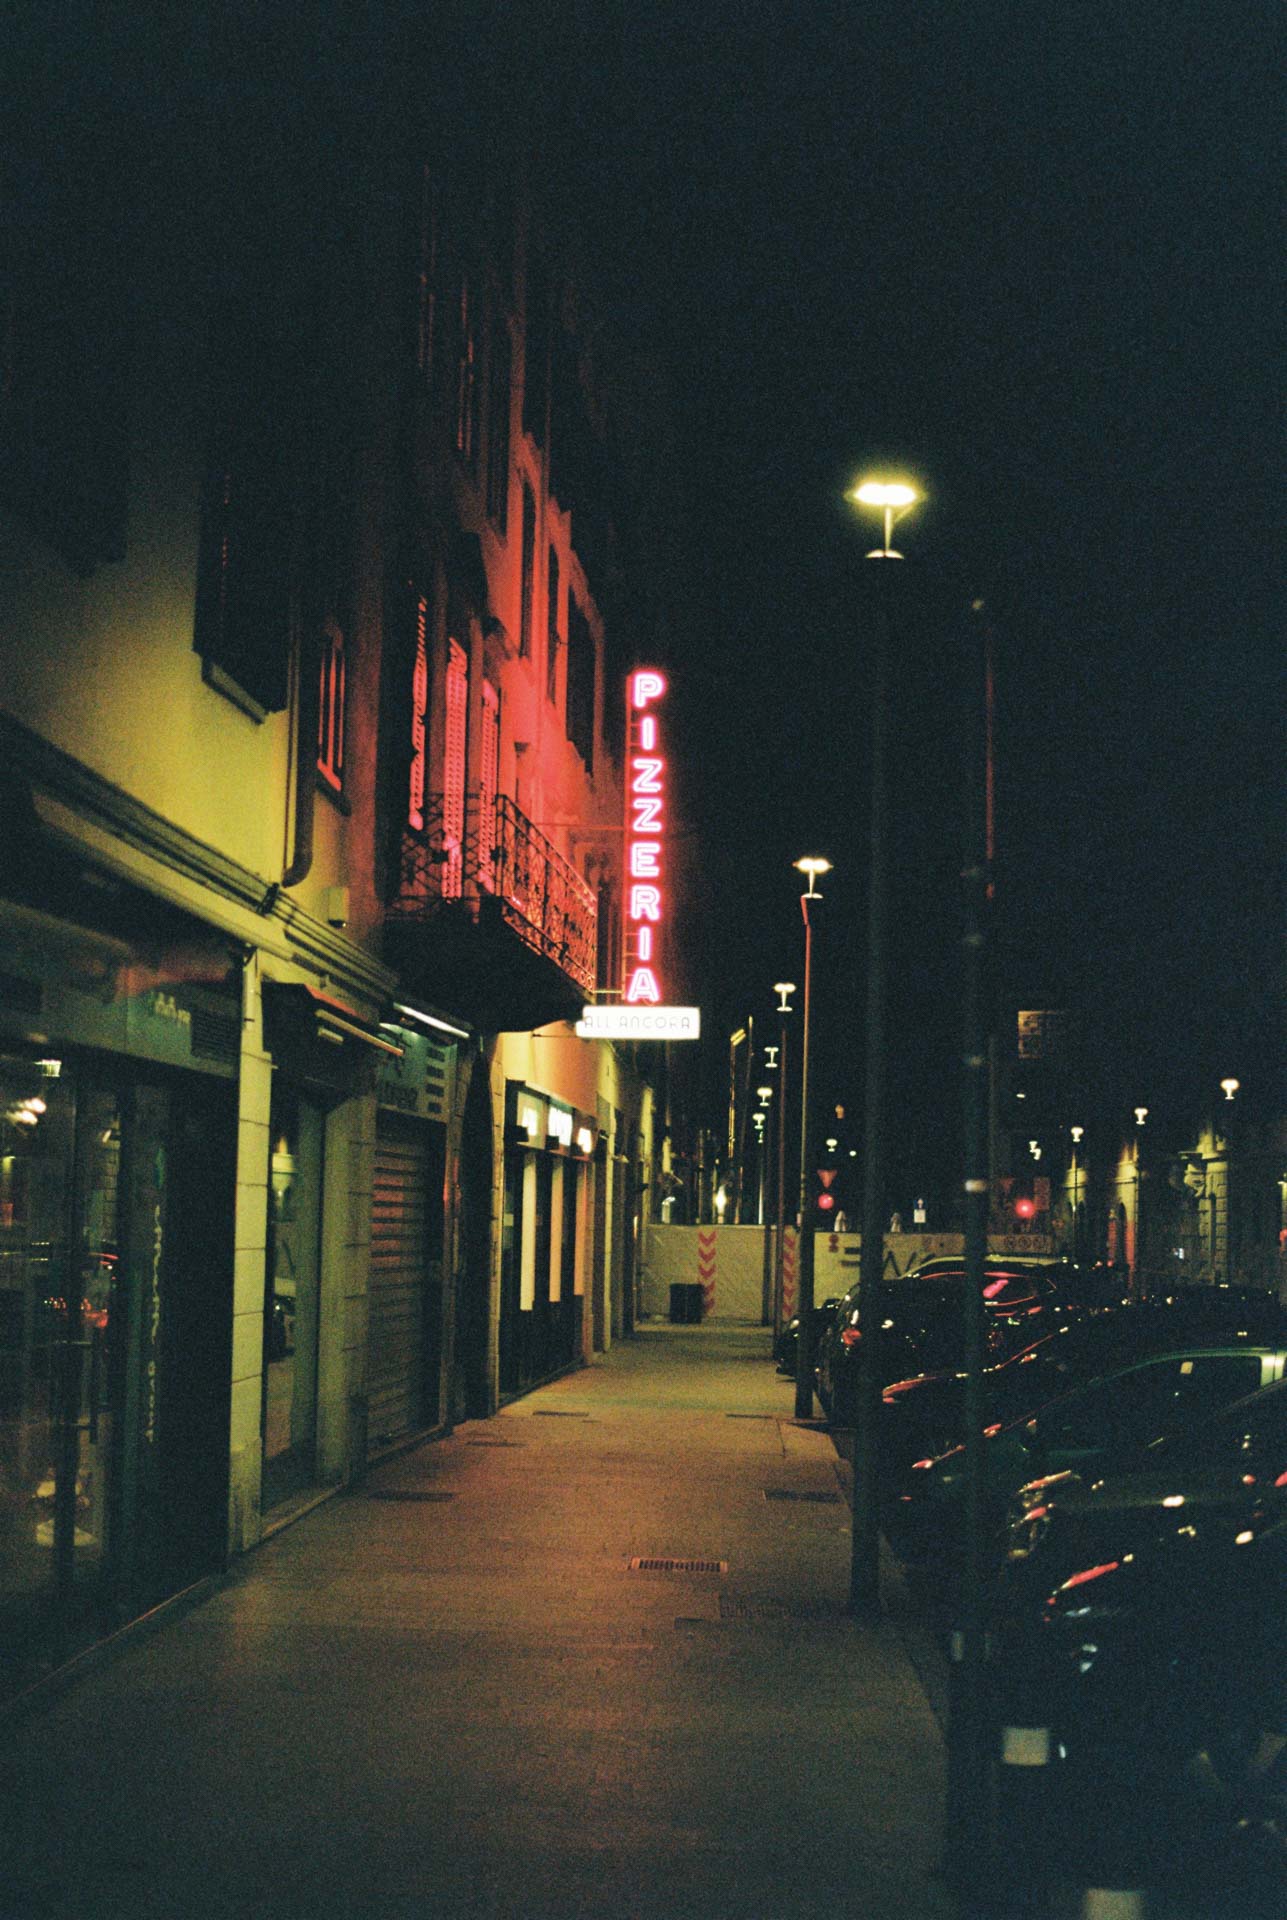
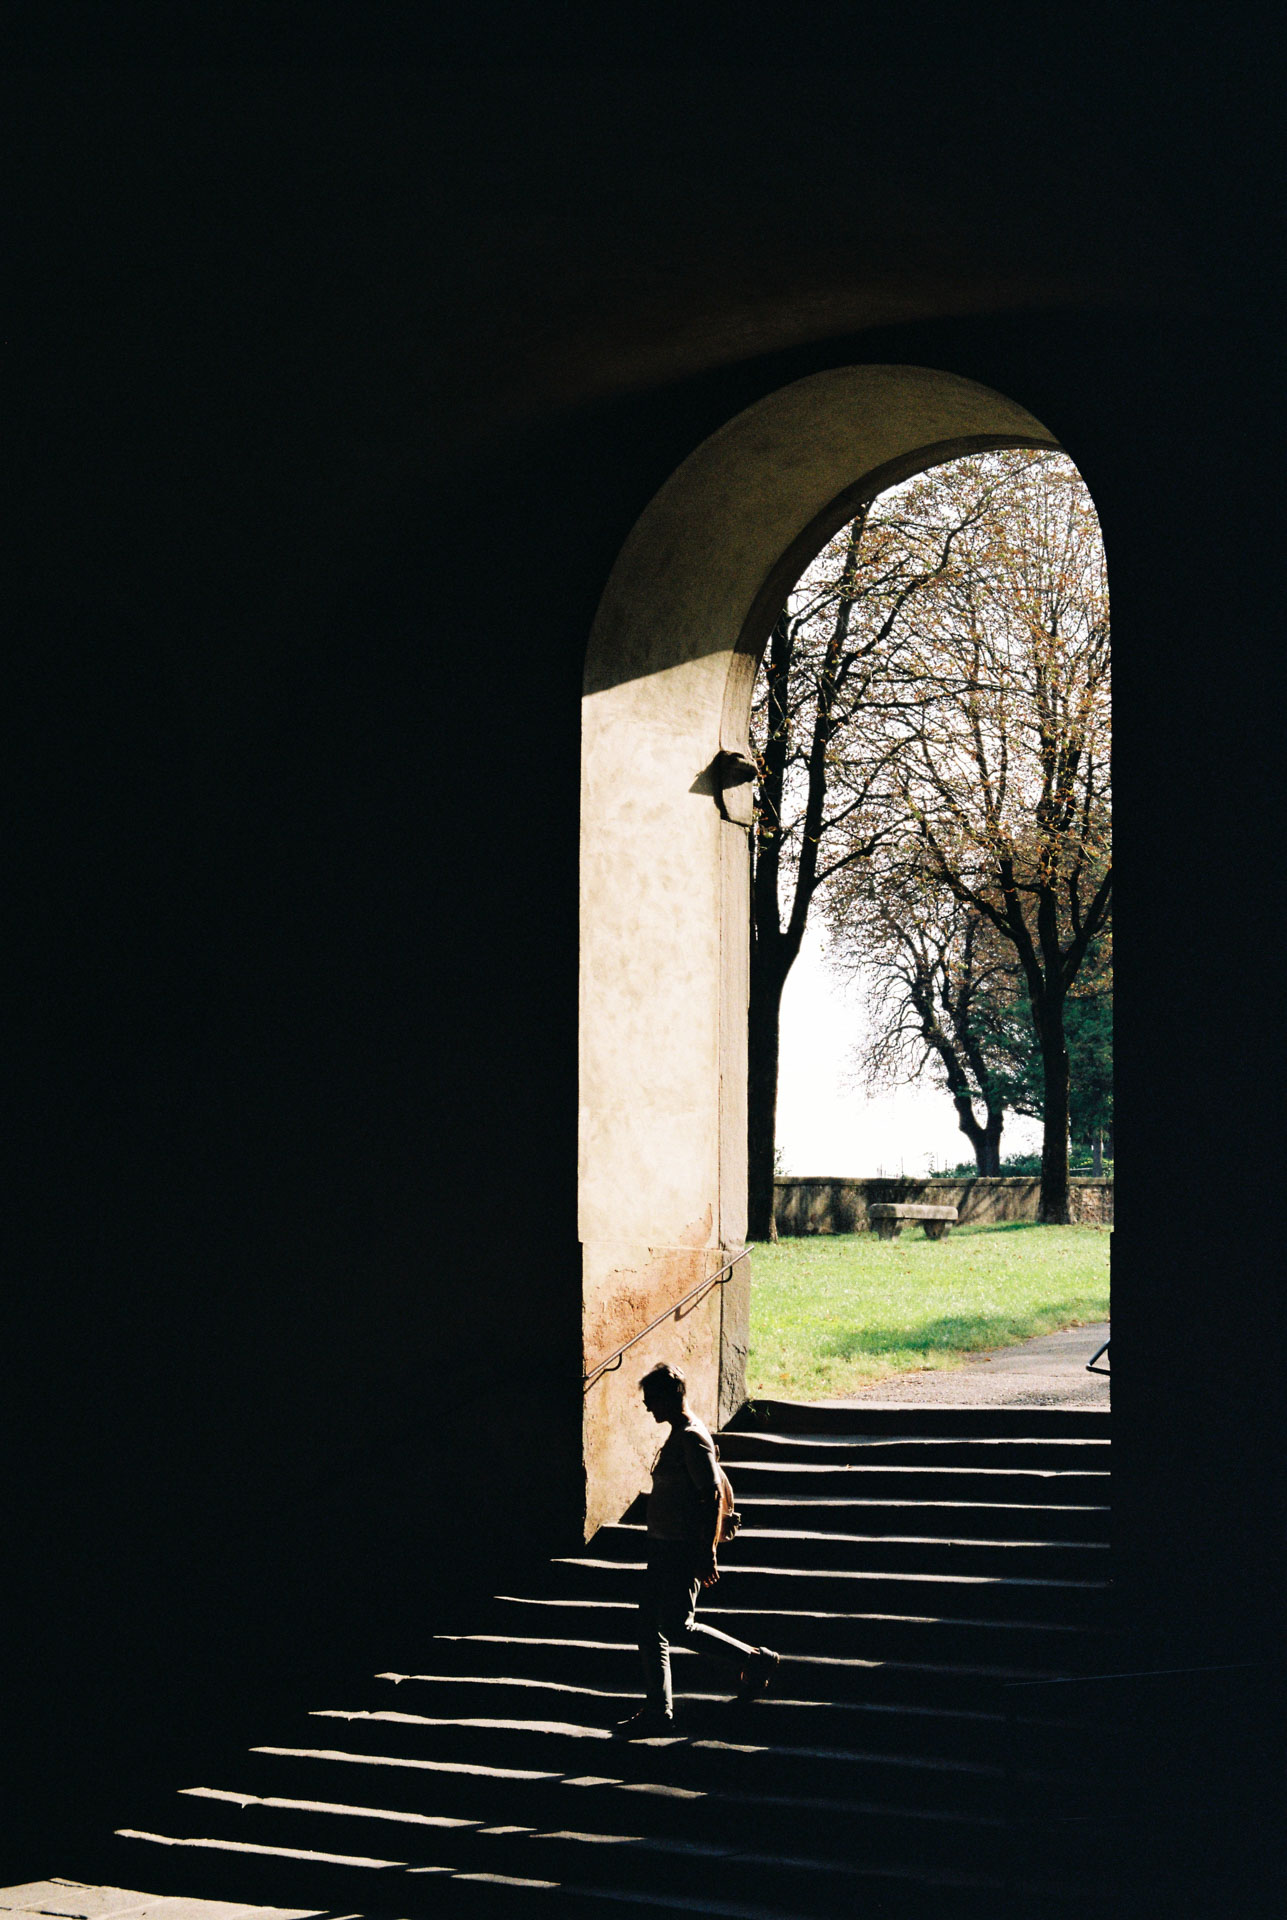
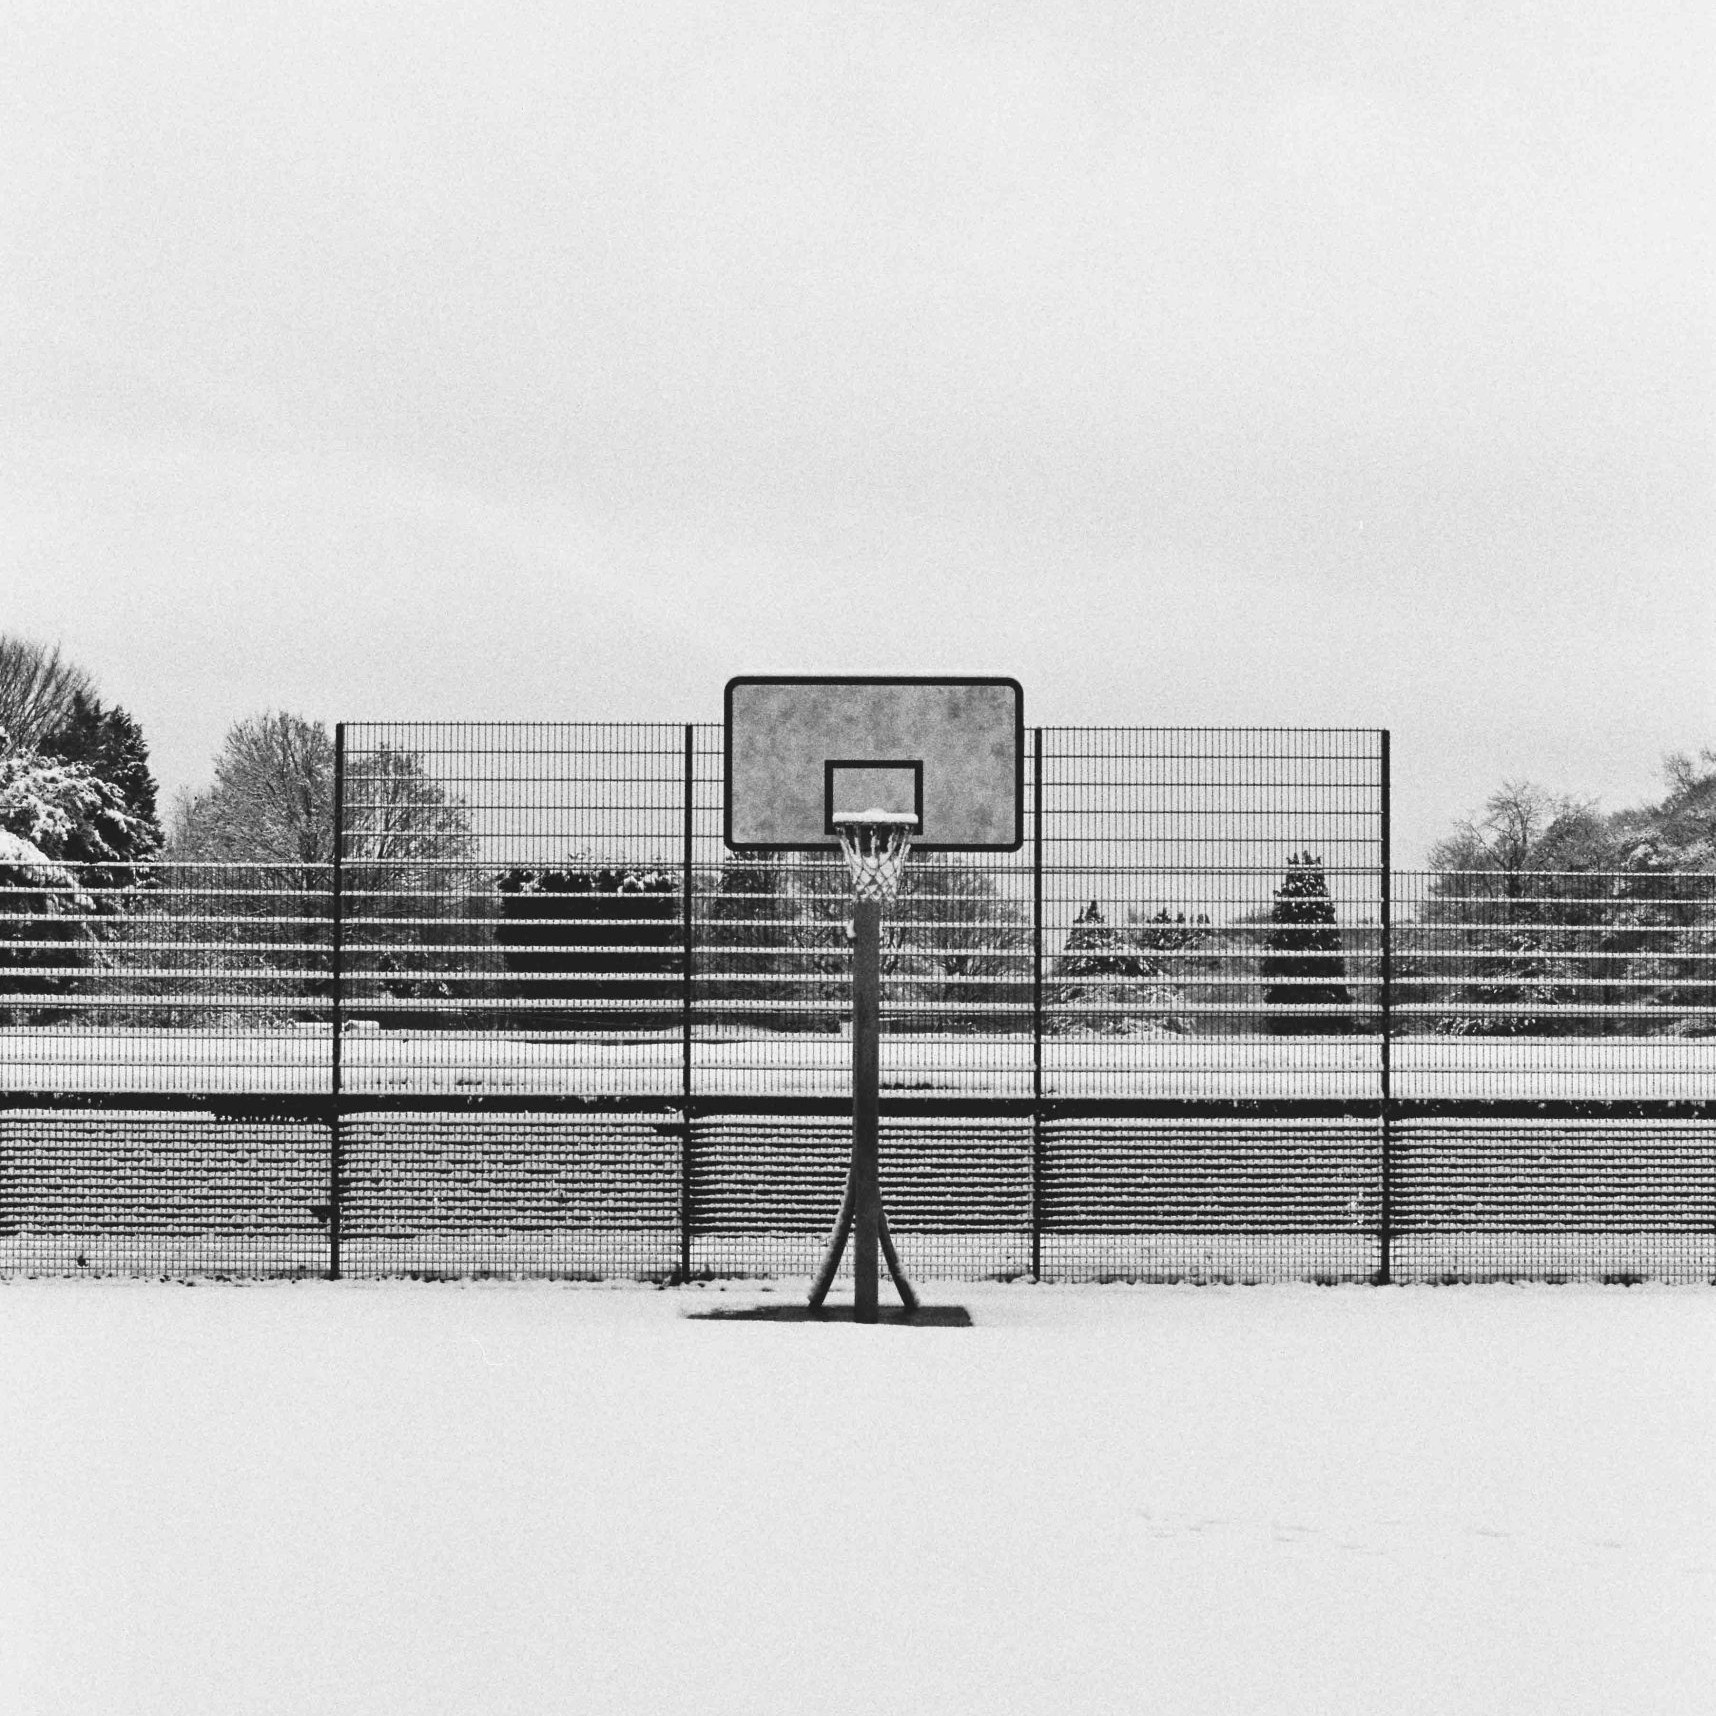
Look at the below photographs.
The portrait image was taken with a larger aperture to give a blurred background effect, whilst the woodland shot was taken with a smaller aperture to ensure the scene was in focus.

Shutter Speed: Freezing Motion or Embracing Blur
Shutter speed is relatively self explanatory and refers to how long your camera’s shutter stays open when you press the shutter release button to take a shot. This dictates how much light is able to hit the film.
Shutter speed is measured in fractions of a second – if you pick up your camera and look you’ll see numbers like 1/250 or 1/30, and sometimes shutter speed is displayed without the ‘1/’ – so 1/250 just becomes 250.
A faster shutter speed (e.g. 1/1000s) means that the shutter opens and closes quickly, allowing less light in that a shutter speed of, say, 1/30, which would keep the shutter open longer and therefore let more light in.
The Impact Shutter Speed has on Exposure:
- A faster shutter speed will let in less light, but it will also “freeze” motion. This means it’s super useful for action shots or capturing any fast-moving subjects (such as sports, wildlife, automotive, etc). It is also particularly useful when you’re shooting handheld and want to avoid blur from camera shake. A faster shutter speed would also be typically used in bright sunlight to avoid overexposing your image.
- A slower shutter speed allows more light in but may result in motion blur. This can be used intentionally to capture movement, such as with flowing waterfalls or light trails, or any time you want to convey motion in your image. I would definitely recommend, if this appeals to you, to use a tripod and either your camera’s self timer function or a shutter release cable to avoid camera shake!
Using a slower shutter speed when shooting indoors, at night, or anywhere with low light conditions will allow enough light in to properly expose your film – just beware of introducing unwanted blur from camera shake.
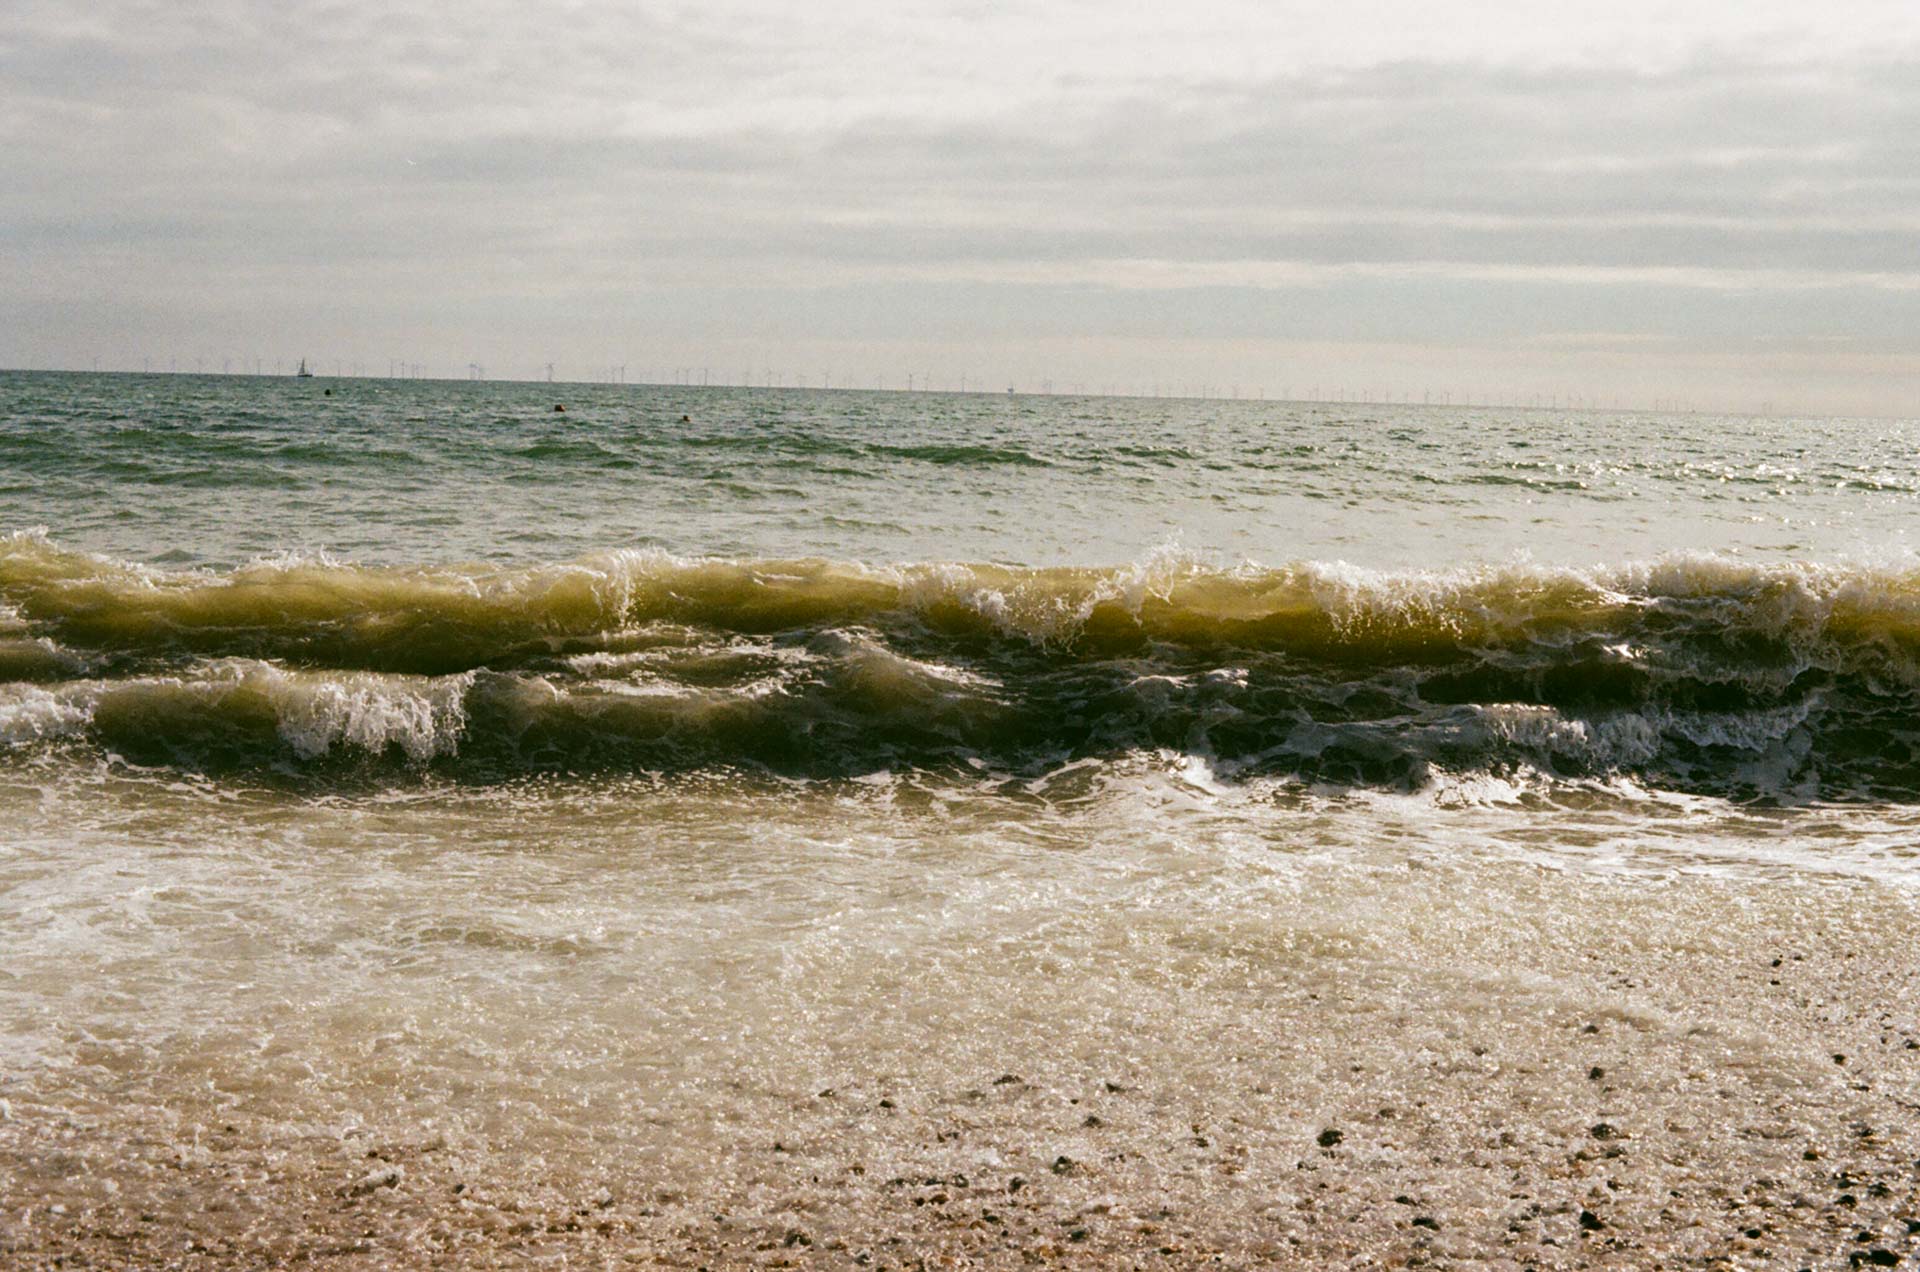
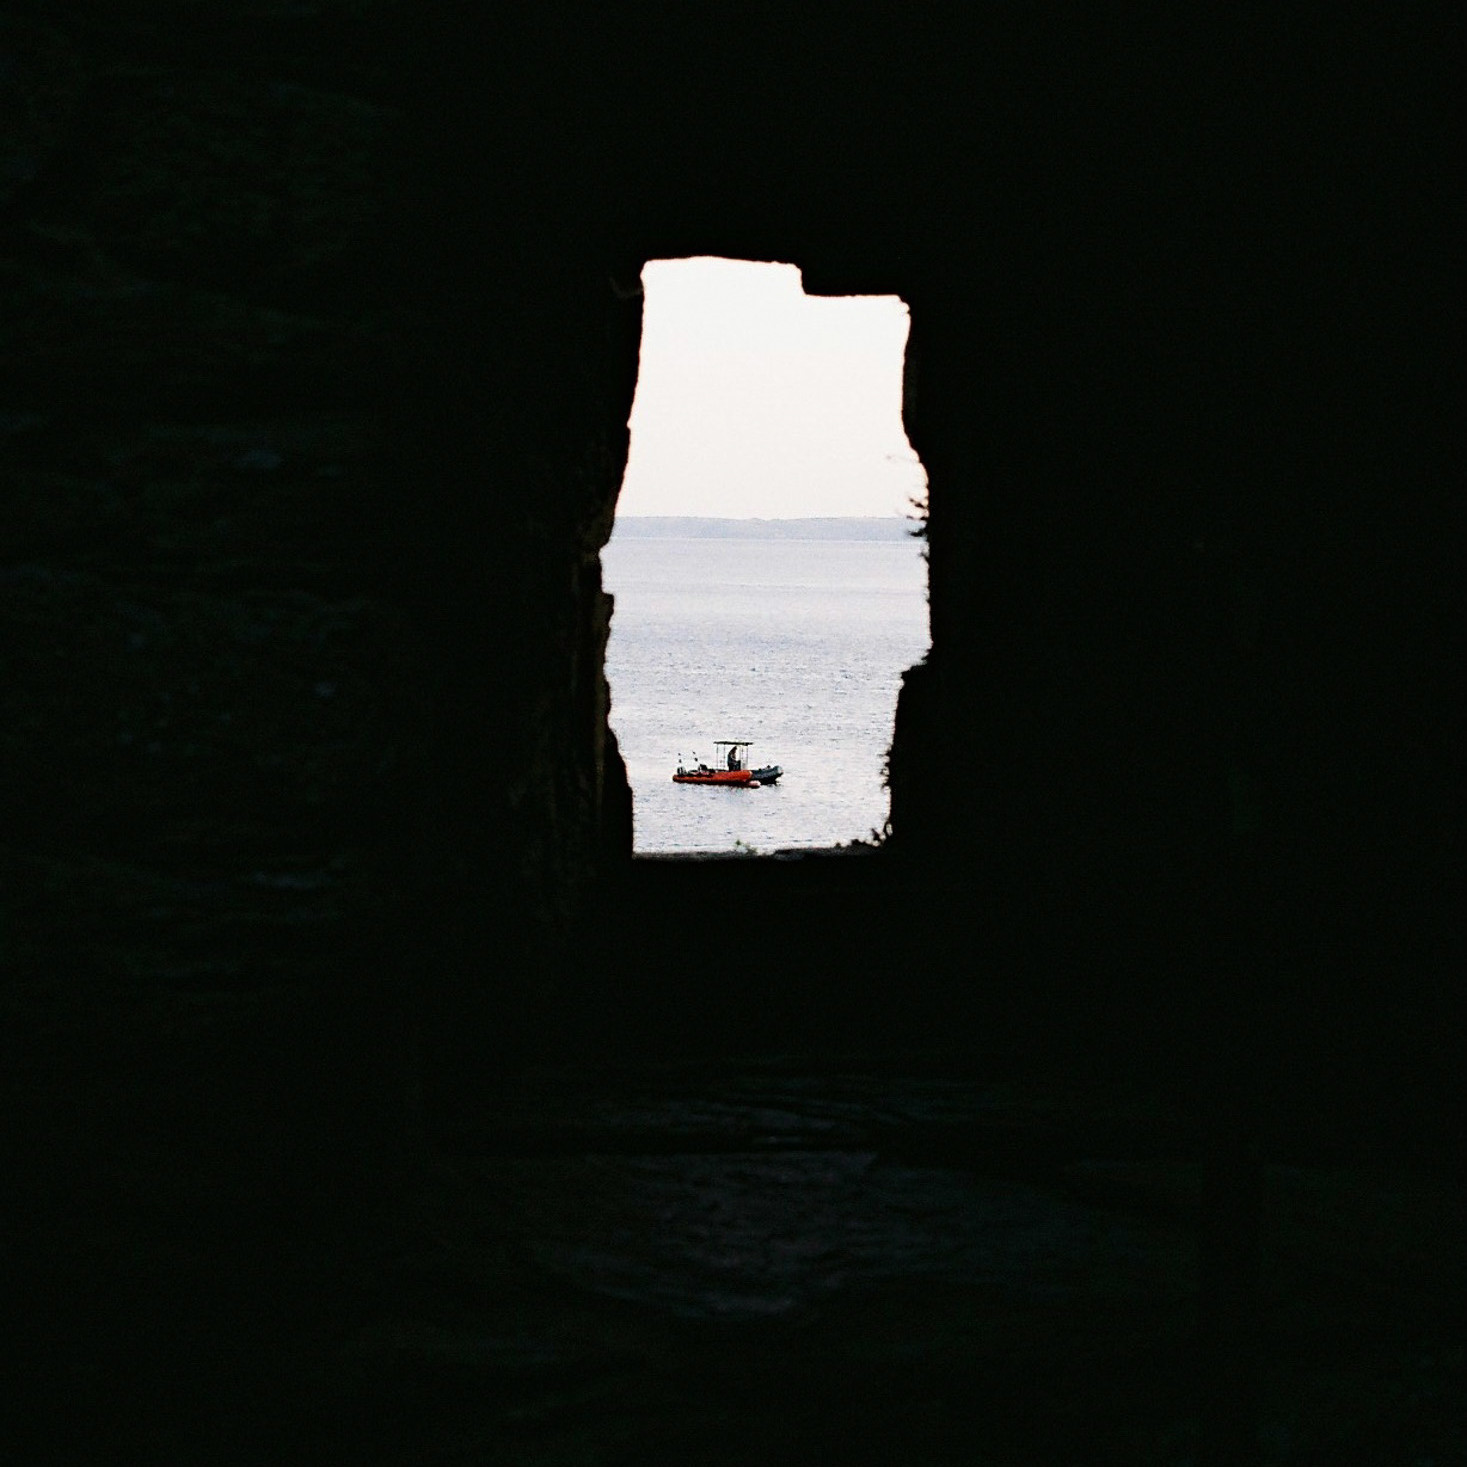
I used a fast shutter speed in the shot below to capture the wave before it crashed!
ISO Sensitivity: Finding the Right Light for Your Film
ISO and ASA are the same thing are refers to your film’s sensitivity to light.
ISO stands for International Organisation for Standardisation, which is the body that standardised the sensitivity ratings for film and digital sensors.
ASA stands for American Standards Association, which was the earlier system used to measure the sensitivity of photographic film before ISO became the standard. The numbers between ASA and ISO were the same, but ISO replaced ASA to create a globally unified system for measuring sensitivity.
In essence, both terms refer to the same concept—light sensitivity—but ISO is the modern term, while ASA is the older one.
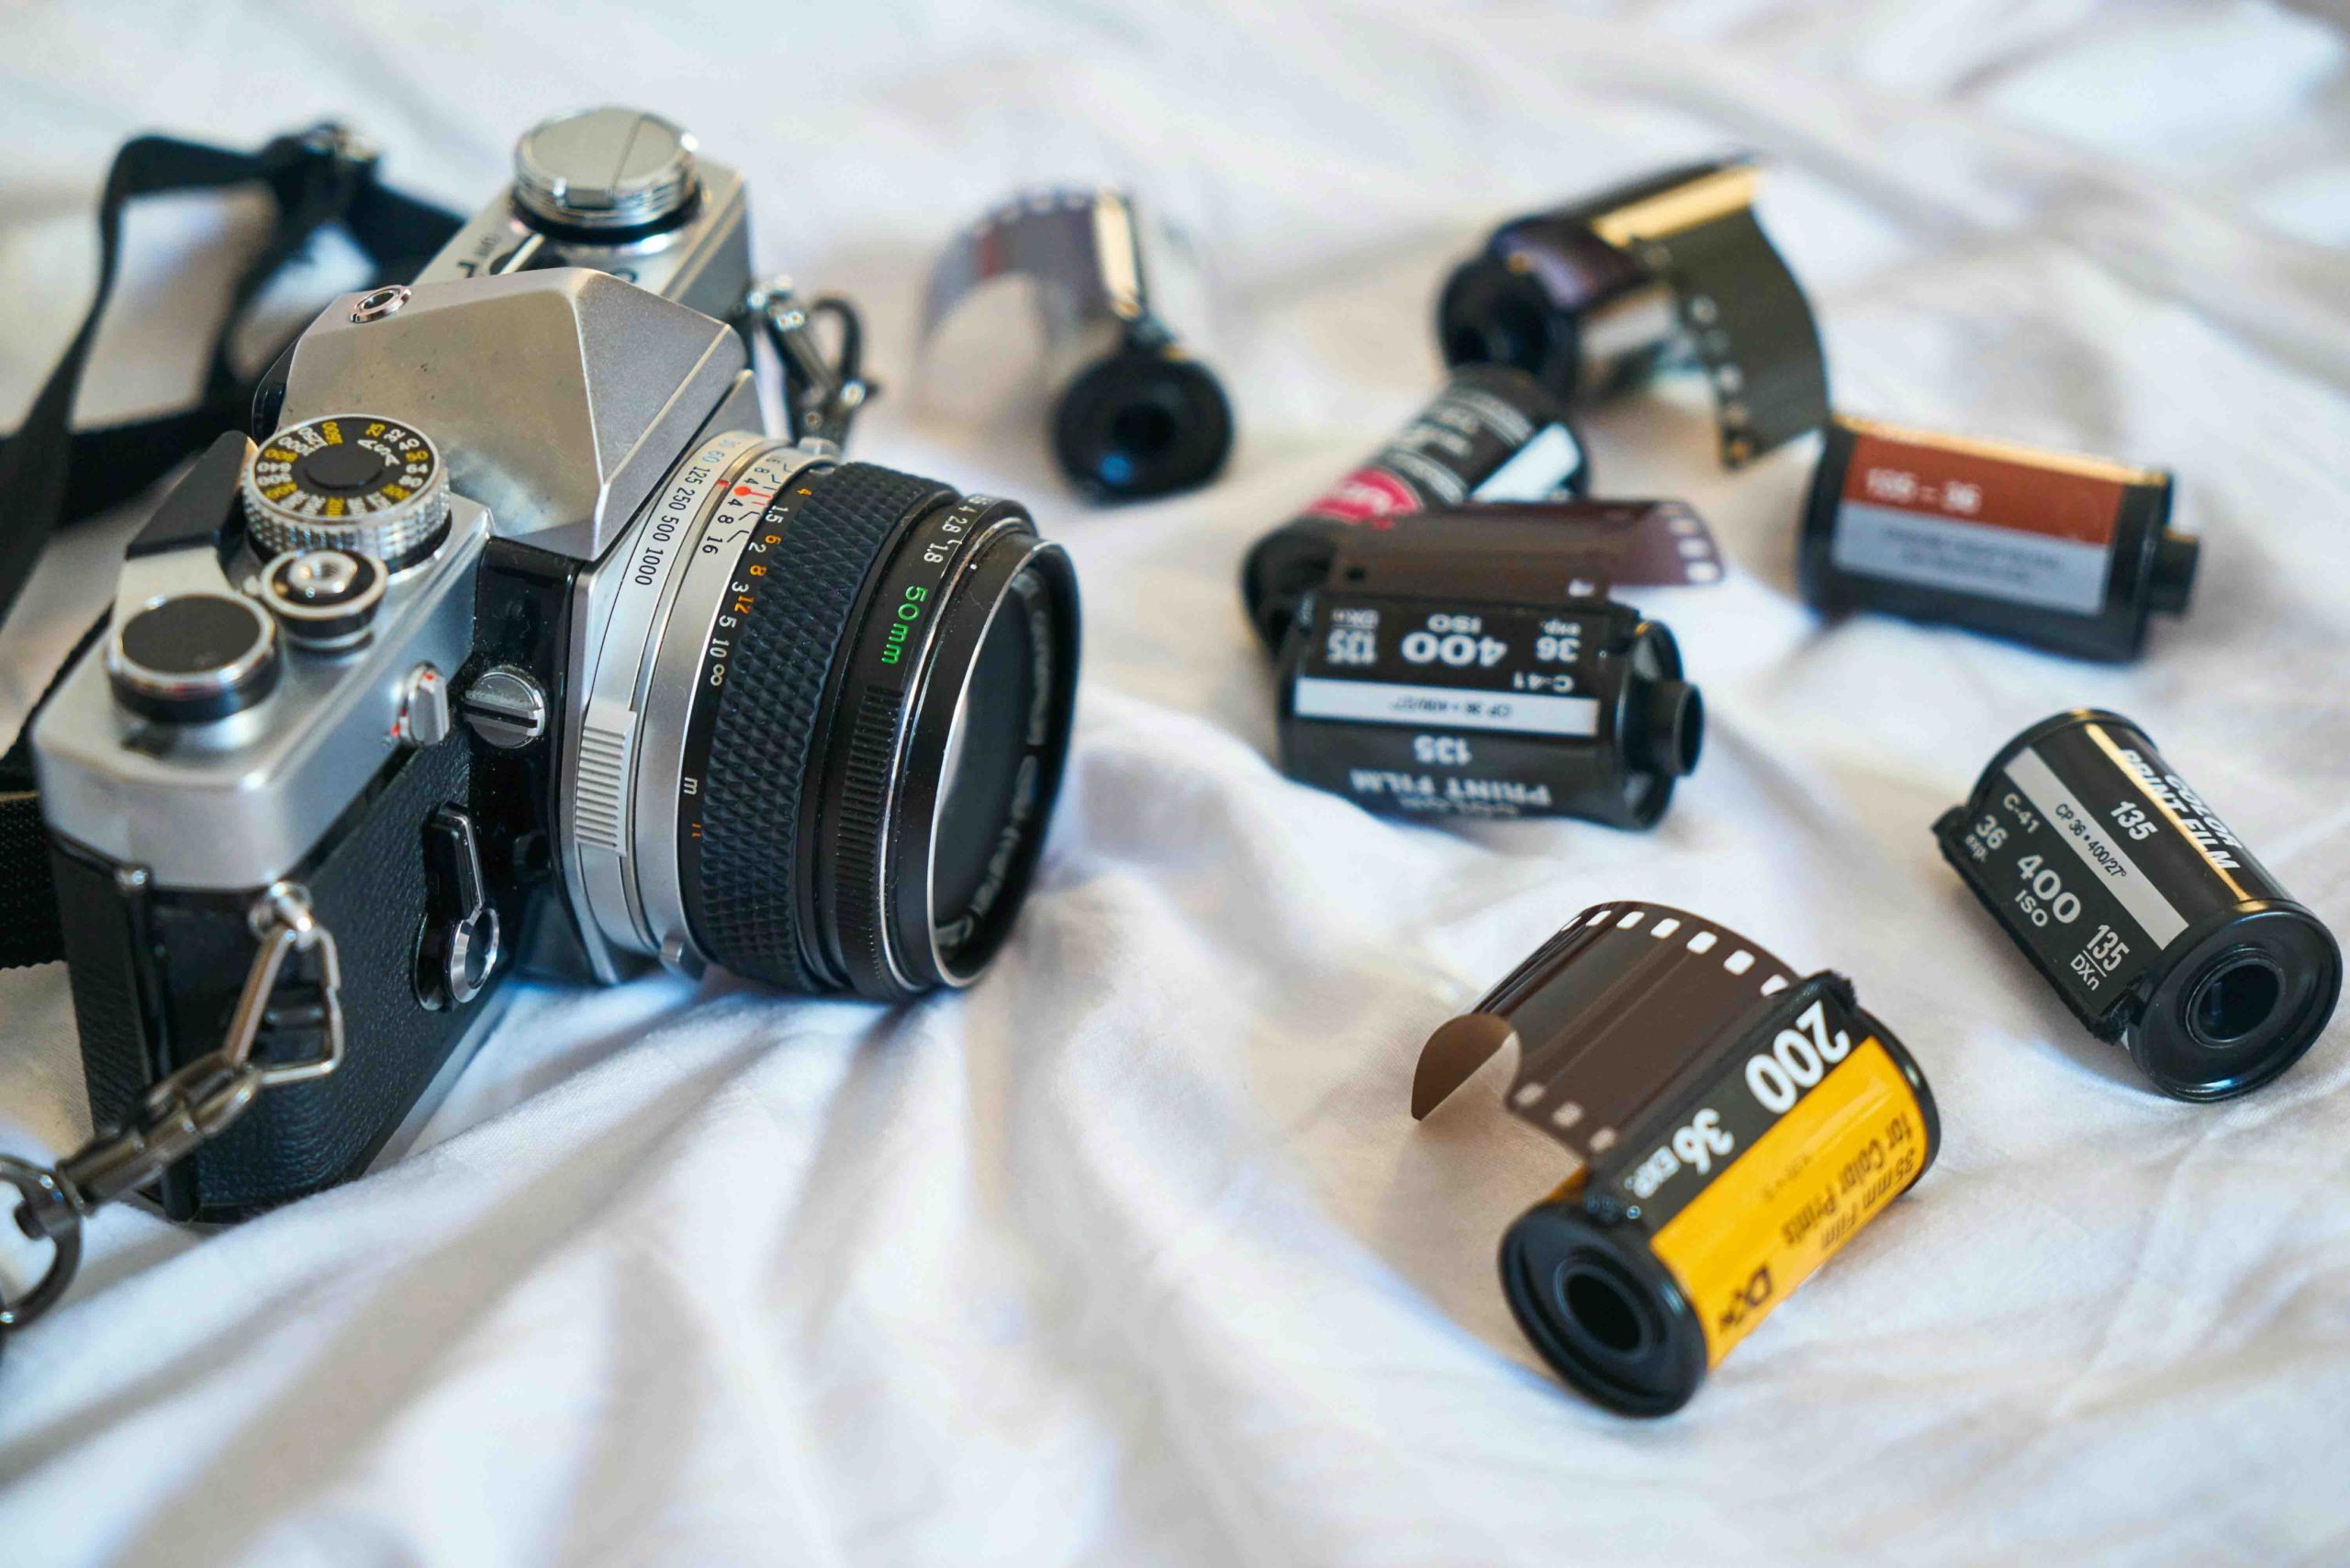
When you’re using a digital camera, ISO is a setting you can change shot to shot, but with film photography the ISO is dictated by type of film you’re using. There are circumstances where you may choose to alter this by tricking your camera into thinking it’s shooting with a different ISO, such as when shooting expired film, but we don’t need to cover that here.
Lower ISO values, such as ISO 100 or 200, mean the film is less sensitive to light and therefore would be more suited to daylight or brighter conditions. A very famous and common example would be Kodak Gold 200 film stock.
Higher ISO values, such as ISO 800 or 1600, mean that the film is more sensitive to light and therefore would be more suited to low light conditions and night photography. You may see that a lot of low light film photography online uses film stock like Cinestill 800T.
The Impact ISO has on Exposure:
- Low ISO Film (e.g. Kodak Gold 200) is ideal for bright, well-lit conditions. It produces finer grain (or less “noise”) and creates sharp, clean images. Whilst certainly possible to use in low light, low ISO film will struggle to capture enough light without the help of slower shutter speeds or a wider aperture.
- High ISO Film (e.g. Cinestill 800T ) is more sensitive to light and works better in darker conditions. However, the trade-off is that higher ISO film introduces more grain, which can give your images a distinct, gritty look. Some photographers love this aesthetic, but it’s something to be aware of when choosing your film.
Just to elaborate slightly on grain, as I’m aware I’ve just thrown that in without much explanation… The grainier look of high-ISO film can be used creatively, especially in low-light situations or when you’re looking for a certain mood in your photos.
It’s great for documentary or street photography when the extra grain adds to the atmosphere. On the other hand, low-ISO film gives you crisp, clear images, perfect for bright, daylight scenes like landscapes or portraits in good light.
Since you can’t change the ISO once you’ve loaded your film, choose your film carefully based on your shooting environment. If you’re going to be shooting mostly outdoors during the day, stick with lower ISO film. But if you’re shooting indoors or in low light, go for a higher ISO film, or plan to use a tripod and wider aperture.

How the Exposure Triangle Works Together
Now, if if I’ve done my job correctly, you should have a good understanding of each element. It’s important to see how they work together as a system and how changing one element affects the others.
For example…
- If you open your aperture (lower f-stop), you’re letting in more light. To maintain the same exposure, you might need to use a faster shutter speed to let in less light or lower your ISO to make the film less sensitive.
- If you slow your shutter speed, allowing more light in, you might need to close your aperture (higher f-stop) or use a lower ISO film to avoid overexposure.
- If you’re using high ISO film (e.g., ISO 800), you’re increasing the film’s sensitivity to light. To prevent overexposure, you might need a faster shutter speed or a smaller aperture.
The key is balance. If you change one part of the triangle, you need to compensate with another to achieve a proper exposure. This balance is where the artistry of photography comes in – I always recommend that you start with what is creatively the most important element and then go from there.
Say, for example, that it’s important for your shot that you have a shallow depth of field to capture a portrait, or that you want to capture motion blur to show headlights in the rain – you know you would need to adjust the rest of the elements to compensate for this creative choice.
You should learn to log your shooting settings so that you can learn from your successes and mistakes – find out how I log my film photography metadata here.
Stick With It – It’s Worth The Struggle!
Understanding and mastering the exposure triangle is one of the most important steps toward becoming a skilled film photographer. It’s learned best through trial and error – but stick with it, it will help you execute any creative vision for a shot.
If you have access to a digital camera, I would definitely recommend shooting on manual mode and experimenting with different variables so you get used to how these interact with one another without having to wait for film to be processed or incurring the cost of film itself!
Photography is both a science and an art, and knowing how to control light through the exposure triangle is the foundation that will help you take your craft to the next level.
Now that you know about aperture, ISO and shutter speed, you should check out the Sunny 16 Rule!
I hope this helps get you out there shooting!
5 Things to Consider Before Buying Your First Film Camera.
5 Things to Consider Before Buying Your First Film Camera.
Quick Summary
This blog contains all the things I wish someone had said to me when I was buying my first film camera.
To be clear, this is NOT a list of recommended cameras, there are already plenty of these kicking around Reddit, YouTube and forums.
This is a place for me to share some key considerations and thoughts before you pull the trigger and spend your money…
Key Takeaways:
- You can often get your hands on a film camera for a lot less than you think
- You don’t need to spend hundreds to get something worth shooting on
- More gear does not make you a better photographer
- Keep things simple for yourself and consider a prime lens
1 - Do You Actually Need to Buy a Film Camera?
Despite many of us growing up firmly in the digital age, it’s worth remembering that many people you know likely pre-date this technologically saturated world.
In my experience, folks tend to have relics of their analogue past tucked away at the back of drawers or boxed up in dusty attics.
To us, these objects are valuable, interesting and intriguing, but you’d be surprised at how many film cameras, lenses and accessories are just kicking around, unused and taking up space at the annoyance of their current owners.
So, before you open your wallet and start buying up gear, it’s worth asking around – reach out to parents, grandparents, friends, or anyone else who might have old film cameras and lenses.
It’s very likely that someone, somewhere, has something you can get your hands on to start shooting with.
Whether it’s given to you, lent, or even sold to you cheaply, if you can pick one up this way, I’d thoroughly recommend it.
Not only is it just nice to have a personal connection to your camera, it doesn’t really matter, at this stage in your journey, if you have the “best” camera or lens in your possession.
What matters is that you have something you can shoot with.
What you’re really after here is to be able to dip your toe into the hobby whilst limiting your financial investment until you’re sure you’d like to pursue this further.
So, if you can put a few rolls of film through one of these and start to the learn the ropes, you’ll at least be confident enough to know that this is something you want to really get into or not.
What’s more, anything you learn using this camera will be knowledge taken forward and applied to any future analogue efforts.
Any manual camera will help you learn fundamental concepts like the exposure triangle which will be vital for you developing as a photographer!
This hobby is expensive enough already, so please don’t be picky – if someone offers you the chance to get shooting for free or very little, take them up on the offer!
It doesn’t matter if this camera doesn’t feature on “Top 10 Film Cameras for Beginners” lists…
2 - Do Your Best to Avoid the Film Camera Gear Trap
More money does not mean more quality and more gear does not mean better photos.
This is worth keeping in mind at all times.
It’s easy to fall into the trap of thinking “if I had that particular camera or lens then I’ll be a better photographer”.
Or, upon seeing your favourite Instagram photographer using a particular model, you may catch yourself thinking “if I had that gear, I could take those shots.”
The truth is, there’s only one thing that makes you a “better” photographer, whatever that means, and that’s…taking more photos.
Practicing your craft. Engaging in your own creative process. Making mistakes.
Gear envy is hard to shake – for one, the attraction of this hobby is rarely limited to the creative output of a photograph.
It is a tactile, hands-on passion and there are so many different things to try out and experiment with – new lenses, different camera models, fully mechanical, fully automatic, SLRs, rangefinders, the list goes on and on…
But, if you’re just starting out, you really need to focus on the basics before you let your eyes wander.
For one, it’s highly unlikely that you are at a level where you can really take advantage of more complicated features that some cameras have on offer.
What’s more, investing in a new lens or camera may only provide marginal gains – whereas a more experienced photographer may be able to take full advantage of these and use them to elevate their craft, you have to be honest with yourself to see if you’re in a place where you could really extract value from the additional expense.
I would look to spend as little as possible and focus my efforts on shooting film and getting familiar with core film photography elements such as the exposure triangle and the Sunny 16 Rule.
This isn’t to say if you have money to burn that you shouldn’t kick off your analogue journey with a Leica and throw caution to the wind, but you can’t buy your way to taking “good” photos and “good” photos can be taken on just about any camera/lens, regardless of expense!
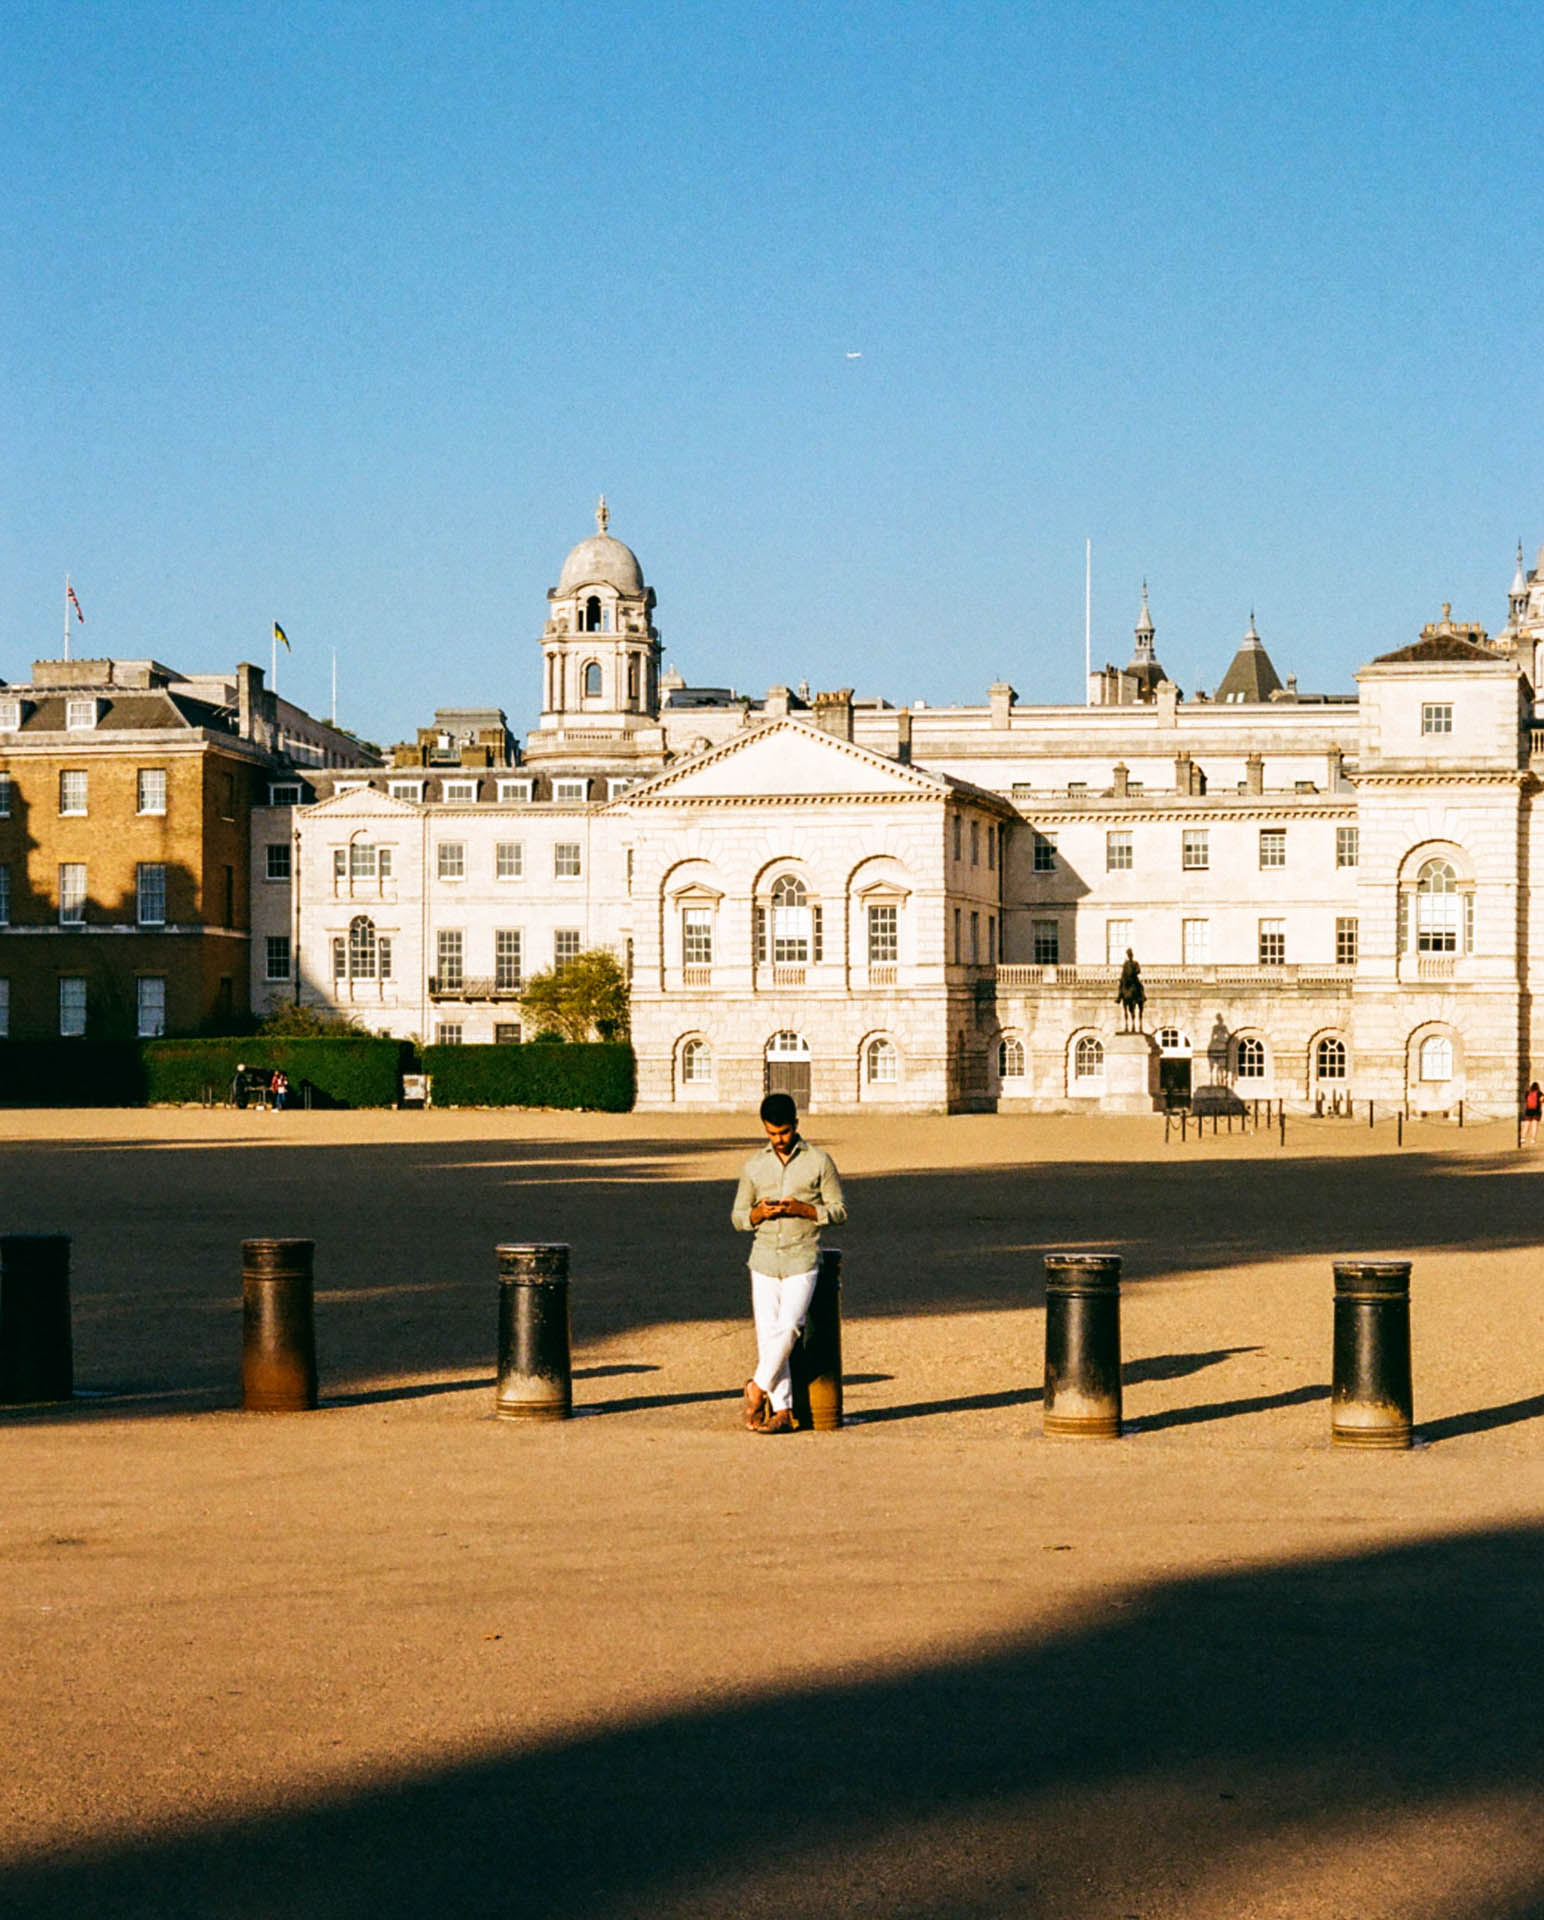
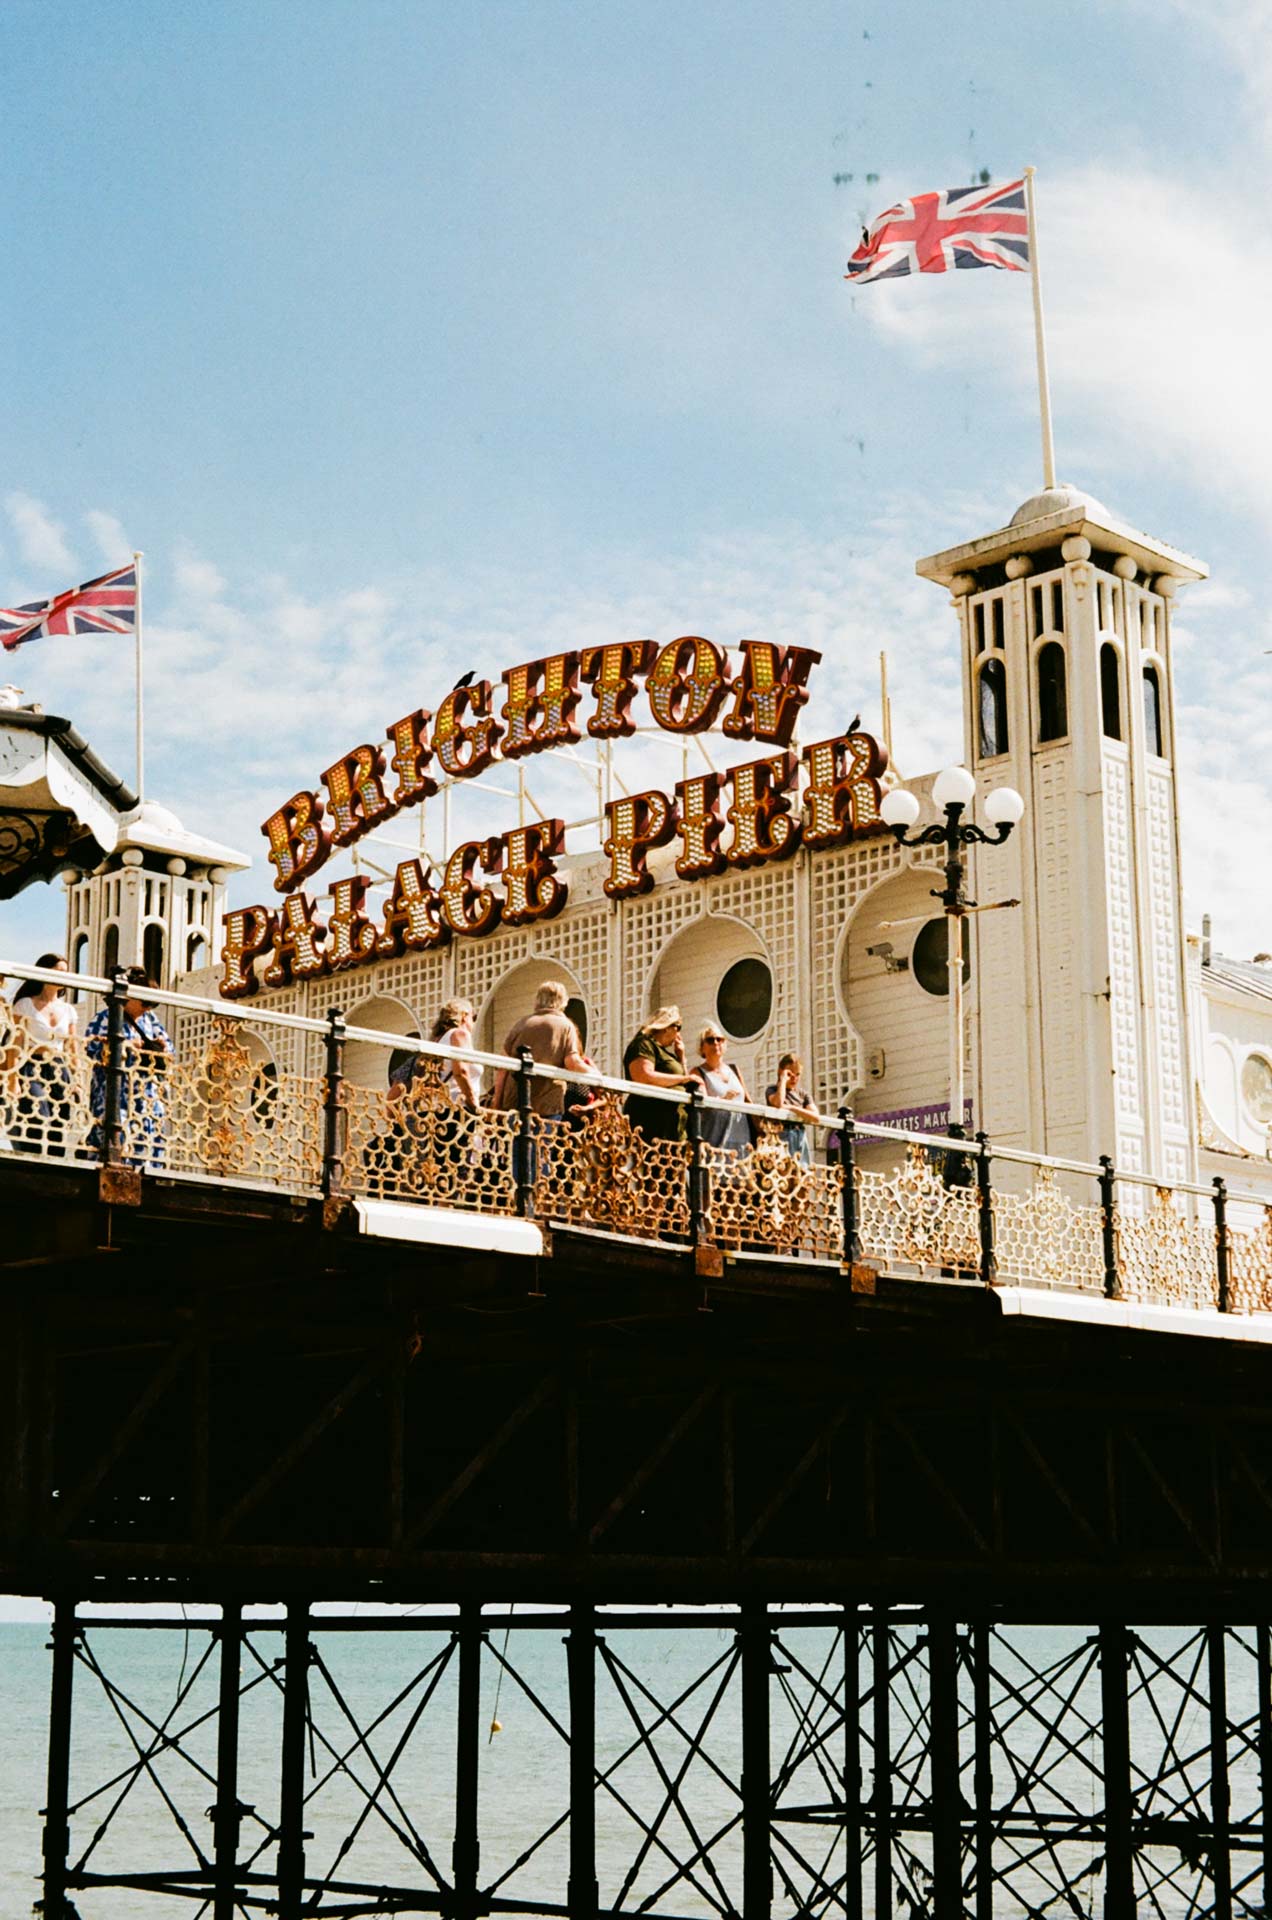
The photos below were taken on a Pentax SFXn setup you can get for around £50-70 online ($60-80)…

3 - Maximise Your Film Shooting & Processing Budget.
As mentioned before, what makes you better at taking photos is the act of taking photos. To do this on film, you need to ensure you can afford film itself!
This isn’t cheap, I’m afraid – there’s a reason that #staybrokeshootfilm is a movement, after all.
So, if you’re set on buying a camera, it’s worth accounting for buying film and getting it processed when looking at the budget you have available.
In my opinion, if this is your first foray into the world of analogue photography, it’s better to spend a little less on the camera/lens combination itself and maximise the budget you have available to shoot and develop film (within reasonable limits).
A good way to do this is to secure a camera body that is in good condition and then get the cheapest lens you can find that achieves a base level of quality.
Typically, if you just input the lens details into Google you’ll be able to see user reviews as well as shots taken with that lens – if you’re willing to dig around a bit you can get some great glass!
Here’s an example of a lens review found online – you can see it is rated for variables such as value, sharpness and handling.

Then, when you feel like you have got the hang of things a little and you know what you like to shoot, you can start to invest in lenses that suit your purpose.
If you find you love shooting street photography, you’d probably opt for a different lens than someone spending all day trying to take photographs of wild animals from a distance and vice versa.
Additionally, if you start to look outside more recognised names, you can get some absolutely great cameras and lenses for a fraction of the cost.
Ricoh, Praktica, Minolta, and a whole host of other manufacturers and brands can deliver fantastic performance and leave you spending hundreds less than more well known makes and models of similar levels.
It’s also worth noting that if you’re looking to mainly use your camera as a “snapshot” camera for documenting memories of you and your friends, you really don’t need to spend much at all.
In fact, if this is what appeals to you, you could stick to finding some cheaper point and shoot cameras or even look into half frame cameras.
Regardless, just make sure whatever you do that you’ve left enough in the bank to actually buy and process your film!
4 - Consider a Prime Lens.
The world of lenses can be incredibly confusing, especially if you’re new to photography in general and not just new to analogue.
To help remedy this confusion, and make things a little easier when making decisions on what to buy, I tend to recommend starting out with a prime lens.
A prime lens has a fixed focal length, meaning they don’t zoom. Common examples are 50mm, 35mm and 25mm lenses.
Whilst this might sound like a negative rather than a positive, let me explain…
For one, prime lenses do not have to cope with a wide range of focal lengths in the way that zoom lenses do – this means they tend to be sharper and produce “crispier” images than their zoom counterparts.
They also typically have larger apertures. This refers to numbers like “f/1.2” or “f/2.8” that you might see – confusingly, the smaller the number, the larger the aperture…
Having a larger aperture means better performance in low-light condition and also a shallower depth of field, making them perfect for things like portrait photography or when you’d like your subject to “stand out” from the background.
Additionally, prime lenses are often much smaller, more compact, and lighter, which means they’re easier to carry, use, and wield on a day-to-day basis. Due to their fewer mechanical parts, they’re also incredibly fast to focus.
All of this taken into consideration, prime lens offer powerful and versatile shooting capabilities perfectly suited to architectural, portrait, landscape, street and travel photography and, importantly, offer great value too.
Luckily, that’s about everything I shoot, hence why I use a prime lens every time I step out of the door with my camera.
However, there is one other reason why I recommend prime lenses to film photography beginners, and photography beginners in general…
They provide one less variable!
Using a fixed focus lens forces you to learn to operate creatively within the limitations of the lens. This means you’re really considering your composition and approach with each shot and, as every shot is using the same focal length, you start to “train” yourself to think in that way!
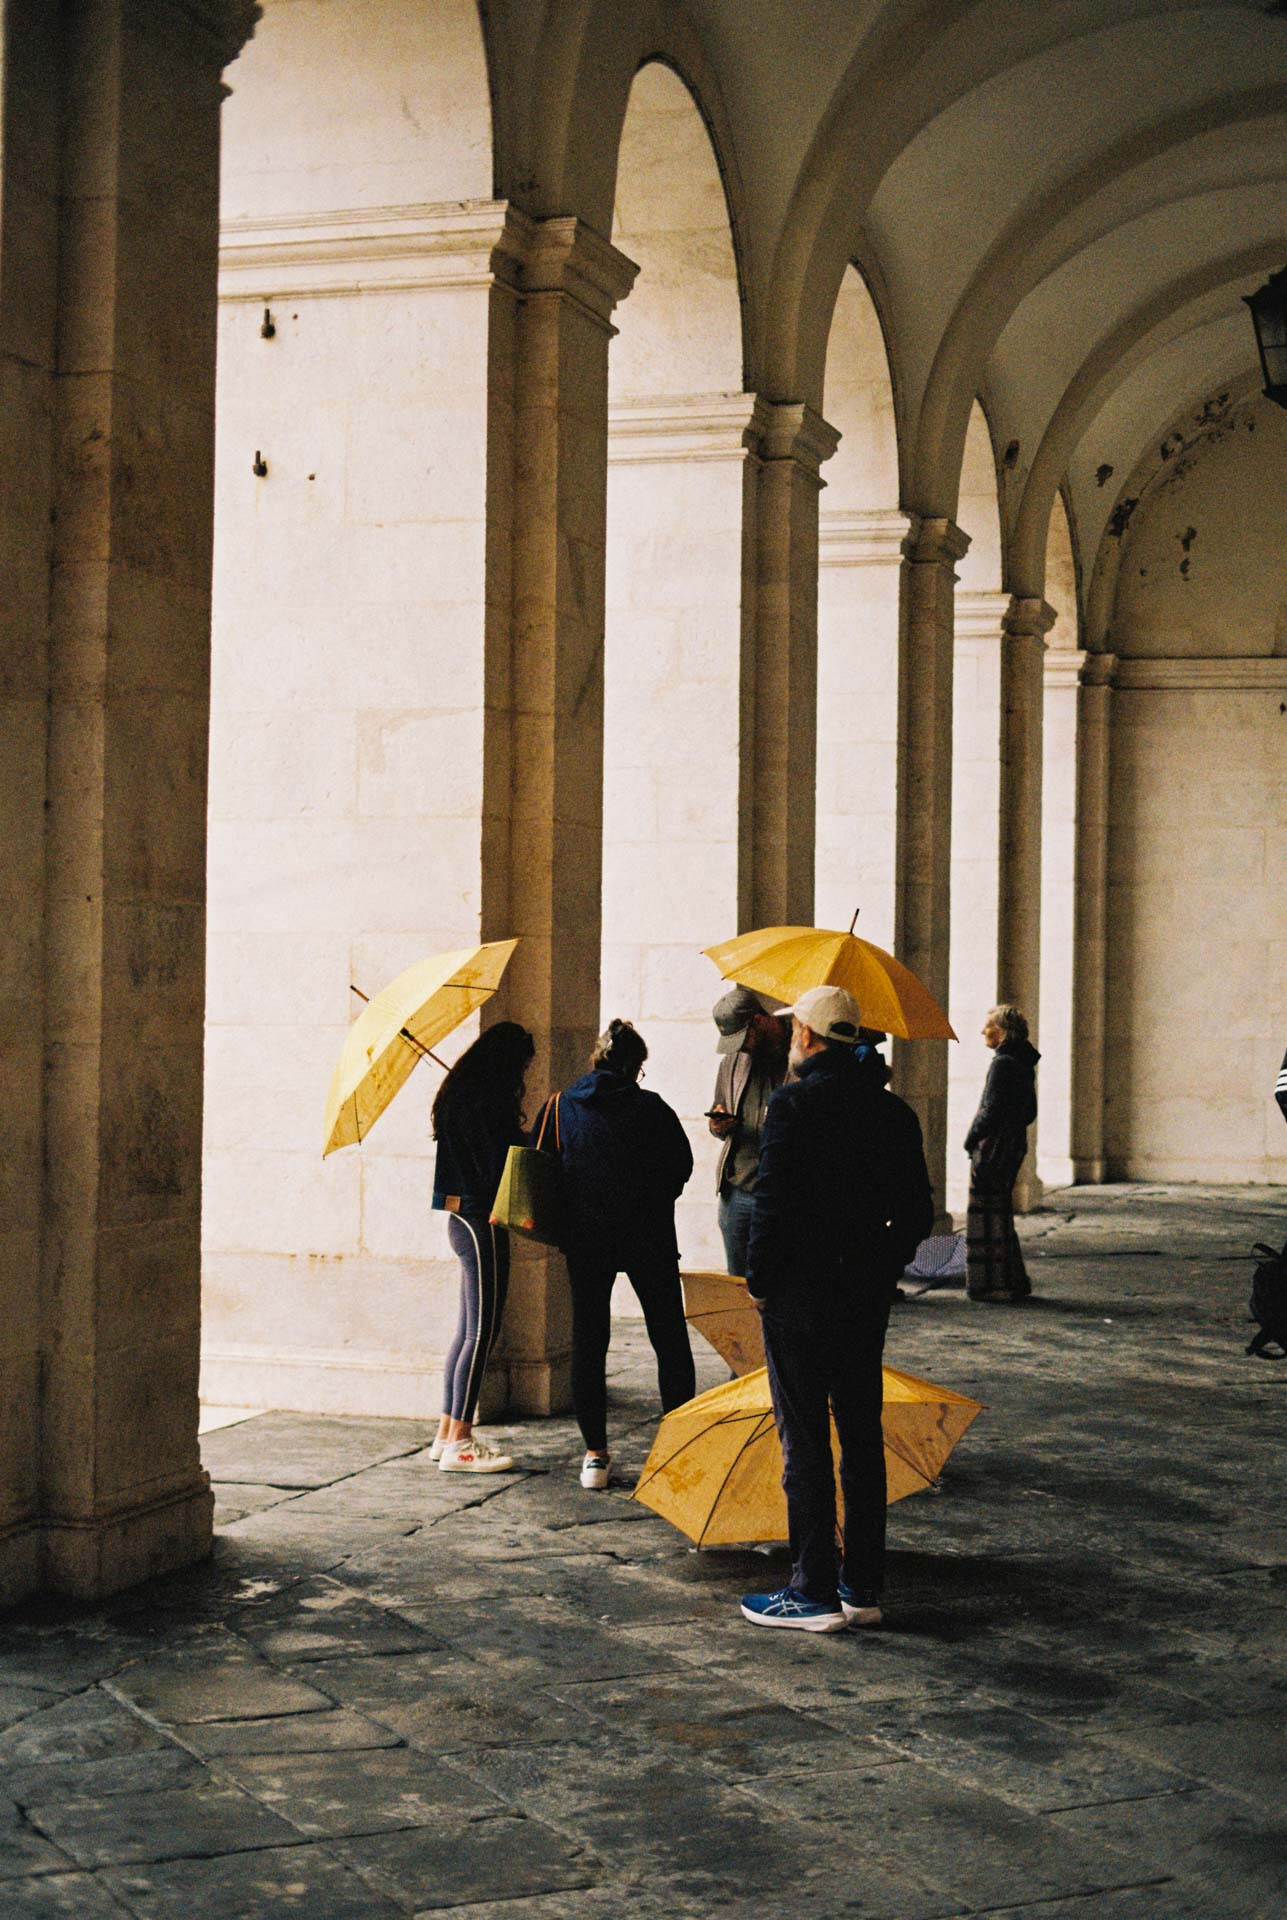
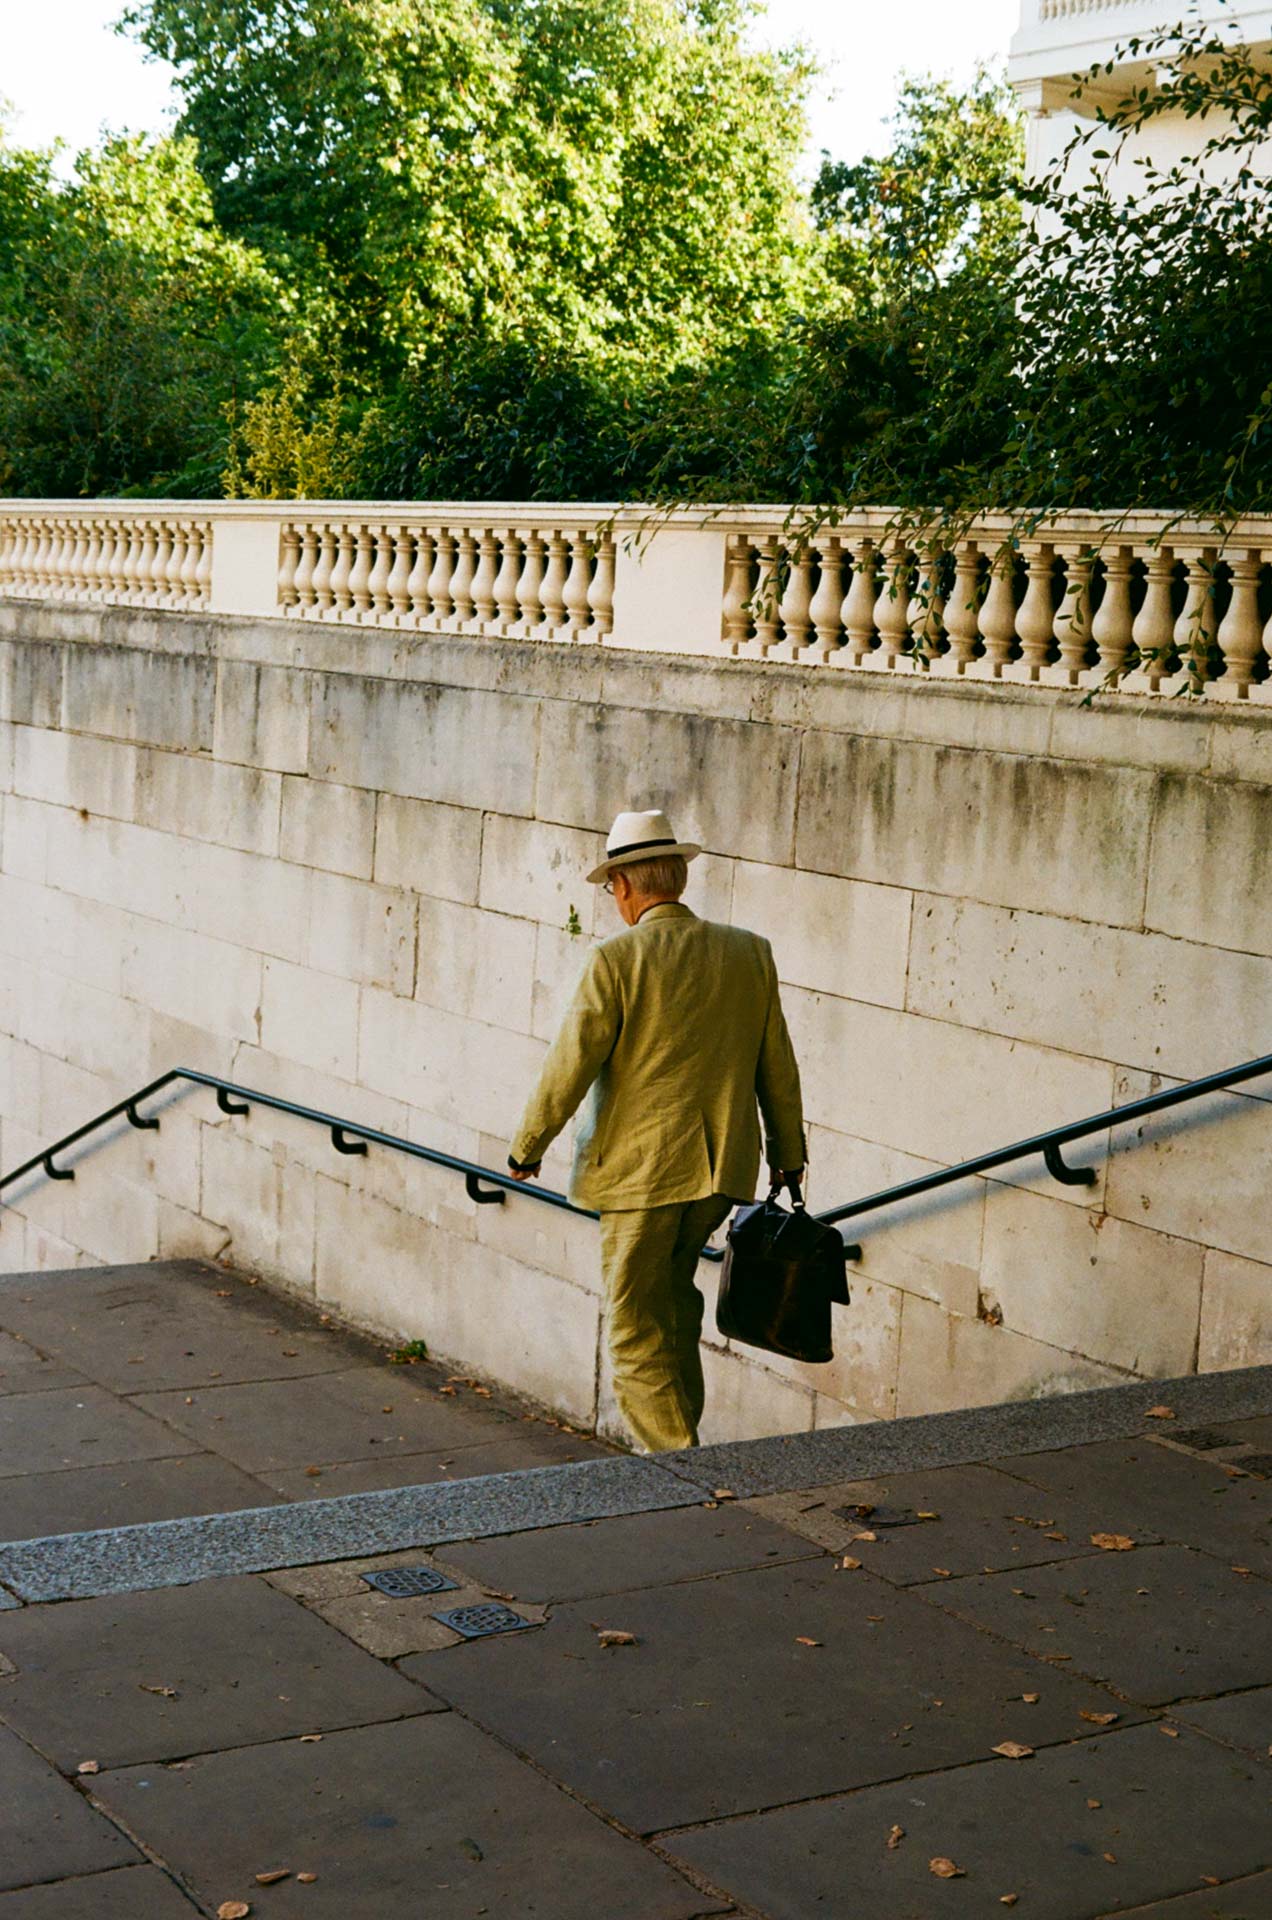
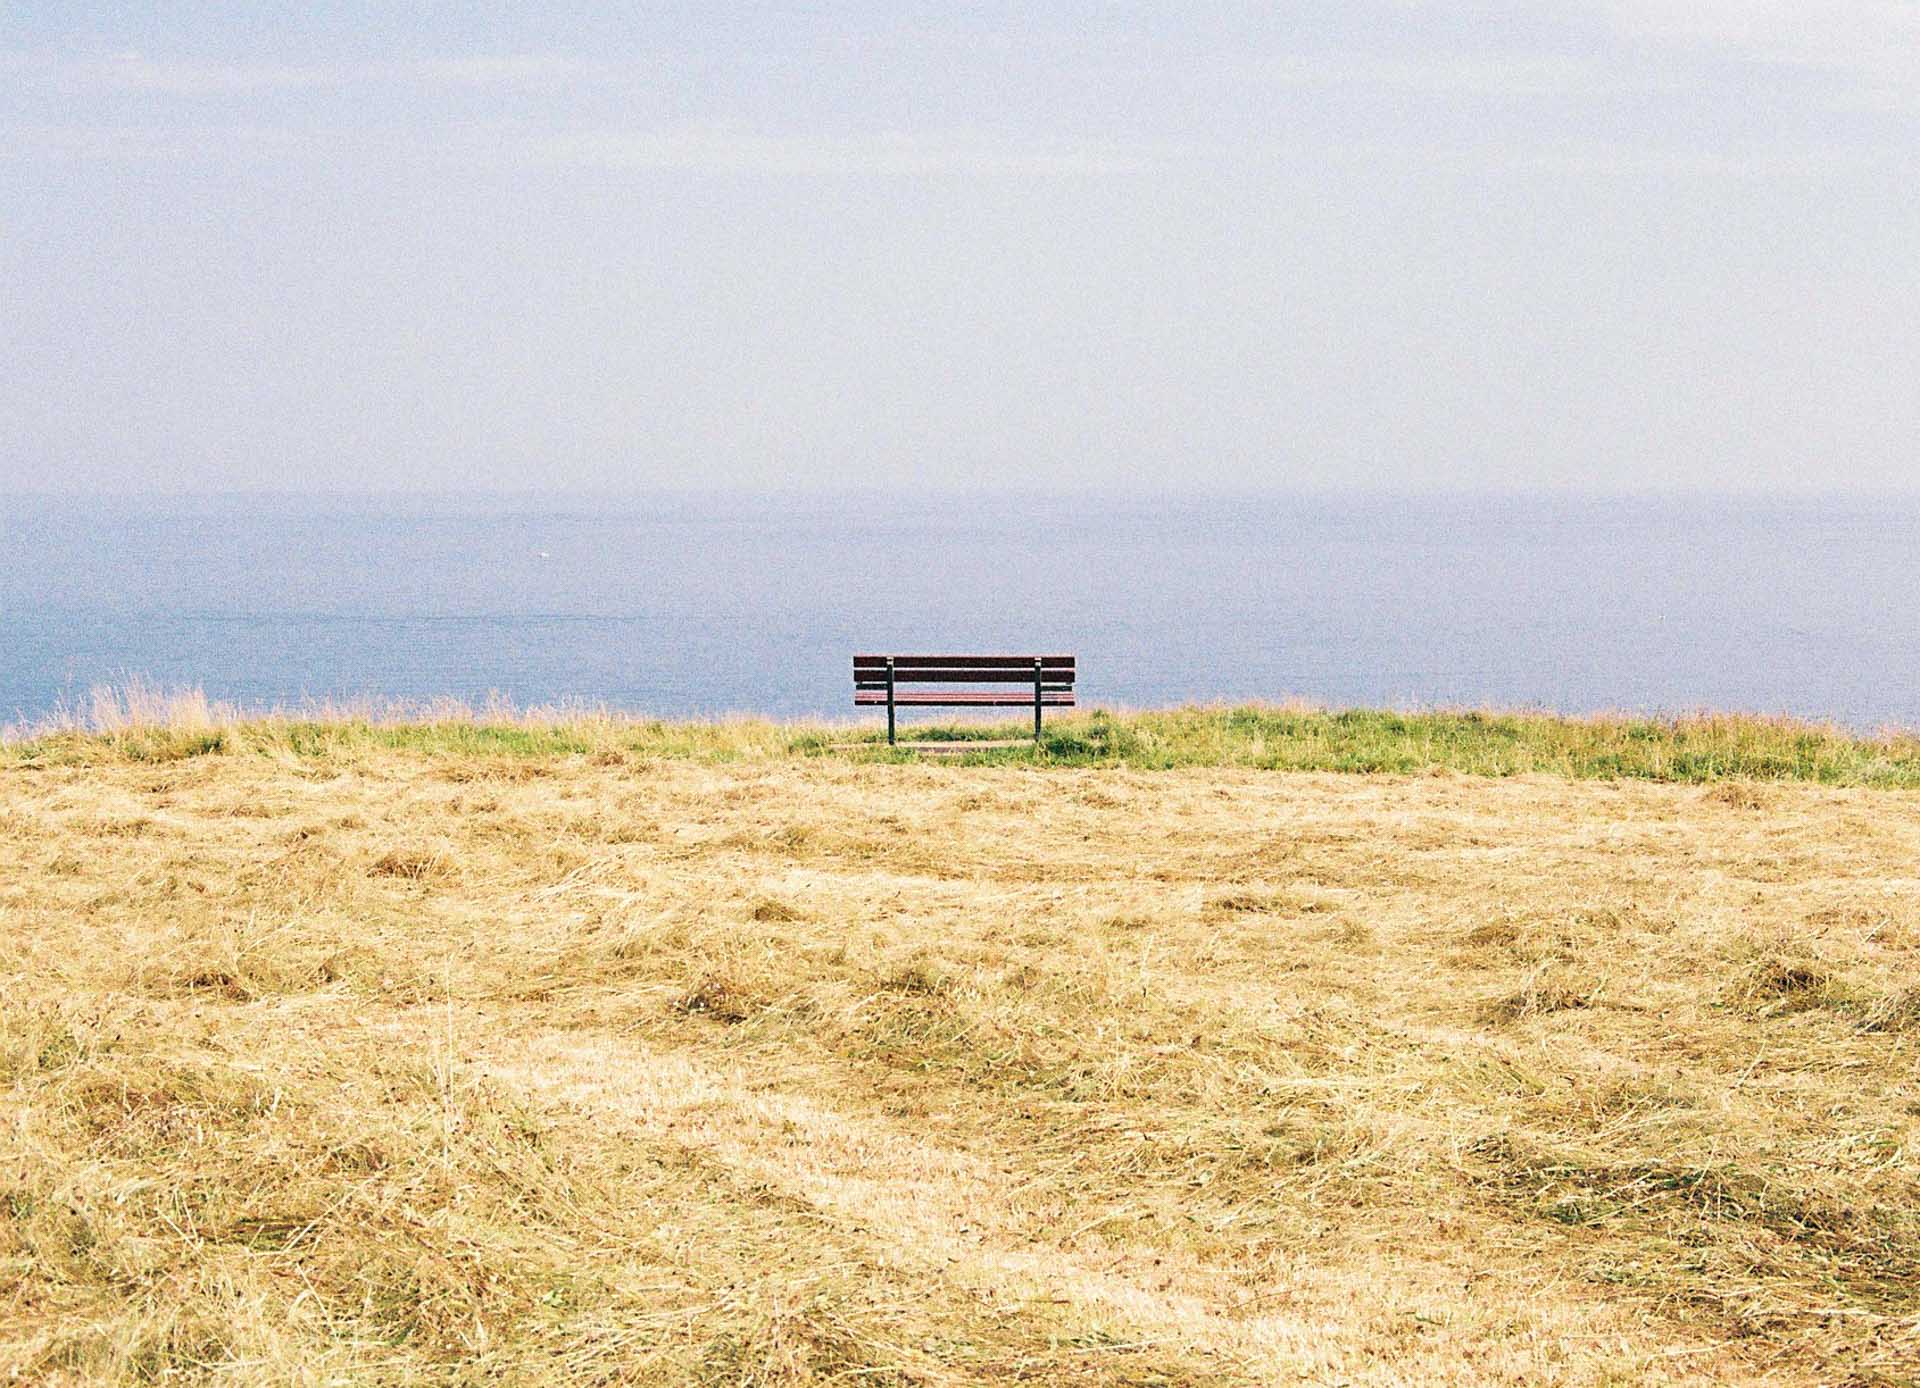
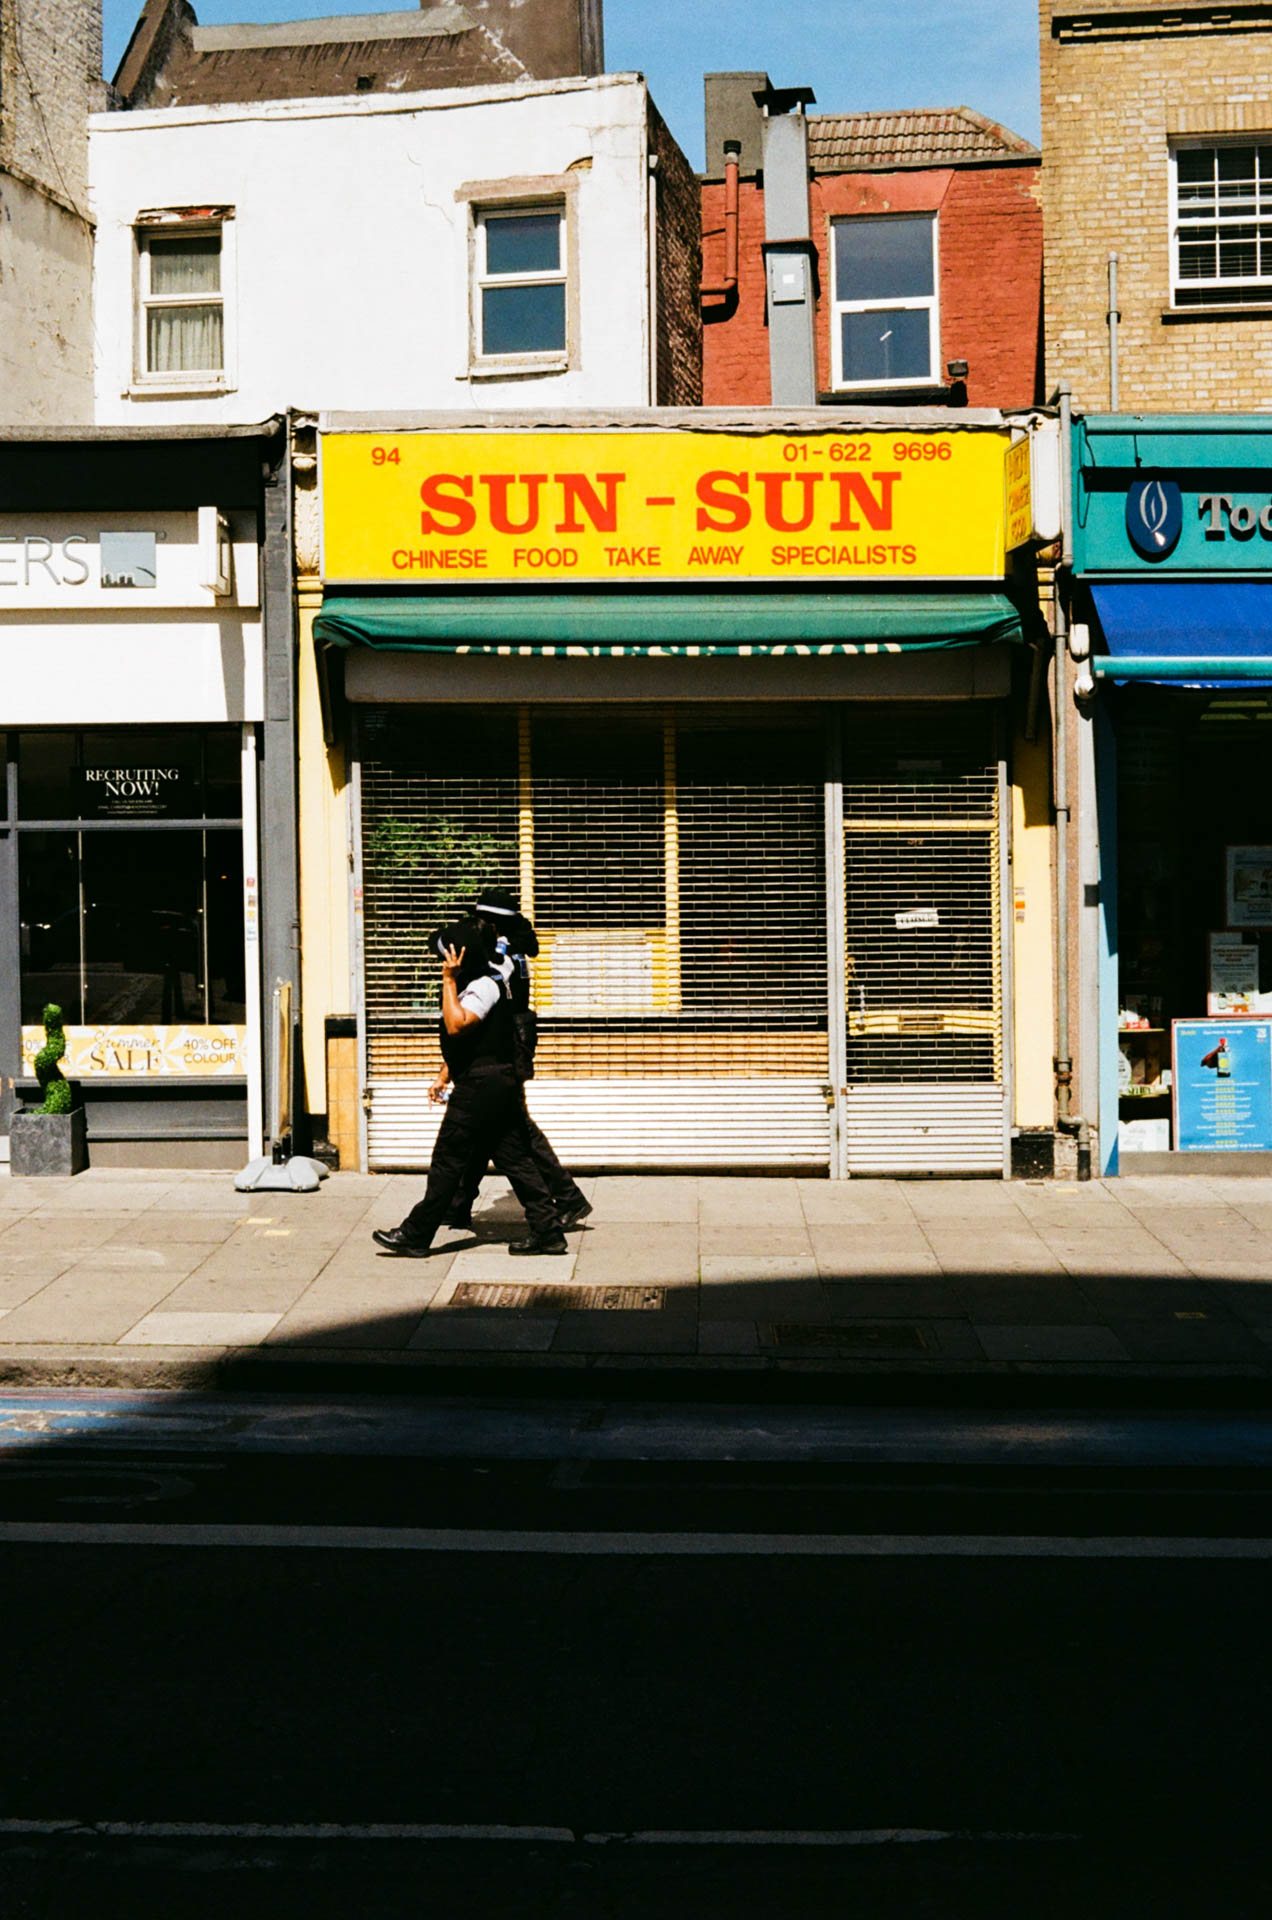
To showcase their versatility, here are 4 shots taken with the same 50mm lens…

5 - Don’t Forget About Your Local Camera Shop!
It’s easy to overlook your local camera shop in lieu of using eBay or larger retailers, but in my experience these places can be great for finding second-hand film cameras.
Shopping local can give you the opportunity to chat to knowledgeable staff who can guide you through their gear, help with repairs, and may even offer warranties on used equipment.
Typically, purchasing from an actual store is more expensive, but it does give you peace of mind that your camera actually works as well as the option of actually holding the camera in your hands and inspecting it before buying, ensuring it feels right for you.
My local camera shop is Harrison’s in Sheffield – their advice and guidance when I was starting out was incredibly valuable to me.
However, this isn’t to say you shouldn’t use eBay or similar sites.
I know good friends of mine who exclusively use these to great effect, and if you’re hunting for real bargains they’re definitely where you should be looking alongside places like car boot sales and markets.
But if you’d like a bit more reassurance or guidance, pop into your local camera shop for a chat.
Online forums and marketplaces also offer more direct interactions with film enthusiasts. Often, sellers in these spaces are hobbyists themselves, eager to give detailed descriptions and fair prices to those starting out.
Plus, the conversations happening in these communities can offer valuable insights into what to look for, helping you avoid common pitfalls or spending too much just for a brand name or hype.
So, it’s worth shopping around a bit and assessing your options!
Final Thoughts...
Buying your first film camera can feel overwhelming, but it’s important to remember that photography is ultimately about the images you create, not the gear you use.
So, with this in mind, start your journey on the right foot by avoiding the hype and getting going without breaking the bank.
Take your time, explore your options, ask questions to the community, and most importantly, enjoy the process of discovering the world of film photography.
Learn fundamental concepts like the exposure triangle and ensure you’re logging your metadata when you shoot so you can become a better photographer with each and every roll.
The right camera is the one that gets you shooting!
Welcome to Fred Shoots Film - A Film Photography Project
Welcome to Fred Shoots Film: My Journey in Film Photography
Quick Summary
I have set up this space to showcase my photography portfolio as well as provide resources, articles and guides on all aspects of film photography to help get you out there and shooting film!
Hi there 👋 I’m Fred, a film photography enthusiast based in Sheffield and The Peak District, UK.
Fred Shoots Film is a space I created to document, reflect, and share my journey into the world of 35mm film photography.
After rediscovering my love for analogue photography, I launched an Instagram page in the summer of 2024 to showcase my work.
At first, I was unsure about sharing my personal photography and re-engaging with social media after a fair few years off all platforms, but I am very happy to report that the experience has been overwhelmingly positive!
The film photography community has been incredibly welcoming, supportive, and generous with their knowledge. For everyone who has shared advice, assistance, and encouragement over the past months – thank you.
You’ve inspired me to keep going and to create this website, where I’ll be sharing more of my work alongside what I’ve learned along the way.
As much as I love taking photos, I’m equally passionate about writing.
So, I decided to combine the two and start sharing blogs and articles alongside my visual work. During the Christmas break of 2024, I finally found the time to launch this website and turn that idea into reality.
Thank you for checking it out!

What Can You Expect from Fred Shoots Film?
I’m creating a range of resources for anyone just starting out with 35mm film photography. My goal is to inspire others to explore this wonderful hobby in their own way, while learning from the mistakes I’ve made along the way!
Here’s a preview of some of the content you can expect:
- Tutorials on using film cameras
- Guides on film photography essentials like the exposure triangle
- Tips for buying your first film cameras and gear
- Reviews and discussions of different film stocks
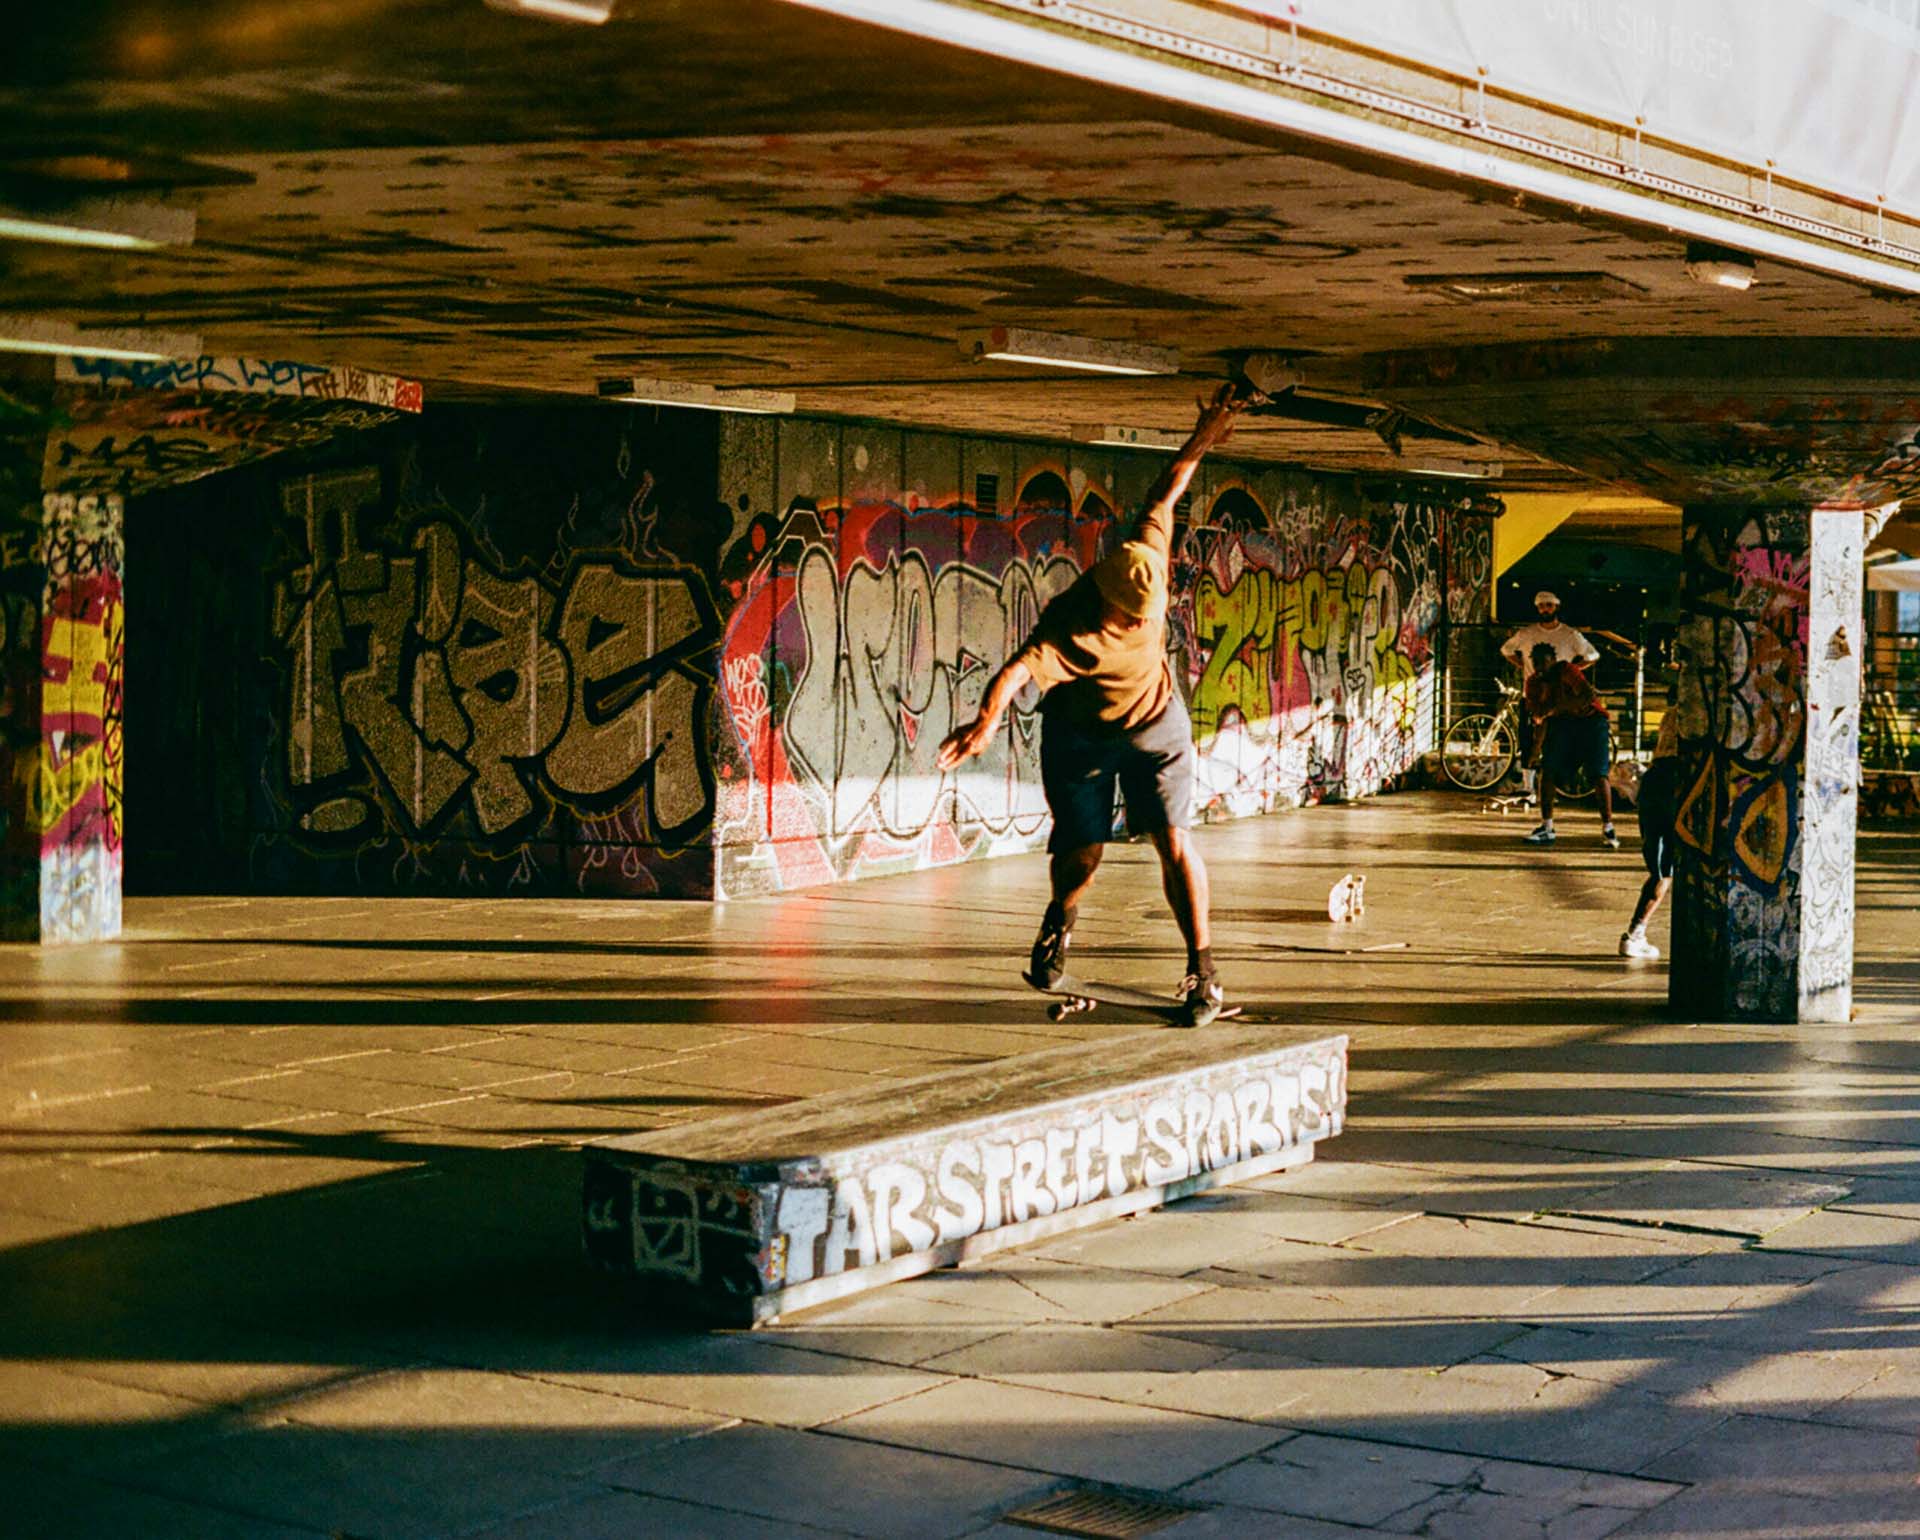
- Showcasing how I shoot street photography on film
In addition to written articles, I’ll be recording video tutorials and discussions for my YouTube channel. If you have any content ideas or questions, feel free to head over to the contact page or drop me a DM on Instagram!
What Kind of Photos Do I Take?
I nearly always have a film or digital camera with me, so my photography is an eclectic mix. I’m particularly drawn to street and travel photography, but my love for hiking and wild camping also means I enjoy capturing landscapes and nature.
I’m also fascinated by human stories and experiences, which is why I often shoot documentary-style work and portraiture. I like to keep things spontaneous – rarely planning beyond choosing a location and time that will offer the best light or the most interesting subjects.