Exposure Triangle Explained: A Complete Guide for Film Photography
Quick Summary
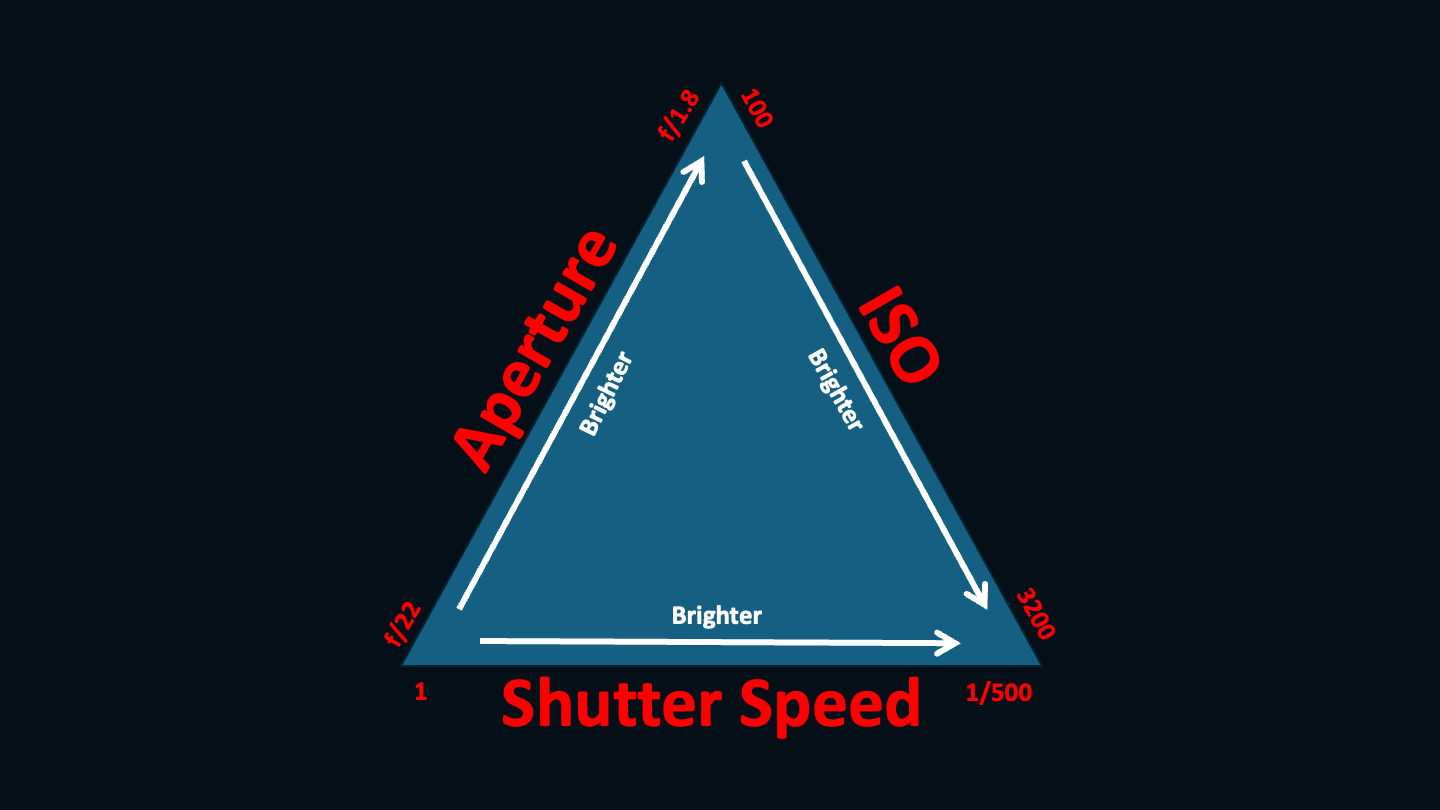
If you’re new to the world of film photography, one of the most fundamental concepts you need to grasp is that of the exposure triangle. This blog post breaks down each element (ISO, Shutter Speed and Aperture) and how these work together to create a well exposed shot.
Key Takeaways:
- The exposure triangle consists of three critical elements that work together to control how much light reaches the film: aperture, shutter speed, and ISO (sometimes called ASA).
- Balancing these three aspects is the key to achieving well-exposed images and avoiding your shot coming out too bright (overexposed) or too dark (underexposed).
- Understanding each element will also empower you to make decisions to achieve certain creative effects in your work.
- This blog breaks down each part of the exposure triangle and how they interact with one another to shape your final image.
- Once you understand these, you should familiarise yourself with the Sunny 16 Rule – here’s a dedicated blog just for that!
Mastering Aperture: Controlling Light and Focus
Aperture refers to the opening in your lens that allows light to pass through and reach the film. This is measured in f-stops, such as f/1.8, f/4, or f/11, which are the numbers you’ll likely see on your lens or when reading descriptions of lenses.
Somewhat confusingly, the smaller the f-stop number, the larger the opening (aperture) and therefore more light is let in. Conversely, a higher f-stop number means a small aperture and less light entering the lens.
I find that aperture is often the thing that people struggle to understand, so I’ll share with you the analogy that helped me grasp it better…
Think of aperture like the pupil of your eye. When you’re in a dark room, your pupil expands to let in more light so you can see better. This is similar to a large aperture (low f-stop), which lets in more light to expose your film in low-light conditions.
On the other hand, when you step outside into bright sunlight, your pupil constricts (gets smaller) to reduce the amount of light entering your eye.
This is like using a small aperture (high f-stop), which limits the light entering your lens to prevent overexposure in bright conditions.
Just like your eye adjusts its pupil size to control how much light you see, your camera’s aperture adjusts to control how much light reaches the film, affecting the overall exposure and focus of your image.
Like all elements of the exposure triangle, it’s important to log what aperture you use so you can learn from your own shots – find out how to make an analogue photography log book here.
The Impact Aperture has on Exposure:
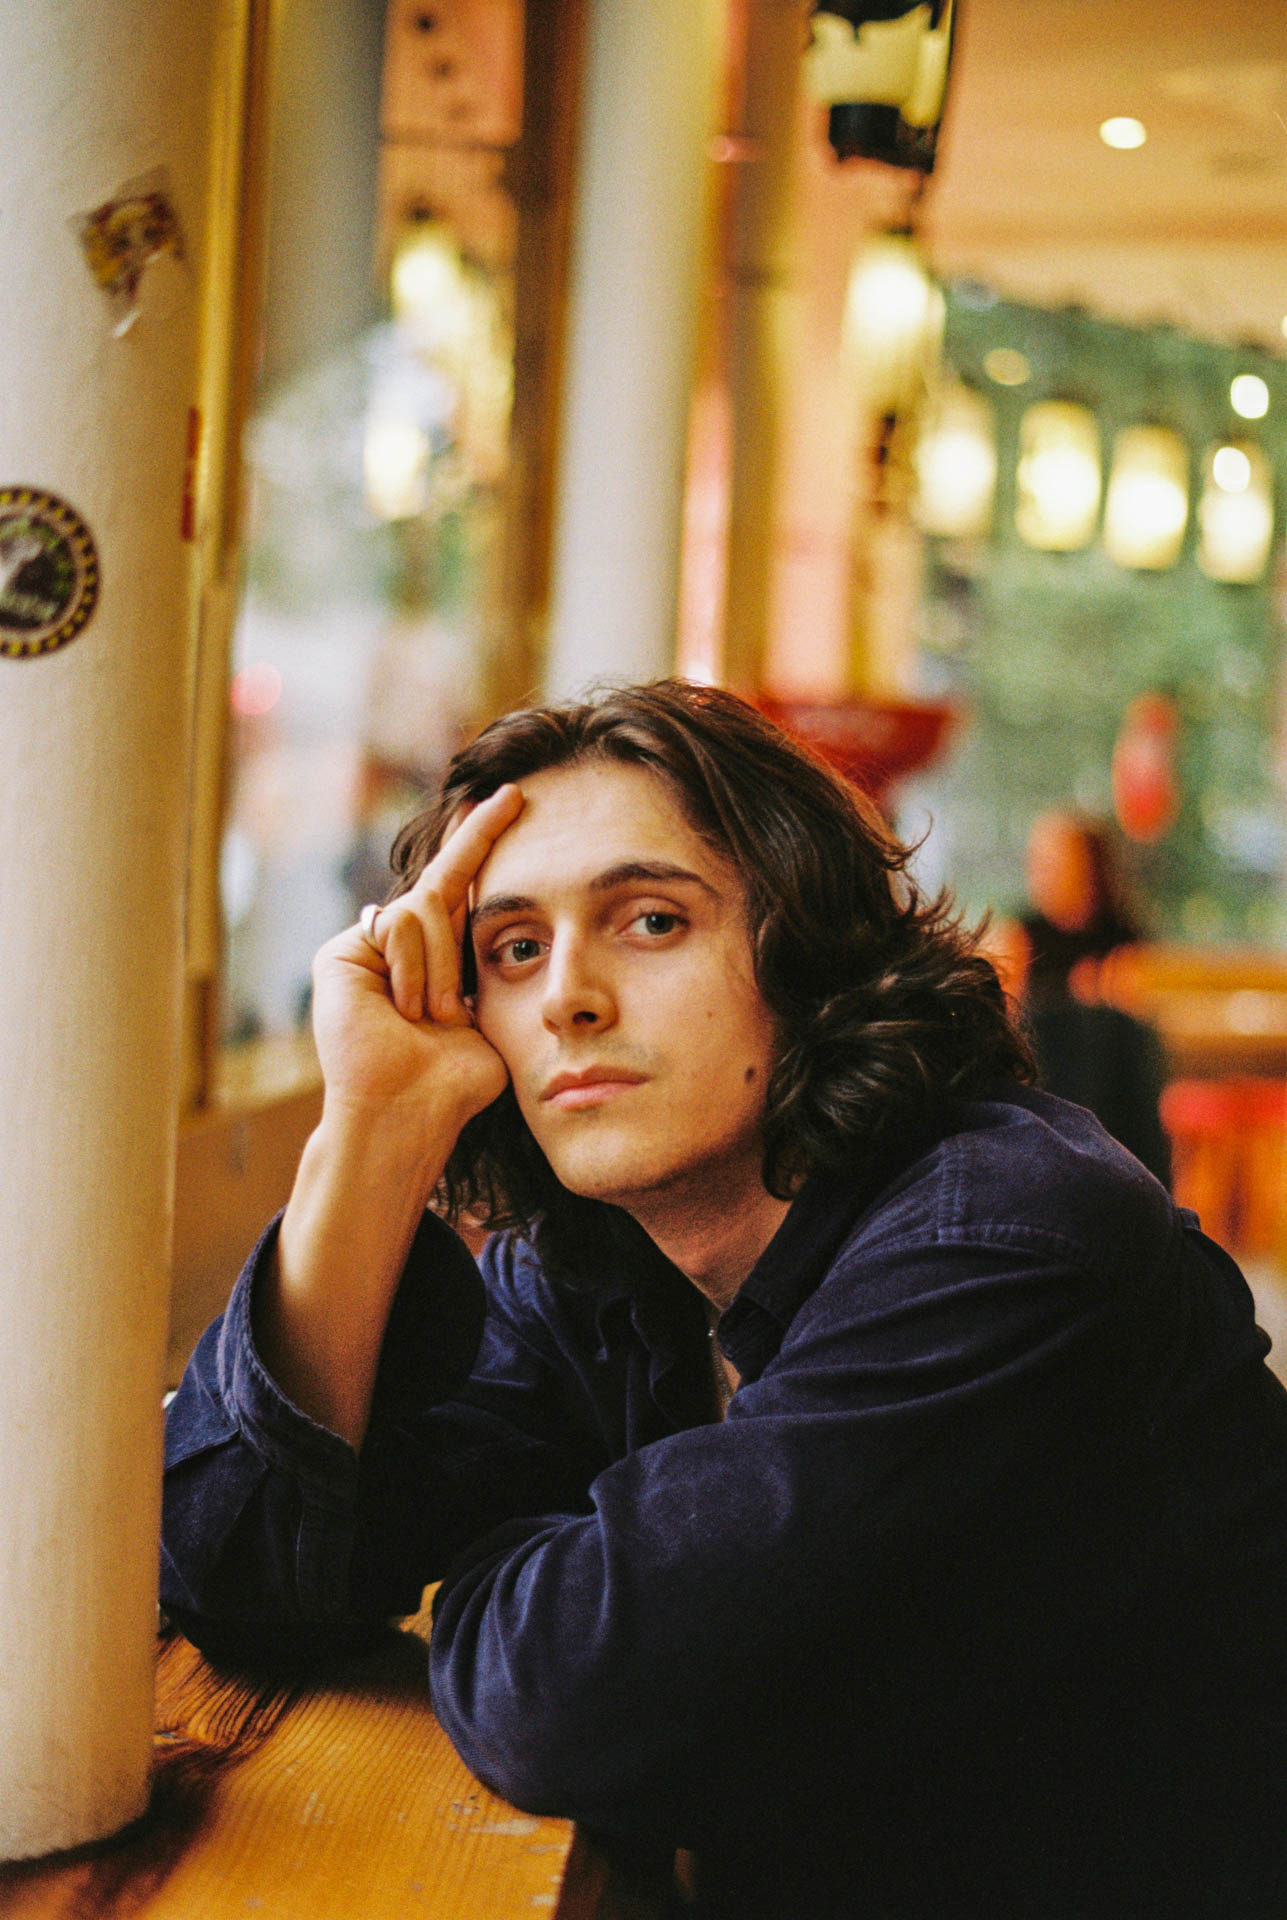
- A larger aperture (e.g. f/1.8) allows more light in and is much better for dealing with low-light conditions. However, this also reduces your depth of field. This means only a small portion of your image will be in focus, making larger apertures perfect for portraiture or any shot where you’d like your subject sharp against a blurred background.
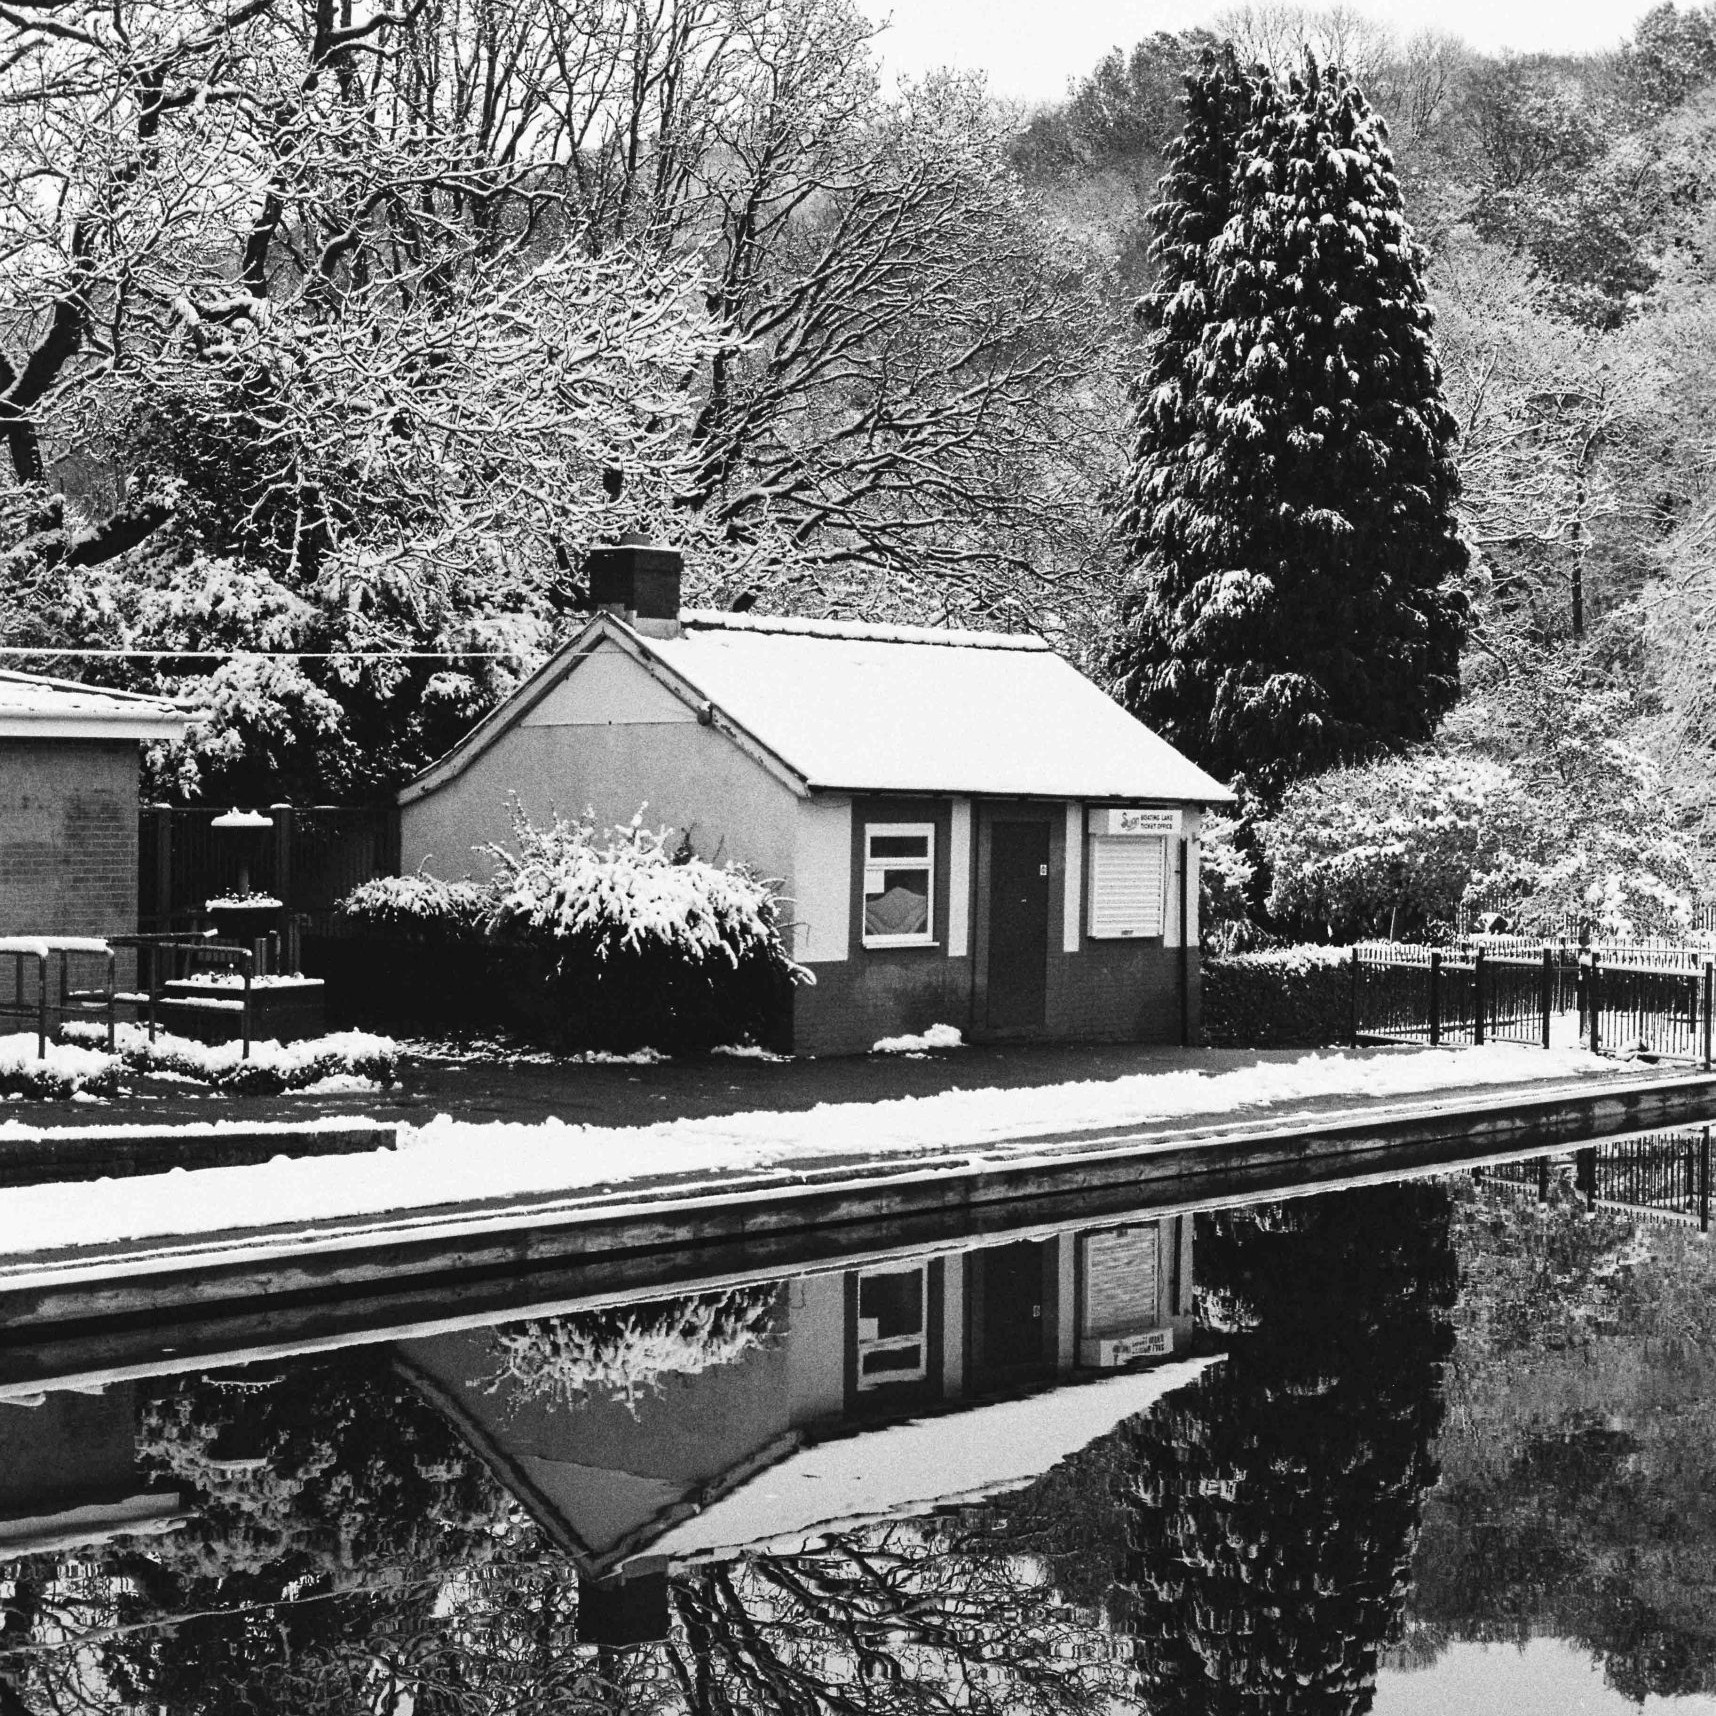
- A smaller aperture (e.g. f/11 or f/16) allows less light in, and is more suited for brighter daylight conditions. This increases your depth of field, so much more of your image will be in focus and therefore typically makes the most sense for landscape or architectural photography.
It is worth reiterating that beyond just controlling light, aperture is an immensely powerful creative tool in photography and dictates how much of your shot is in focus.
Once understood and wielded correctly, this can really help you match your final exposure to the creative vision you have for the shot at hand.
Look at the below photographs.
The portrait image was taken with a larger aperture to give a blurred background effect, whilst the woodland shot was taken with a smaller aperture to ensure the scene was in focus.

Shutter Speed: Freezing Motion or Embracing Blur
Shutter speed is relatively self explanatory and refers to how long your camera’s shutter stays open when you press the shutter release button to take a shot. This dictates how much light is able to hit the film.
Shutter speed is measured in fractions of a second – if you pick up your camera and look you’ll see numbers like 1/250 or 1/30, and sometimes shutter speed is displayed without the ‘1/’ – so 1/250 just becomes 250.
A faster shutter speed (e.g. 1/1000s) means that the shutter opens and closes quickly, allowing less light in that a shutter speed of, say, 1/30, which would keep the shutter open longer and therefore let more light in.
The Impact Shutter Speed has on Exposure:
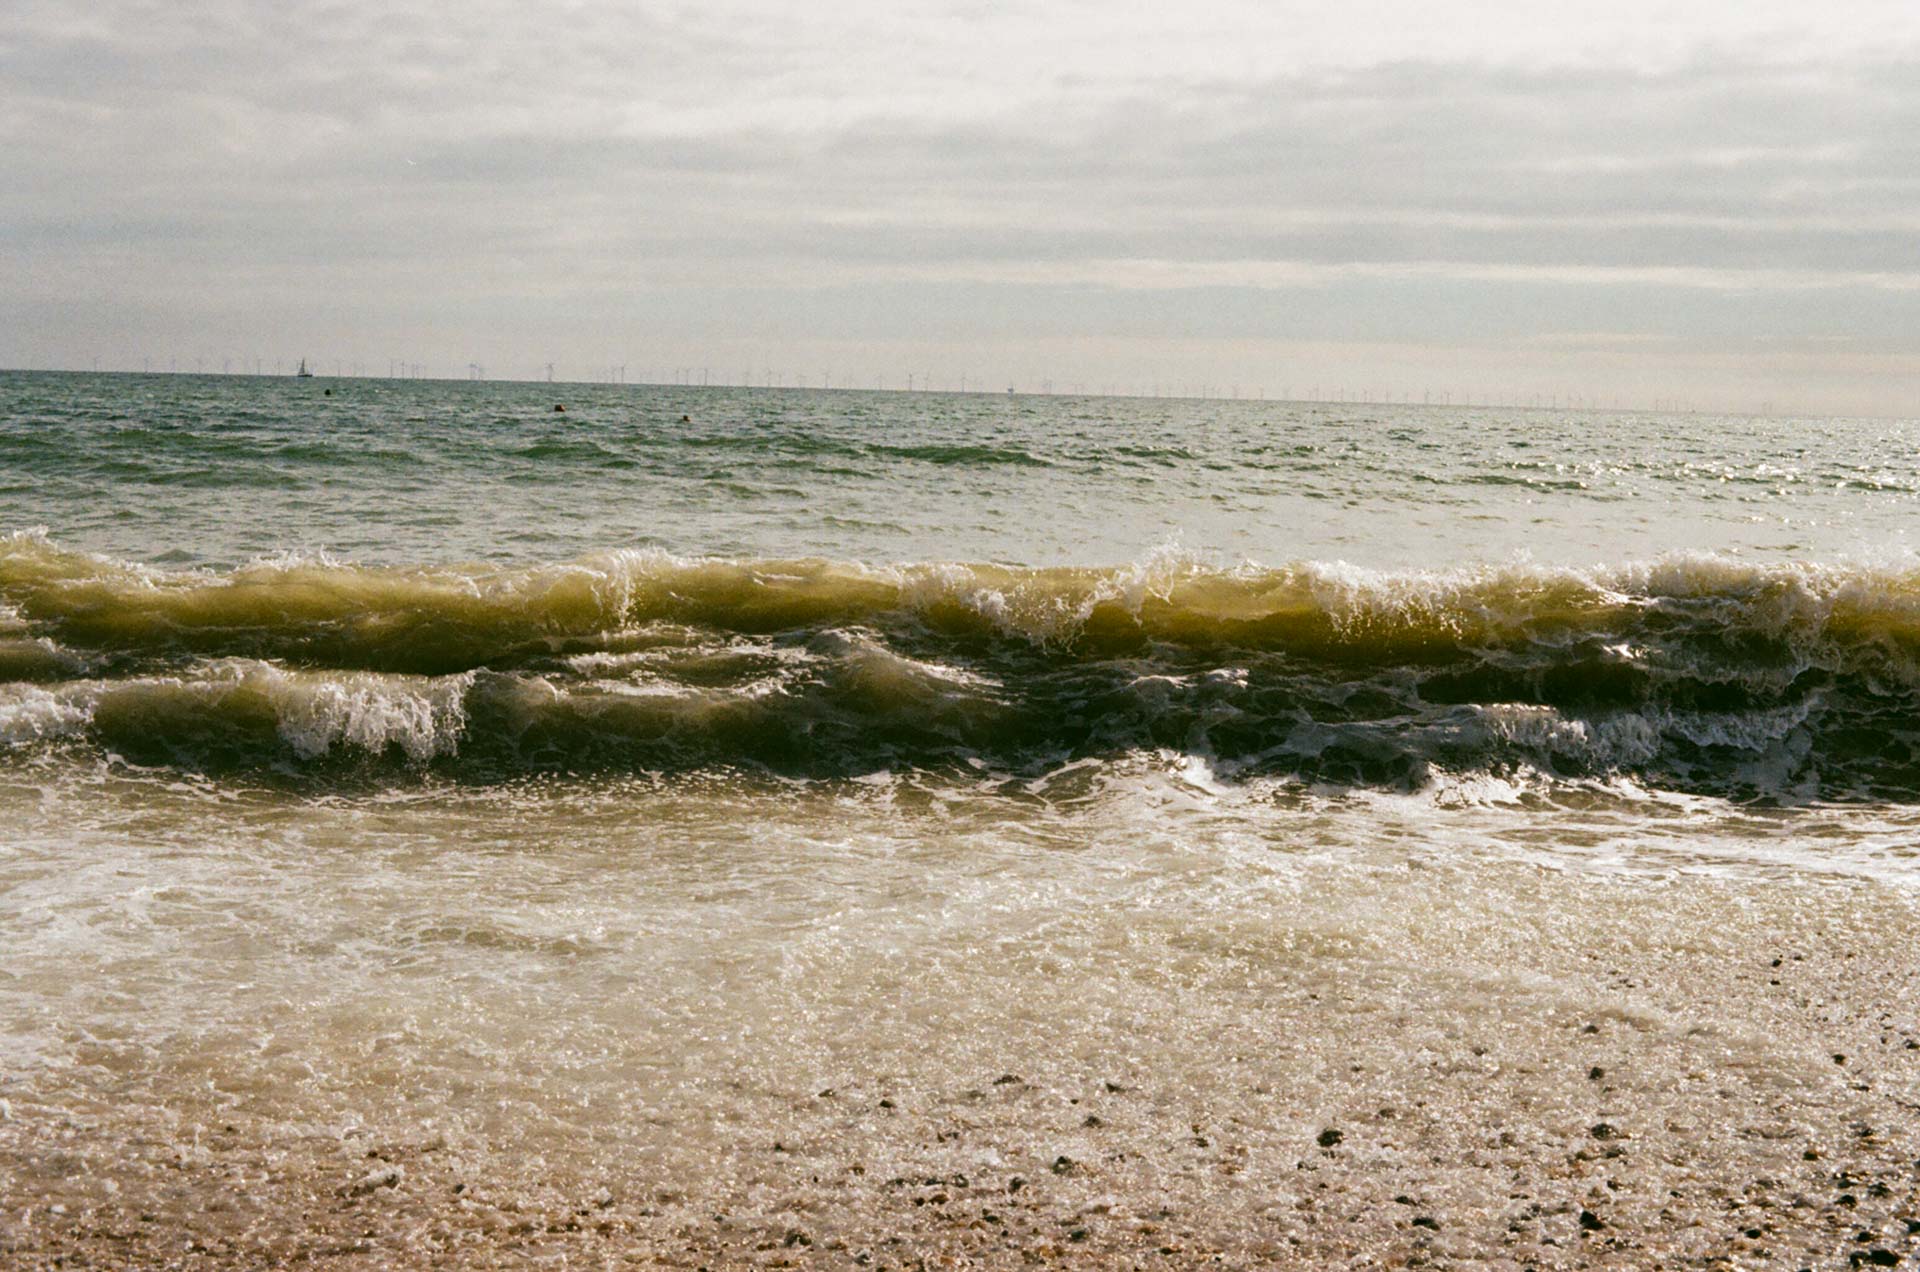
- A faster shutter speed will let in less light, but it will also “freeze” motion. This means it’s super useful for action shots or capturing any fast-moving subjects (such as sports, wildlife, automotive, etc). It is also particularly useful when you’re shooting handheld and want to avoid blur from camera shake. A faster shutter speed would also be typically used in bright sunlight to avoid overexposing your image.
- A slower shutter speed allows more light in but may result in motion blur. This can be used intentionally to capture movement, such as with flowing waterfalls or light trails, or any time you want to convey motion in your image. I would definitely recommend, if this appeals to you, to use a tripod and either your camera’s self timer function or a shutter release cable to avoid camera shake!
Using a slower shutter speed when shooting indoors, at night, or anywhere with low light conditions will allow enough light in to properly expose your film – just beware of introducing unwanted blur from camera shake.
I used a fast shutter speed in the shot below to capture the wave before it crashed!
ISO Sensitivity: Finding the Right Light for Your Film
ISO and ASA are the same thing are refers to your film’s sensitivity to light.
ISO stands for International Organisation for Standardisation, which is the body that standardised the sensitivity ratings for film and digital sensors.
ASA stands for American Standards Association, which was the earlier system used to measure the sensitivity of photographic film before ISO became the standard. The numbers between ASA and ISO were the same, but ISO replaced ASA to create a globally unified system for measuring sensitivity.
In essence, both terms refer to the same concept—light sensitivity—but ISO is the modern term, while ASA is the older one.
When you’re using a digital camera, ISO is a setting you can change shot to shot, but with film photography the ISO is dictated by type of film you’re using. There are circumstances where you may choose to alter this by tricking your camera into thinking it’s shooting with a different ISO, such as when shooting expired film, but we don’t need to cover that here.
Lower ISO values, such as ISO 100 or 200, mean the film is less sensitive to light and therefore would be more suited to daylight or brighter conditions. A very famous and common example would be Kodak Gold 200 film stock.
Higher ISO values, such as ISO 800 or 1600, mean that the film is more sensitive to light and therefore would be more suited to low light conditions and night photography. You may see that a lot of low light film photography online uses film stock like Cinestill 800T.
The Impact ISO has on Exposure:
- Low ISO Film (e.g. Kodak Gold 200) is ideal for bright, well-lit conditions. It produces finer grain (or less “noise”) and creates sharp, clean images. Whilst certainly possible to use in low light, low ISO film will struggle to capture enough light without the help of slower shutter speeds or a wider aperture.
- High ISO Film (e.g. Cinestill 800T ) is more sensitive to light and works better in darker conditions. However, the trade-off is that higher ISO film introduces more grain, which can give your images a distinct, gritty look. Some photographers love this aesthetic, but it’s something to be aware of when choosing your film.
Just to elaborate slightly on grain, as I’m aware I’ve just thrown that in without much explanation… The grainier look of high-ISO film can be used creatively, especially in low-light situations or when you’re looking for a certain mood in your photos.
It’s great for documentary or street photography when the extra grain adds to the atmosphere. On the other hand, low-ISO film gives you crisp, clear images, perfect for bright, daylight scenes like landscapes or portraits in good light.
Since you can’t change the ISO once you’ve loaded your film, choose your film carefully based on your shooting environment. If you’re going to be shooting mostly outdoors during the day, stick with lower ISO film. But if you’re shooting indoors or in low light, go for a higher ISO film, or plan to use a tripod and wider aperture.

How the Exposure Triangle Works Together
Now, if if I’ve done my job correctly, you should have a good understanding of each element. It’s important to see how they work together as a system and how changing one element affects the others.
For example…
- If you open your aperture (lower f-stop), you’re letting in more light. To maintain the same exposure, you might need to use a faster shutter speed to let in less light or lower your ISO to make the film less sensitive.
- If you slow your shutter speed, allowing more light in, you might need to close your aperture (higher f-stop) or use a lower ISO film to avoid overexposure.
- If you’re using high ISO film (e.g., ISO 800), you’re increasing the film’s sensitivity to light. To prevent overexposure, you might need a faster shutter speed or a smaller aperture.
The key is balance. If you change one part of the triangle, you need to compensate with another to achieve a proper exposure. This balance is where the artistry of photography comes in – I always recommend that you start with what is creatively the most important element and then go from there.
Say, for example, that it’s important for your shot that you have a shallow depth of field to capture a portrait, or that you want to capture motion blur to show headlights in the rain – you know you would need to adjust the rest of the elements to compensate for this creative choice.
You should learn to log your shooting settings so that you can learn from your successes and mistakes – find out how I log my film photography metadata here.
Stick With It – It’s Worth The Struggle!
Understanding and mastering the exposure triangle is one of the most important steps toward becoming a skilled film photographer. It’s learned best through trial and error – but stick with it, it will help you execute any creative vision for a shot.
If you have access to a digital camera, I would definitely recommend shooting on manual mode and experimenting with different variables so you get used to how these interact with one another without having to wait for film to be processed or incurring the cost of film itself!
Photography is both a science and an art, and knowing how to control light through the exposure triangle is the foundation that will help you take your craft to the next level.
Now that you know about aperture, ISO and shutter speed, you should check out the Sunny 16 Rule!
I hope this helps get you out there shooting!