Parker Loew - An Interview
Parker Loew - Conversations with Creatives
Quick Summary
Conversations with Creatives is an ongoing interview series between myself and those that truly inspire me. This is a space for me to dig deeper into their creative journey and process to uncover more about what led them here, what pushes them forward and what they hope to achieve.
Interview #2 - Parker Loew
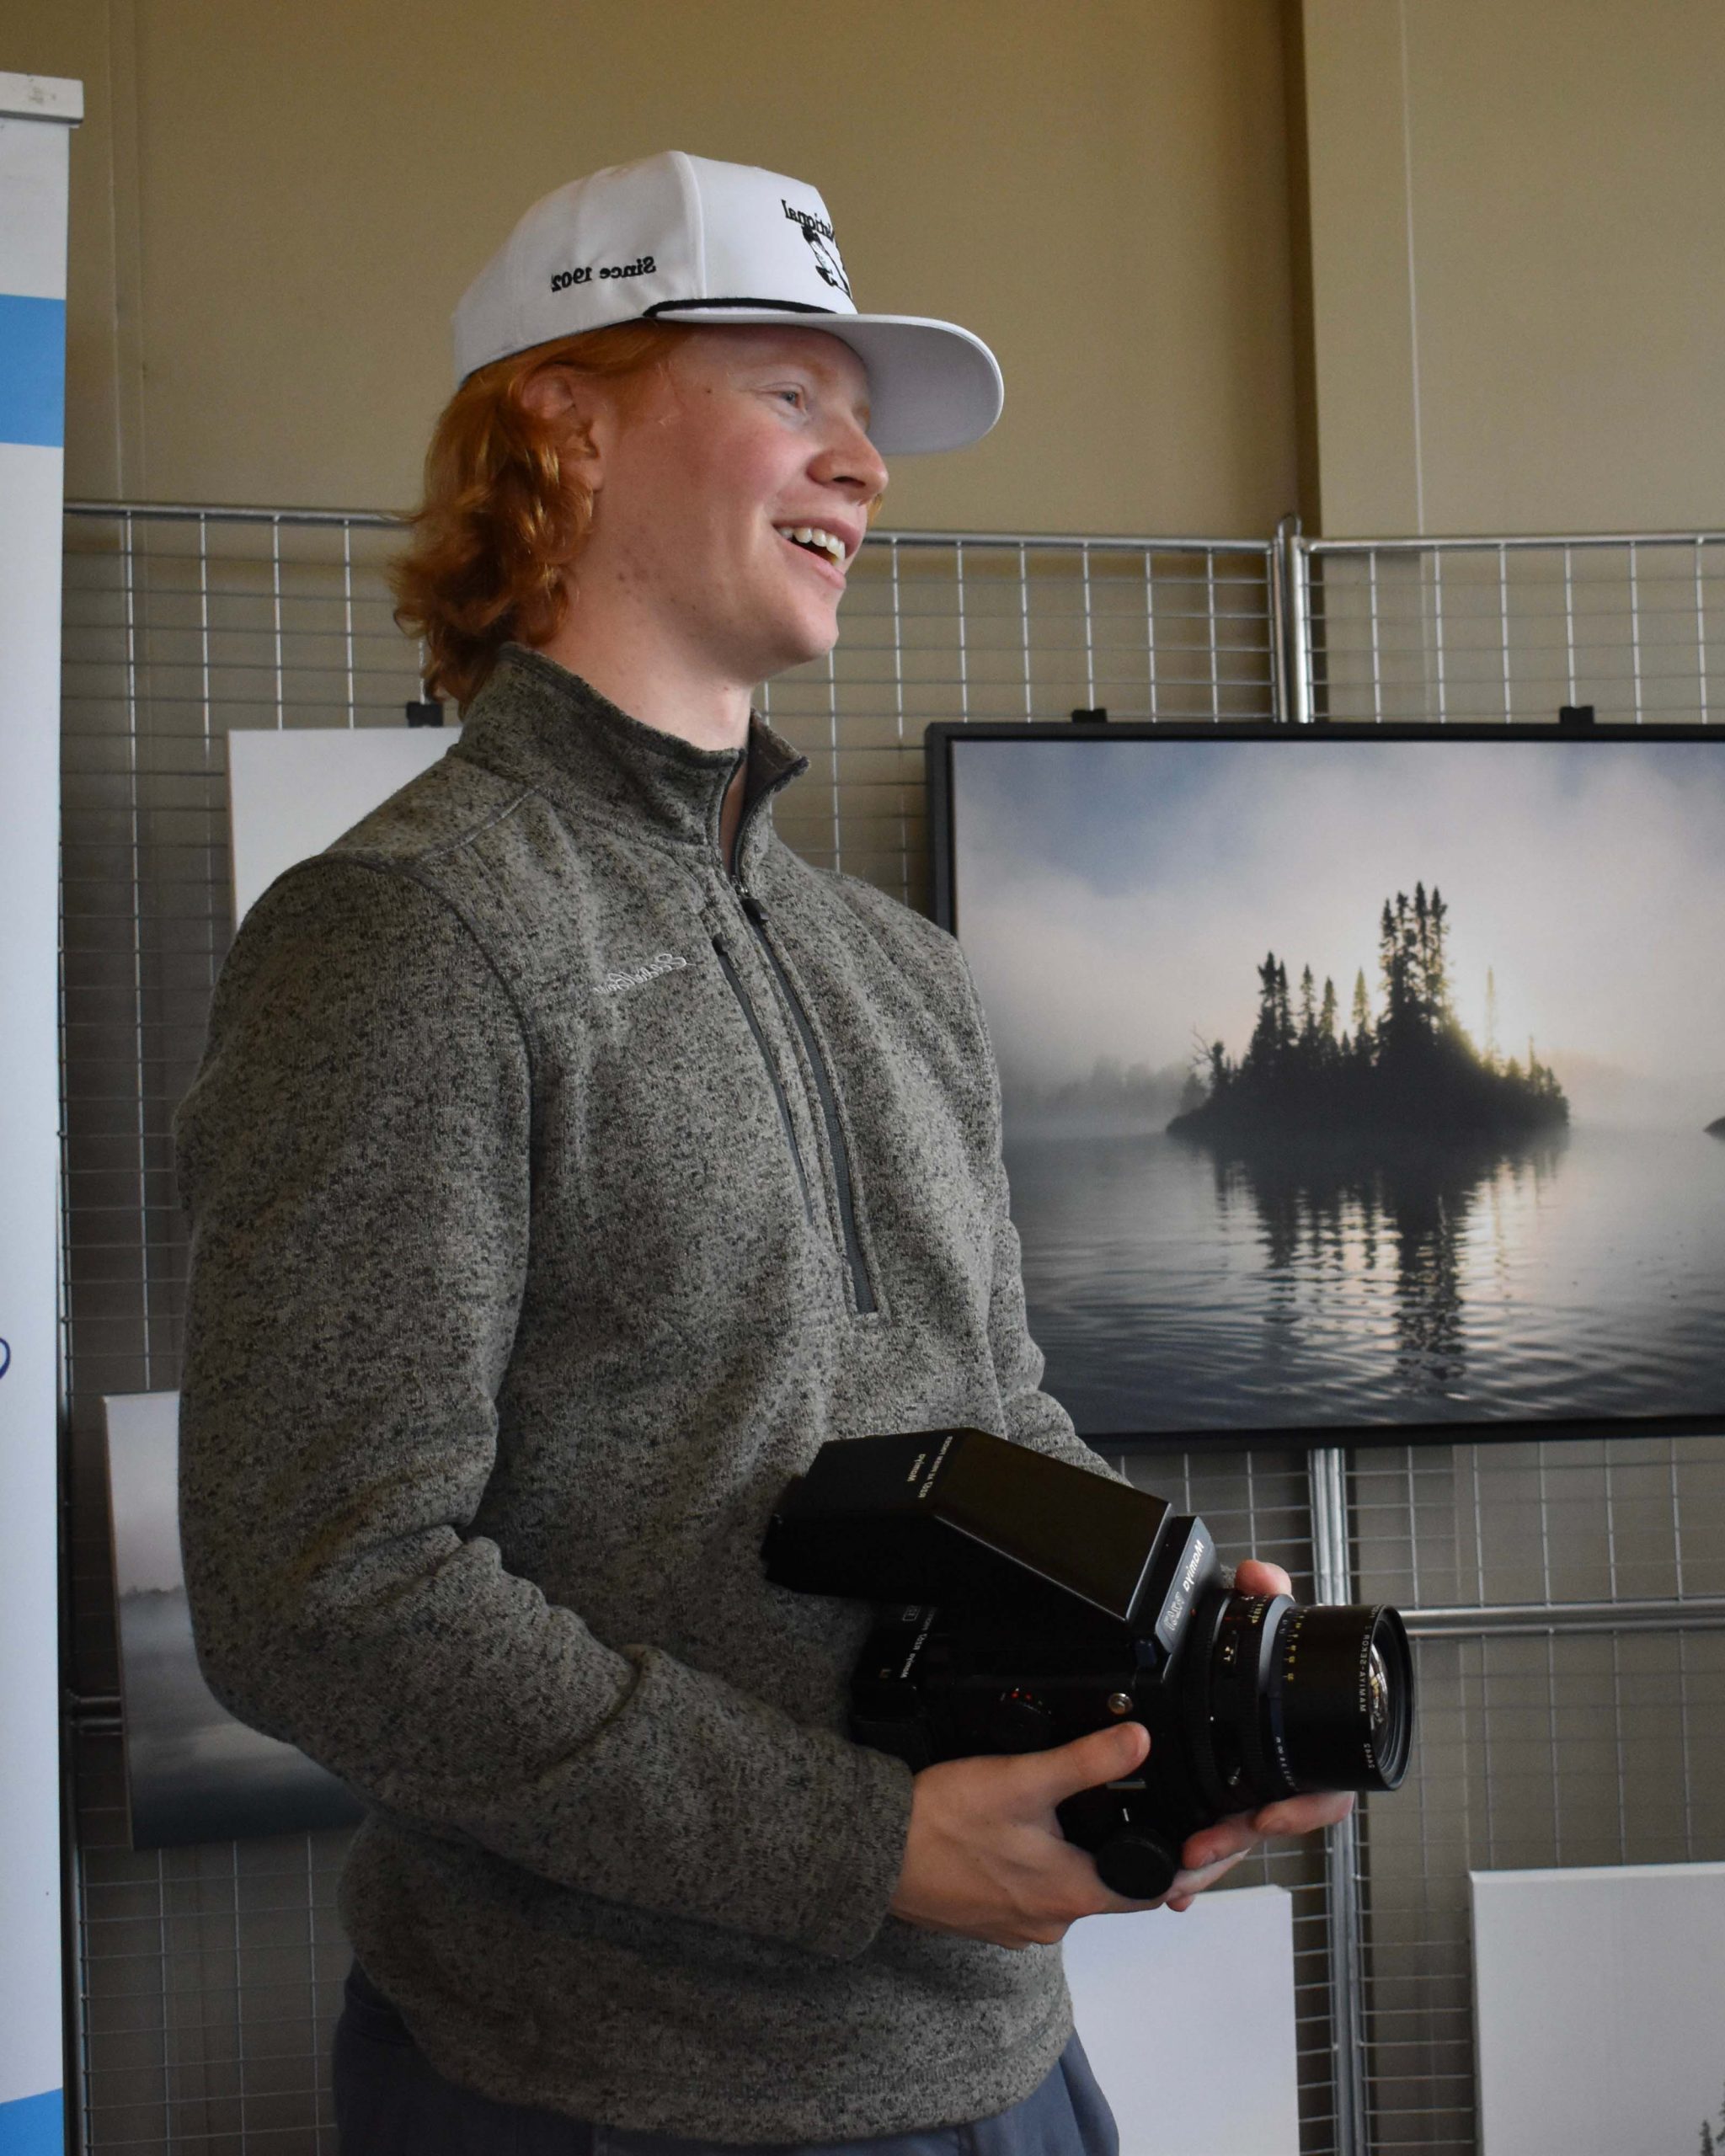
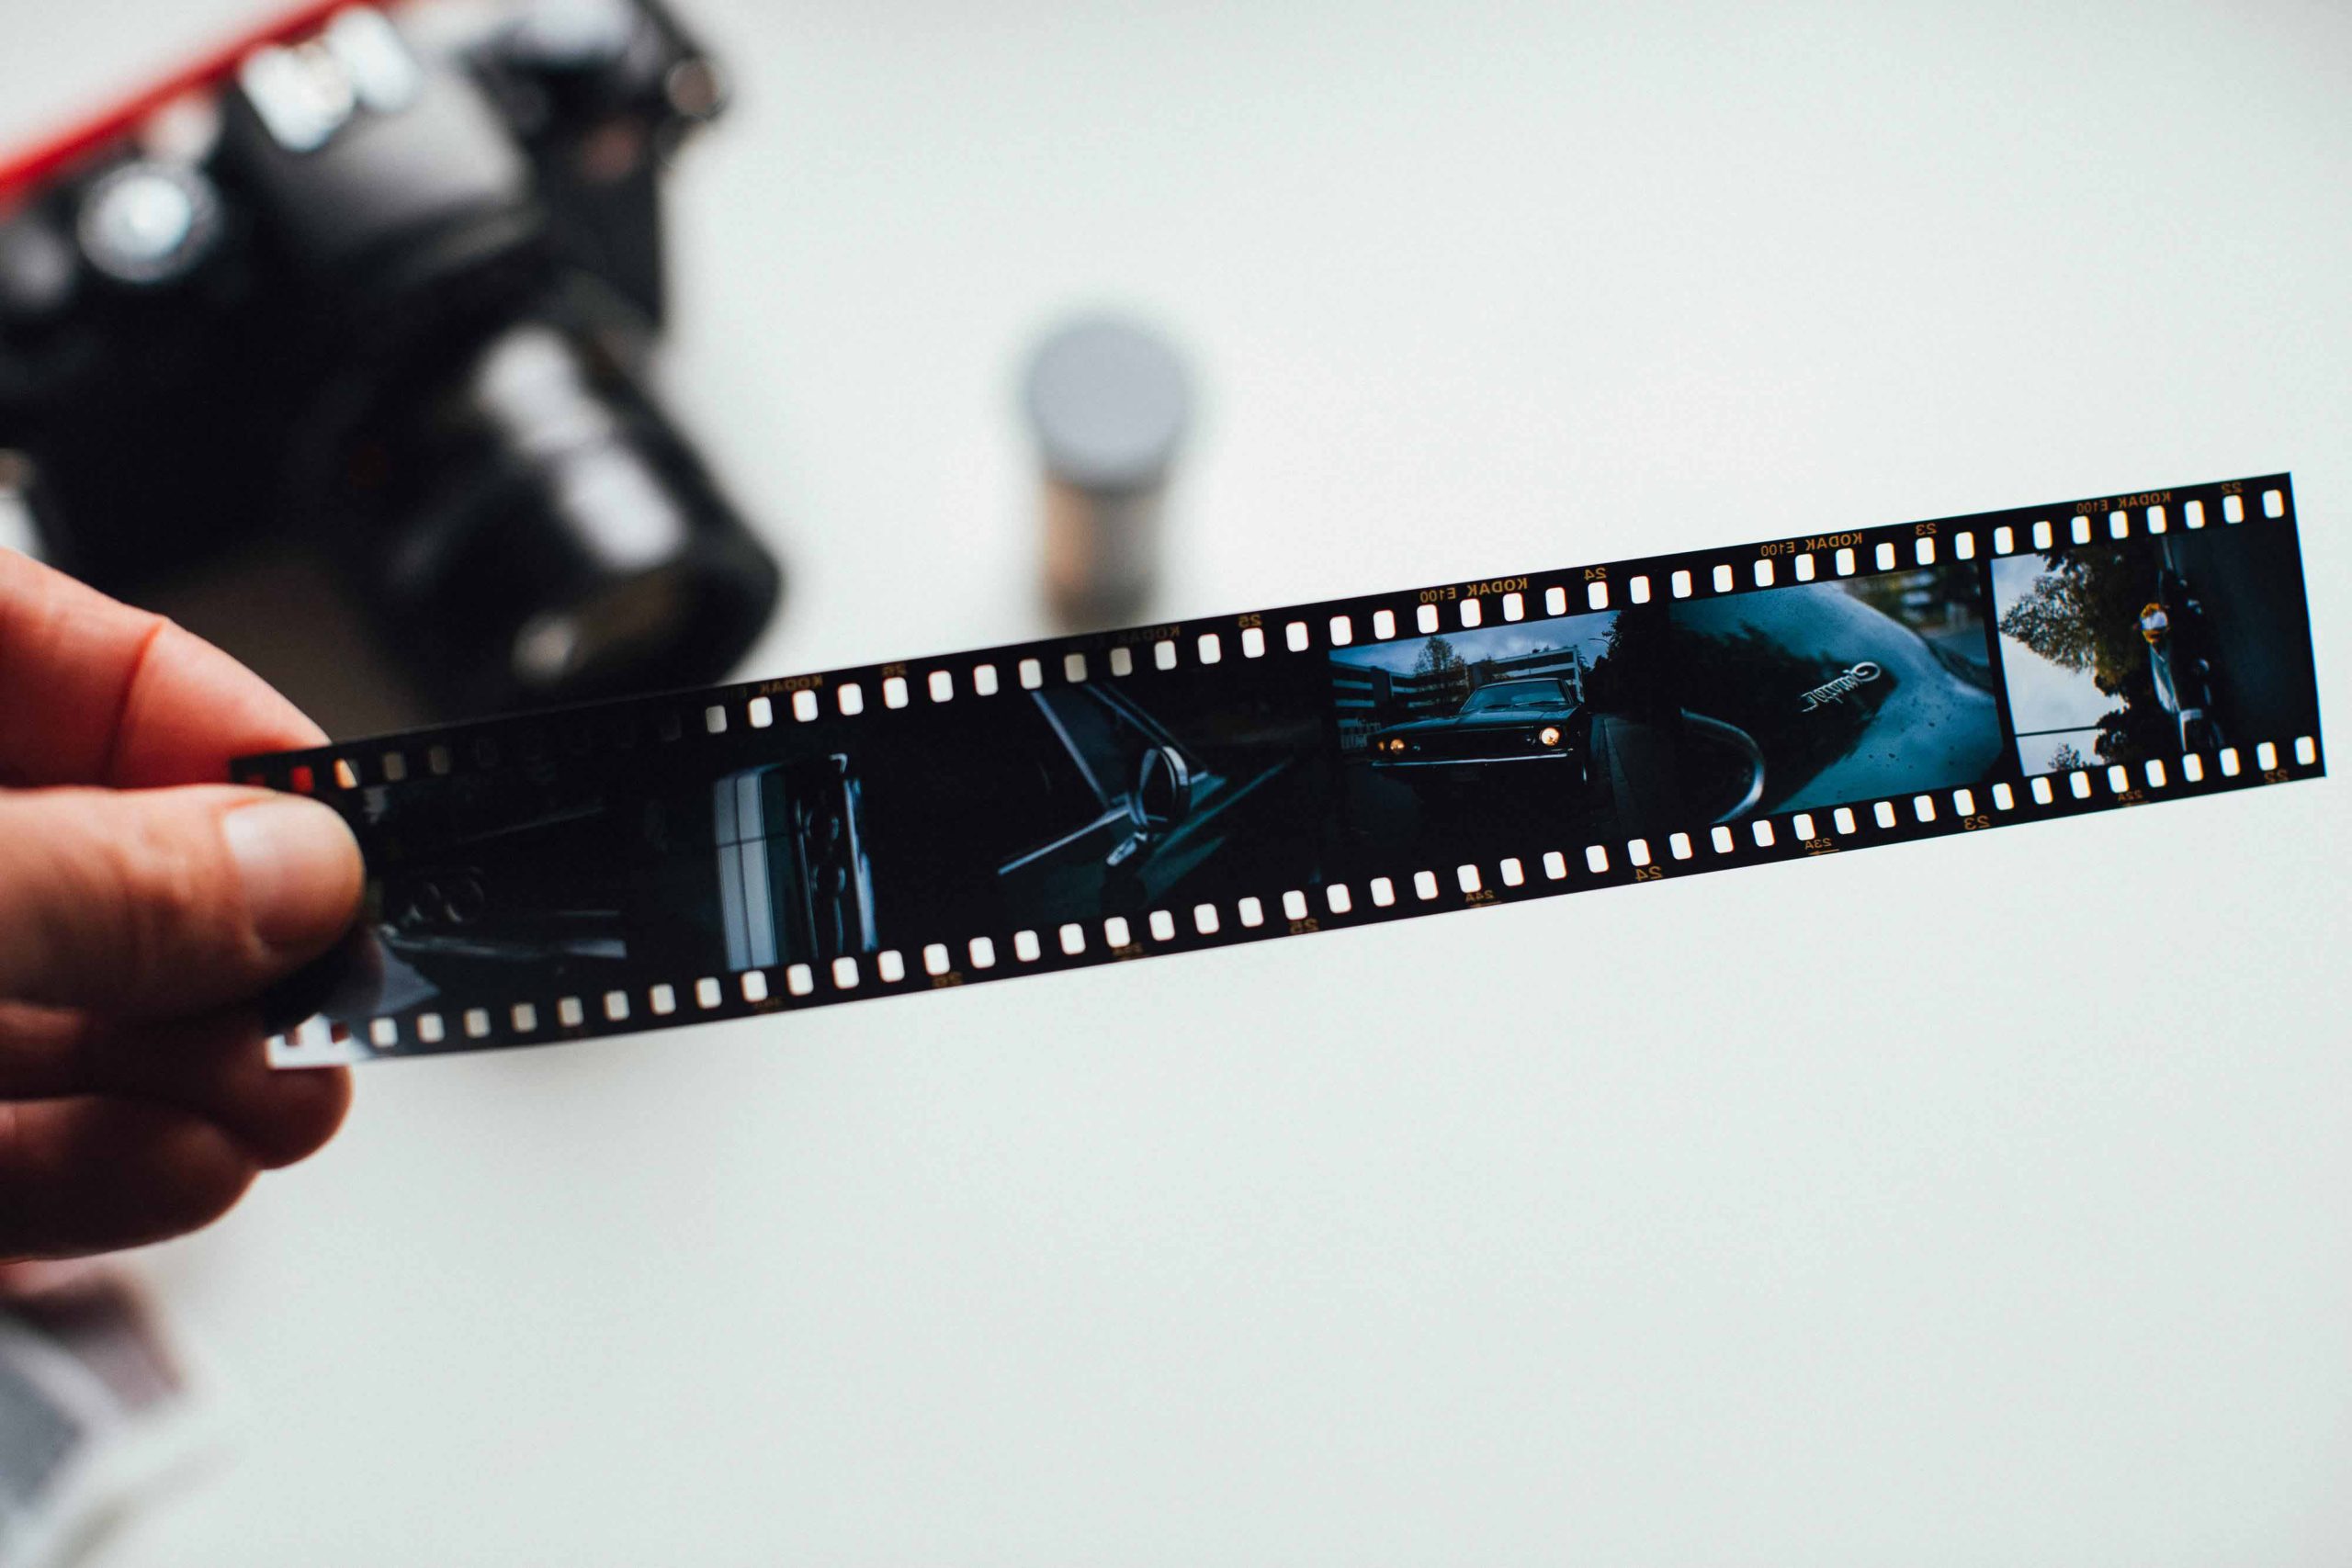
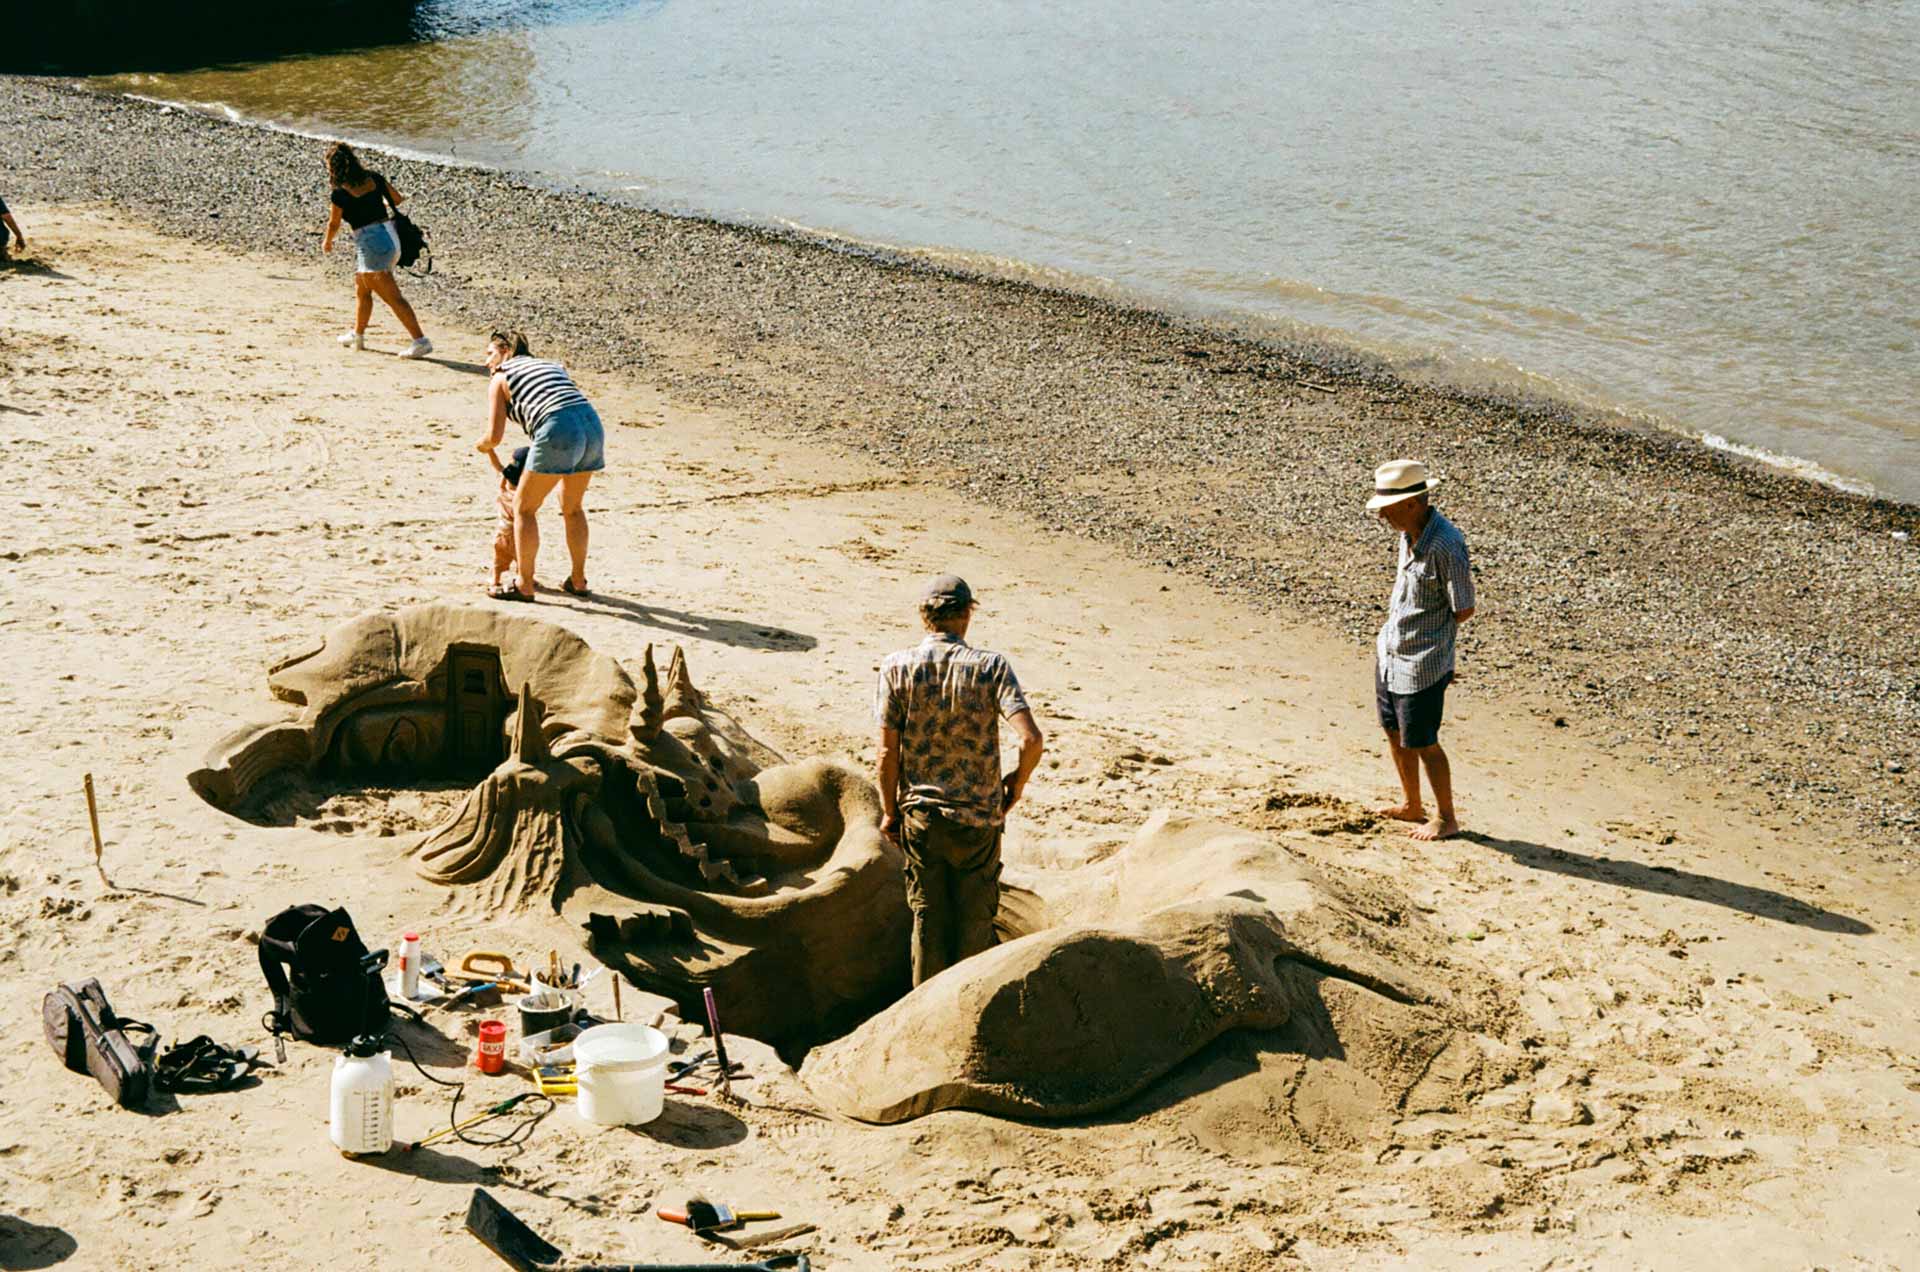
Parker Loew is a film photographer and outdoorsman currently based in Colorado.
Once you see Parker's work, it's hard to forget.
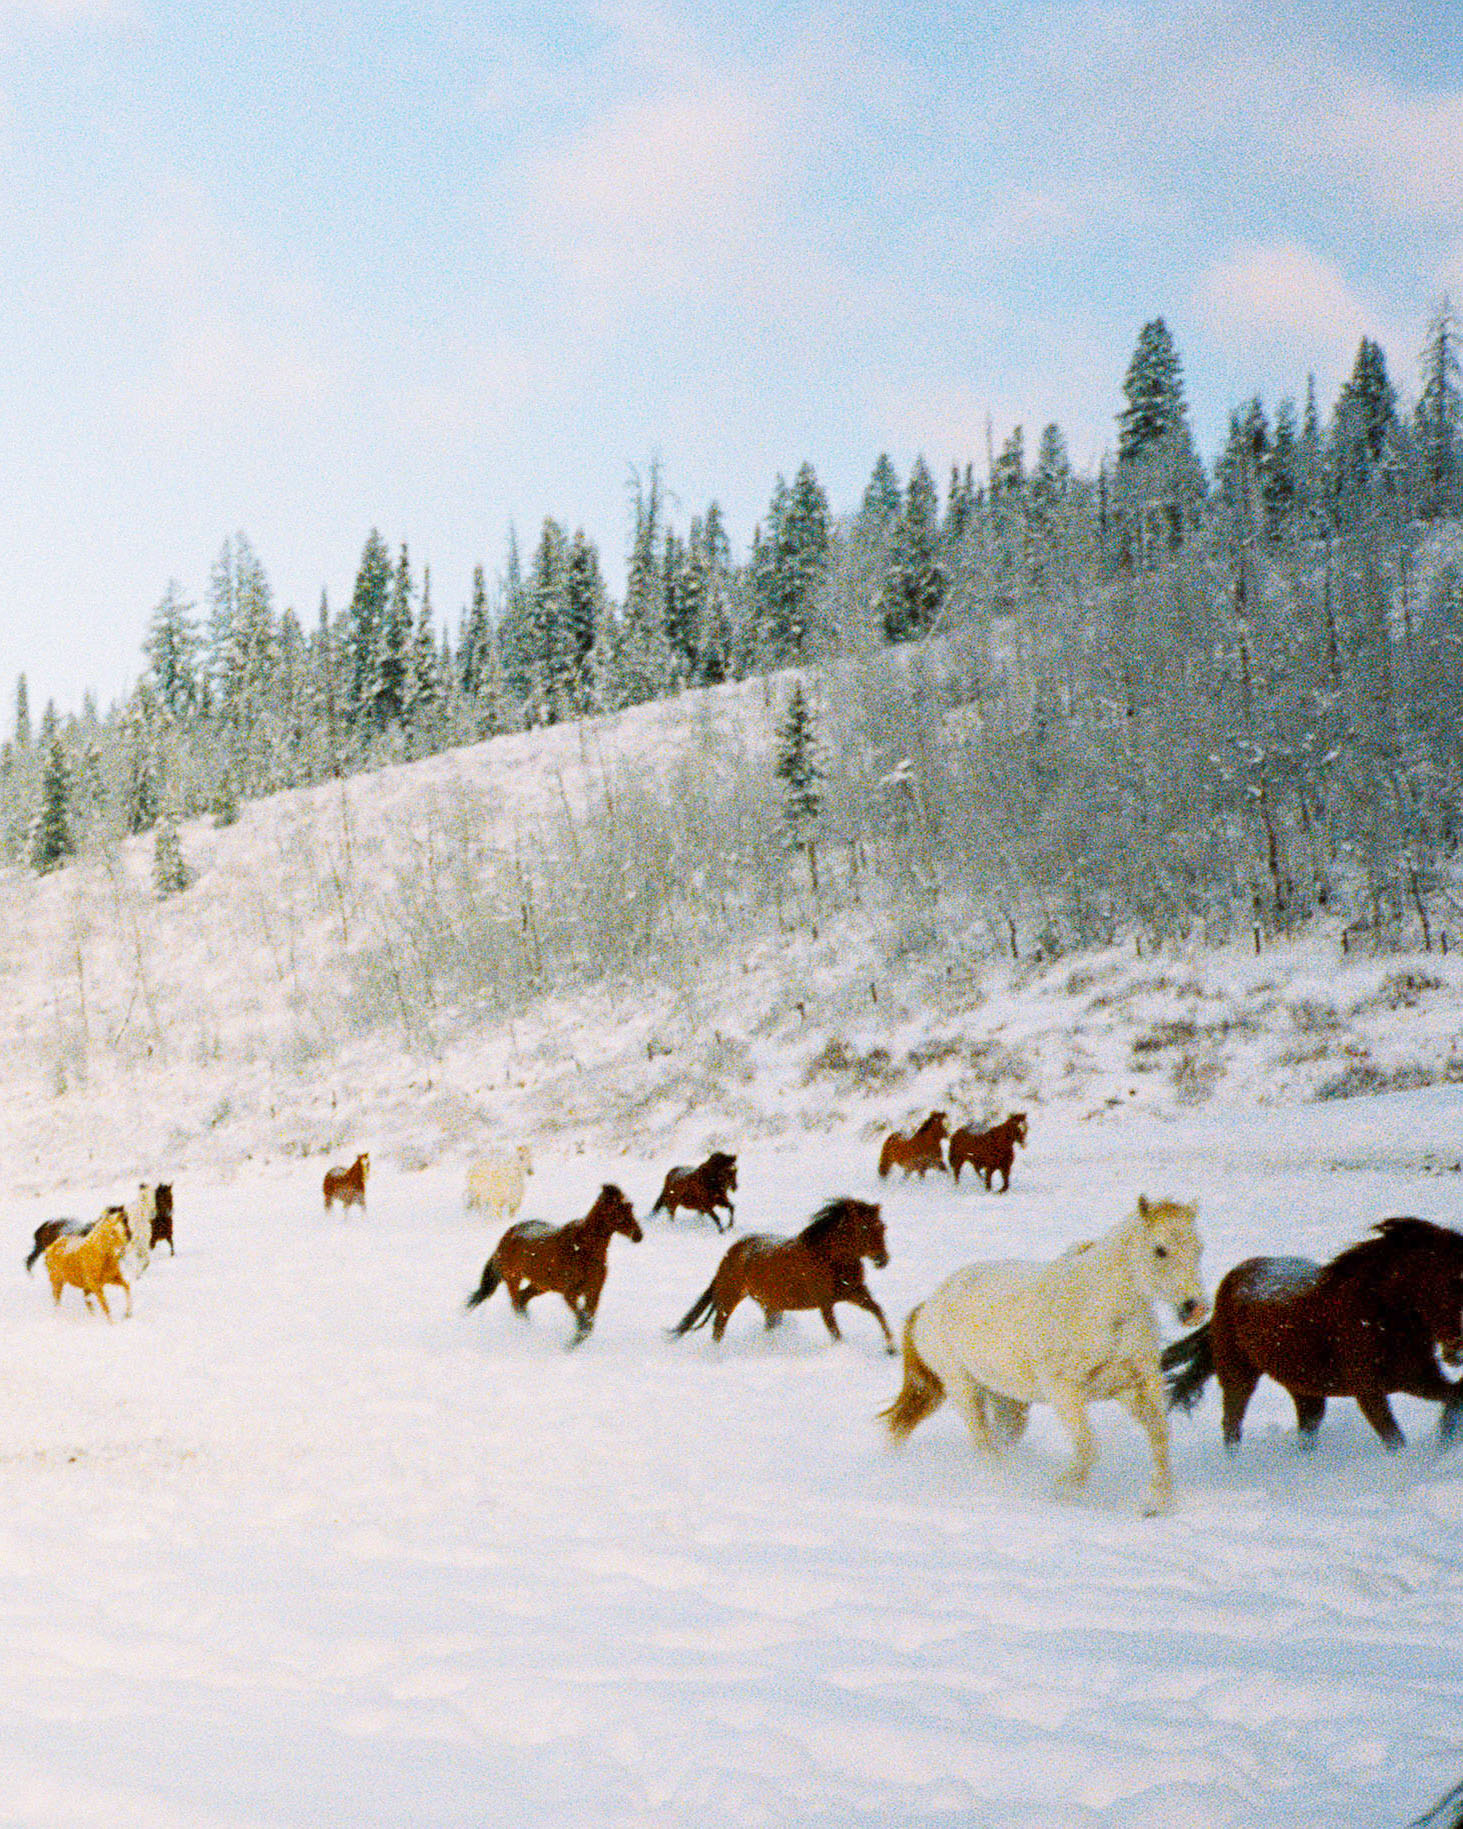
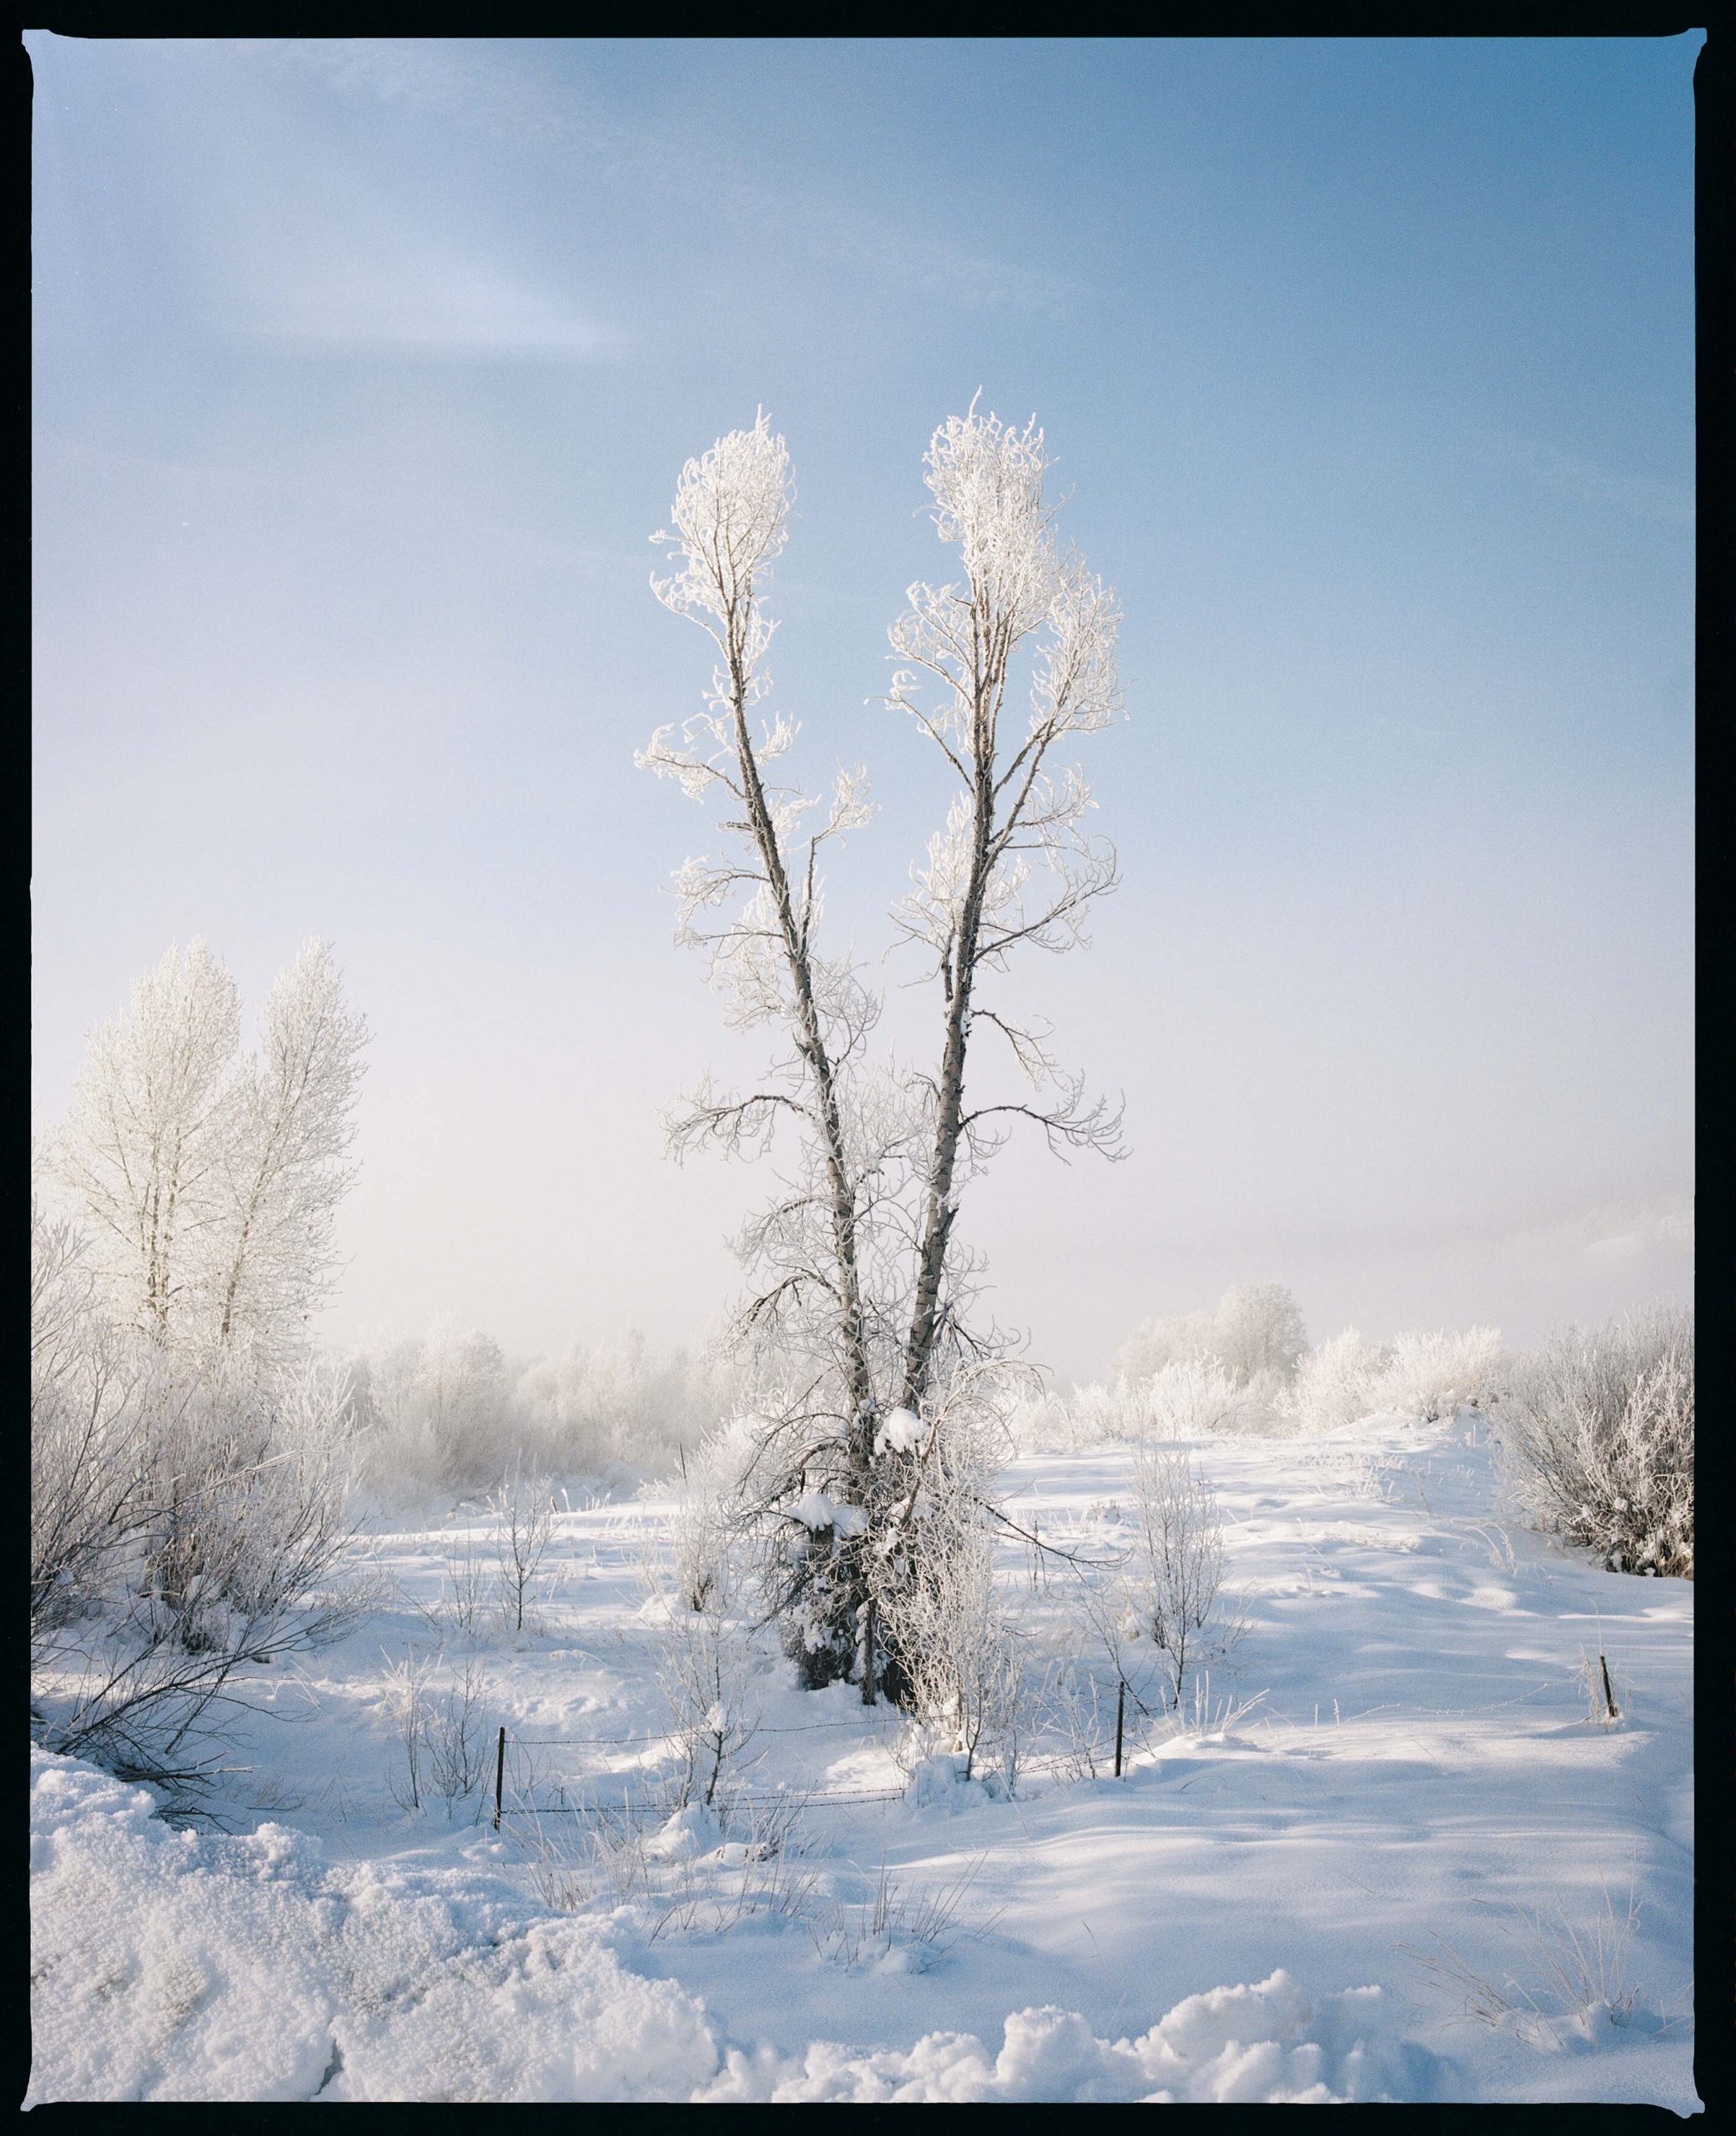
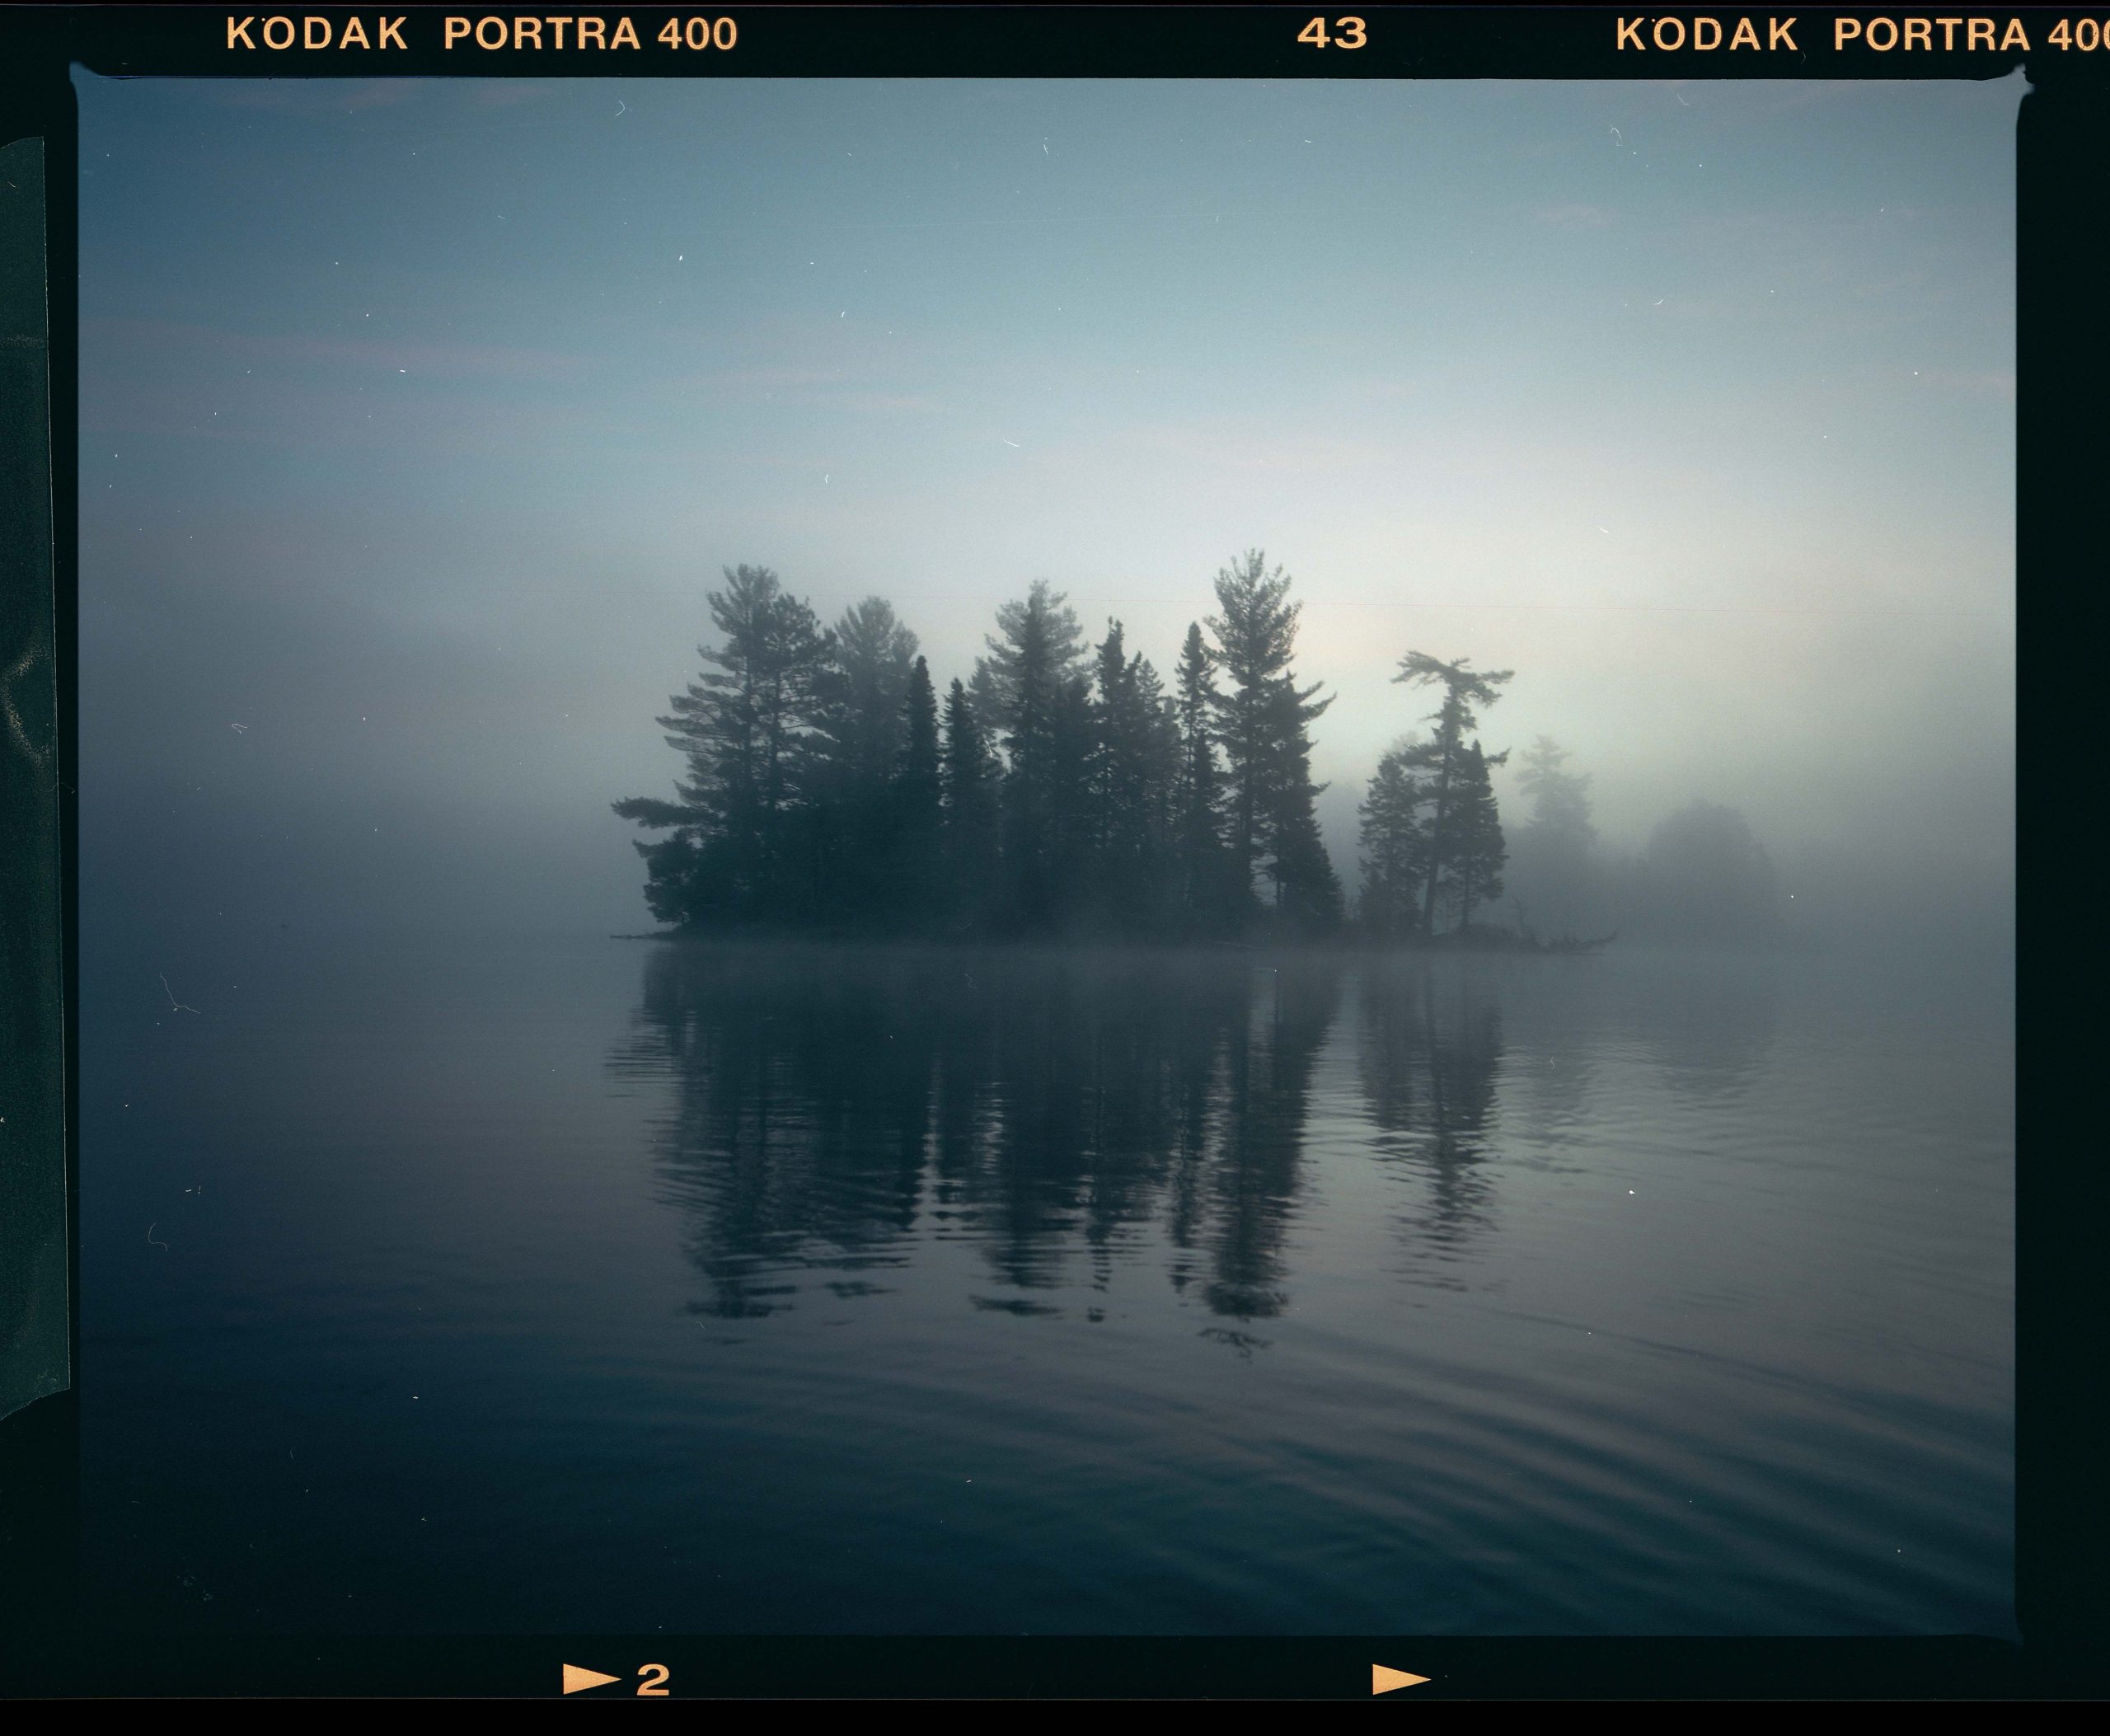
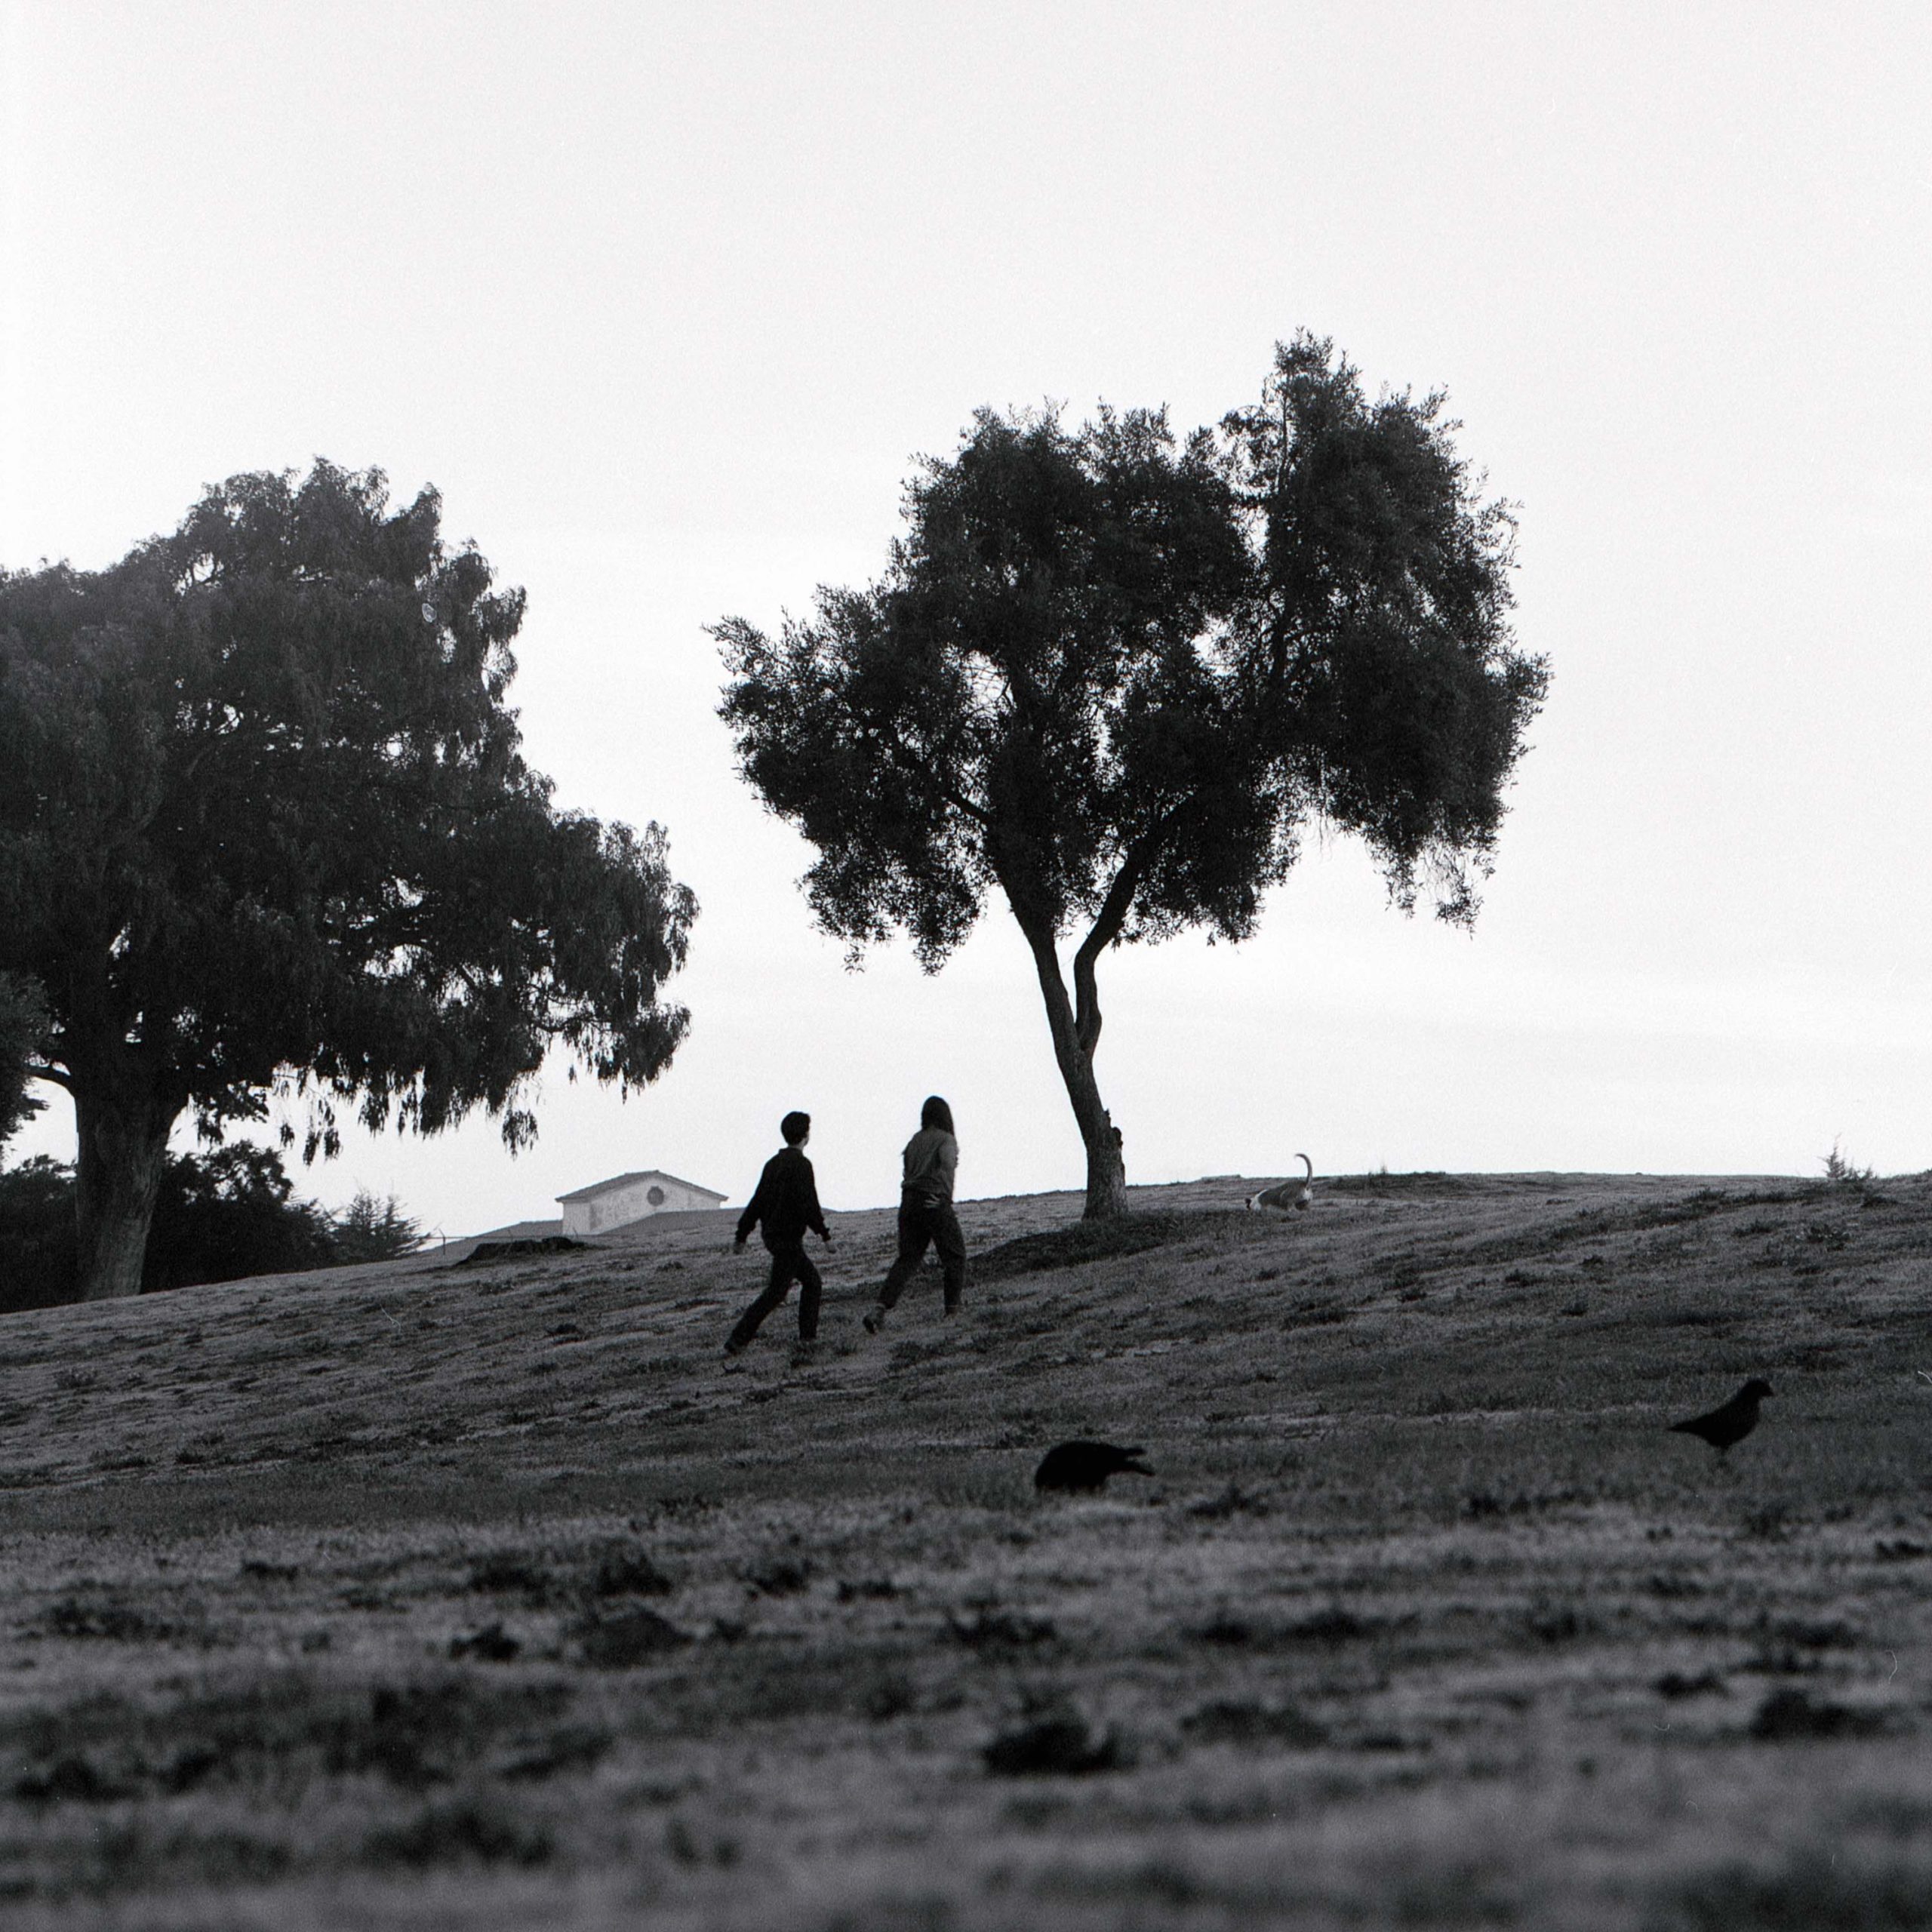
His film photography captures the vastness, solitude, and beauty of remote landscapes that feel deeply personal yet universally resonant. From the foggy waters of Boundary Waters Canoe Area to the stark, snow-covered plains of Routt County, Parker’s photographs don’t just depict nature, they transport you into its heart.
What struck me most about Parker’s work is his ability to weave themes of isolation, resilience, and memory into his images, creating not just stunning photographs but also evocative narratives. His commitment to long-term visual studies, such as Islandland, Westworld, and Winter in Routt County, demonstrates a dedication to not just capturing moments but fully immersing himself in the stories of the landscapes and people he photographs.
In this interview, we dive into his passion for film photography, the creative process behind his series, and how his understanding of the natural world shapes his work. Parker’s reflections on photography as both a tool for connection and a medium for conveying the essence of his subjects offer an inspiring glimpse into what drives him to pick up his camera and get shooting.
I hope this conversation inspires you as much as it inspired me. You can follow Parker on Instagram here.
1 - Early Days...
I’d love to, firstly, understand more about where you grew up and your younger years. Could you give a brief sketch of your early childhood?
I grew up in a suburb of Minneapolis, Minnesota; my mom was a nutrition scientist and my dad an architect.
I went to a small private catholic school for most of my secondary schooling.
Though I grew up in a mostly urban environment, my house backed up to a small regional park with a couple hundred acres of forest and small lakes and ponds. My brother and I spent a ton of time together exploring this area growing up.
Are there any aspects of your childhood or youth that led you toward an appreciation of the outdoors and eventually into your photography?
When I was about 8 years old my Mom got a work cell phone that could take pictures.
I was constantly bugging her to take pictures with her phone of butterflies behind our house in the regional park, and eventually, my parents thought it a good idea to just buy me a camera.
They bought me a blue Nikon Coolpix which I still have to this day. I brought the camera everywhere for a few years until I became a teenager and lost interest in photography for a while.
I shot mostly insects and was particularly captivated by caterpillars and butterflies.
Was there a defining moment that made you realise photography was something you wanted to pursue seriously?
I didn’t pick up a camera again until I was a sophomore in college.
I was looking for a way to express myself and remembered how much I loved taking pictures when I was a kid. I bought a camera (Sony A7s with a 50mm 1.8 kit lens) and started taking pictures at parks and natural areas around my campus (University of Minnesota Twin Cities).
Were there any specific photographers, artists, or outdoor experiences that shaped your early approach to photography?
Growing up watching the Nature Channel and Discovery, I was always inspired by the commitment and artistry that went into capturing the natural world.
My favorite photographer who I am constantly inspired by is Emmanuel Lubezki.
The way he captures light is incredible and something I often try to emulate. Another photographer whom I admire for capturing atmospheres so perfectly is Todd Hido.
An experience that permanently shaped my approach to photography was a family trip out west to Yellowstone and the Grand Tetons.
Becoming immersed in a world where I was unfamiliar and out of my comfort zone was a spectacular experience, and one I also try to create in my photography.
Two other experiences that heavily shaped my approach to photography were my photojournalism internship with the Wyoming Game and Fish Department, and working as a reporter for the Ely Echo Newspaper in Minnesota for a year and a half.

2 - Film Photography and Process
You shoot on film, which adds a unique depth and texture to your images. I’m interested in what drew you to film photography, and why have you chosen to work with it over digital?
My friend in college, Jay Sullivan, showed me one of his buddy’s Instagram pages who shot film (Kaleb Jordan) and I was blown away by the image quality and how different the images felt from digital.
I didn’t start shooting on film however until I got a photojournalism internship with Wyoming Game and Fish Department. They had me clean their photography closet and I found an old Nikon FM2 and a suite of lenses. I asked my boss if I could use it for the summer and he said yes, so I shot a bunch of film in my free time that summer.
This internship was a fantastic experience and one that also permanently shaped my style and creative process. After the internship, I bought an RB67 and used it for a couple of years until I upgraded to the RZ67 which I still own today.
I prefer to shoot film because it gives images a classic, timeless look which isn’t possible when shooting digital.
Also, I am not looking at my monitor 24/7 when shooting film, which can remove me from the scene. That being said, I do shoot digital in some circumstances and believe there is a time and a place for both.
How do you balance the technical demands of film with the unpredictable nature of outdoor photography?
During my Islandland series when I was in my Kayak with my gear, I kept everything in drybags, and all those drybags in a big drybag.
I also brought with me towels to dry off equipment when it inevitably got wet. I fortunately never had anything of importance fall in the water.
The series I am working on now is much easier to manage equipment, although I do have to deal with foggy lenses every once in a while.
How do the limitations of film enhance your ability to capture the perfect shot?
I find when I am shooting film, the pressure to capture the perfect shot is non-existent. The beauty of film is that it is imperfect, and the imperfections are beautiful.
3 - Knowledge of Landscapes and the Natural World
Your work shows a deep understanding and respect for the landscapes and natural environments you photograph. How did you come to acquire such knowledge of the land and ecosystems in places like Routt County and Boundary Waters Canoe Area?
My desire to capture and photograph these areas comes from my respect and appreciation of the landscapes.
I want to share with other people not exactly what these areas look like, but more so what they feel like.
I am often blown away by how different areas feel based on the pictures I see of them. Instead of capturing exactly what these places look like, I want to capture their atmospheres.
Do you spend a lot of time scouting locations before a shoot, or is there an element of spontaneity?
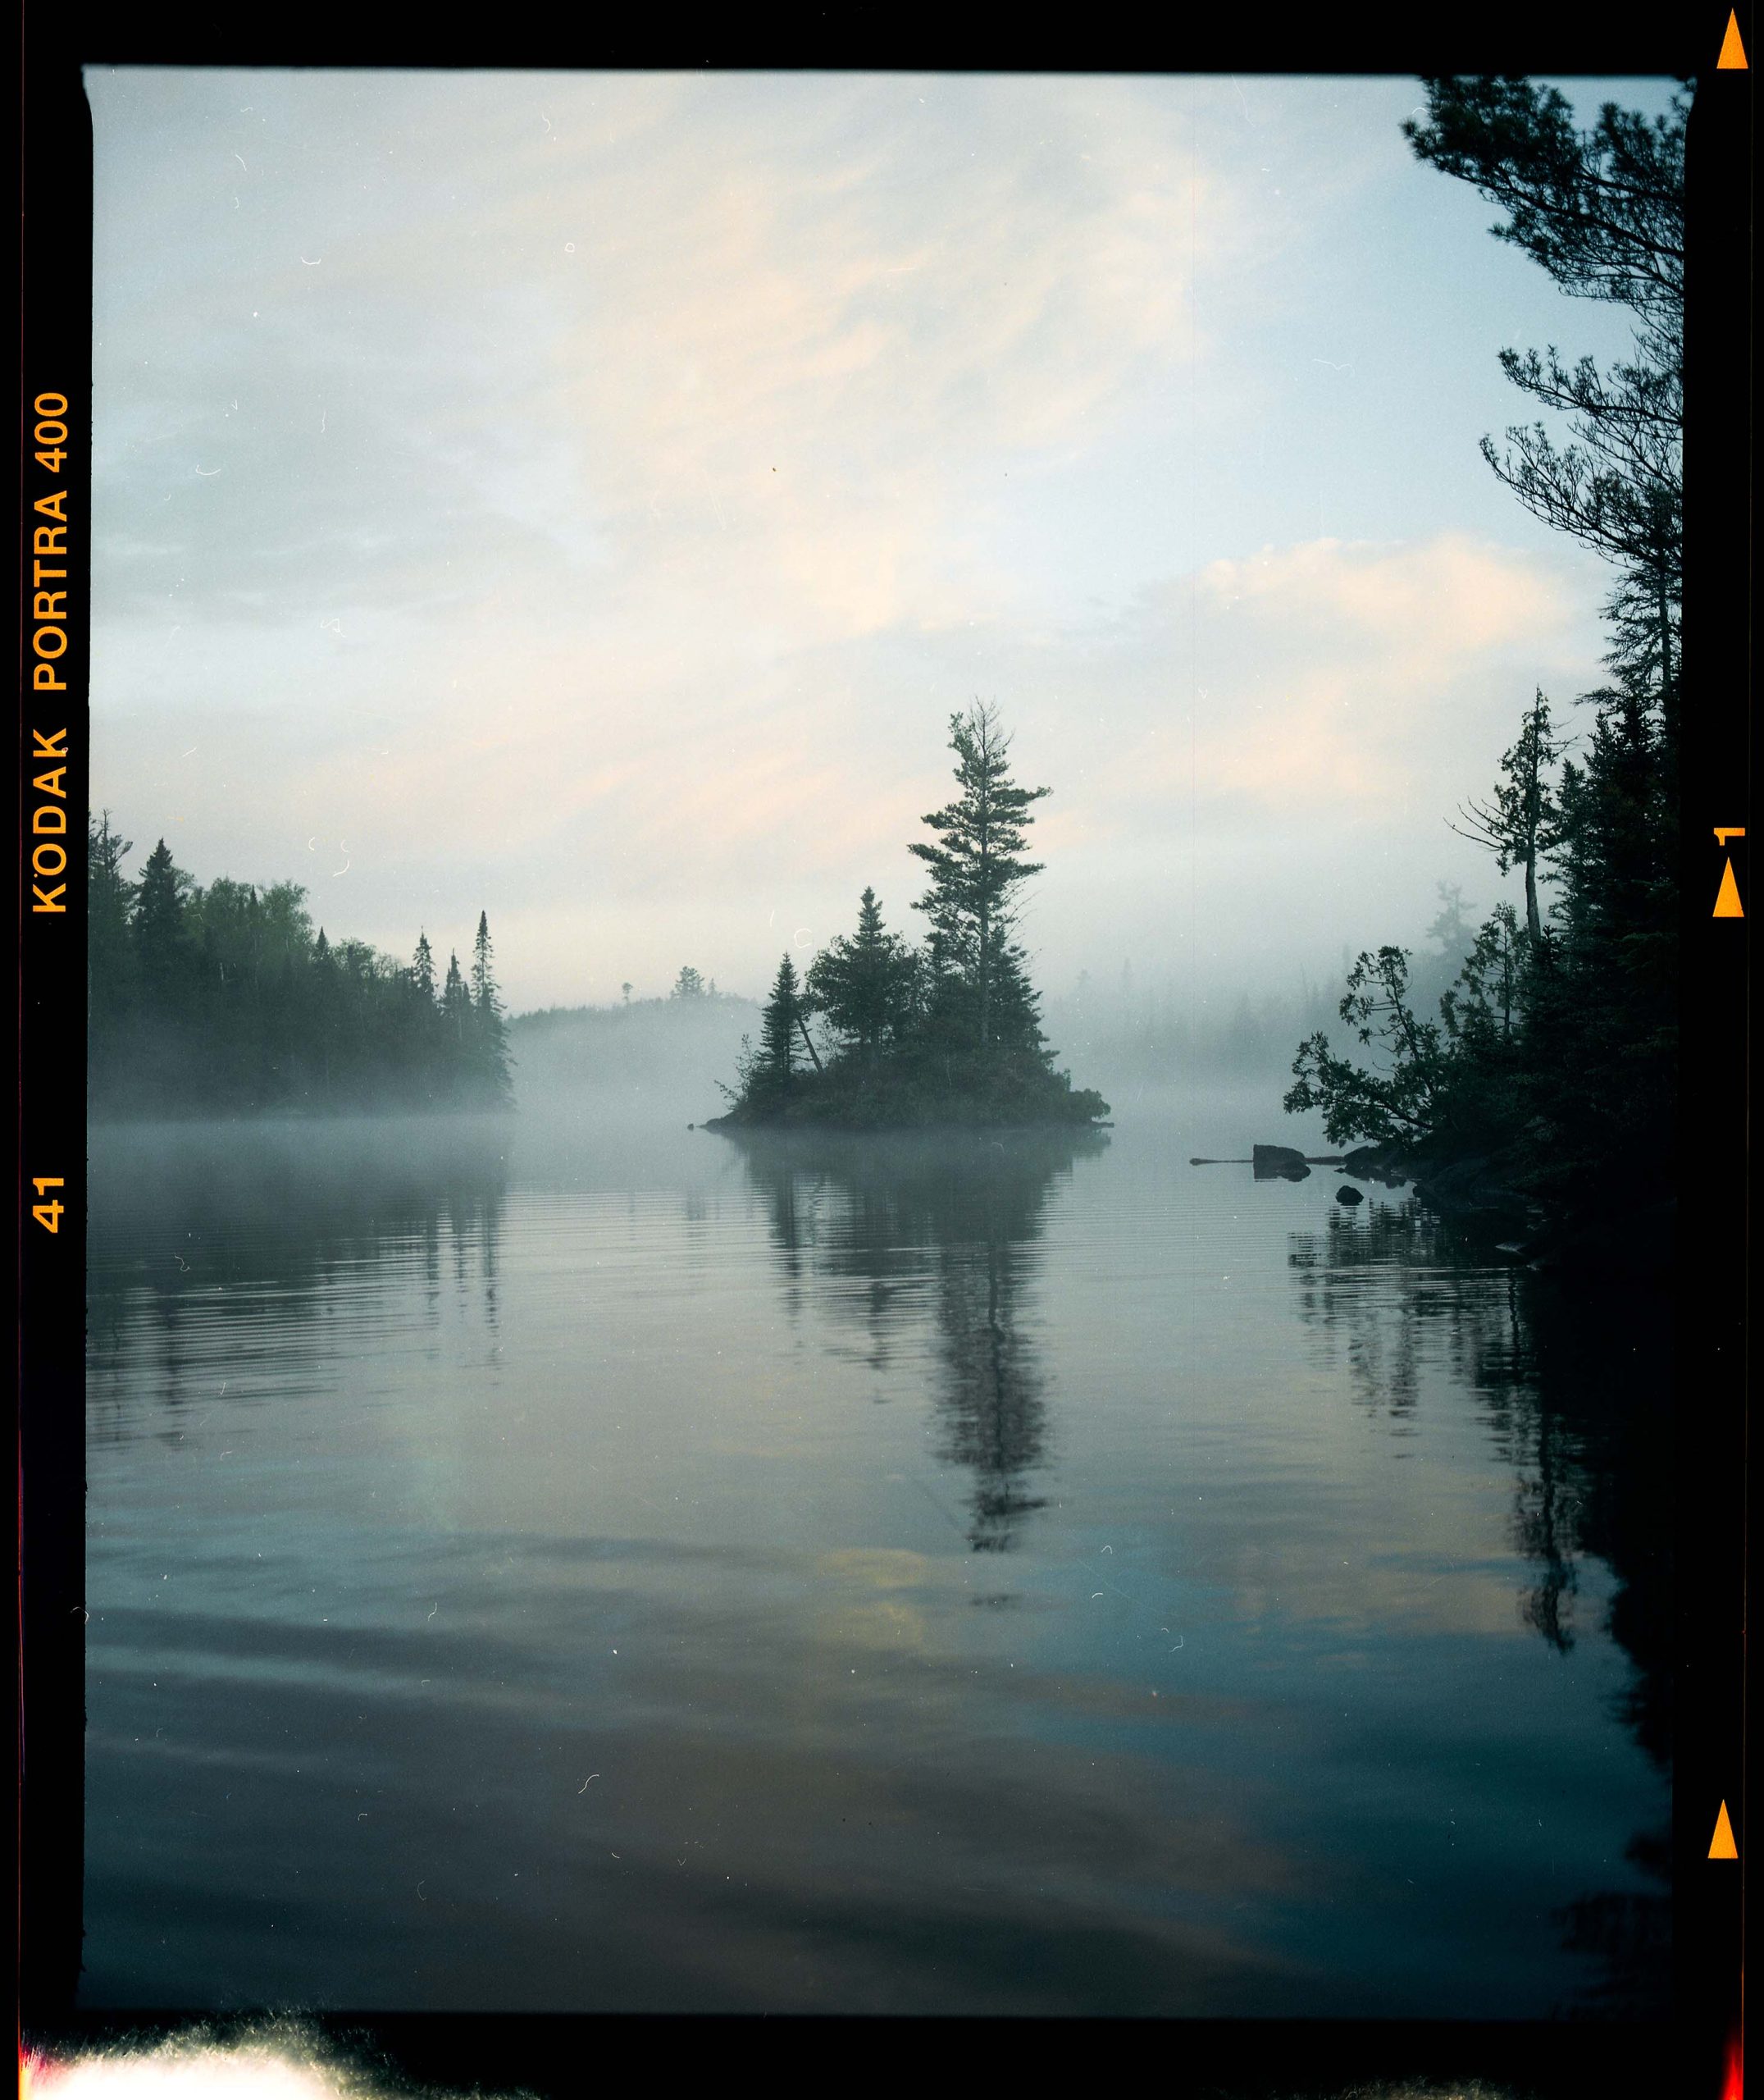
In the Islandland series, I spent roughly half my time on the series scouting. One of the requirements for good pictures in this series was sea smoke or fog. The window of opportunity for this fog was so small I needed to make sure that when it happened, I knew where I was going.
On cold, calm, sunny mornings the fog lasted around 30 minutes after the sun rose, so I needed to be prepared! I often paddled upwards of 5 miles to find these locations.
Some were close to boat launches, some were pretty deep in the wilderness. I am just getting started on my Routt County series but think it will be some of my best work.
While it is a completely different location with different requirements, I still find myself doing a good amount of scouting.
How do the natural elements you encounter (weather, light, time of year) impact your creative process? Is there a particular season or condition you find most inspiring to shoot?
I find fog by far the most appealing to shoot in, as do many photographers. It offers depth, isolation, and atmosphere. If there is ever fog in Routt County I try to be there with my camera.
4 - Exploration of Themes and Series
You’ve developed several long-term visual studies that I love, each with a distinct theme. What drew you to focus on series like "Westworld," "Winter in Routt County," and "Islandland"?
One thing that draws me to continue pursuing photography as a hobby/career is its ability to capture a place and time.
I try to create escapism in my photography, and by focusing on a smaller area, I believe I can transport people into my world.
When people look at my grid I want them to gain a sense of awe and mystery, and I want them to wonder if that is really what the BWCA or Routt County is like. The sense of mystery is quickly vanishing from the world (or maybe I’m getting old) but I want to try and create some mystery and create a world based on my interpretation of the places I live/work.
I always love it when photographers sink their teeth into a project and enjoy seeing the end results. I hope I can reciprocate that.
Winter is often a time of fallow for creative minds, but in your “Winter in Routt County” series you document the isolation, harsh beauty, and human effort against the element. What is it about winter that energises you creatively?
I didn’t expect to create anything this winter and had planned to put photography down for the season.
Something inside of me drove me to do some exploring though, and I realized that one area of Routt County got routinely foggy and perfect for photography.
The winter here is barren but beautiful, and hopefully my photography showcases that.
As I write this many of the images I have for this series are still unpublished, but I hope it comes together like I envision.
One of my favorite directors, Alejandro Iñárritu once stated “The poet might know what he wanted to write, but he will never know what he wrote.”
While I know what I want to create, I will never know if I was successful, because I can’t see my own work like others do. All creatives are cursed with this dilemma.
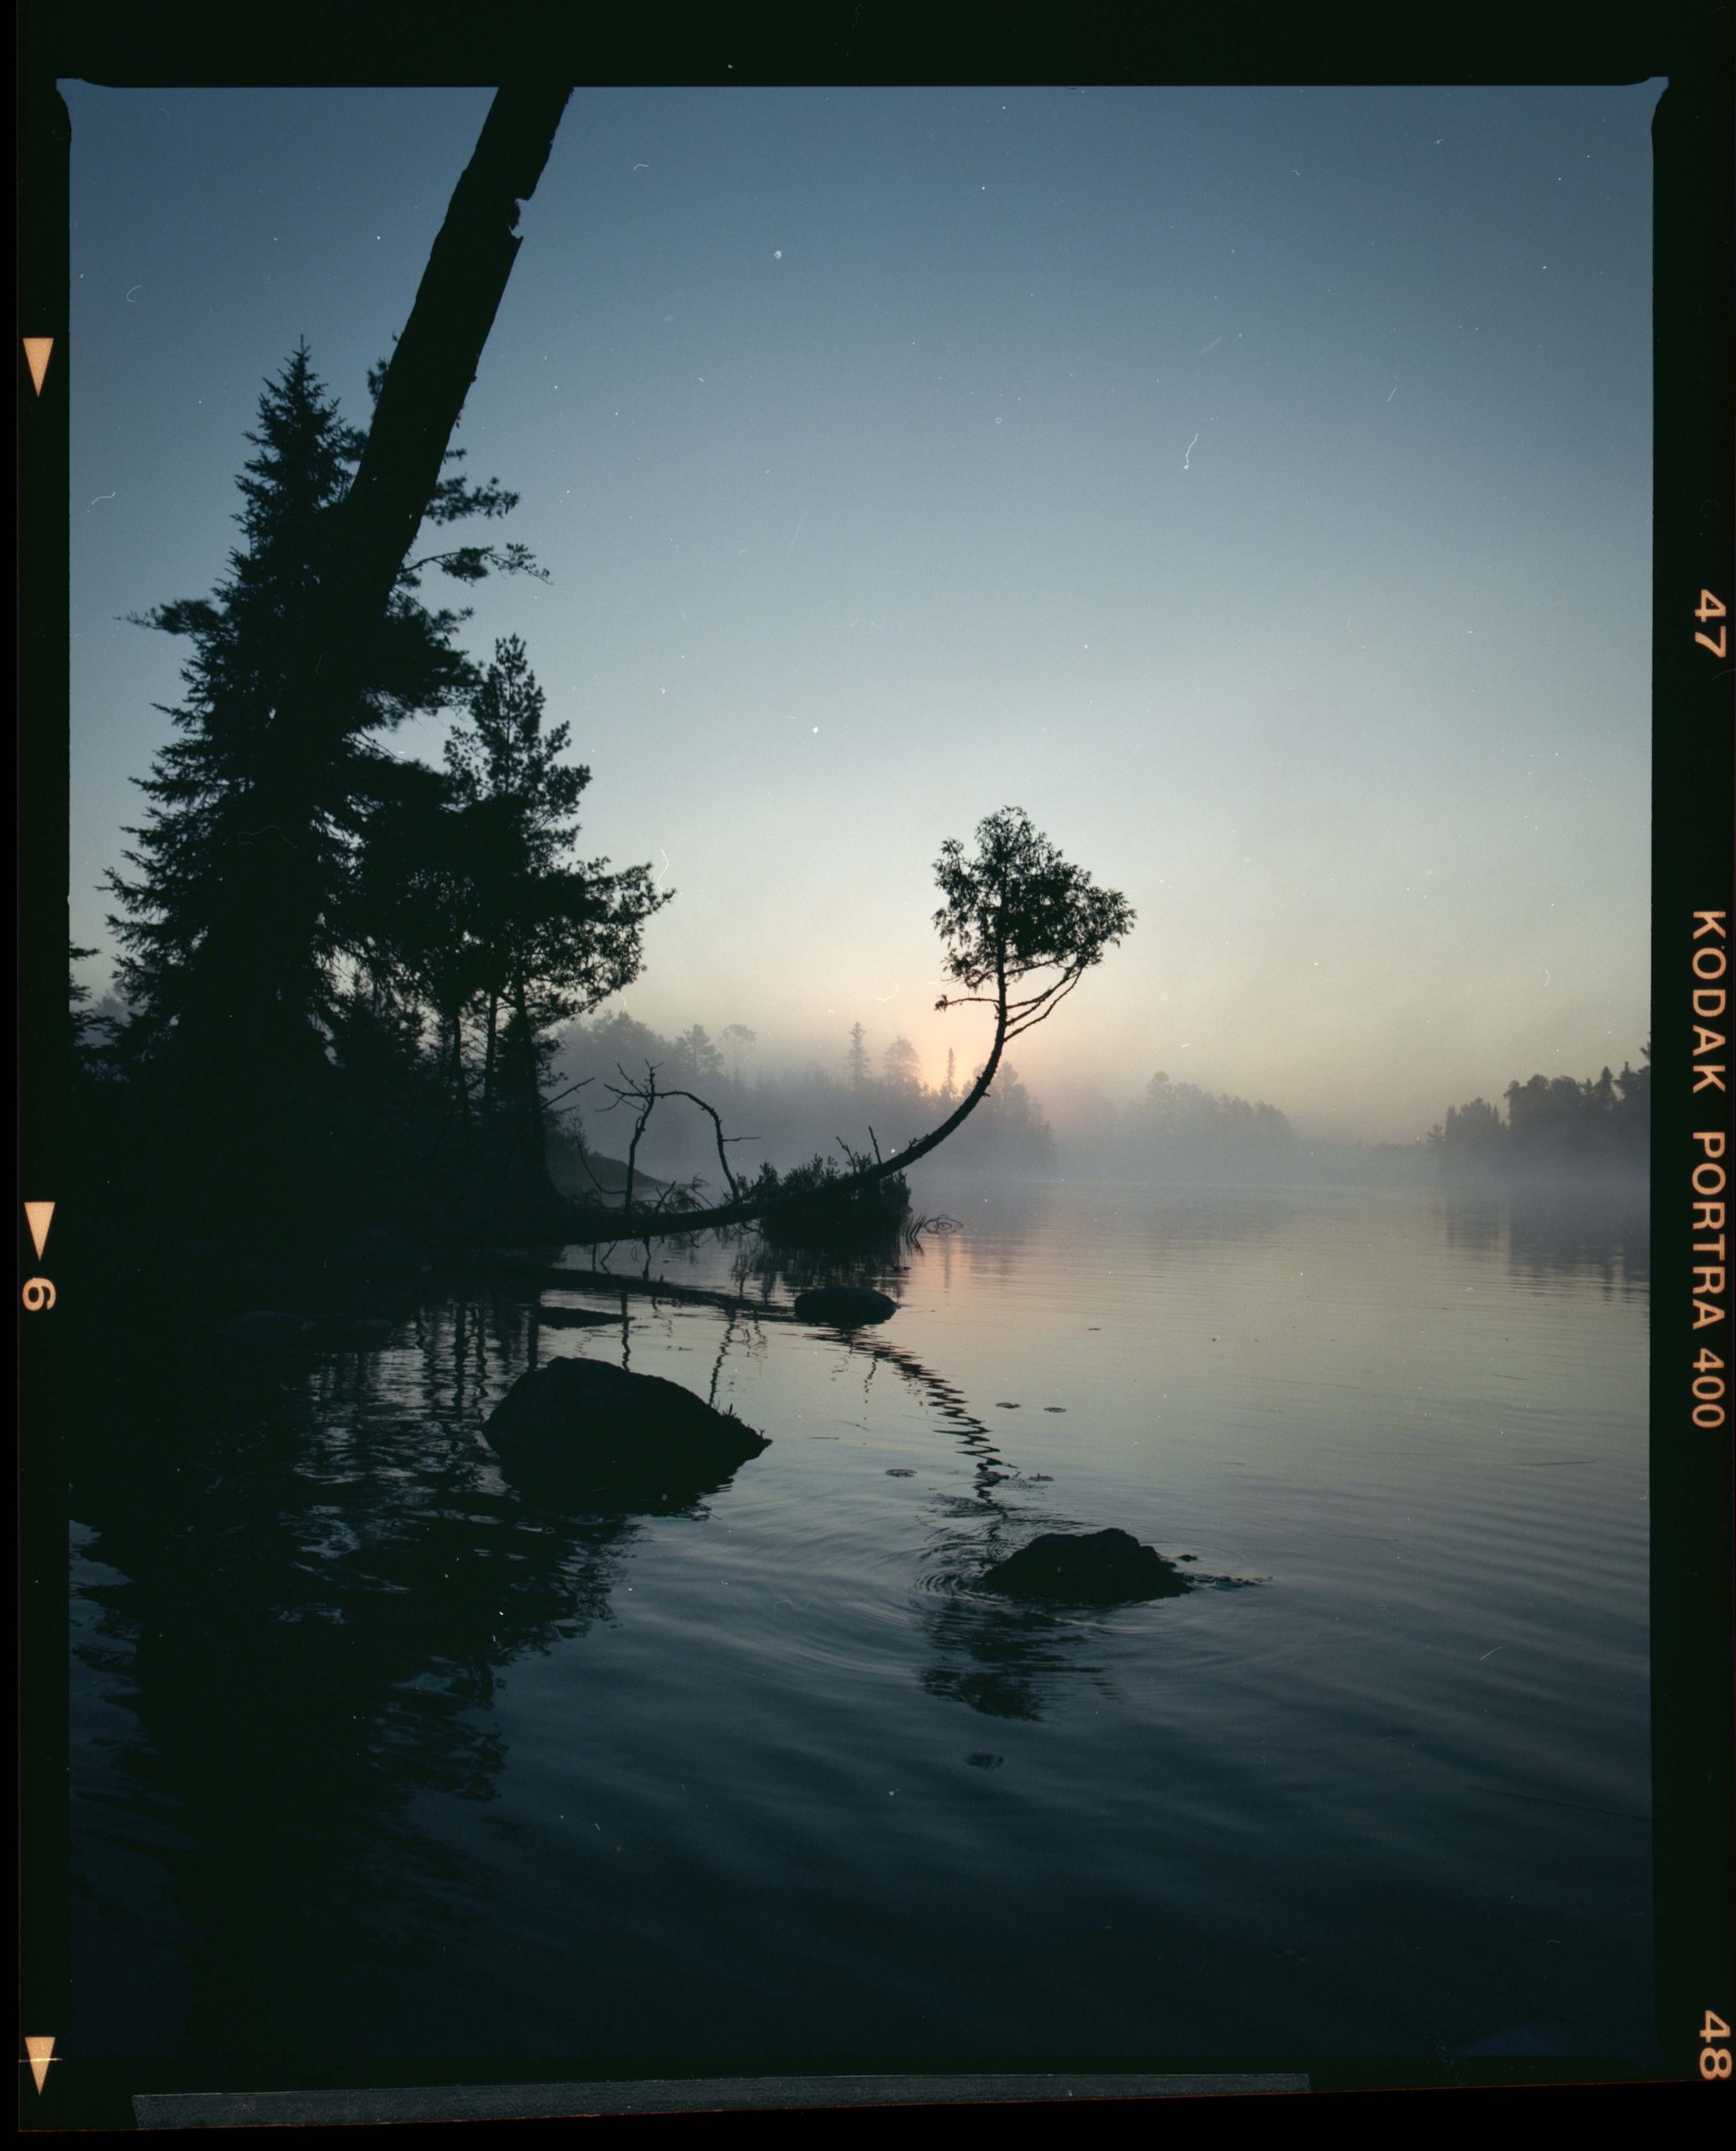
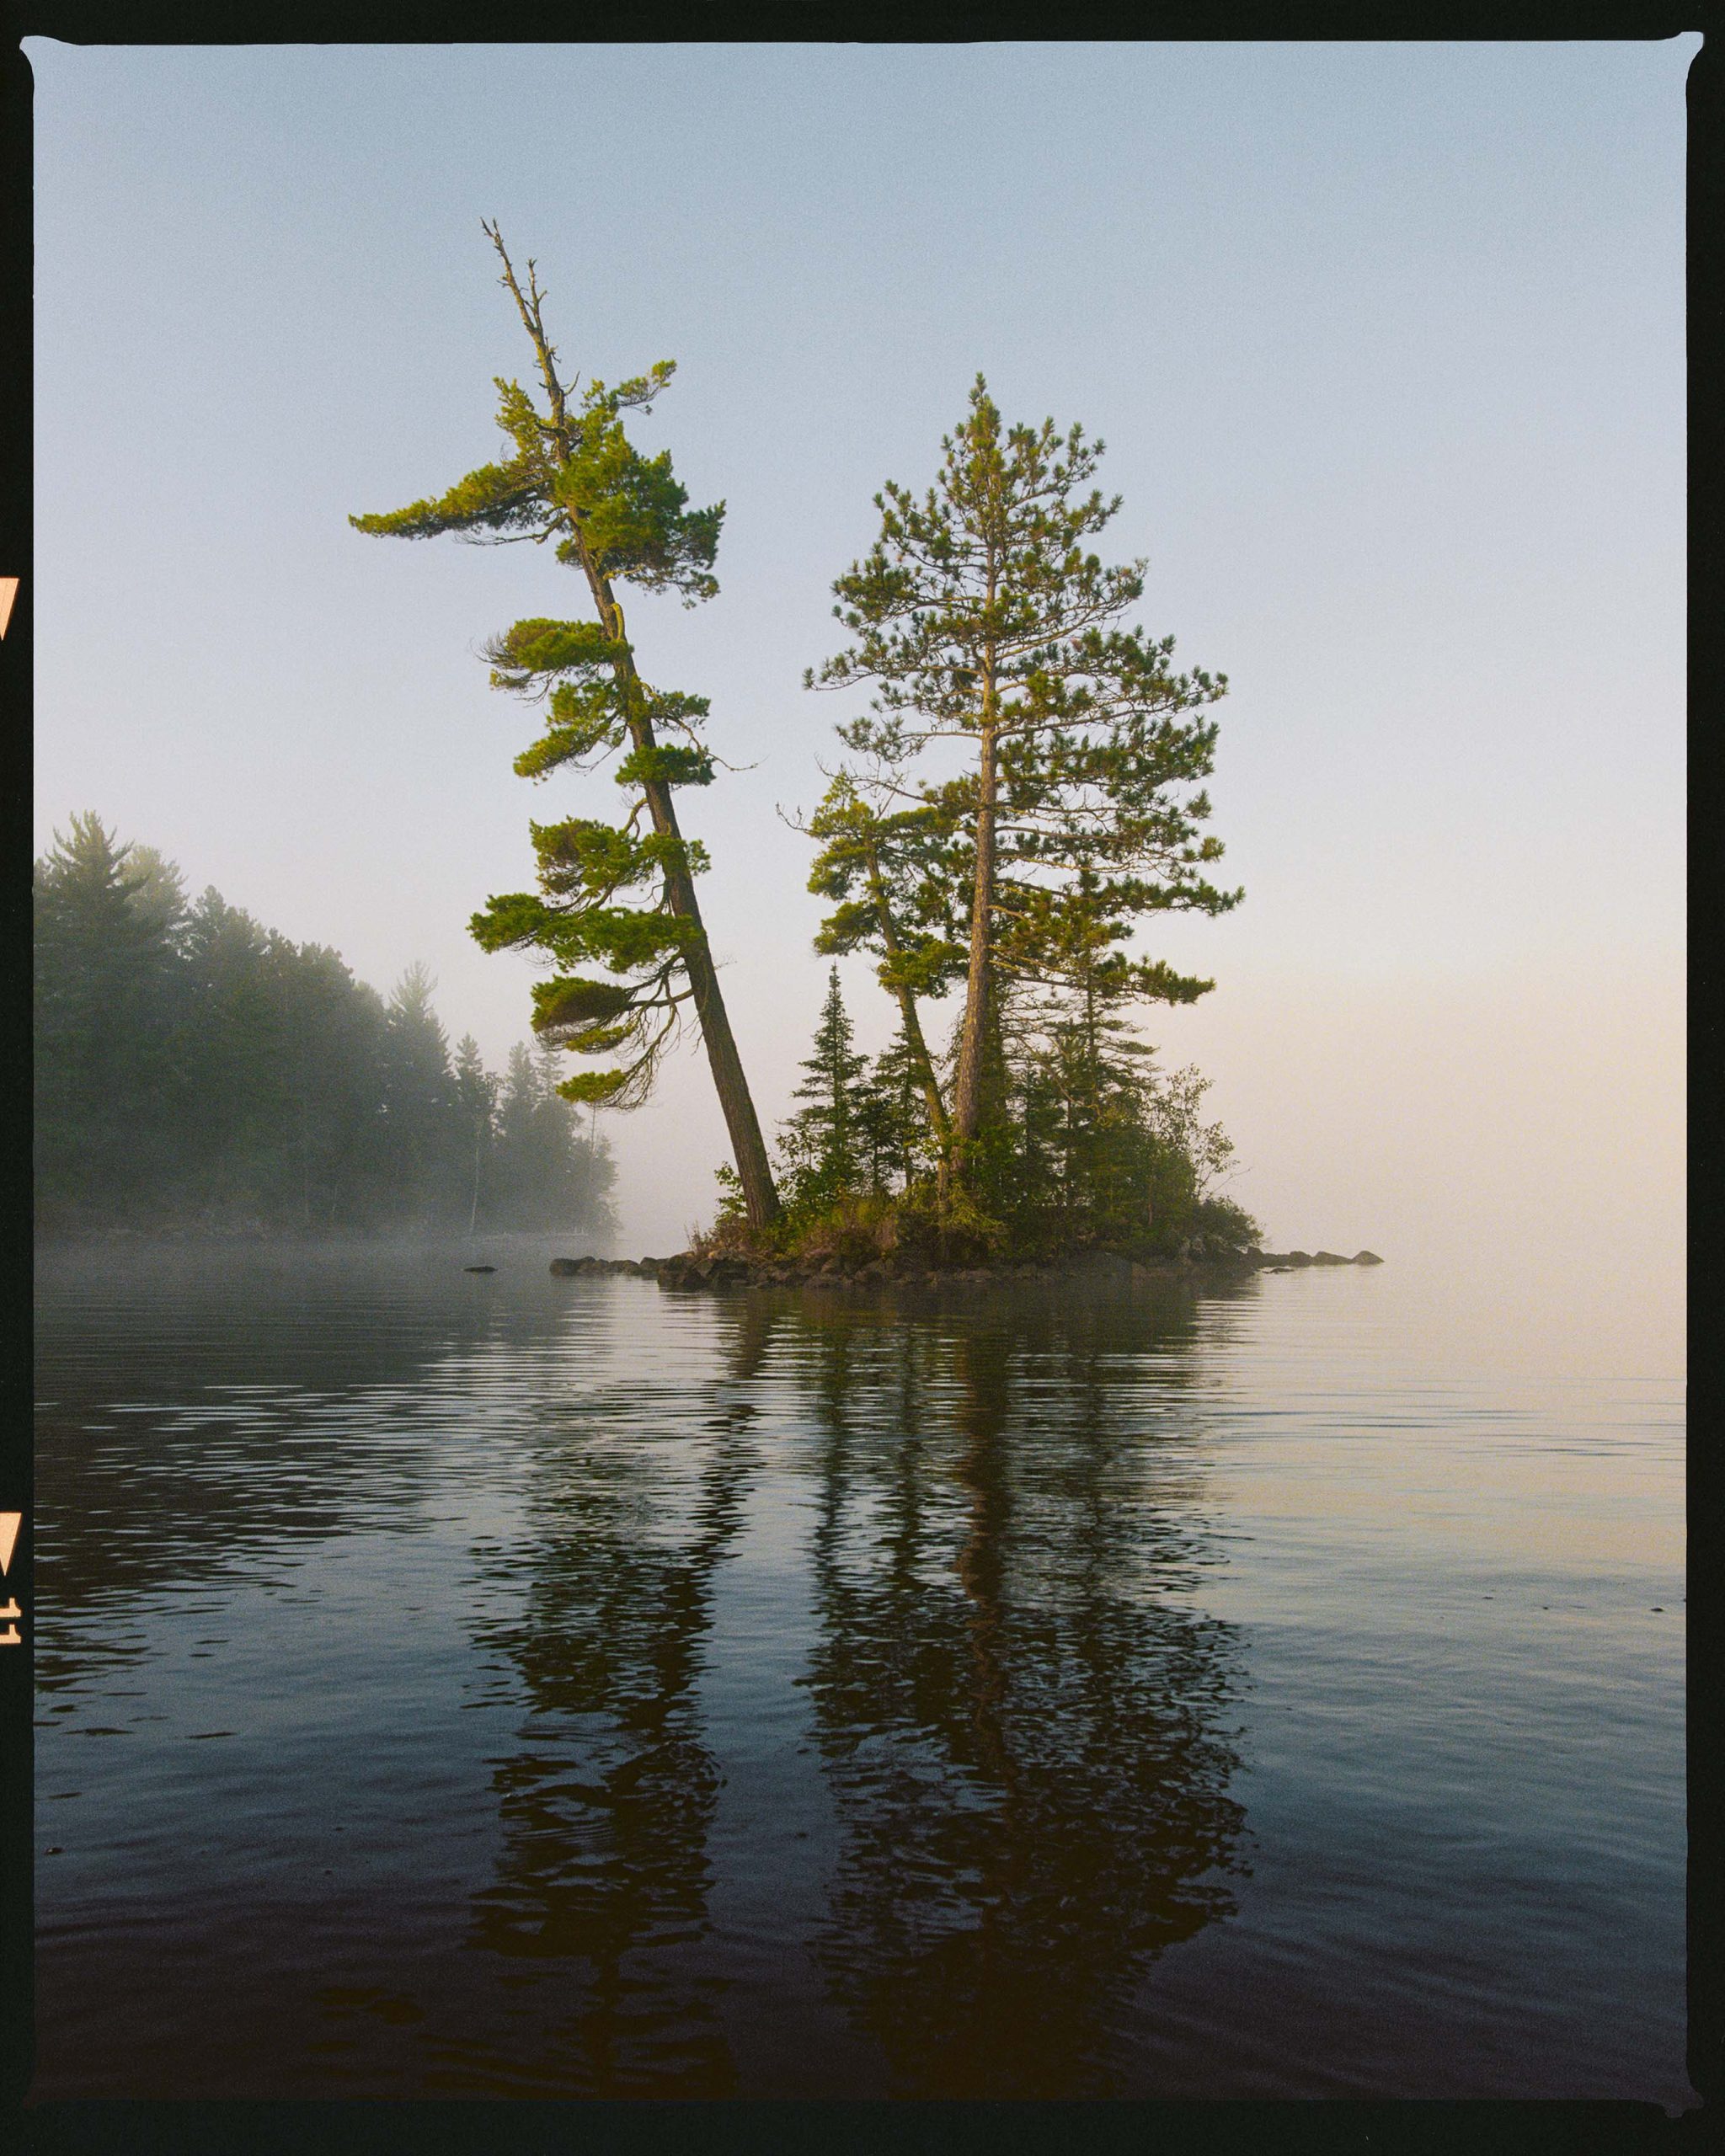
"Islandland" offers a stark contrast to your other series, focusing on serene lakes and remote islands. What do these landscapes mean to you, and how do you see the relationship between nature and solitude in this series?
I took on this series while I was working as a reporter for the Ely Echo in Northern Minnesota.
I wanted to capture how the BWCA felt, not necessarily what it actually looked like. Paddling the waters and creating this series offered an escape from my mundane job and life, and I hope people can also briefly escape when they look at the pictures.
One of the themes of this series was isolation and the power of being alone. I wanted to express that there is vulnerability in solitude, but also power.
5 - Future Projects and Advice
Looking ahead, do you have any upcoming projects or themes you’re excited to explore? How do you see your work evolving as you continue to document the natural world?
I will be working on the Winter in Routt County series the rest of the winter, and I am extremely excited to continue exploring the themes of this series and to see where it takes me.
The themes I want to explore in this series is solitude (again), and memory. I want my photography to continue evolving as the way I want to express myself continues to evolve.
What advice would you give to film photographers, especially those who are trying to capture the beauty and complexity of outdoor landscapes?
I am one who doesn’t really believe in advice, especially when it comes to creative endeavors.
Get out there and do it yourself and find what works for you.
There is no right way to do it, only your way. Try not to get caught emulating one photographer too much, and try to take inspiration from many different photographers so that you create something new.
That being said, I am a big advocate of a high-quality, built-in light meter! You will save a lot of time and effort by exposing images correctly, and you will have a lot more fun knowing you can be confident in your readings.
Do you have any tips for maintaining patience and presence while shooting in sometimes unpredictable and harsh conditions?
The worse or riskier the conditions, often the better photographs you will get! Don’t shy away from the conditions! Be prepared and try to plan ahead for every circumstance! Dry bags and towels are huge when entering unknown conditions.
6 - Personal Reflection
How has photography changed your relationship with the natural world? Do you feel that it has deepened your connection to the places you photograph?
I’m not sure I can say it has changed my relationship with the natural world. I look at things in nature (animals, mountains, trees) and I empathize with them, not because it’s the right thing to do, but because I see myself in them.
If you could go back to the start of your photography journey, is there anything you would tell your younger self, or something you wish you had known earlier on?
Having too many cameras will only set you back in your creative process. Have one or two cameras is all you need. I try and use between a 25mm and 50mm focal lengths, as I think it is a good representation of the human eye, and images taken with these focal lengths I find easier to relate to.
Lastly, how do you hope viewers of your work connect with the themes and places you’ve captured? What emotions or thoughts do you want to evoke through your photography?
I hope I can spark a sense of mystery in people, and I hope I inspire them to want to create their own photo series.

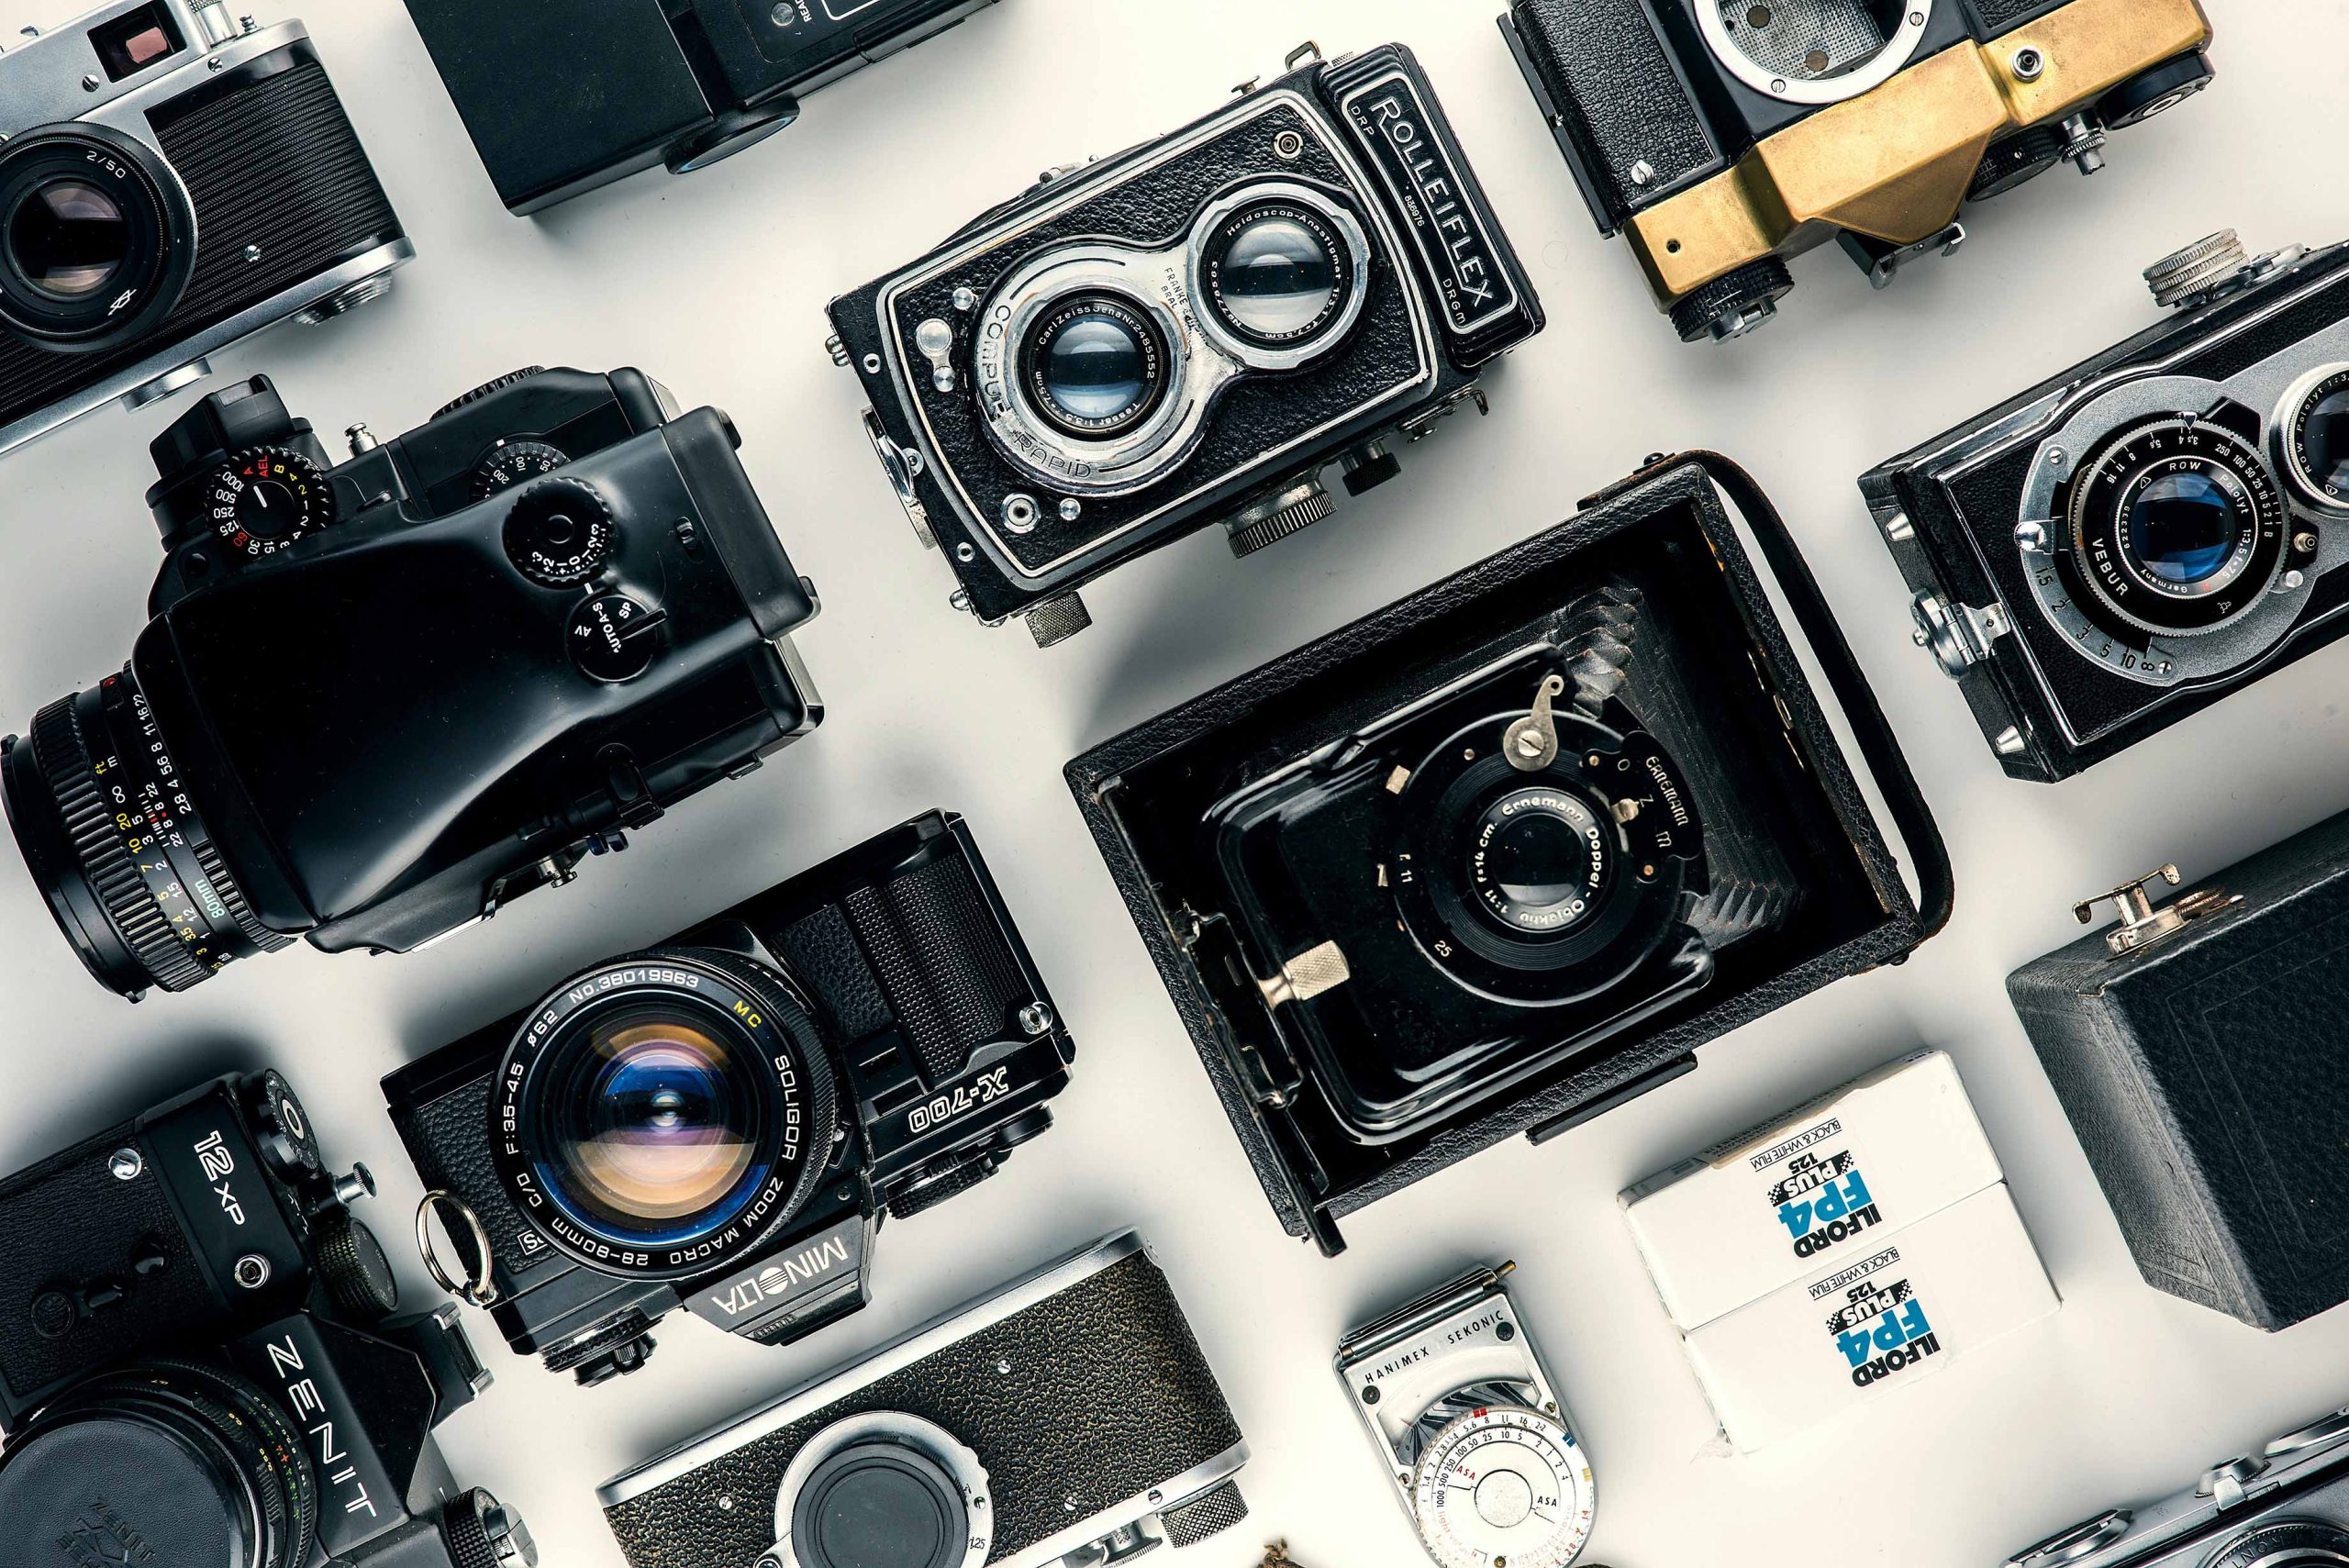
Understanding Film Cameras: A Guide to SLRs, Rangefinders, Point-and-Shoots, and TLRs
Understanding Film Cameras: A Complete Guide to SLRs, Rangefinders, Point-and-Shoots, and TLRs
Quick Summary
If you’re exploring film photography or expanding your collection, understanding the various types of film cameras is essential. From versatile SLRs to unique TLRs, each type offers distinct benefits, challenges, and creative opportunities. Whether you’re looking for full manual control, portability, or a unique shooting experience, this guide should help you navigate the options.
Key Takeaways:
- SLRs (Single-Lens Reflex): Great for beginners, offering full manual control, interchangeable lenses, and a true-to-life view through the lens.
- Rangefinders: Quiet, lightweight, and ideal for street or travel photography, though they require practice to master focusing.
- Point-and-Shoot Cameras: Compact and fully automatic, perfect for casual use and quick snaps.
- TLRs (Twin-Lens Reflex): Vintage charm, excellent for medium-format photography and portrait work, but require more time and precision to use.
Camera Type 1: SLR (Single-Lens Reflex)
Introduction
SLRs are arguably the most accessible type of film camera for beginners and experienced photographers alike. They use a mirror and prism system to reflect the image seen through the lens into the viewfinder, providing a direct preview of your shot.
How SLRs Work
The defining feature of an SLR is its mirror mechanism. Here’s how it functions:
- Viewing: When you look through the viewfinder, light enters through the lens and hits a mirror positioned at a 45-degree angle inside the camera. This light is then reflected upwards to a pentaprism (or pentamirror), which flips the image and displays it correctly in the viewfinder.
- Focusing and Composition: Because you’re seeing exactly what the lens sees, you can accurately compose and focus your shot.
- Taking the Shot: When you press the shutter button, the mirror flips up, and the light hits the film directly. At the same time, the shutter opens for the set duration, allowing light to expose the film.
- Reset: After the exposure, the mirror returns to its original position, and the camera is ready for the next shot.
This mirror mechanism is what distinguishes SLRs from other types of cameras, as it provides a true-to-life preview of the scene you’re capturing.

Key Points
Pros:
- Interchangeable Lenses: SLRs offer a wide range of lenses, allowing you to experiment with different focal lengths and effects.
- Manual Control: Perfect for learning photography fundamentals (like the Sunny 16 Rule)
- Durability: Many classic SLRs are built to last decades.
Cons:
- Size and Weight: Bulkier compared to other camera types.
- Noise: The mirror mechanism can be loud.
Best For:
SLRs are ideal for beginners, general-purpose photography, and anyone looking to have creative control. Much of my photography portfolio is taken with SLRs.
Examples: Canon AE-1, Nikon FM2, Pentax K1000.
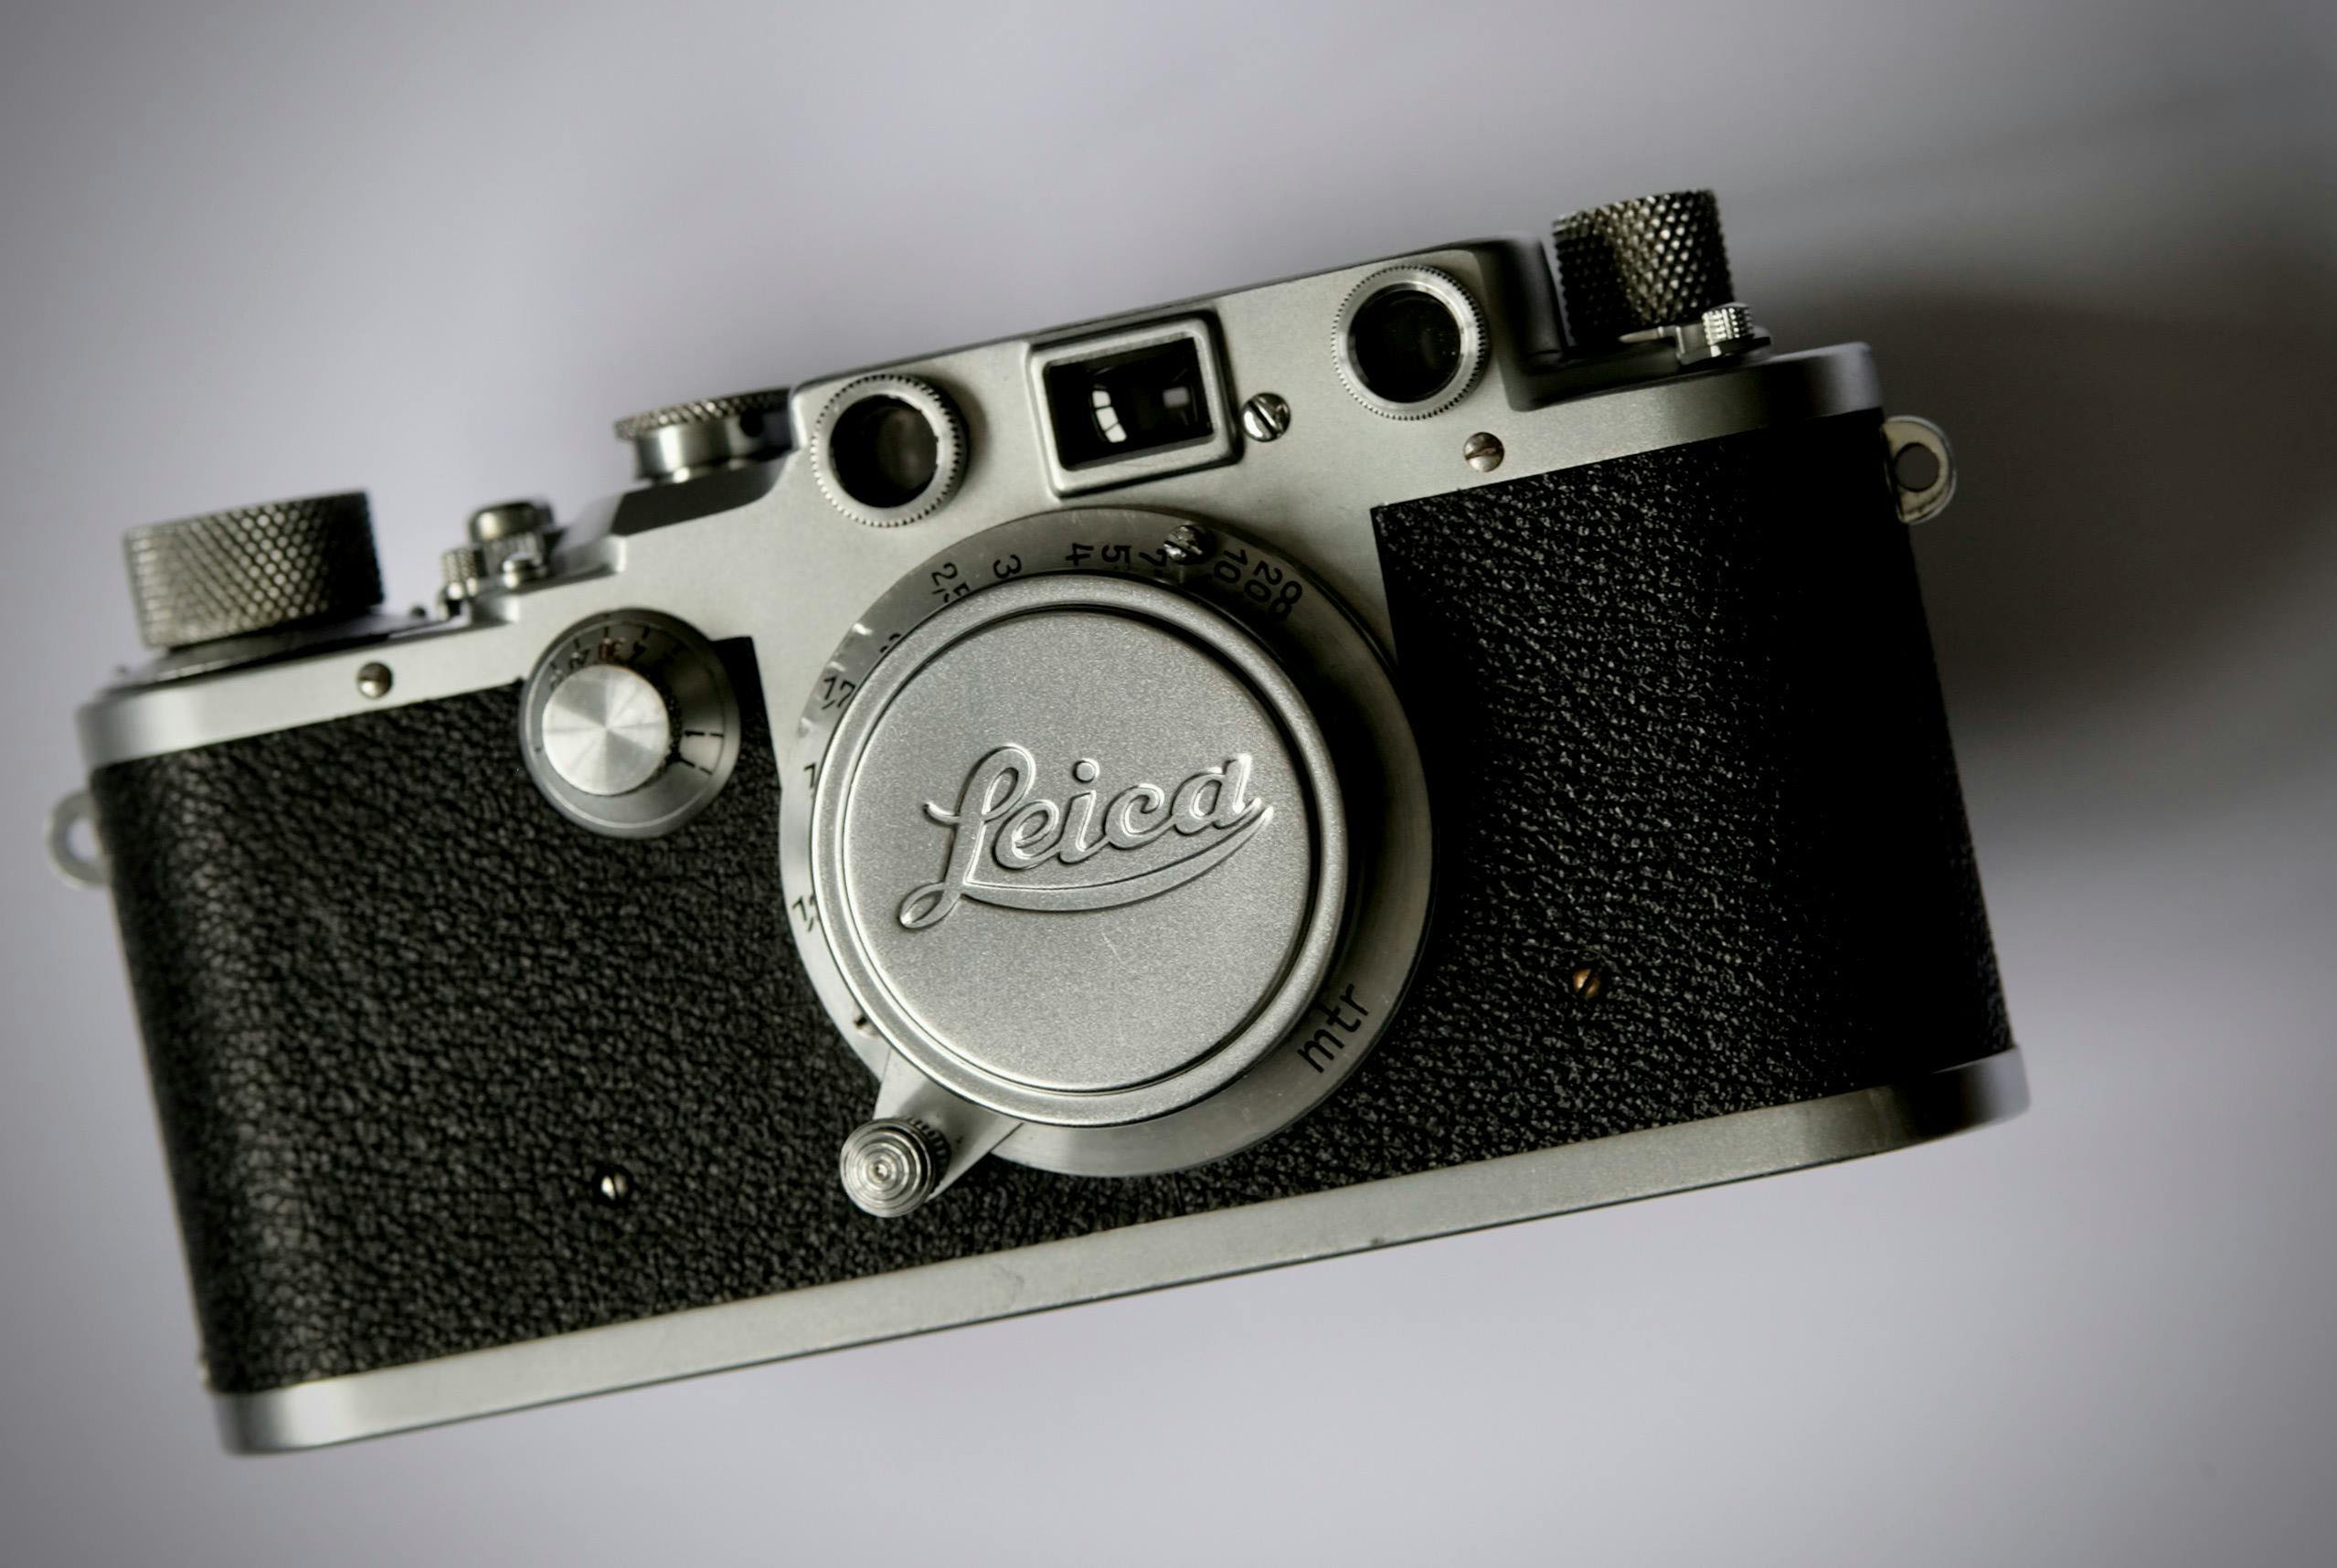
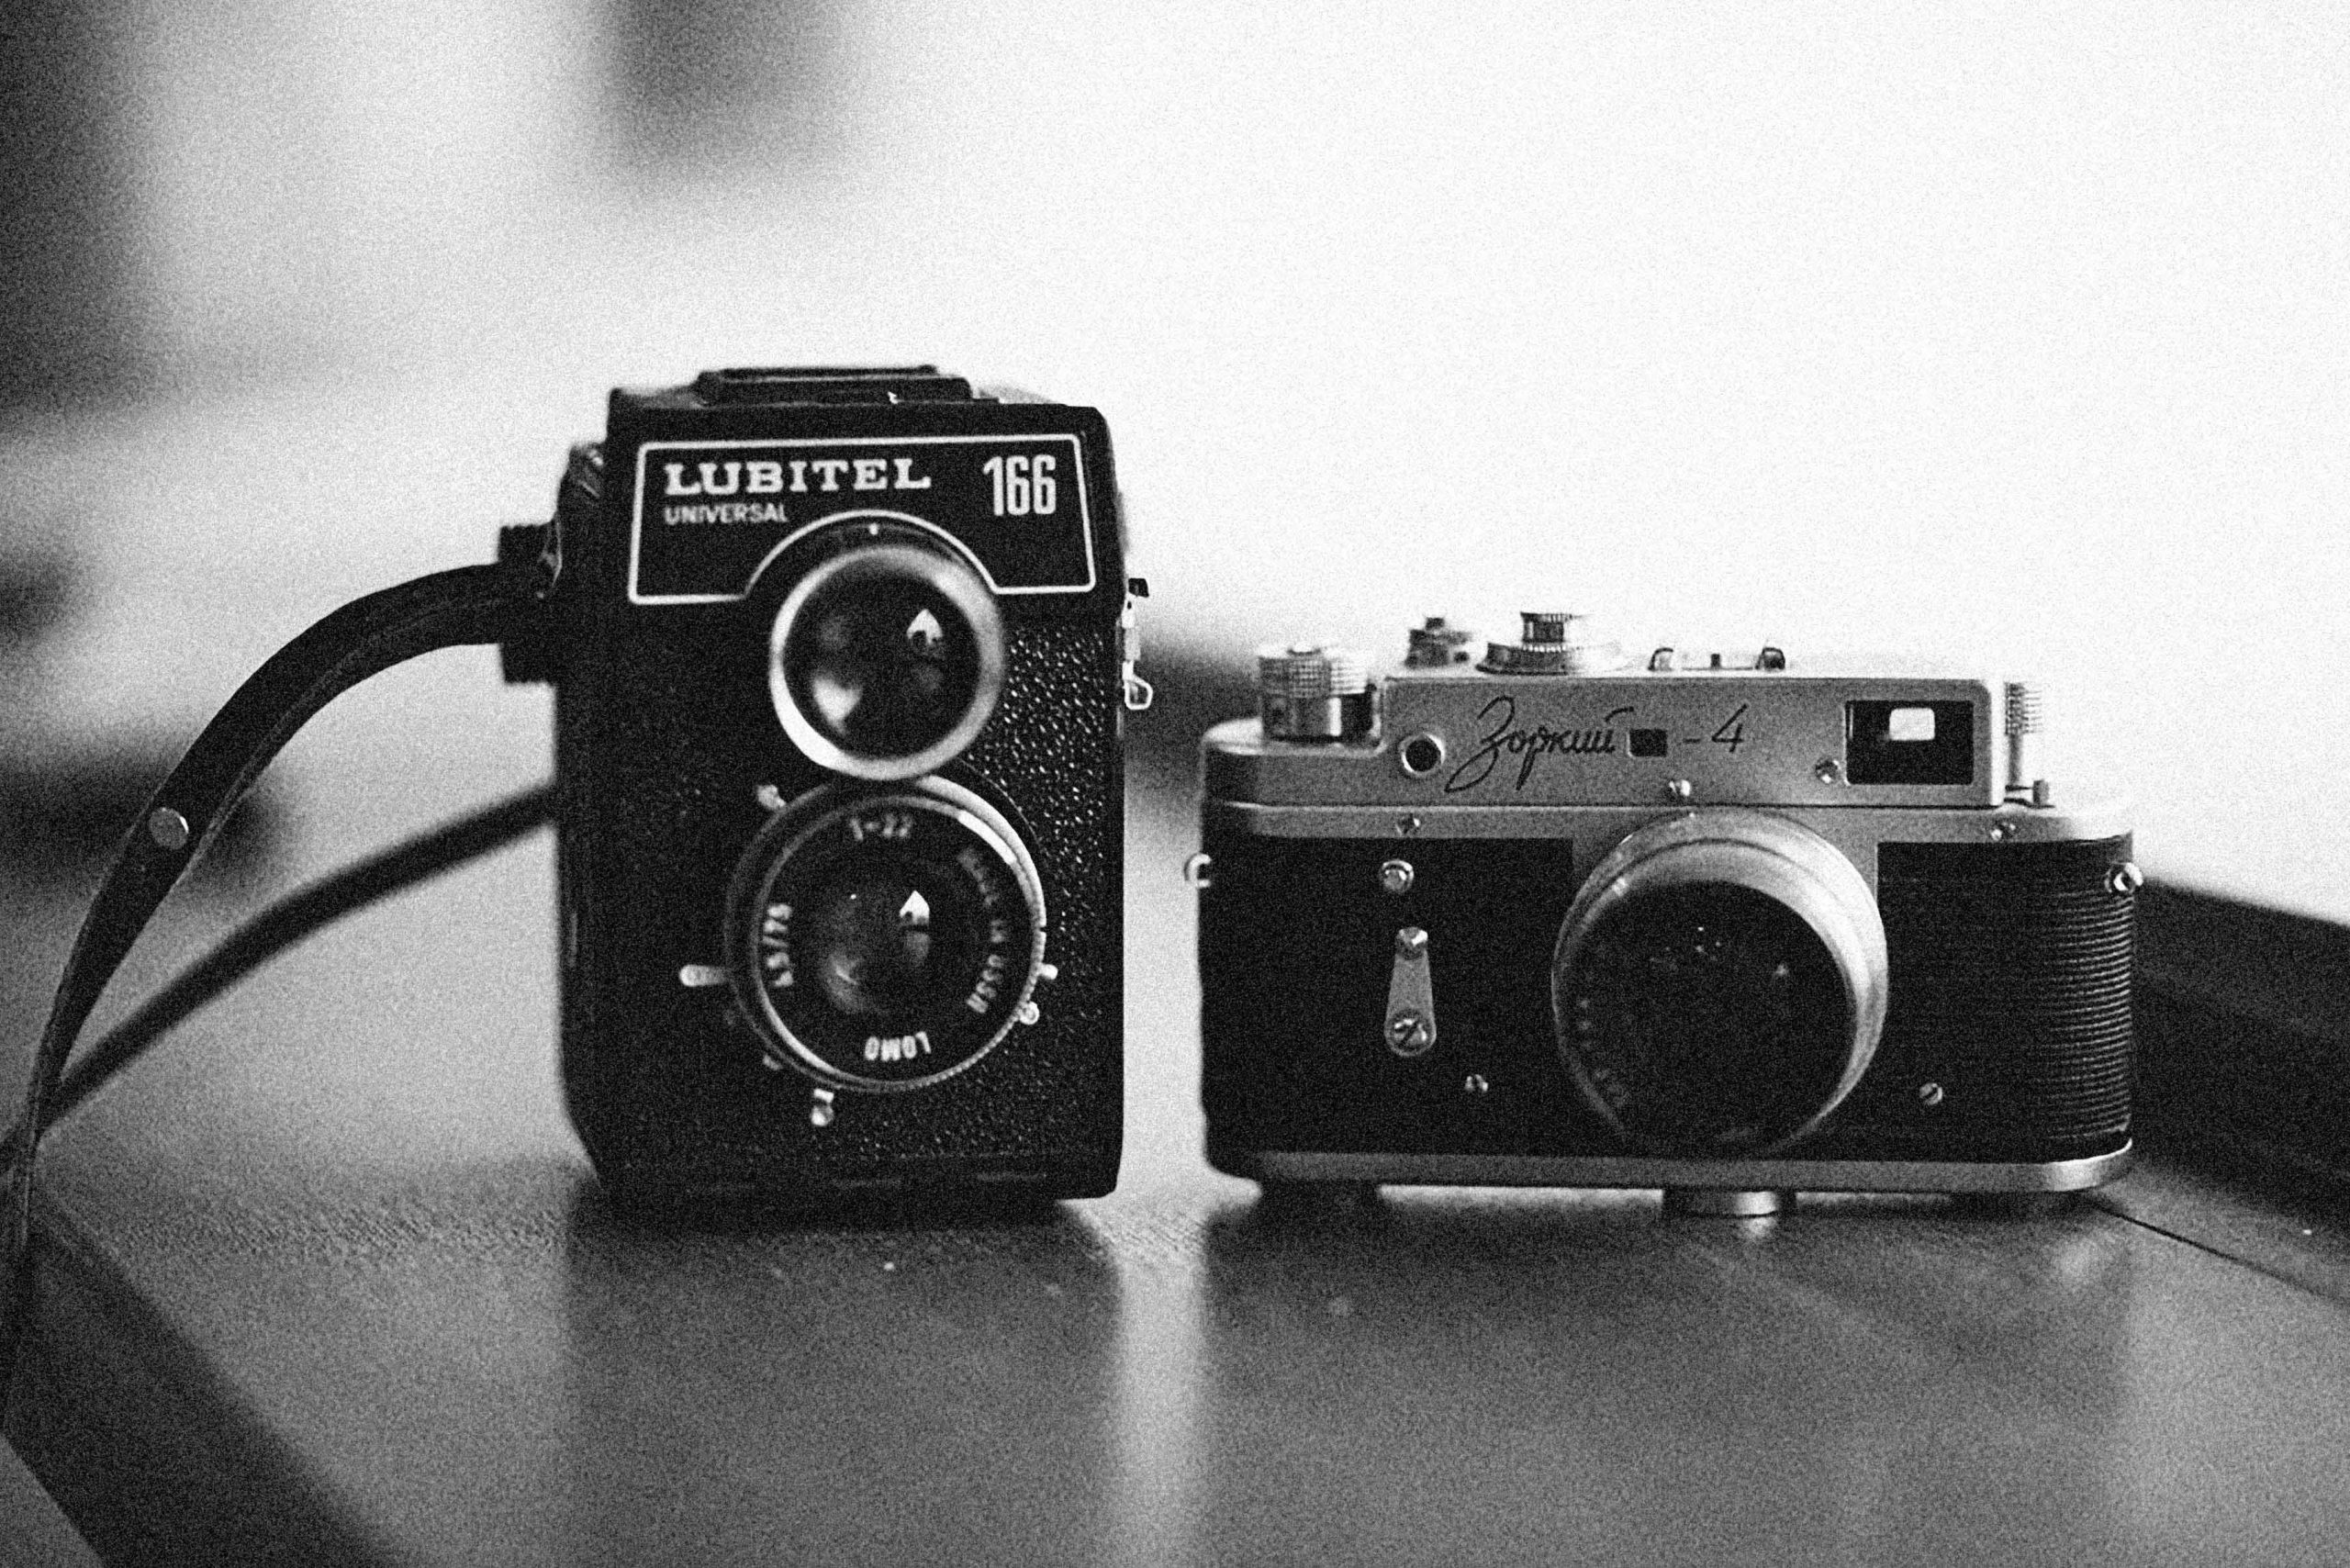
Camera Type 2: Rangefinders

Introduction
Rangefinders offer a unique shooting experience, relying on a separate viewfinder for composition and focusing. This makes them lighter and quieter than SLRs, but they require a bit more skill to master.
How Rangefinders Work
The key difference in rangefinders is their separate focusing mechanism:
- Viewfinder System: The viewfinder is offset from the lens, meaning you’re not looking through the lens itself. Instead, you see a slightly different perspective of the scene.
- Focusing: Rangefinders use a split-image focusing system. Inside the viewfinder, you’ll see two overlapping images of your subject. As you adjust the focus, these images align, indicating that your subject is in focus.
- Parallax Effect: Because the viewfinder is separate from the lens, the framing may not perfectly match what the lens captures, especially at close distances. This is known as parallax error and is most noticeable in macro or close-up photography.
Rangefinders are favoured for their compact size and quiet operation, making them perfect for street photography.
Key Points
Pros:
- Quiet Operation: Ideal for discreet shooting.
- Compact and Lightweight: Great for travel or street photography.
- Sharp Lenses: Rangefinders often come with high-quality, fast lenses.
Cons:
- Focusing Learning Curve: The split-image system requires practice.
- Framing Limitations: Parallax error can affect composition.
Best For:
Rangefinders excel in street and travel photography and are perfect for photographers who value portability.
Examples: Leica M6, Canonet QL17, Yashica Electro 35, Canon P
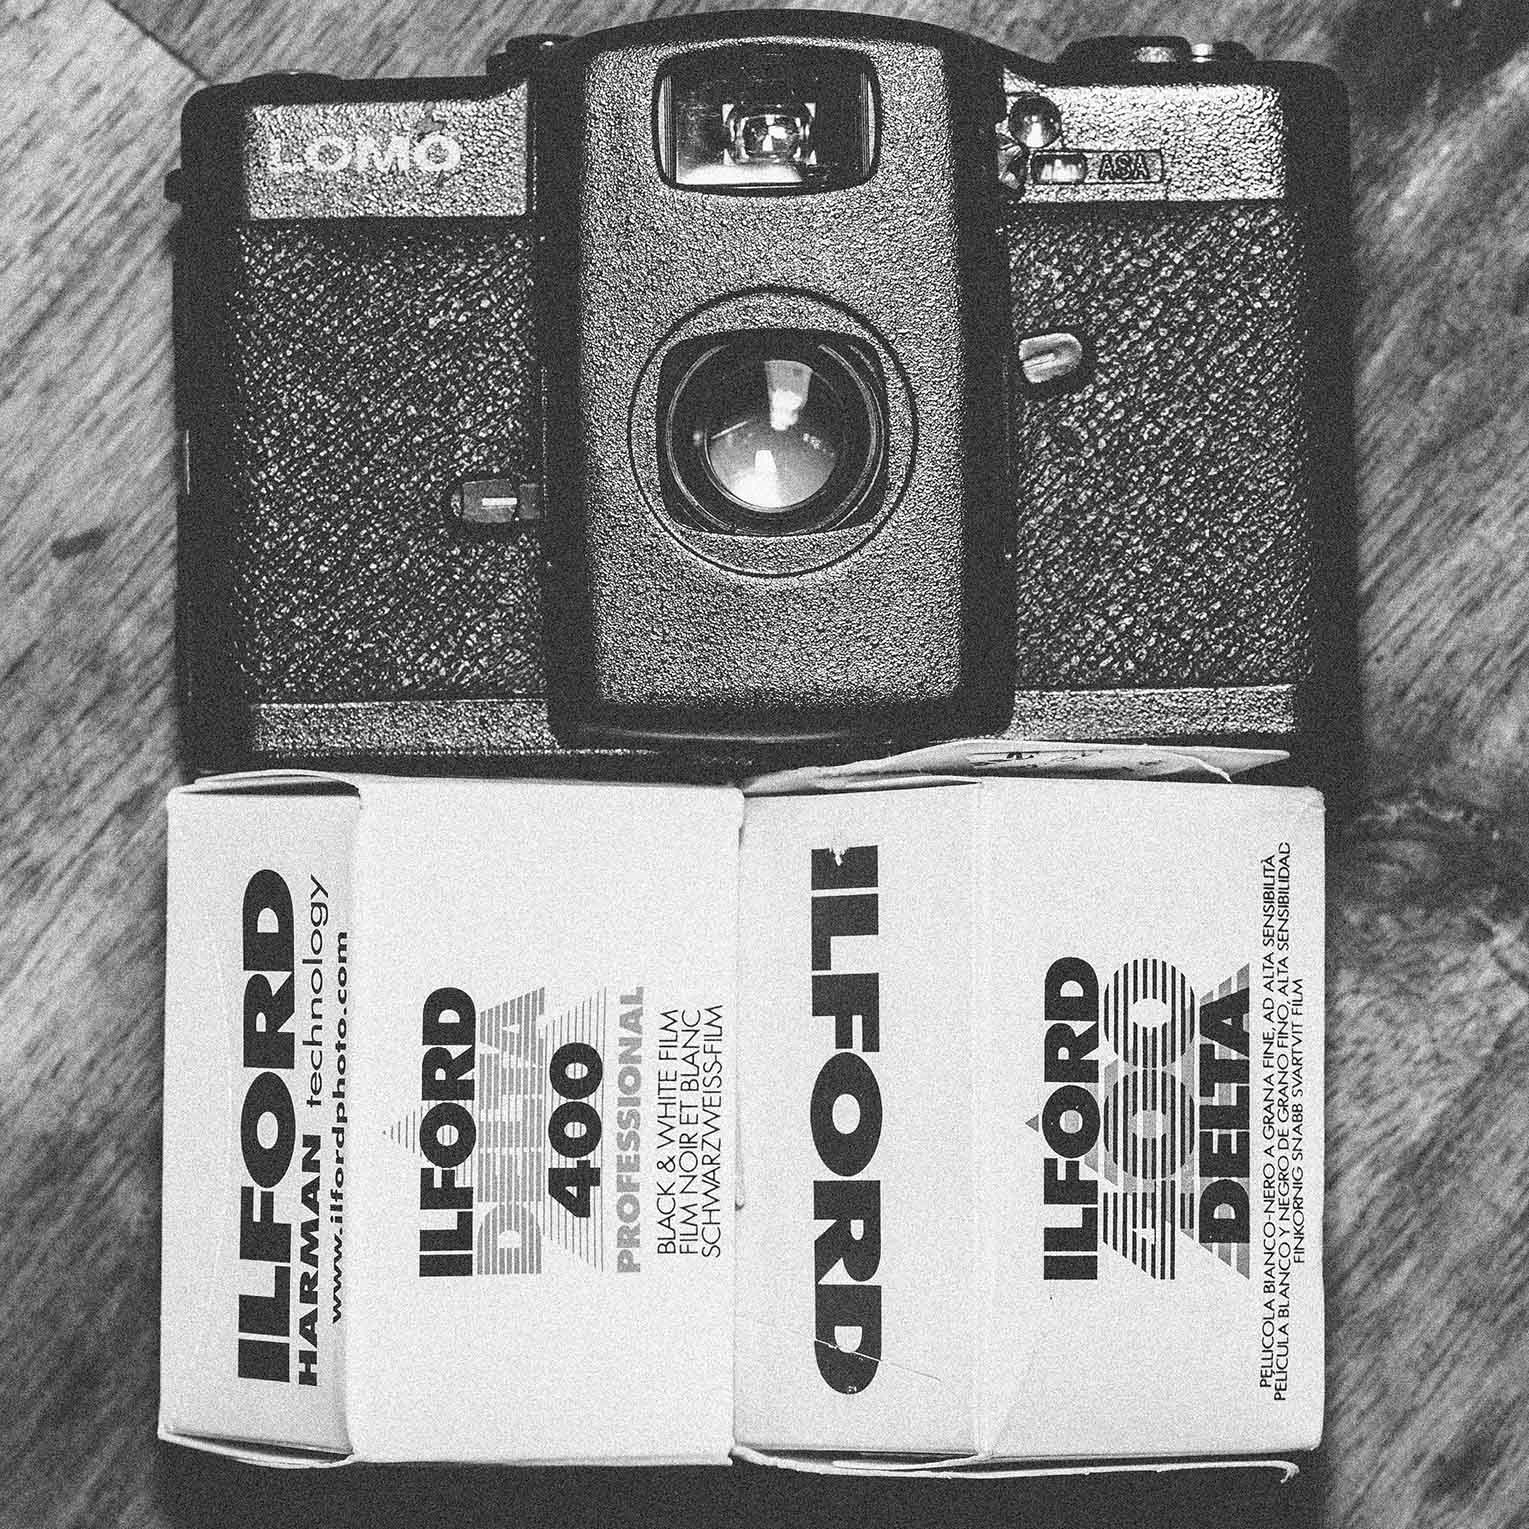
Camera Type 3: Point-and-Shoot Cameras

Introduction
Point-and-shoot cameras are compact, fully automatic cameras designed for ease of use. They’re a fantastic option for casual photographers or those who want a simple, no-fuss shooting experience.
How Point-and-Shoot Cameras Work
Point-and-shoot cameras automate nearly every aspect of photography:
- Lens: Most have a fixed lens with a general-purpose focal length, such as 35mm or 50mm.
- Focusing: Autofocus systems handle focusing for you, ensuring sharp images without manual input.
- Exposure: The camera automatically adjusts shutter speed and aperture based on the light conditions, so you don’t need to worry about settings.
- Shooting: Simply aim, compose your shot in the viewfinder or LCD screen, and press the shutter button.
The simplicity of point-and-shoot cameras makes them ideal for quick, spontaneous photography.
Key Points
Pros:
- Simplicity: Perfect for beginners or casual use.
- Compact and Lightweight: Easy to carry anywhere.
- Affordable Options: Many models are inexpensive.
Cons:
- Limited Control: You can’t manually adjust settings.
- Quality Variability: Image quality depends heavily on the model.
Best For:
Point-and-shoot cameras are great for beginners, casual photographers, or anyone wanting a no-fuss way to capture memories.
Examples: Olympus XA2, Konica Big Mini, Canon SureShot.
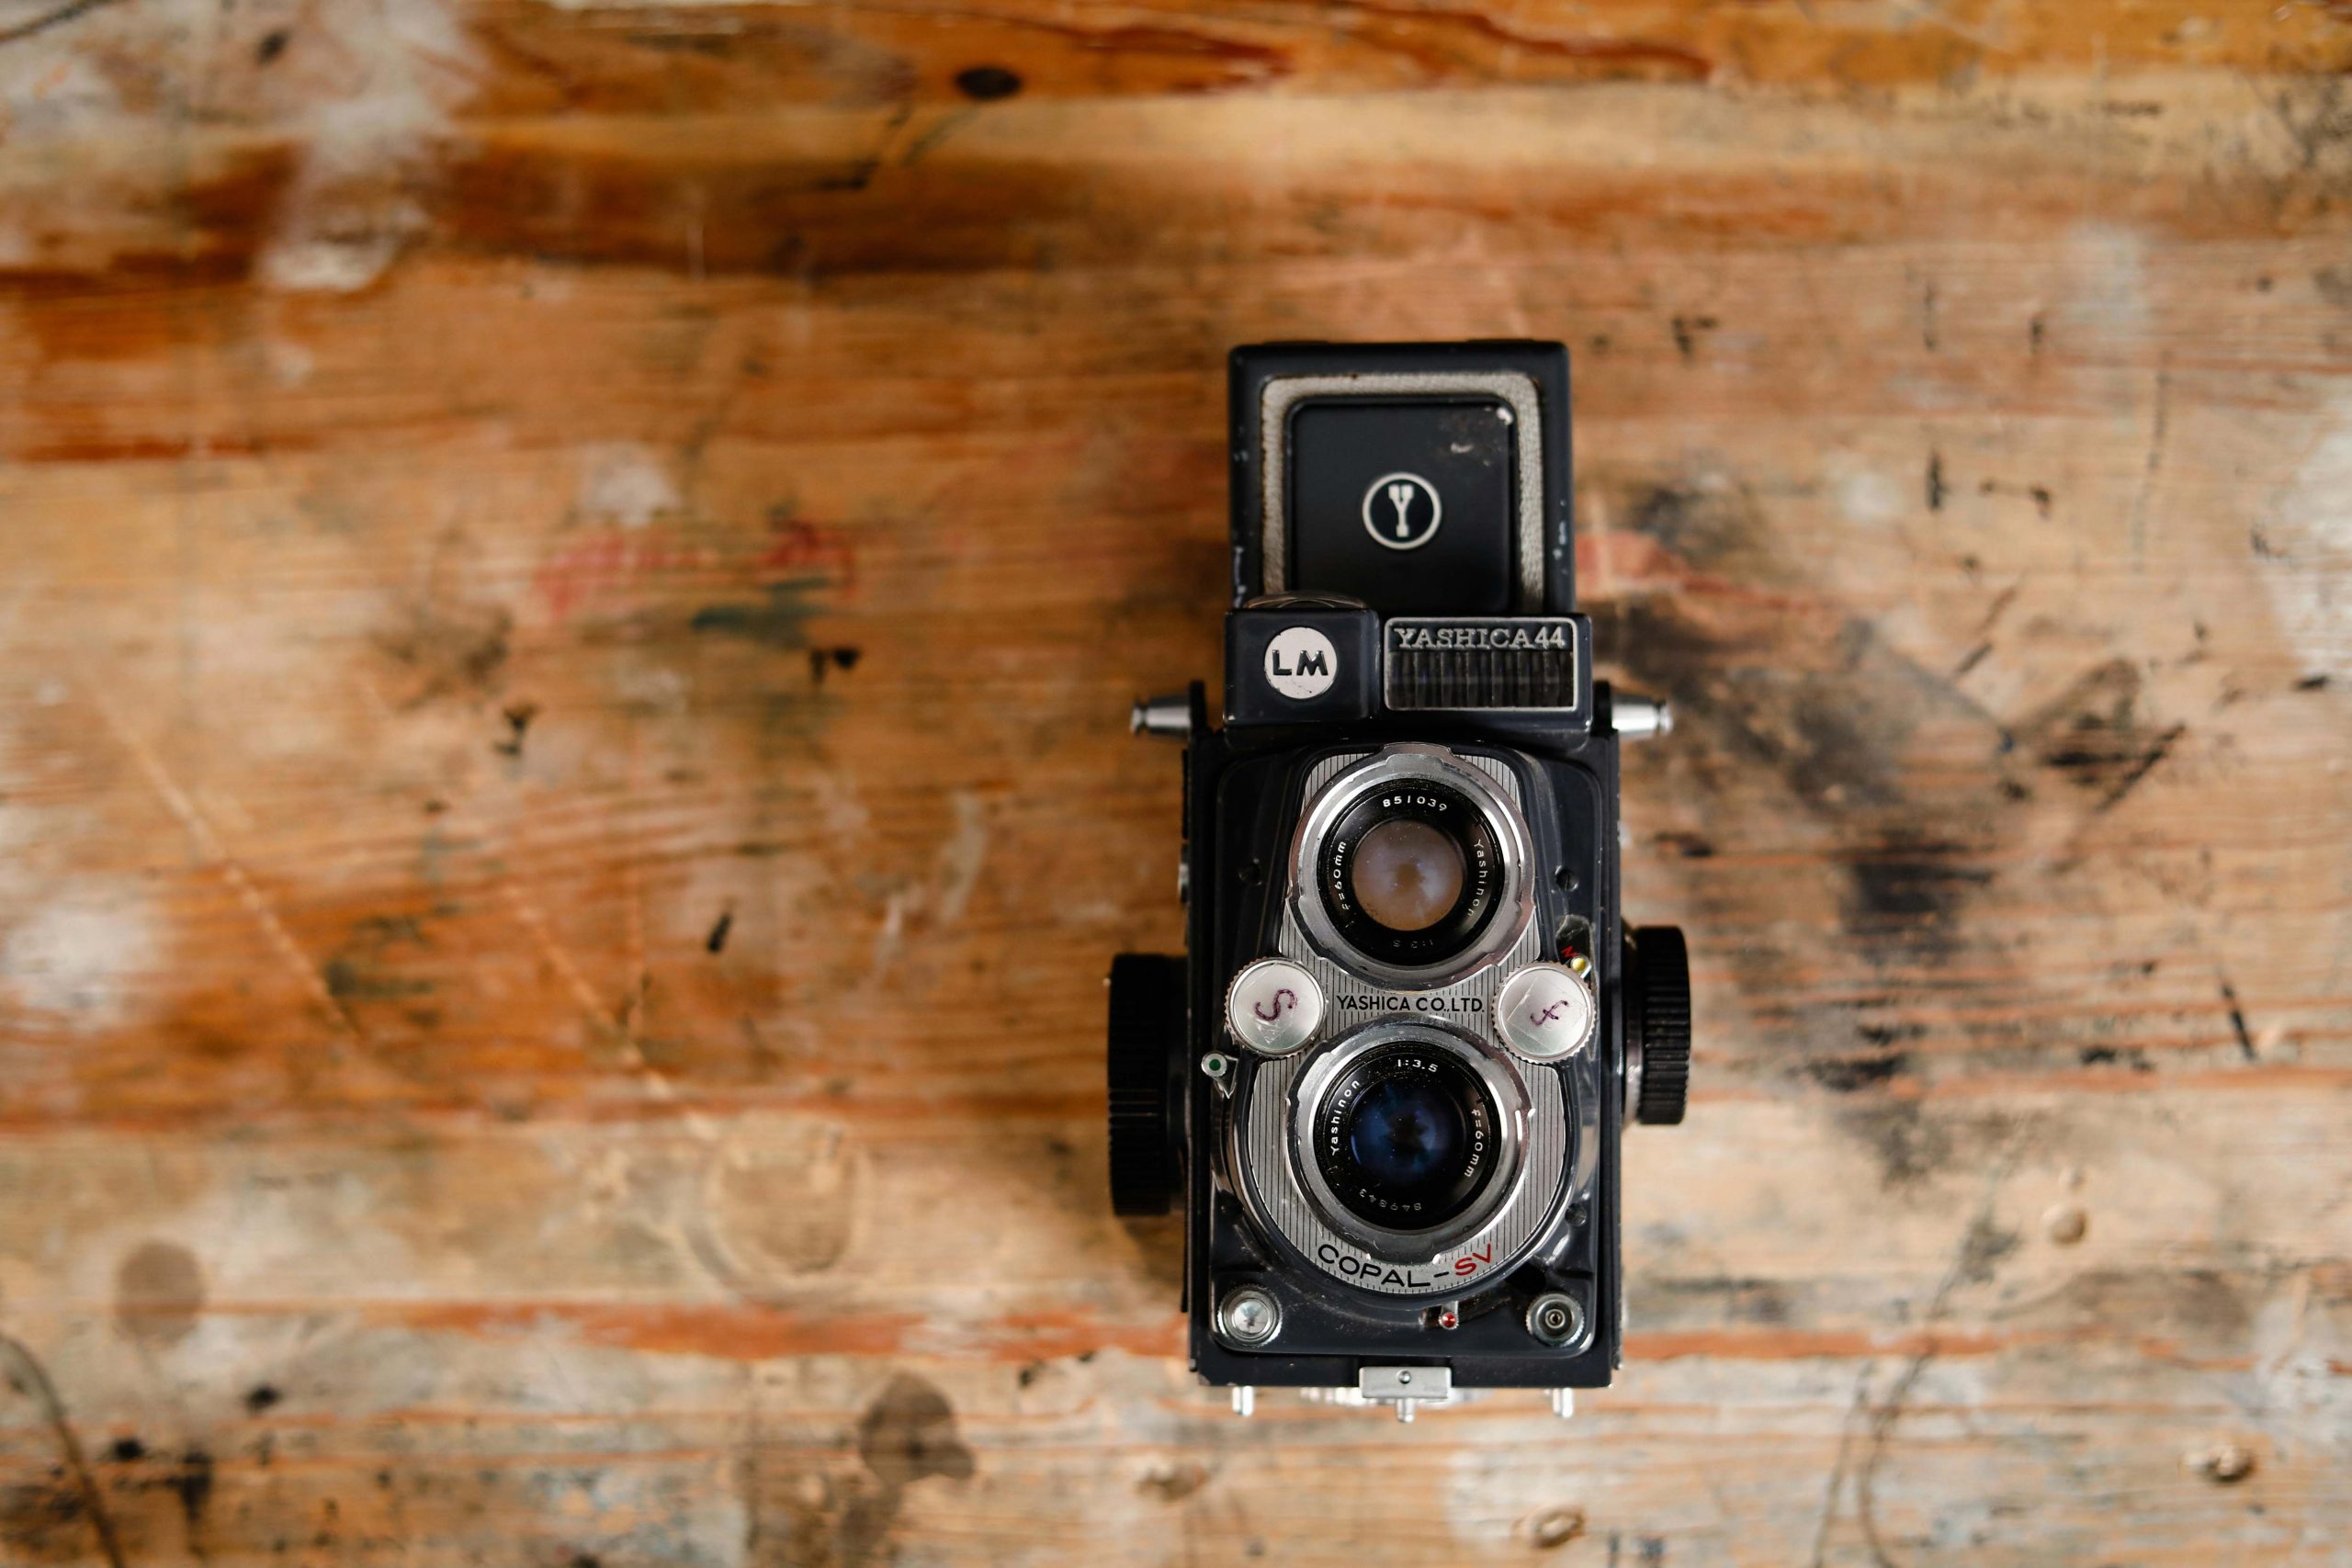
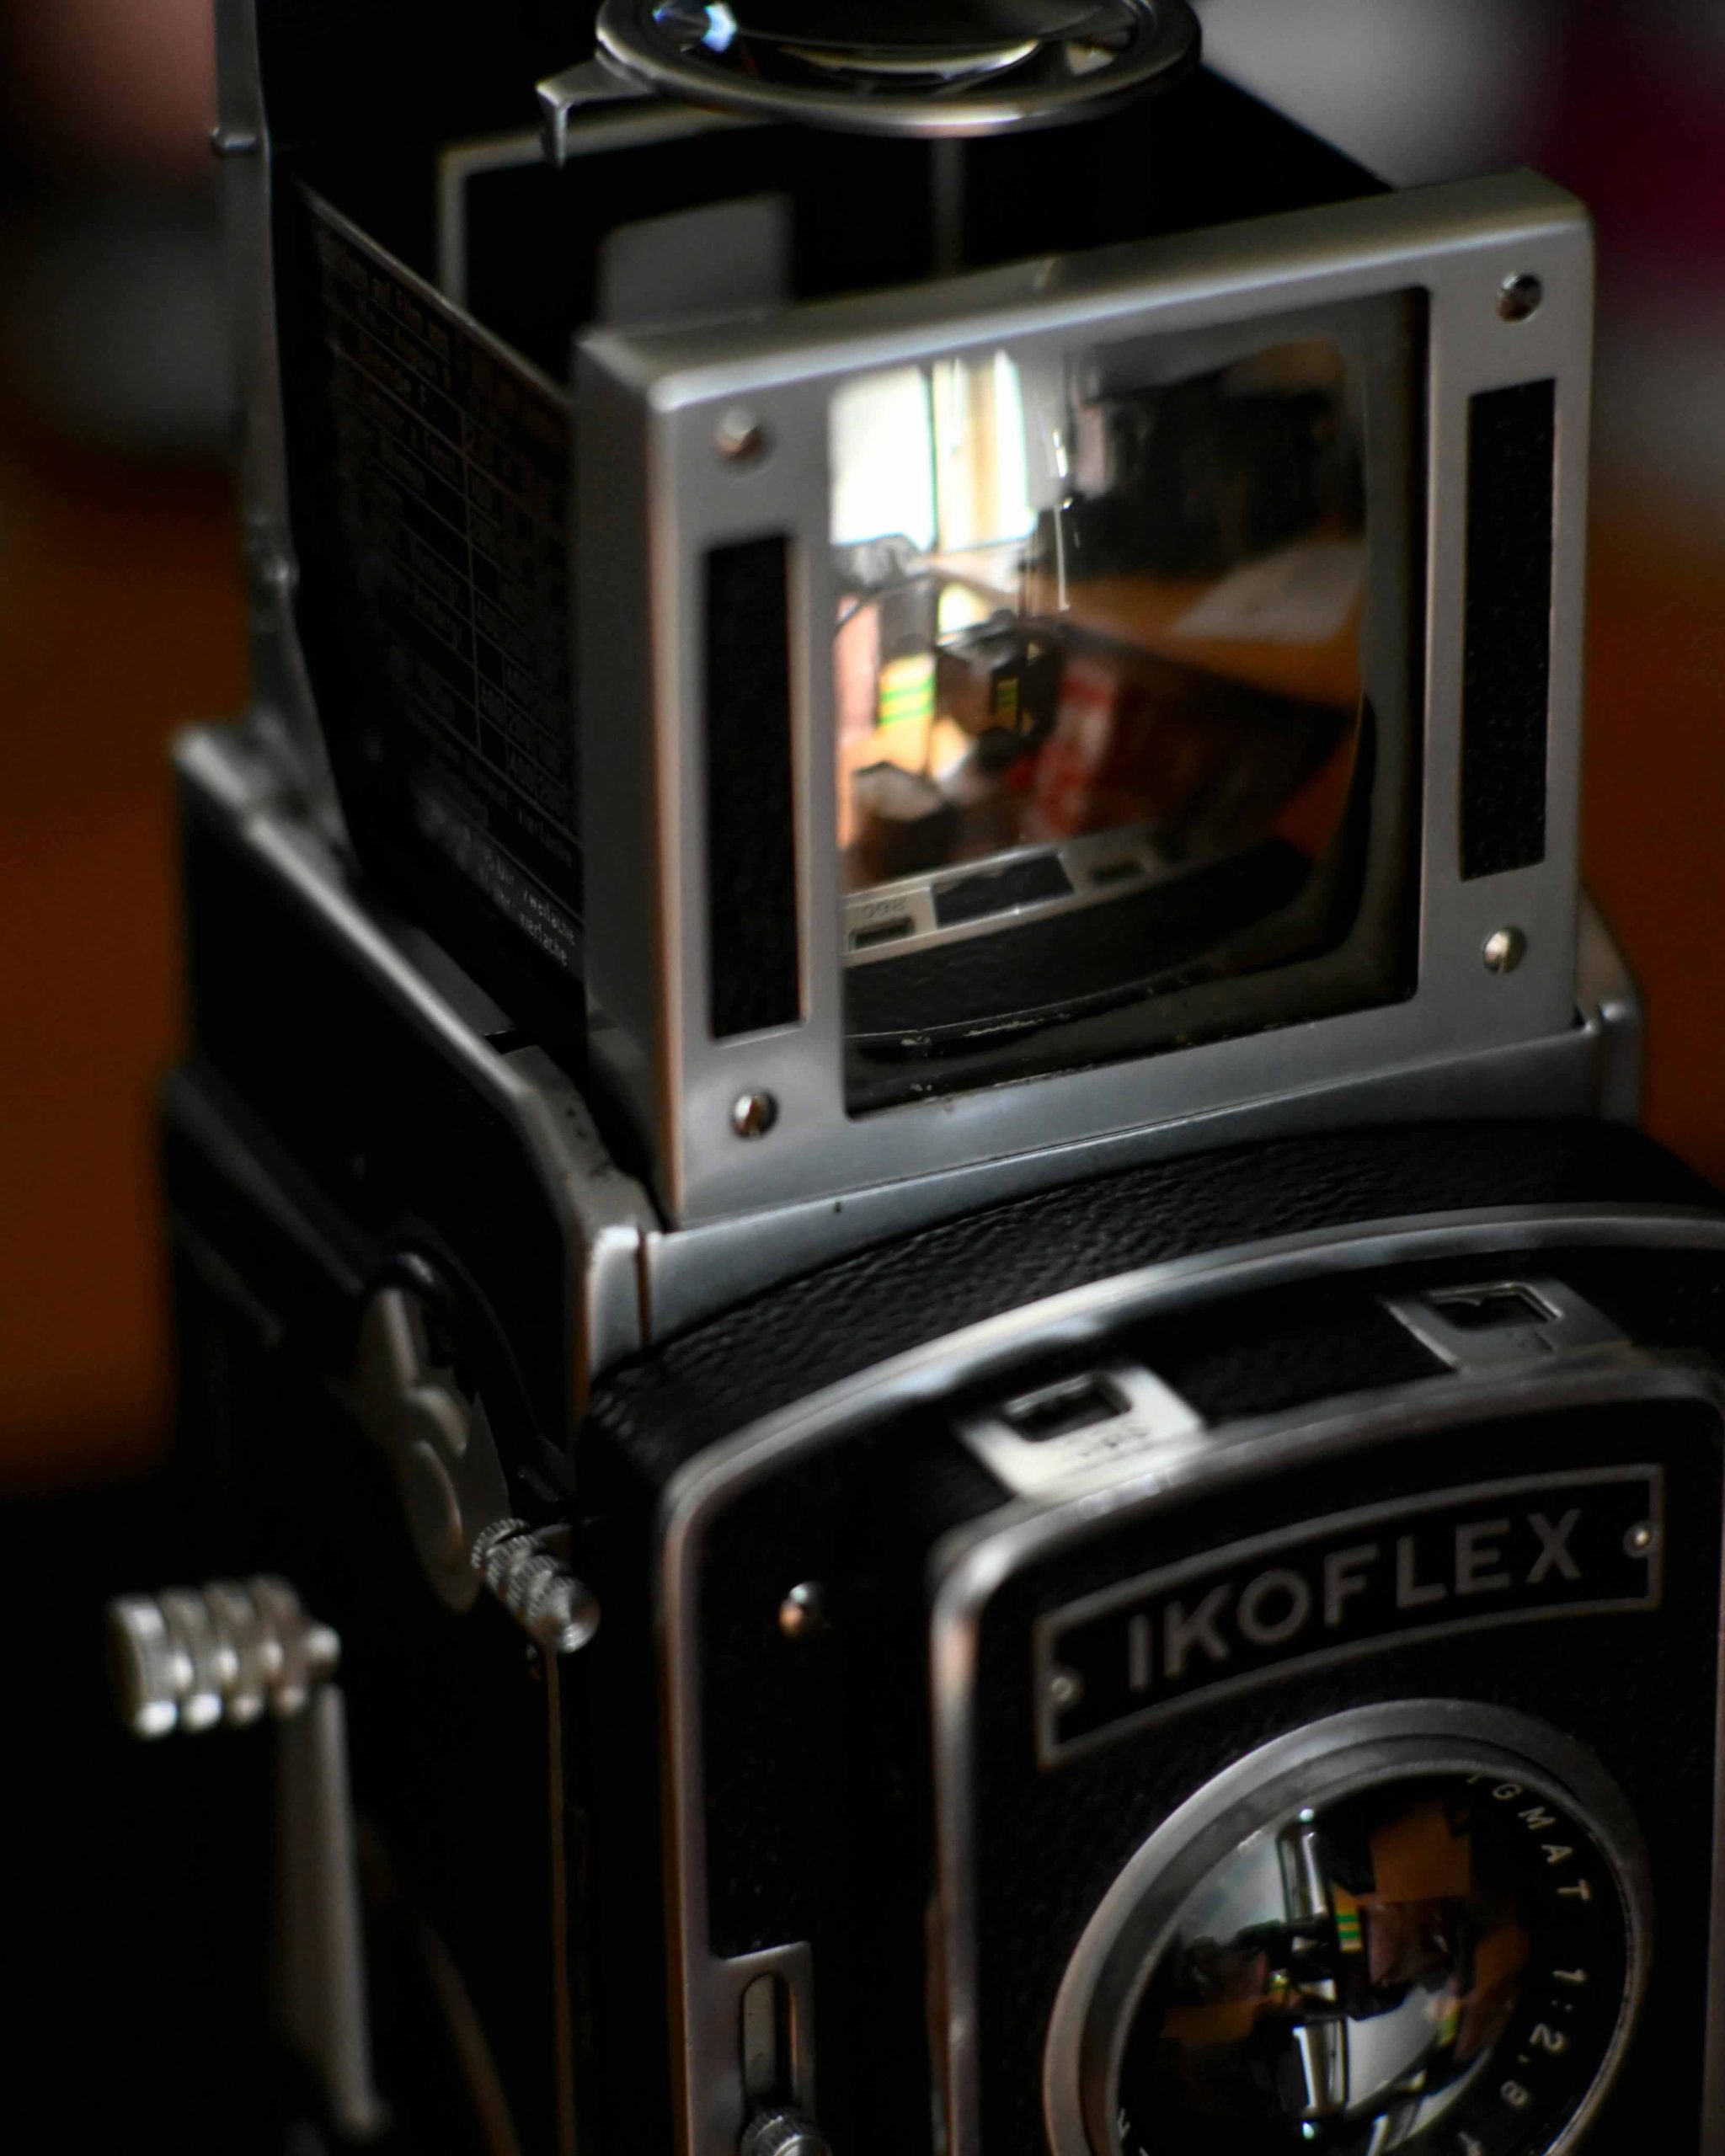
Camera Type 4: TLR (Twin-Lens Reflex)
Introduction
TLRs are vintage-style film cameras with two lenses: one for viewing and one for taking the photograph. Popular for medium-format photography, they are known for their unique shooting experience and incredible image quality.
How TLRs Work
The defining feature of a TLR is its twin-lens system:
- Viewing Lens: The upper lens projects the scene onto a ground-glass screen, viewed through a waist-level viewfinder. This gives you a clear preview of your shot, but the image is flipped horizontally, which can take some getting used to.
- Taking Lens: The lower lens captures the image onto the film. Because the two lenses are mechanically linked, adjustments to the viewing lens automatically apply to the taking lens.
- Manual Operation: Most TLRs are fully manual, requiring you to set focus, aperture, and shutter speed yourself.
- Film Format: TLRs typically use medium-format film (120) for larger negatives and incredible detail.
Key Points
Pros:
- Stunning Image Quality: Larger negatives provide exceptional detail.
- Vintage Charm: The waist-level viewfinder and tactile controls make shooting an experience in itself.
- Durability: Built to last and often fully mechanical.
Cons:
- Bulky: TLRs are heavier and less portable.
- Slower Operation: Requires time and patience to set up each shot.
- Learning Curve: The flipped viewfinder image can be disorienting at first.
Best For:
TLRs are ideal for portrait photographers, enthusiasts of medium-format film, or anyone seeking a unique shooting experience.
Examples: Rolleiflex 2.8, Yashica Mat-124G, Mamiya C330.
Conclusion
Choosing the right film camera depends on your experience level, creative goals, and personal preferences.
- SLRs are versatile and beginner-friendly, offering excellent control.
- Rangefinders excel in street and travel photography with their compact size and quiet operation.
- Point-and-shoot cameras are simple and perfect for casual or spontaneous photography.
- TLRs provide stunning image quality and a vintage charm, ideal for thoughtful, artistic photography, but are a step up in complexity.
Explore these options, and you’re sure to find a camera that suits your style. If you’re new to film photography in general, I would definitely recommend starting out with an affordable SLR.
Take a look at my beginner’s guide to film photography, too!
Abinav Thakuri - An Interview
Abinav Thakuri - Conversations with Creatives
Quick Summary
Conversations with Creatives is an ongoing interview series between myself and those that truly inspire me. This is a space for me to dig deeper into their creative journey and process to uncover more about what led them here, what pushes them forward and what they hope to achieve.
Interview #1 - Abinav Thakuri.
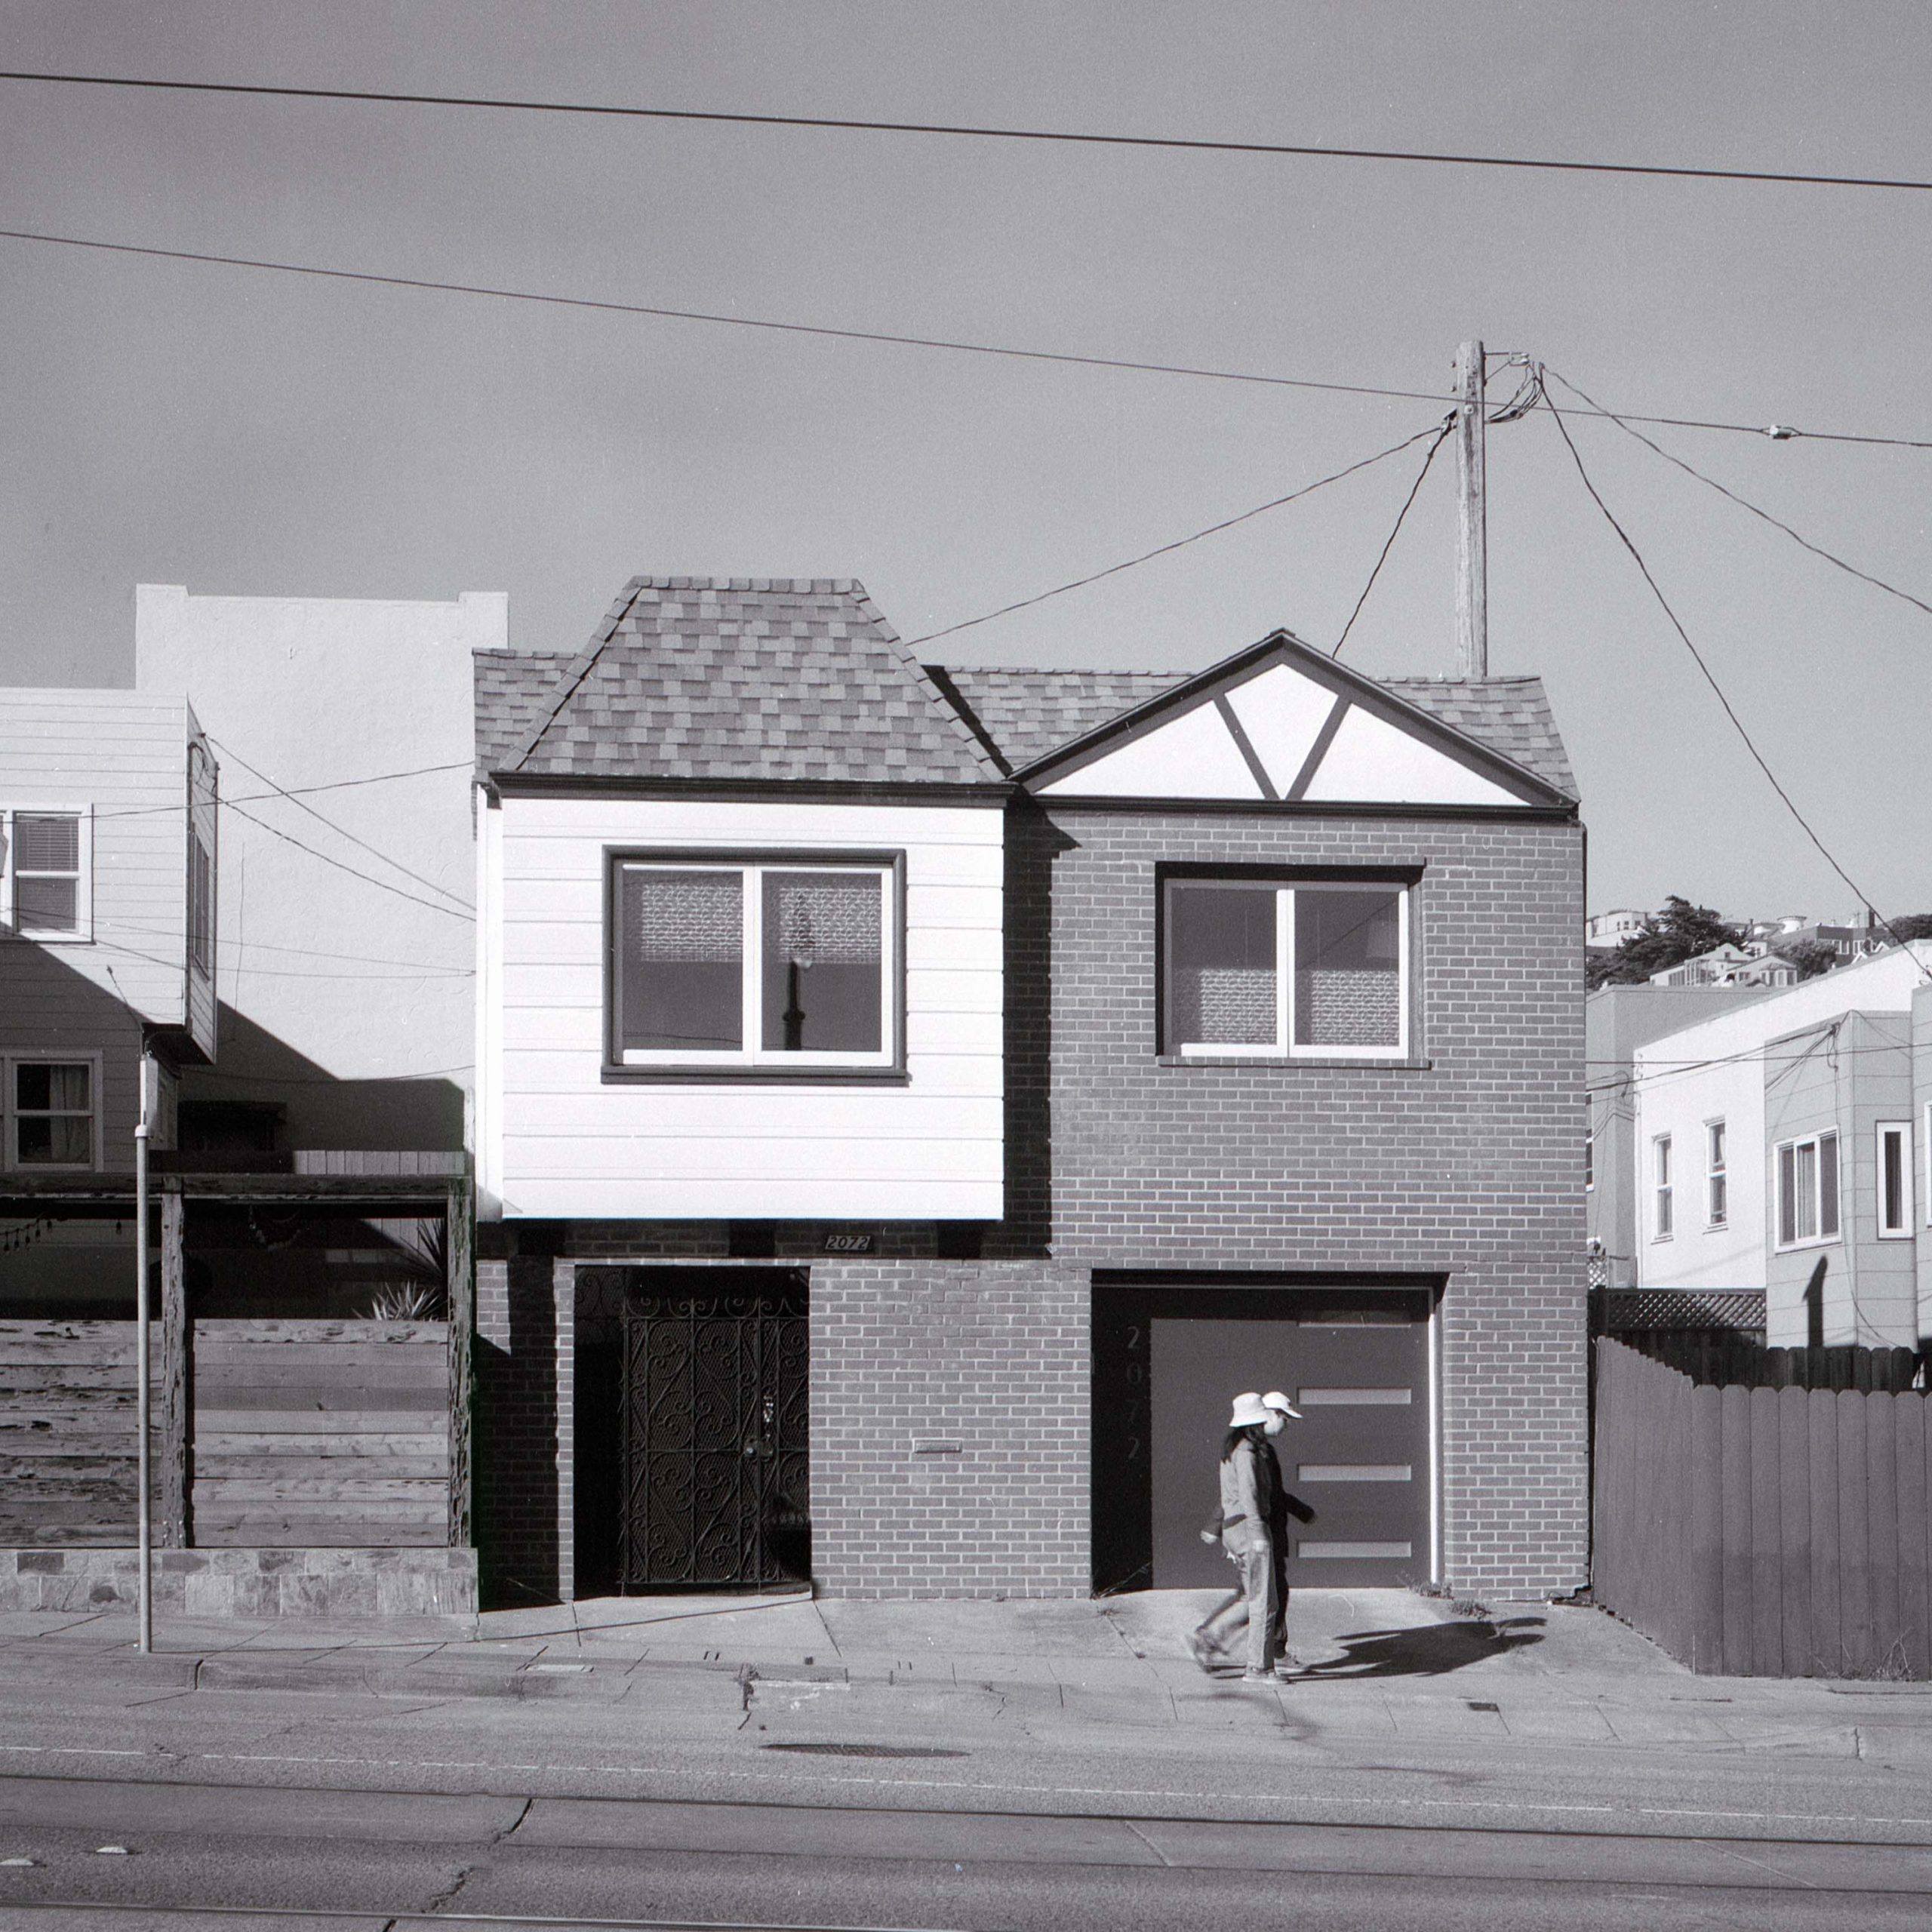
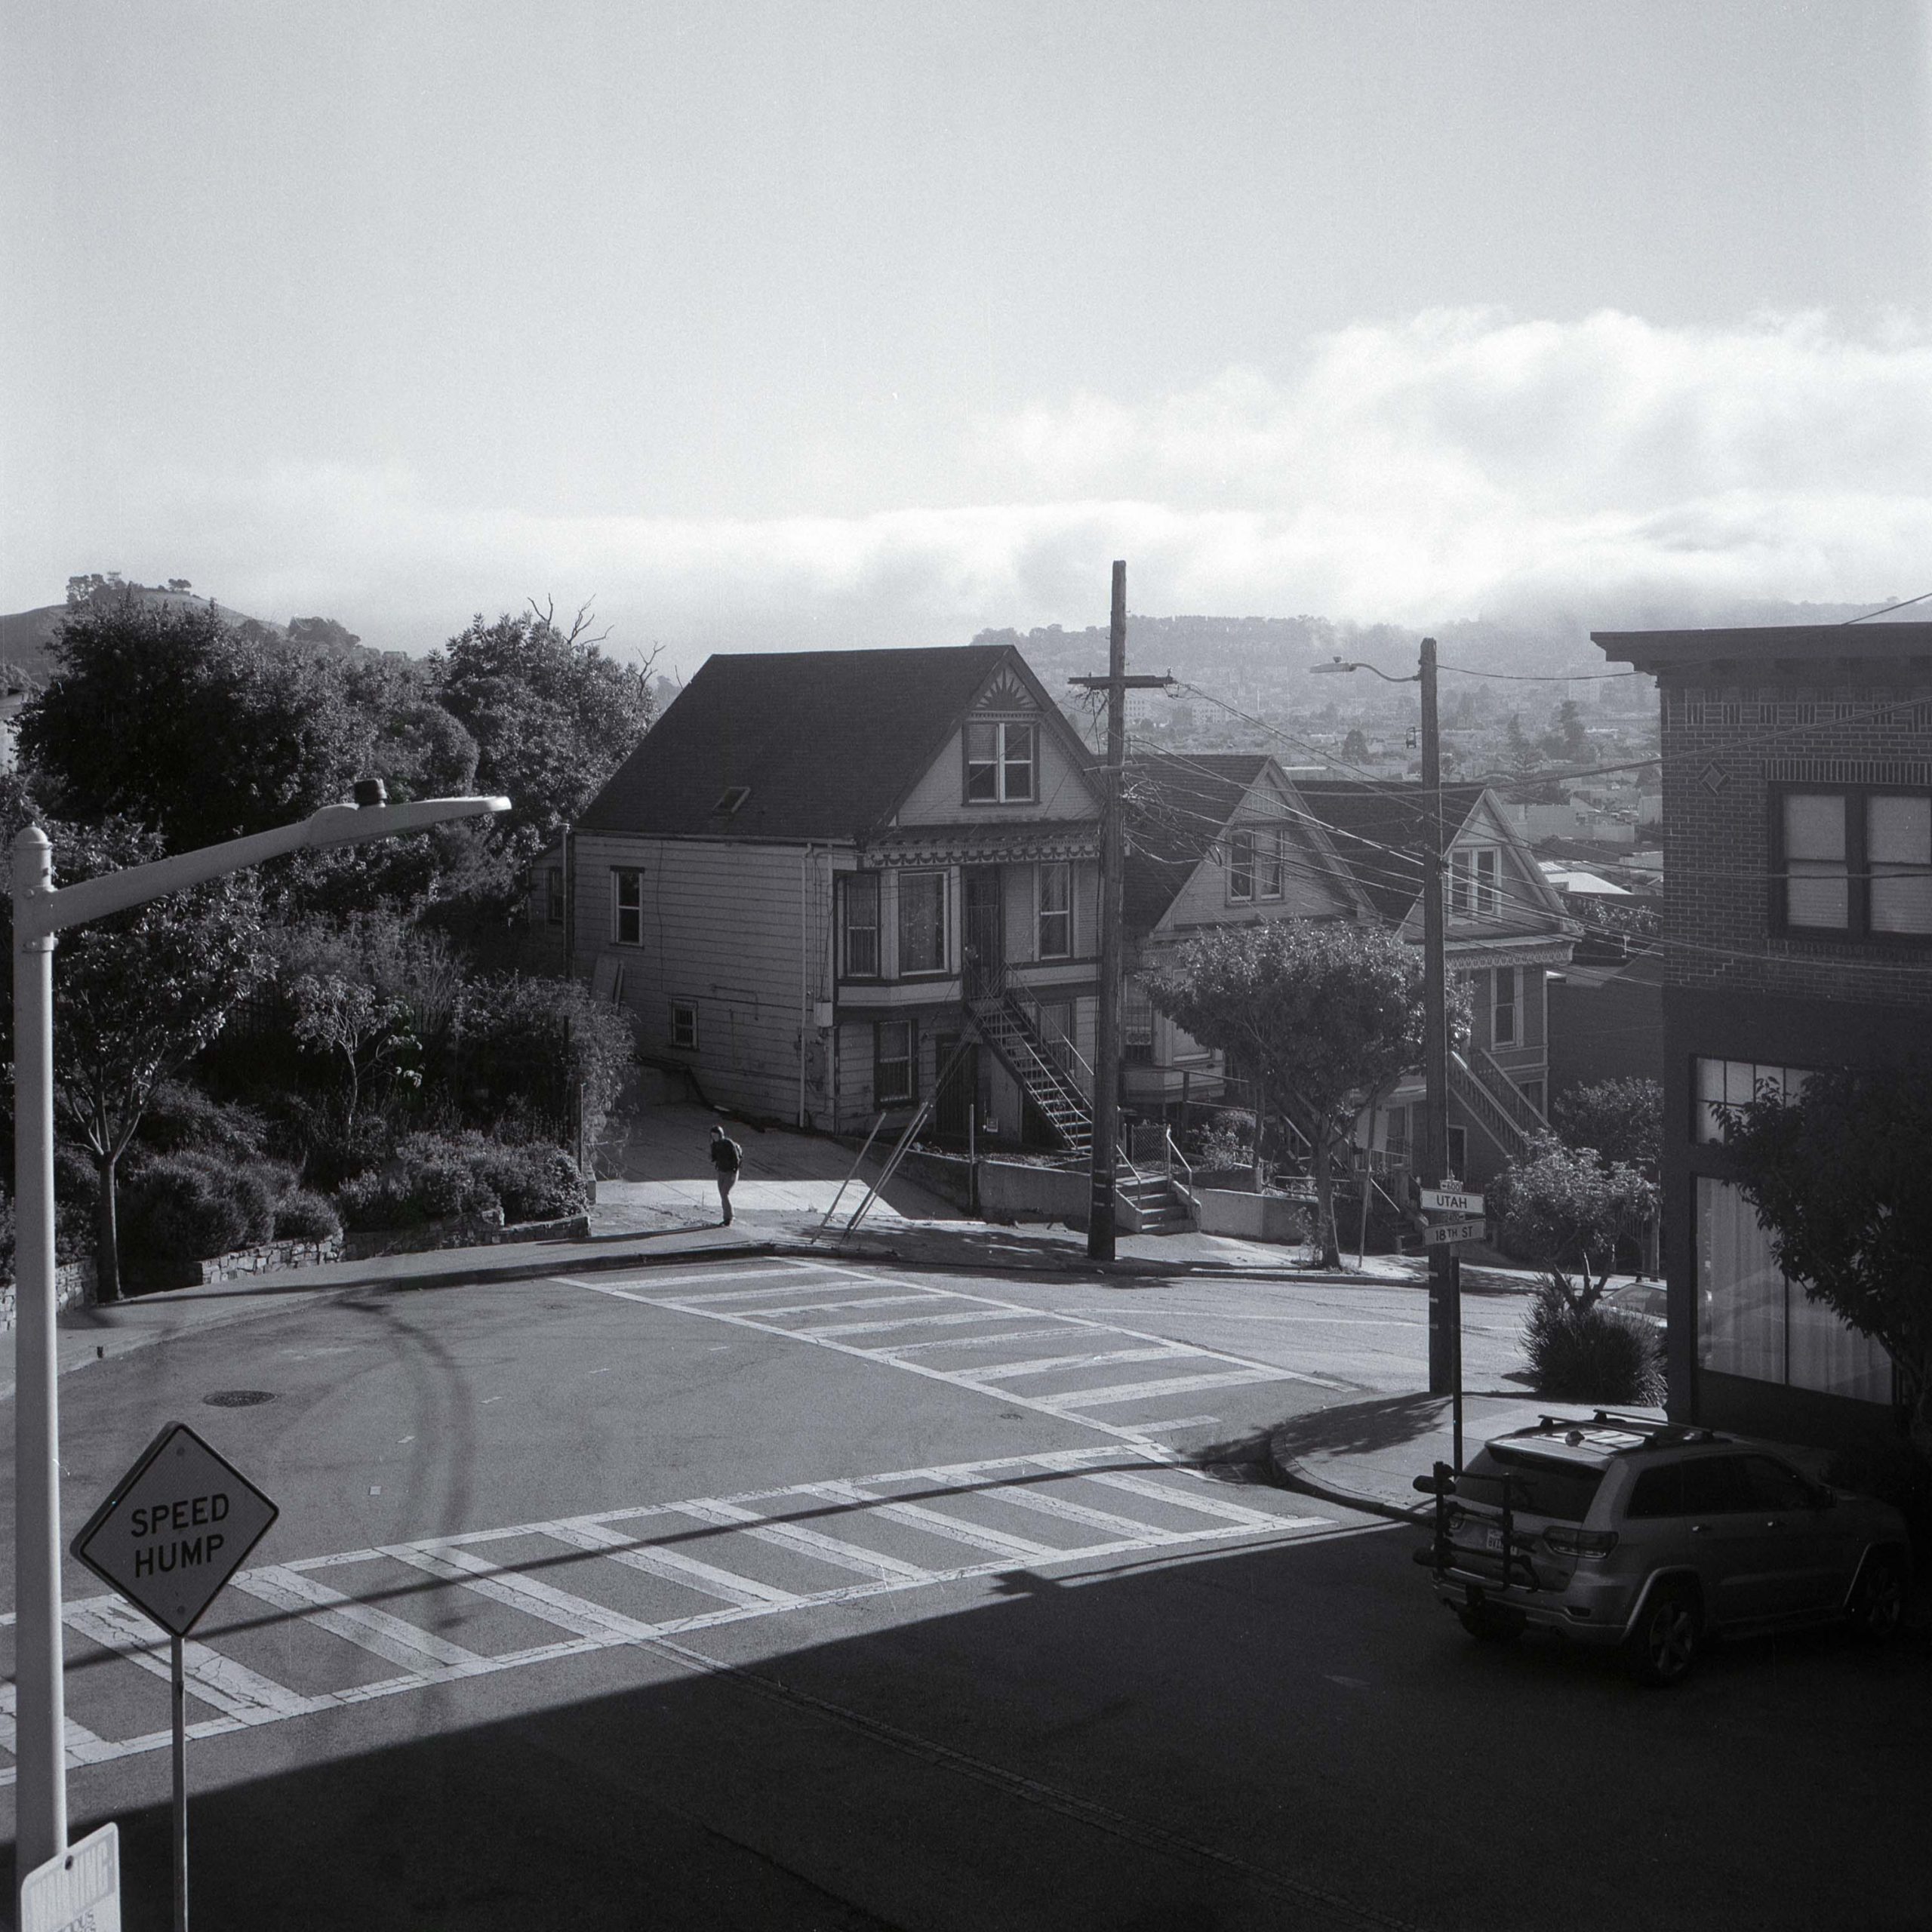
Abinav Thakuri is a contemplative film photographer and writer based in San Francisco.
I first became aware of Abinav's work in the Summer of 2024, right at the start of my renewed interest in film photography.
After coming across his body of work shot exclusively in black and white, I felt immediately inspired to vary my approach and reconsider my own creative choices and knew that this was someone who would have a tremendous impact on how I approach this medium.
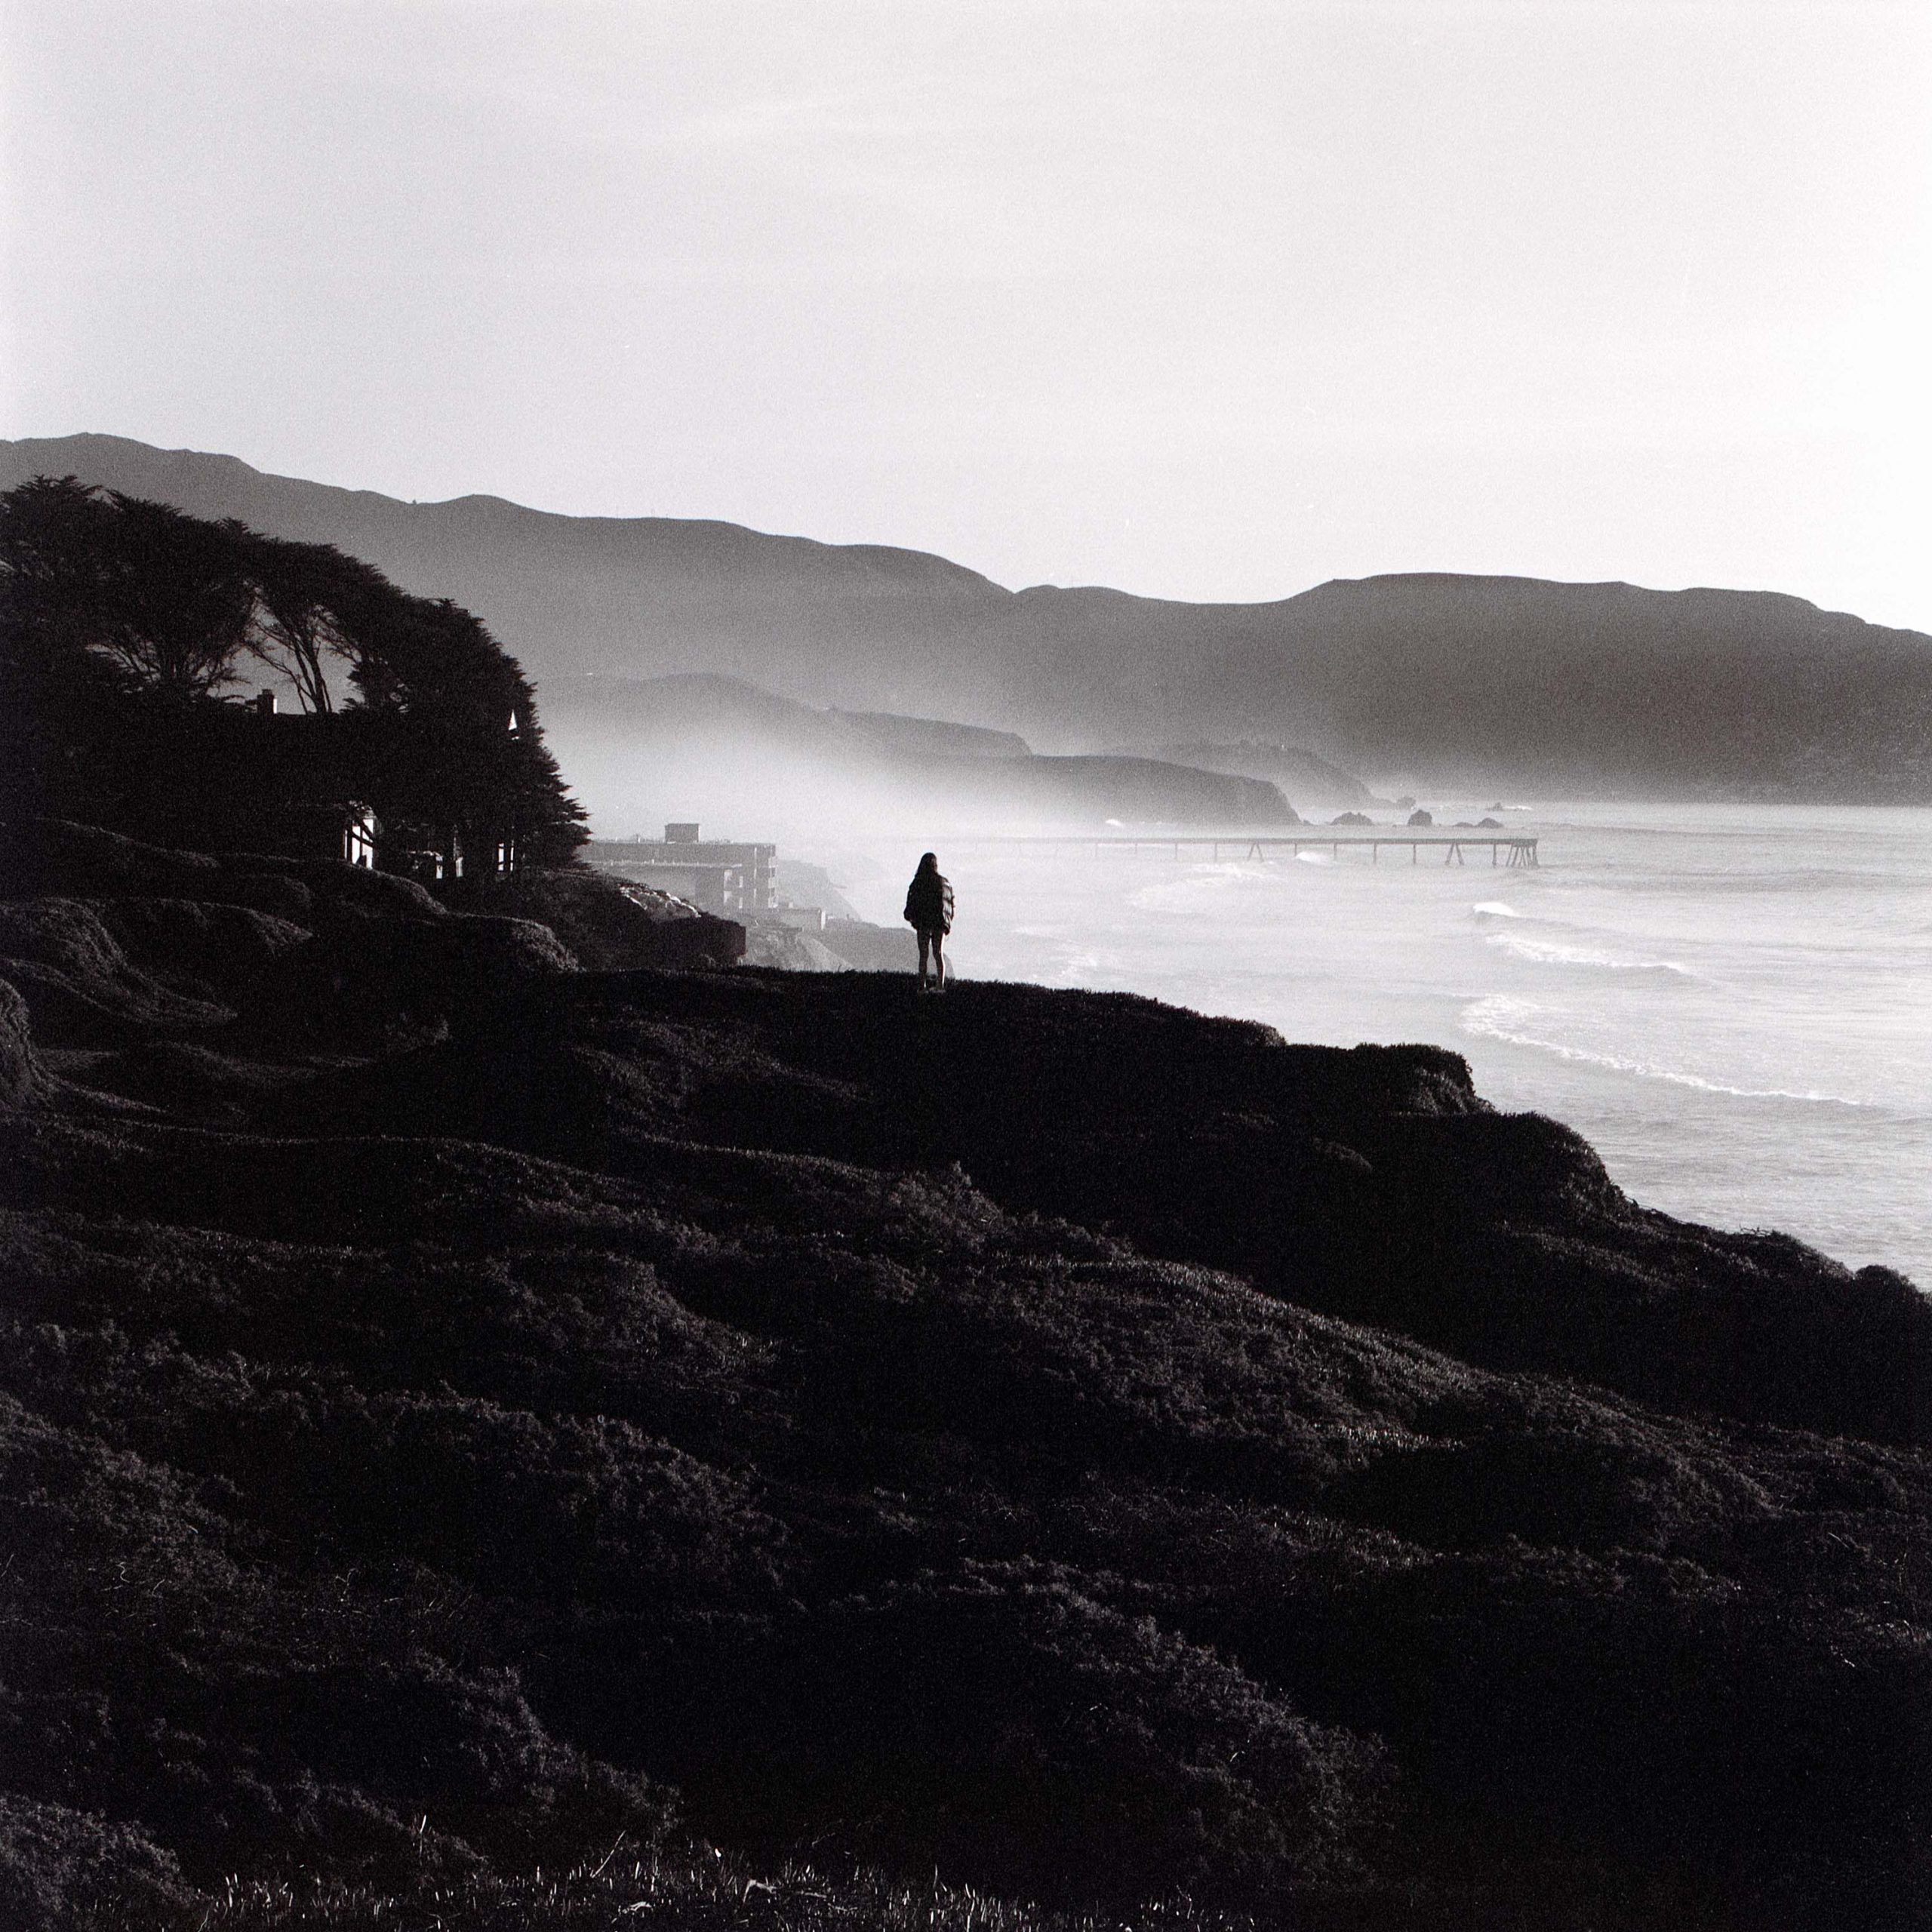
Abinav’s work is truly special, possessing a timeless, almost ethereal quality that I find is few and far between; when I look at his output I feel like I am bearing witness to something beyond photography – they seem effortless, somehow pure.
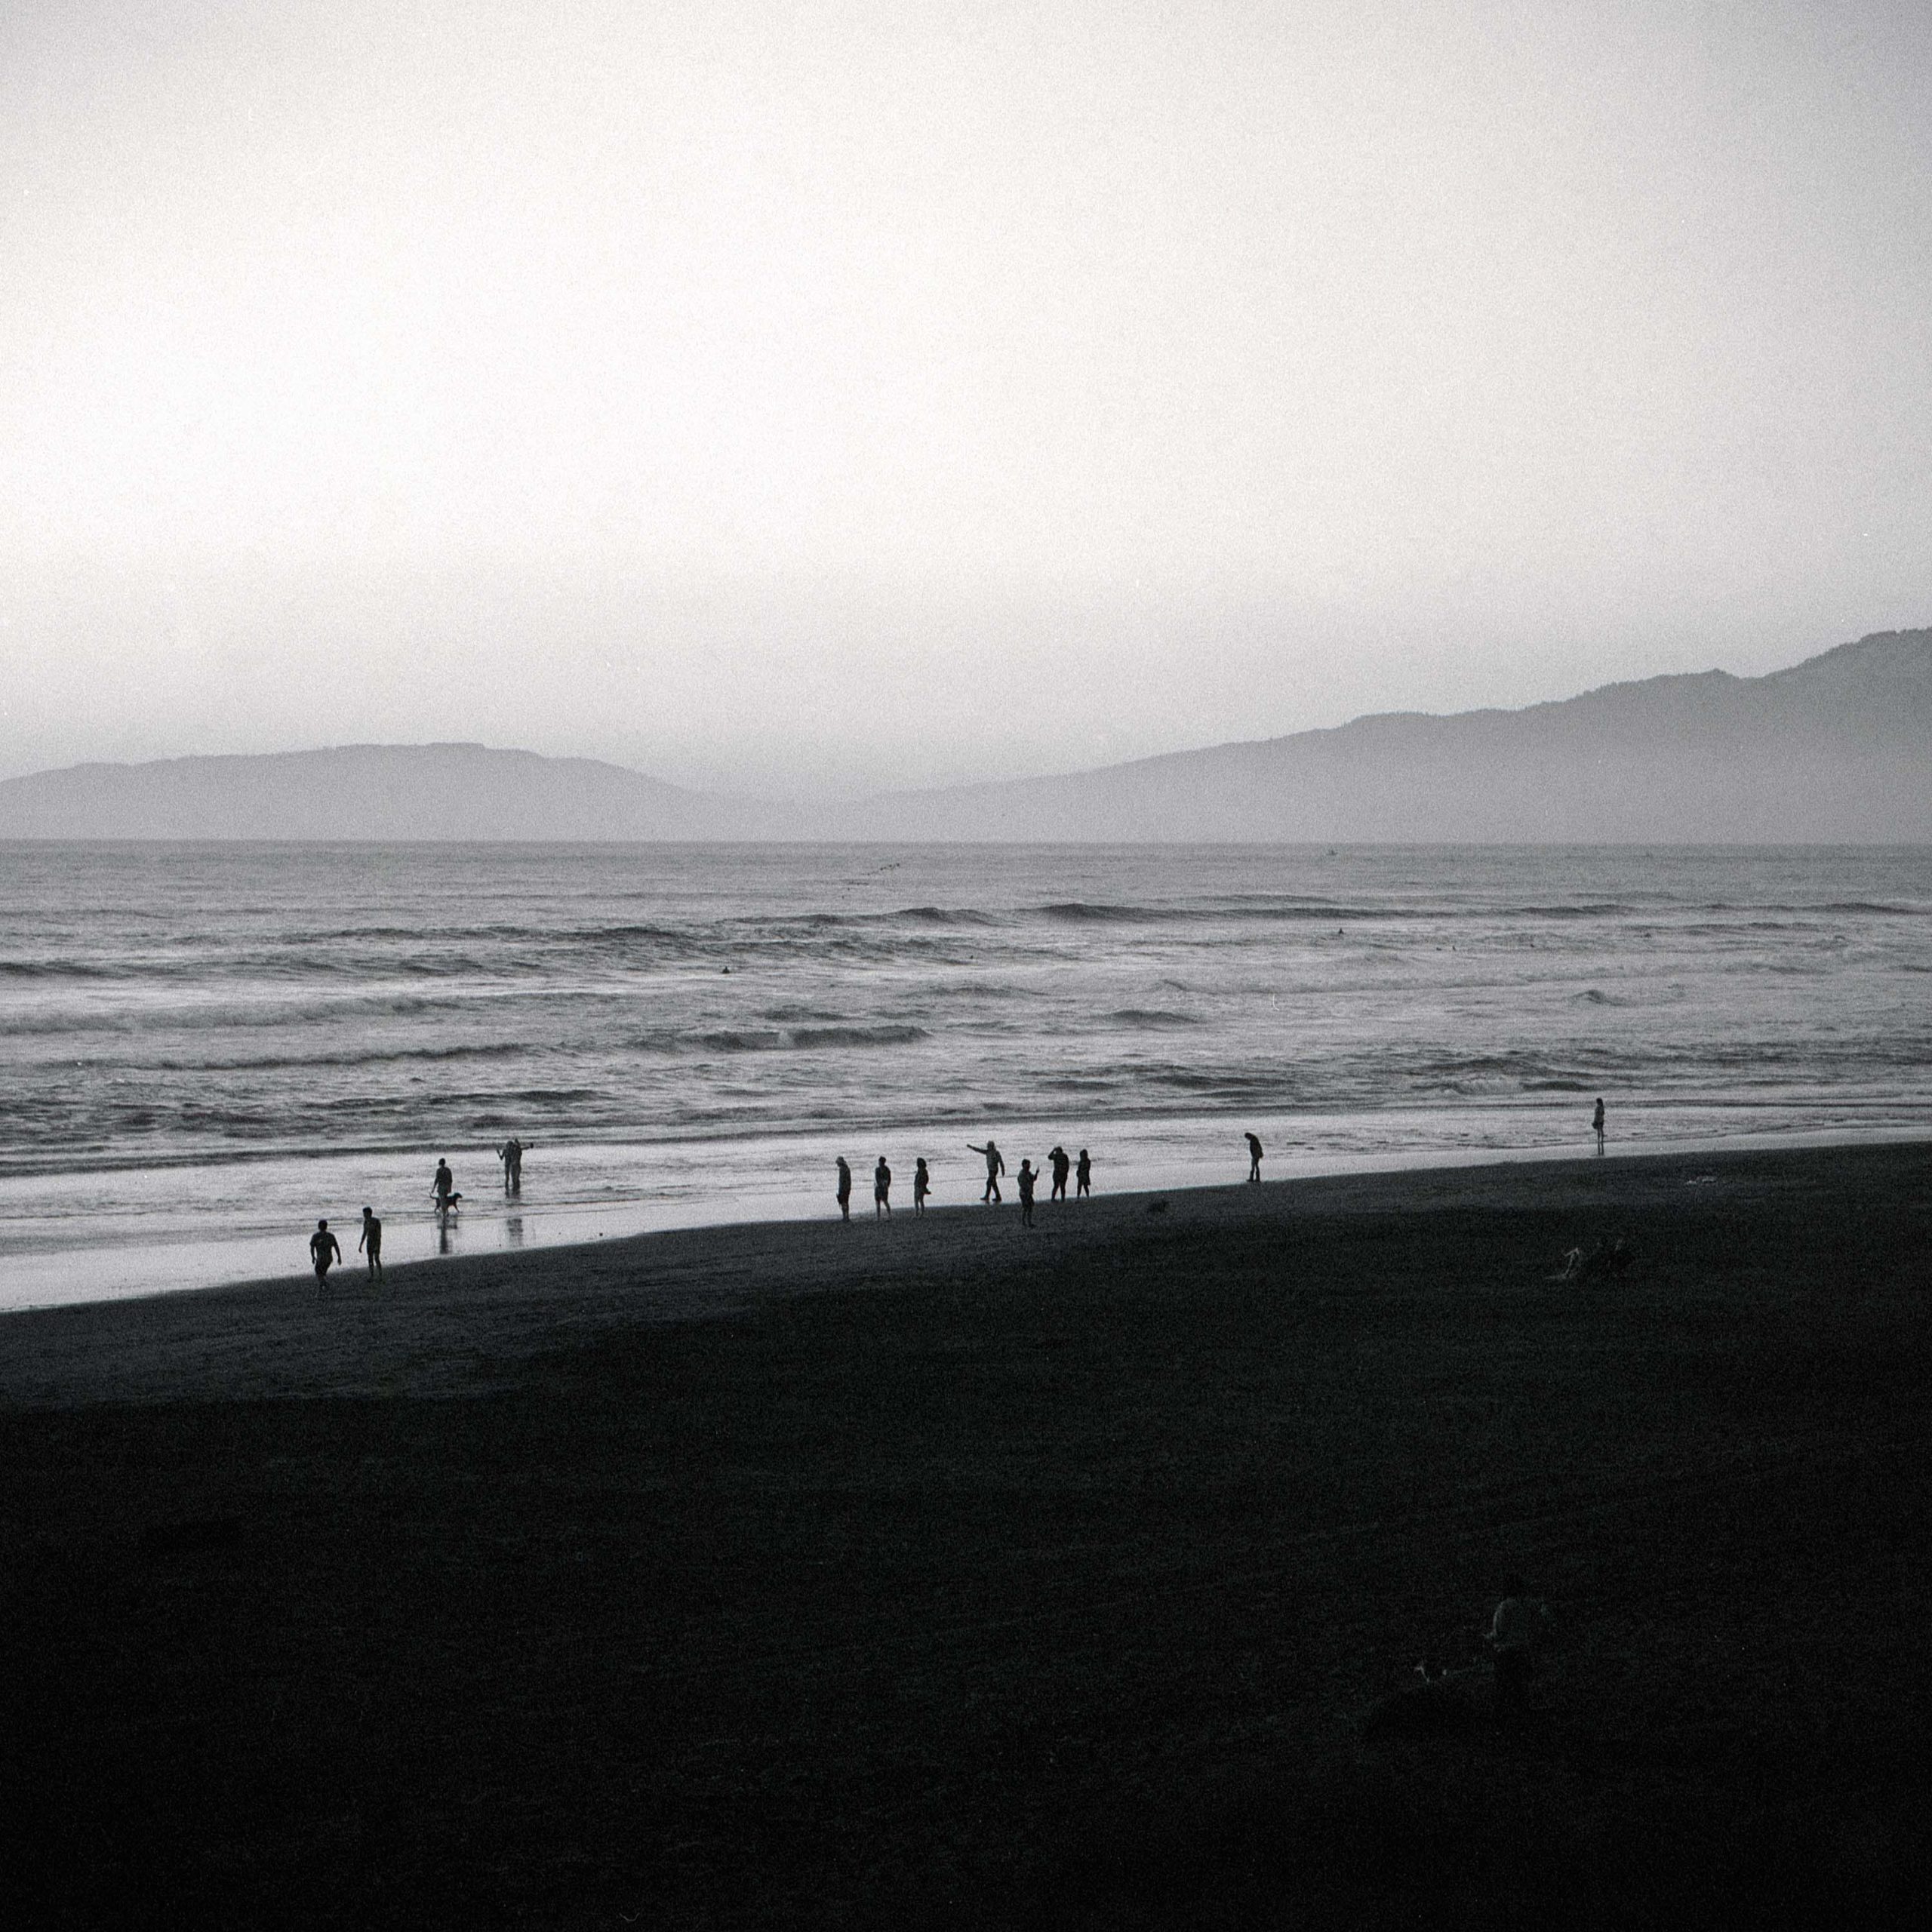
There is breadth, too, to accompany the beauty – far from being contained to preconceived themes or subjects, Abinav’s work is constantly surprising and reveals a deep curiosity and connection to his environment, spanning nature, landscapes, urban scenes, and architectural work, exploring deeply the relationship and experience that humans have with these environments and, ultimately, themselves.
Accompanying his photography, Abinav weaves in personal writings that work together in a profound and often haunting symbiosis, poking and prodding, urging you to internally reflect and respond.
It is impossible to ignore the sincere spiritual element of Abinav’s process – it is threaded through all of his output and I wanted to know much more of how he, as a creative, balances his art and his faith.
I am truly honoured to have been able to build a friendship, albeit confined to digital realms for now, with Abinav over the past few months and equally honoured that I am able to kick start this series of interviews with him.
We cover his upbringing between Nepal and India; how photography has become a spiritual practice; explore his process and the themes guiding his work; and reflect on personal struggles, resilience and connection.
I hope you enjoy the dialogue.
You can follow Abinav on Instagram here and view his website here.
1 - In The Beginning...
I’d love to, firstly, understand more about where you grew up and your younger years. Could you give a brief sketch of your early childhood?
I was born in Kathmandu, Nepal, but my foundational years were spent in Darjeeling, India, in a village called Mirik. My grandparents raised me in their home there, a time that deeply shaped who I would become.
Later, I moved to Darjeeling town to study, living with my grandmother from my father’s side and my aunt and uncle. There was a natural rhythm to life in those hills, even with the constant movement between Nepal and India throughout my childhood and teenage years.
While those early years weren’t always easy, living with different family members in different places, I can see now how each experience was gently preparing me for the path that would eventually unfold.
Are there remnants of these formative stages of life that you think still shape your creative vision/expression?
Growing up between Nepal and India, with all its challenges, profoundly shaped how I see the world. Those early hardships taught me something essential – that pain can be transmuted into beauty.
It’s an understanding that still informs how I approach both photography and writing today. What seemed difficult at the time was actually preparing me for this way of seeing and serving.
How did your journey with photography begin? Was there a specific moment or experience that you can remember feeling connected or drawn toward this medium?
My relationship with photography started in my younger years, playing around with my family’s point and shoot cameras.
There was something that felt so natural about it, like the camera was just an extension of myself. This early connection laid the foundation for what would later become something much deeper, though I couldn’t have known it at the time.
What drew you to film photography in particular, and how does it differ from digital photography for you on a personal and creative level?
Film photography feels like coming full circle for me. Growing up, I was surrounded by film cameras, often taking negatives to labs for my family to get developed.
Though I moved through different phases – digital cameras, iPhone photography – when I came to the U.S. and saw film was still very much alive, it felt like returning home in a way.
There was something so natural about coming back to it. The discipline of working with film creates a container that digital could never quite provide. It’s not about nostalgia – it’s about finding the right tool for this practice that’s become so much more than just photography.
Were there any artists, photographers, or specific life experiences that initially inspired your work?
The most profound influences have been life experiences themselves. Growing up between Nepal and India, along with the hardships I faced during those early years, fundamentally shaped my way of seeing.
Later, losing my grandparents, and not being able to be with them during their passing, completely transformed my relationship with photography.
While I appreciate and look at the work of photographers past and present, my path has been more about listening to what naturally moves through me. What guides the work now comes from a different source entirely.
2 - Photography as a Spiritual Practice
On a practical level, your daily photowalks seem to be an integral part of your creative process, but I’m also interested to uncover more about how this feeds into your own spiritual expression, too.
The morning walks have become a sacred time for me. It’s beautiful how photography and spiritual practice have merged into one flowing experience.
I don’t really think about taking pictures anymore – there’s just this natural rhythm of walking, seeing, and receiving what wants to be captured.
The camera has become a bridge of sorts, helping me translate moments of grace into something tangible that can be shared.
Can you talk about the connection between these walks, your photography, and engaging in your faith/spiritual practice?
These walks have become a form of direct communion with the divine. Each step, each frame, flows as part of an ongoing conversation.
The practice isn’t separate from spiritual life anymore – they’ve become one seamless experience where I serve as a channel for whatever needs to be expressed through both image and word.
I’ve seen you describe your photography as a contemplative practice. How does this mindfulness influence the way you approach both taking a photo and reflecting on it afterward?
When I’m out there with my camera, there’s this state of complete presence where the understanding comes right in the moment.
The image and its meaning arrive together – not something I need to figure out later. It’s more like being part of a flowing conversation happening through light and shadow.
Ultimately, do you see photography as a form of meditation? If so, how does it help you connect with yourself and the world around you?
What began as photography has evolved into something far deeper – a way of being in complete communion with the present moment.
Everything flows as one continuous movement, where each image that wants to be captured comes through with its own perfect timing.
Do you ever feel that the camera presents a barrier or a blockage between you and the world around you? I’ve been reading Susan Sontag’s “On Photography” recently which has led me to reflect on this question.
No, quite the opposite actually. The camera has become a way of deepening my connection with everything around me. It’s not about capturing or taking something – it’s about being in complete communion with the moment.
When I’m out there, there’s no separation between photographer, camera, and what’s being photographed. It all becomes one flowing experience of divine grace moving through.
3 - Exploring the Themes at Play
Your work explores the “interplay of light and shadow” - Is there something about this interplay that resonates with you, both visually and emotionally?
Black and white photography strips everything down to this dance between light and shadow.
There’s such profound truth in that interplay – how you can’t have one without the other, how shadow helps define light and light gives meaning to shadow. It’s become a way of understanding life itself, seeing how every experience creates depth and meaning.
How do you choose your subjects or locations? Do you find that your surroundings reflect your inner state at the time of shooting? Do you feel your subjects choose you?
I don’t really choose at all. There’s this beautiful guidance that leads me exactly where I need to be.
Sometimes it’s a quiet street corner, other times it’s an open landscape. The images themselves ask to be captured – it’s more about being available to receive them than deciding what to photograph.
I have read in your own biography that you feel exploring human interaction with nature is at the core of your work. How has this theme evolved for you over time, and what do you hope people take away from it?
What began as documenting the visible relationships between people and their environment has evolved into something deeper – a way of witnessing how grace moves through both natural and built landscapes.
Through this practice, I’ve come to see how everything – nature, architecture, human presence – participates in one flowing conversation. It’s all part of our collective journey toward understanding and connection.
4 - Your Artistic Process
Your dedication to, and championing of, black and white film is inspiring. What do you find most rewarding about working in black and white?
Working in black and white creates a beautiful simplicity that allows truth to emerge more clearly.
Without the distraction of color, the essence of each moment becomes more apparent. It’s not about removing something from the image, but rather about creating space for deeper meaning to come through.
Do you think the absence of colour enhances your focus on any element of composition such as light, texture, mood, etc?
The absence of color creates a direct pathway to the fundamentals of seeing – the way light plays across a surface, how shadows define form, the subtle textures that might otherwise go unnoticed.
It strips away the obvious and reveals something more essential about each moment.
Do you think anything is lost in capturing in black and white? Alternatively, do you think something additional is found?
Nothing is lost – rather, something deeper is revealed. Black and white photography helps distill moments to their essence.
It’s like how poetry can sometimes express truth more clearly than prose. The limitation actually opens up new possibilities for seeing and understanding.
What role does patience play in your process, from choosing the right moment to shoot to developing your film?
Patience has taken on a different meaning now. It’s no longer about waiting for the right moment – it’s about surrendering to divine guidance.
When I trust this guidance completely, amazing scenes orchestrate themselves. The key lies in being patient enough to let grace work through you, to wait until you’re clearly shown what needs to be captured. It’s more about receptivity than traditional patience.
5 - Personal Struggles, Resilience, and Connection
I have previously described your writing as “haunting and personal” - often dealing with themes of real personal struggle, seeking out purpose and healing, an emergence of sorts from real darkness. Could you elaborate on how your own struggles have shaped your photography and artistic expression?
Life’s challenges have been profound teachers. Particularly losing my grandparents, and not being able to be with them during their passing, completely transformed my relationship with photography and writing.
These experiences weren’t punishment but preparation. They taught me to recognize pain in others, to offer light from a place of genuine understanding.
Can you talk a bit about your writing and photography as a dialogue? How do these two forms of expression inform each other? Do you write from photographs or photograph from writing? How do these expressions interact?
The writing and photographs come from the same source. Sometimes words arrive with an image, other times they come on their own.
I’ve learned not to question or analyze it too much. My role is simply to remain open and allow both forms to move through me in service of whatever needs to be expressed.
Do you feel that expressing this pain through your art helps engage a healing process? Has photography helped you navigate or reflect on these in a deeper way?
The practice itself has been transformative. What began as personal experience has opened into something much larger – a way of serving others through both images and words.
Every challenge has become preparation for deeper understanding and service.
What role has photography played within the context of your journey to the US? Have you found your work has acted as a means to engage within this new community or overcome barriers faced when moving to a new environment?
Photography became my way of finding stillness in transition. Through these daily walks and moments of seeing, the Bay Area has become more than just a place – it’s woven itself into the fabric of my practice, into my way of being. These streets and hills have become intimate companions in this journey.
This practice has drawn beautiful souls into my path. Being an introvert, I find that true connection happens in those deeper spaces where hearts meet in genuine understanding.
How do you hope your work resonates with viewers on a personal or emotional level? What do you hope we take away from the experience of viewing your photography and reading your reflections?
I try not to have specific hopes about how people will receive the work. I trust that each image and word will find exactly who needs it, when they need it. The divine knows better than I do who needs what and when.
6 - The Future, Whatever That Means…
Looking back on your journey, what would you say are the most significant ways your relationship with photography has evolved?
The transformation has been profound, especially recently. What began as a simple love for photography transformed into something I never could have imagined.
Looking back, I’m in awe of how completely different my relationship with photography is now. It’s become a form of divine communion, a way of serving others through both photographs and words.
Do you have future projects or themes you’d like to explore in your photography or writing?
I don’t really plan projects anymore. I’ve learned to trust the guidance that moves through me. Each day brings what needs to be expressed. Right now, I’m working on a book that came through in the same way – not something I planned, but something I was led to share.
What advice would you give to photographers who are just beginning their own creative journeys, especially those who want to find deeper meaning in their work?
Stay true to what genuinely calls to you. Whatever practice speaks to your heart, approach it with dedication and openness. Allow it to teach you, to shape you. You might be surprised where it leads.

My Best Film Photos from 2024 - A Year in Review
12 of My Favourite Film Photos from 2024
Quick Summary
This is a reflection on the one of most important years of my life, creatively speaking – in the summer of 2024 I picked up my film camera and didn’t look back. Over 100 rolls of film later, here are some of my favourites, alongside the story behind the shot.
Some of these are the best photos I took technically – others just mean more to be for other reasons.
These are in no particular order. I truly hope you enjoy them.
1 - Take a Seat.
This photo, for me, reflects the idyll peace offered by the innumerable churches scattered across the Città Alta, Bergamo.
This particular shot is from Sant’Andrea, or church of St Andrew the Apostle, a neoclassical church built in 1837 that appears seemingly out of nowhere as you stroll down Via Porta Dipinta.
As someone exited the church doors, a stream of perfect light poured into the space and I felt compelled to capture that scene.
Camera: Pentax SFXn
Lens: SMC Pentax-DA 50mm F1.8
Film: Kodak Gold 200
2 - Sant'Agostino Gate
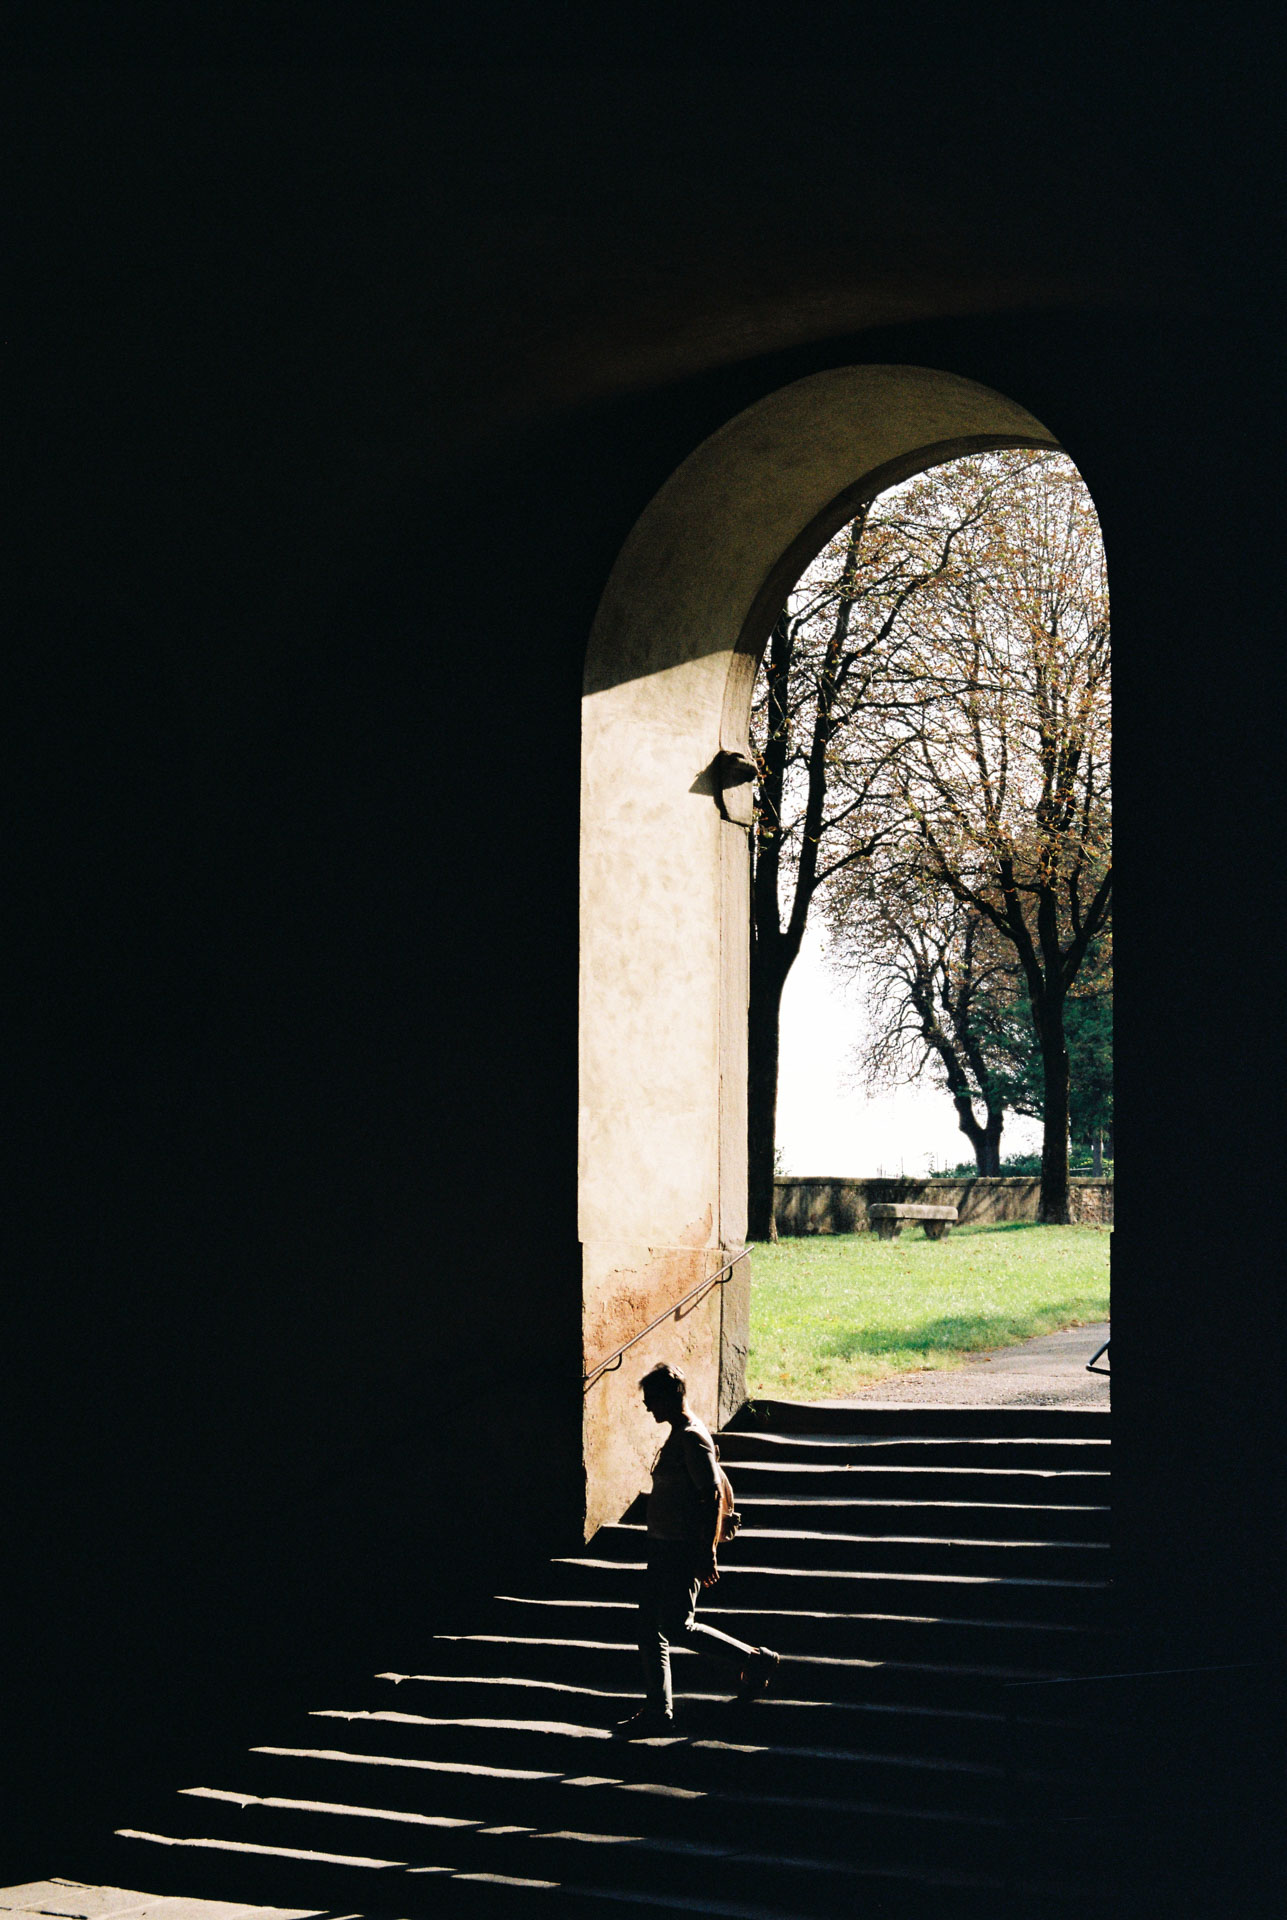
I think this may be one of my favourite photographs I have ever taken.
It is one of those rare, rare times where the final shot and the vision in my head were matched perfectly and I cannot tell you the feeling of shock and excitement getting this back from the lab.
This was taken as I entered the Sant’Agostino gate for the first time – built in 1575, this is the main entrance to reach the old town, or Città Alta, from the lower town of Bergamo.
As I turned to speak to my girlfriend I saw this stairway and arch on the opposite side of the gate, praying that a lone subject would walk down it in time for me to get my camera sorted.
The stars aligned with this one for sure.
Camera: Pentax SFXn
Lens: SMC Pentax-DA 50mm F1.8
Film: Kodak Gold 200
3 - The Way Up!
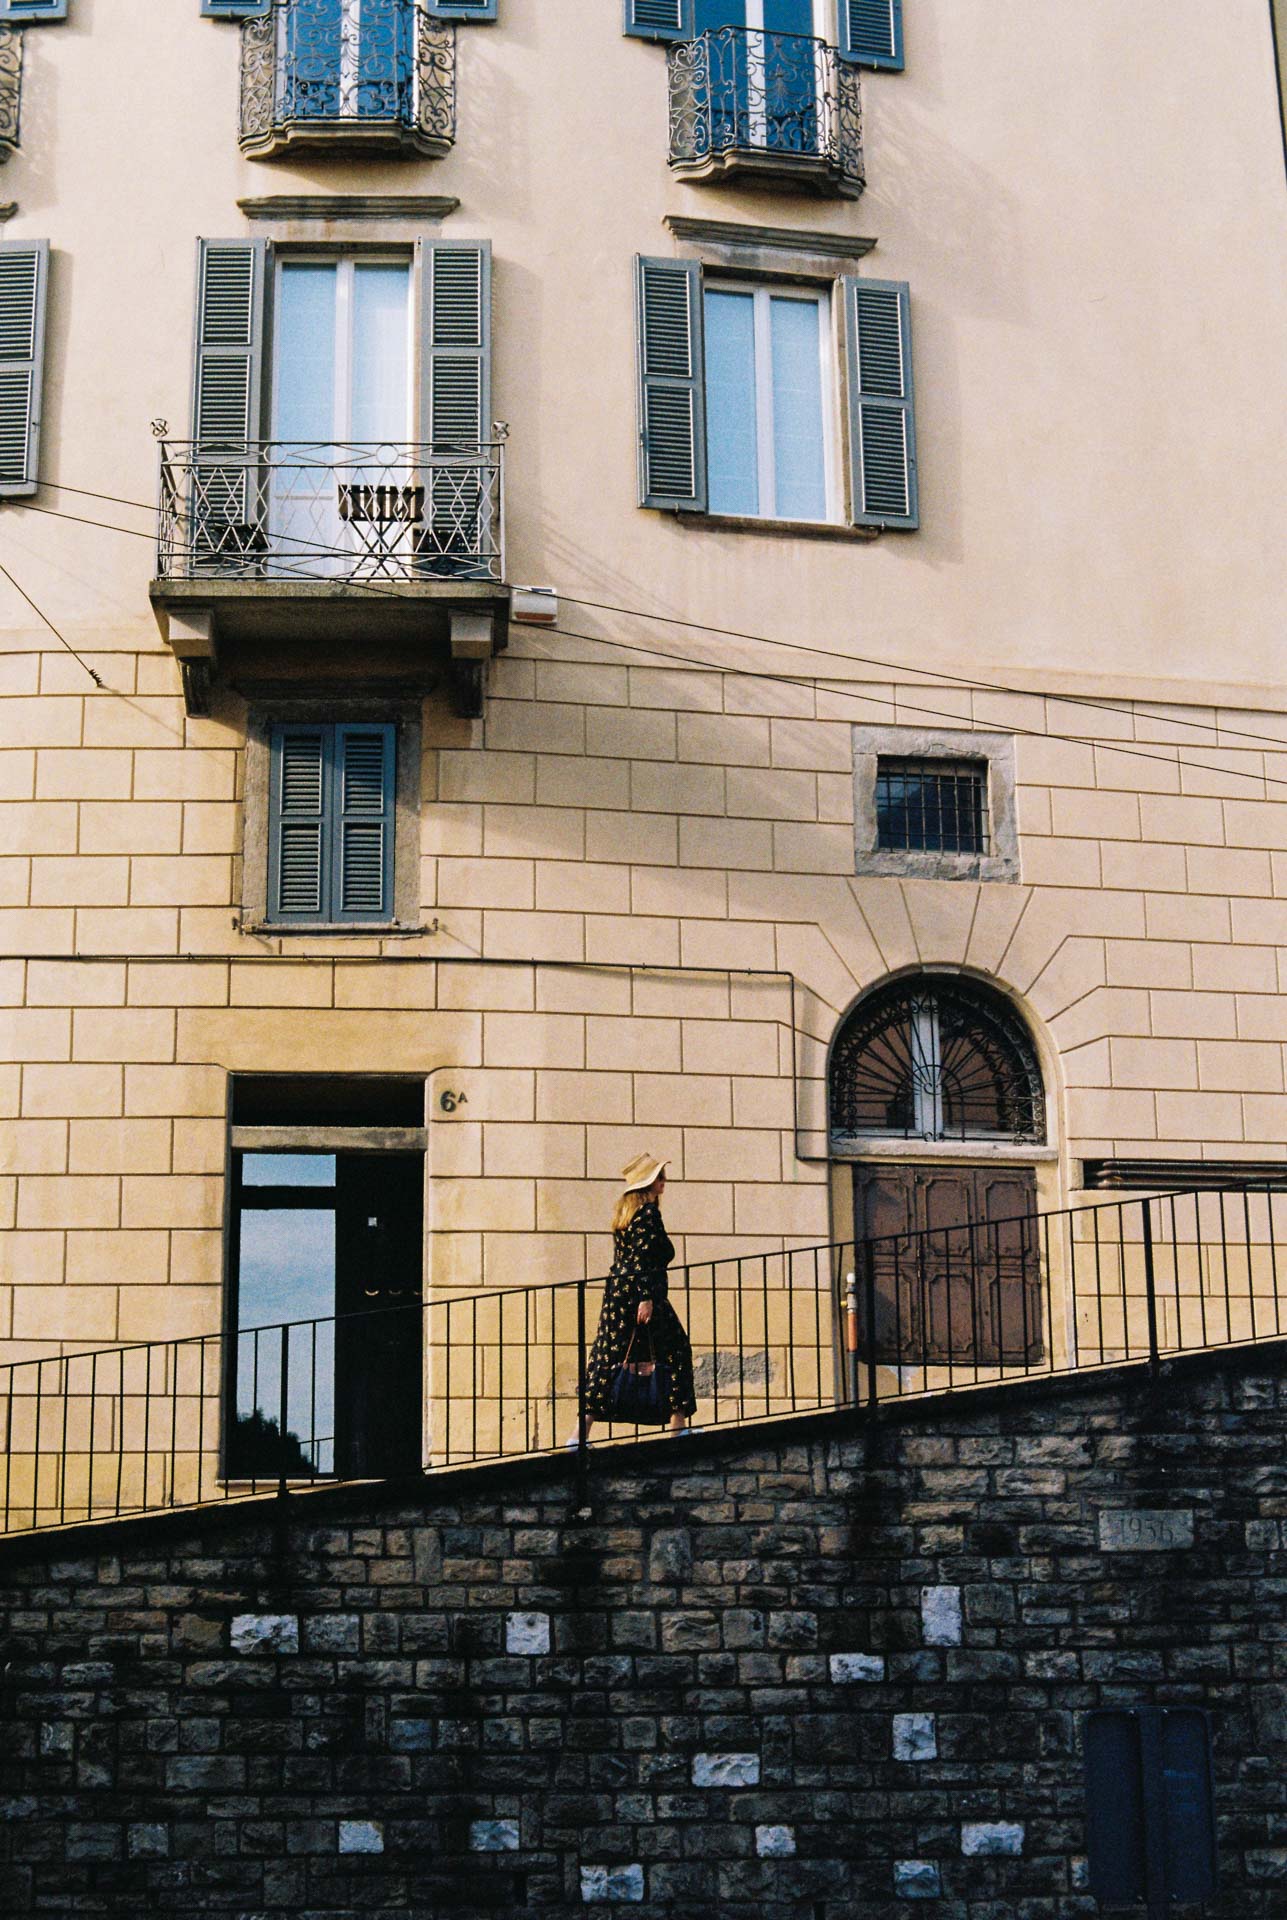
A short walk up from Sant’Andrea, on Via Porta Dipinta, I noticed a sloping walkway out of the corner of my eye.
It was an incredibly busy summer’s day in Bergamo, and as I looked at the composition of the scene I found myself wishing for a clear shot and a lone subject, already aware that might be impossible given the heaving, bustling streets.
However, a minute later there was a natural lull in footfall on the little stretch we were on, and just before a large group of tourists came into shot I managed to snap this and get exactly what I asked for!
Camera: Pentax SFXn
Lens: SMC Pentax-DA 50mm F1.8
Film: Kodak Gold 200
4 - Taking Refuge
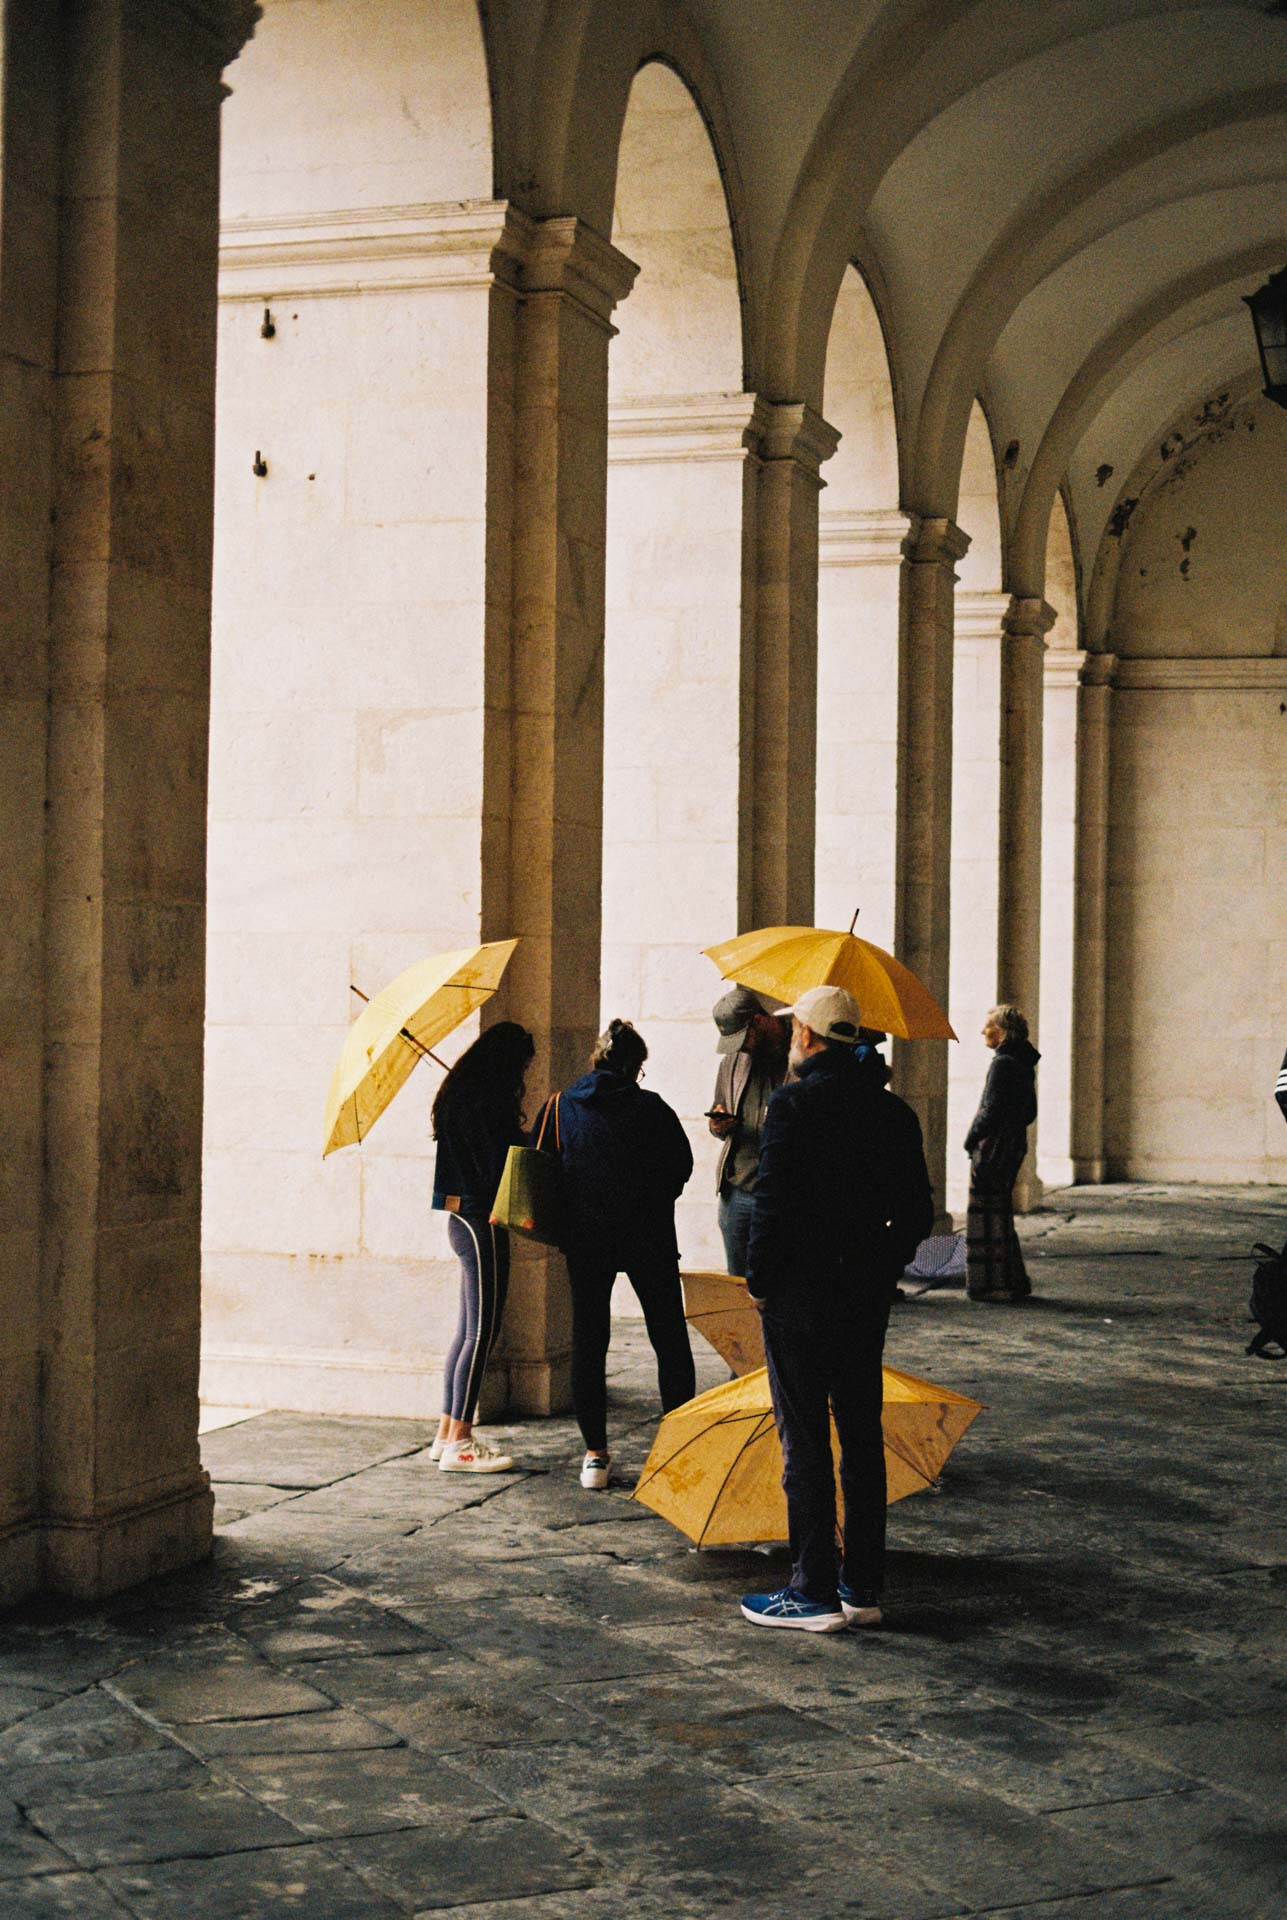
On one of our last days in Bergamo, the rain fell heavily and seemingly out of nowhere.
We had just experienced the wonders of the Duomo, and as we left the giant cathedral doors the heavens opened.
Running across the Piazza Vecchia, we took refuge under the white marble façade of the Palazzo Nuovo, a library and town hall that took over three centuries to finish building.
As we dried off and waited for the rain to calm, a group with matching yellow umbrellas arrived to do the same, providing a very cool opportunity for a shot!
Camera: Pentax SFXn
Lens: SMC Pentax-DA 50mm F1.8
Film: Kodak Gold 200
5 - Deck Chairs and Blue Skies
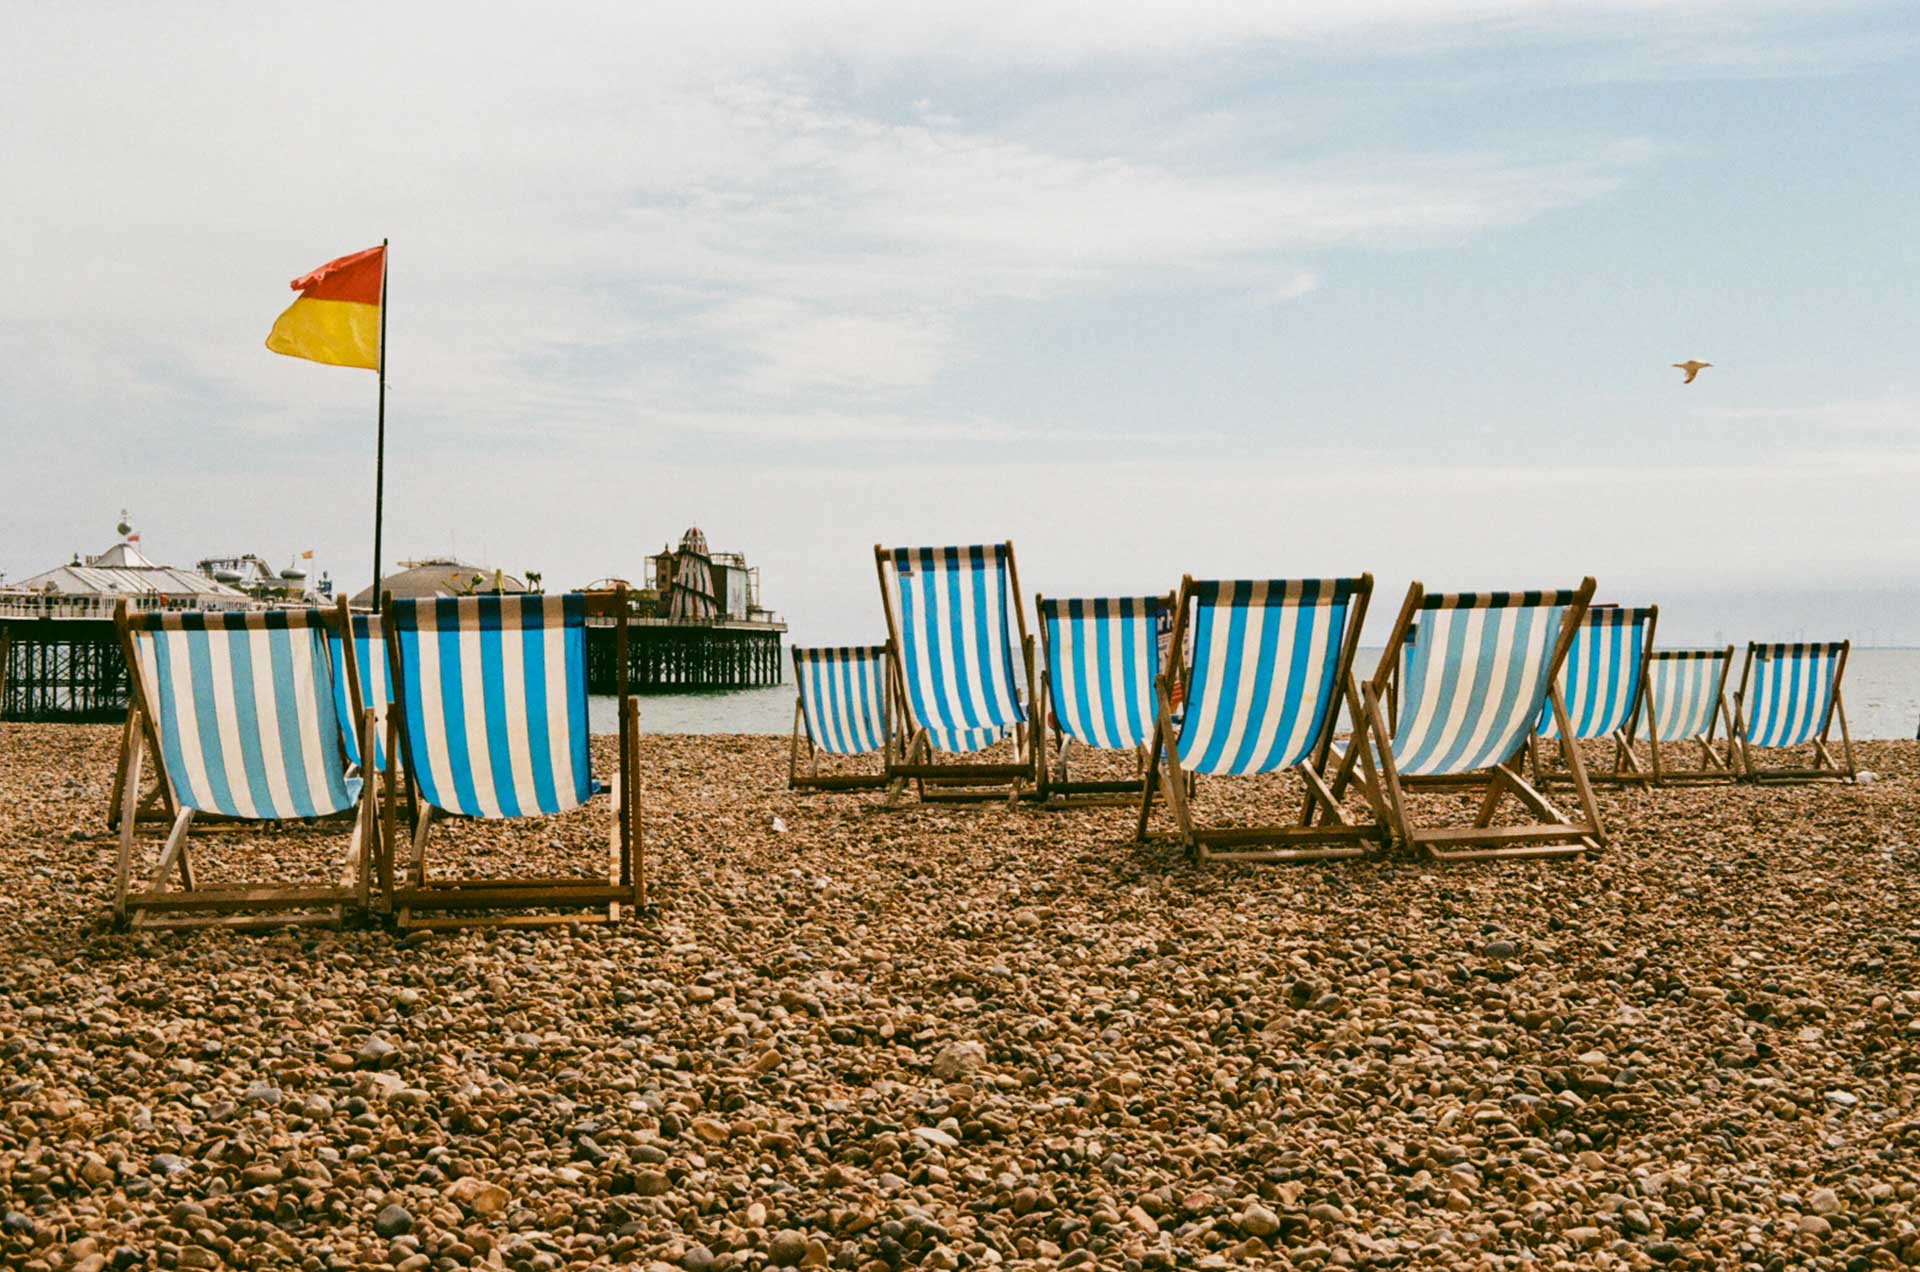
There’s not too much to say about this one other than it captures a wonderful day out visiting our good friend Bella at her home in Brighton.
Beautifully sun, calm waters and warm, smooth pebbles to make a bed of. I even got lucky with a seagull flying into shot!
Camera: Pentax SFXn
Lens: SMC Pentax-DA 50mm F1.8
Film: Kodak Gold 200
6 - Enjoy the View
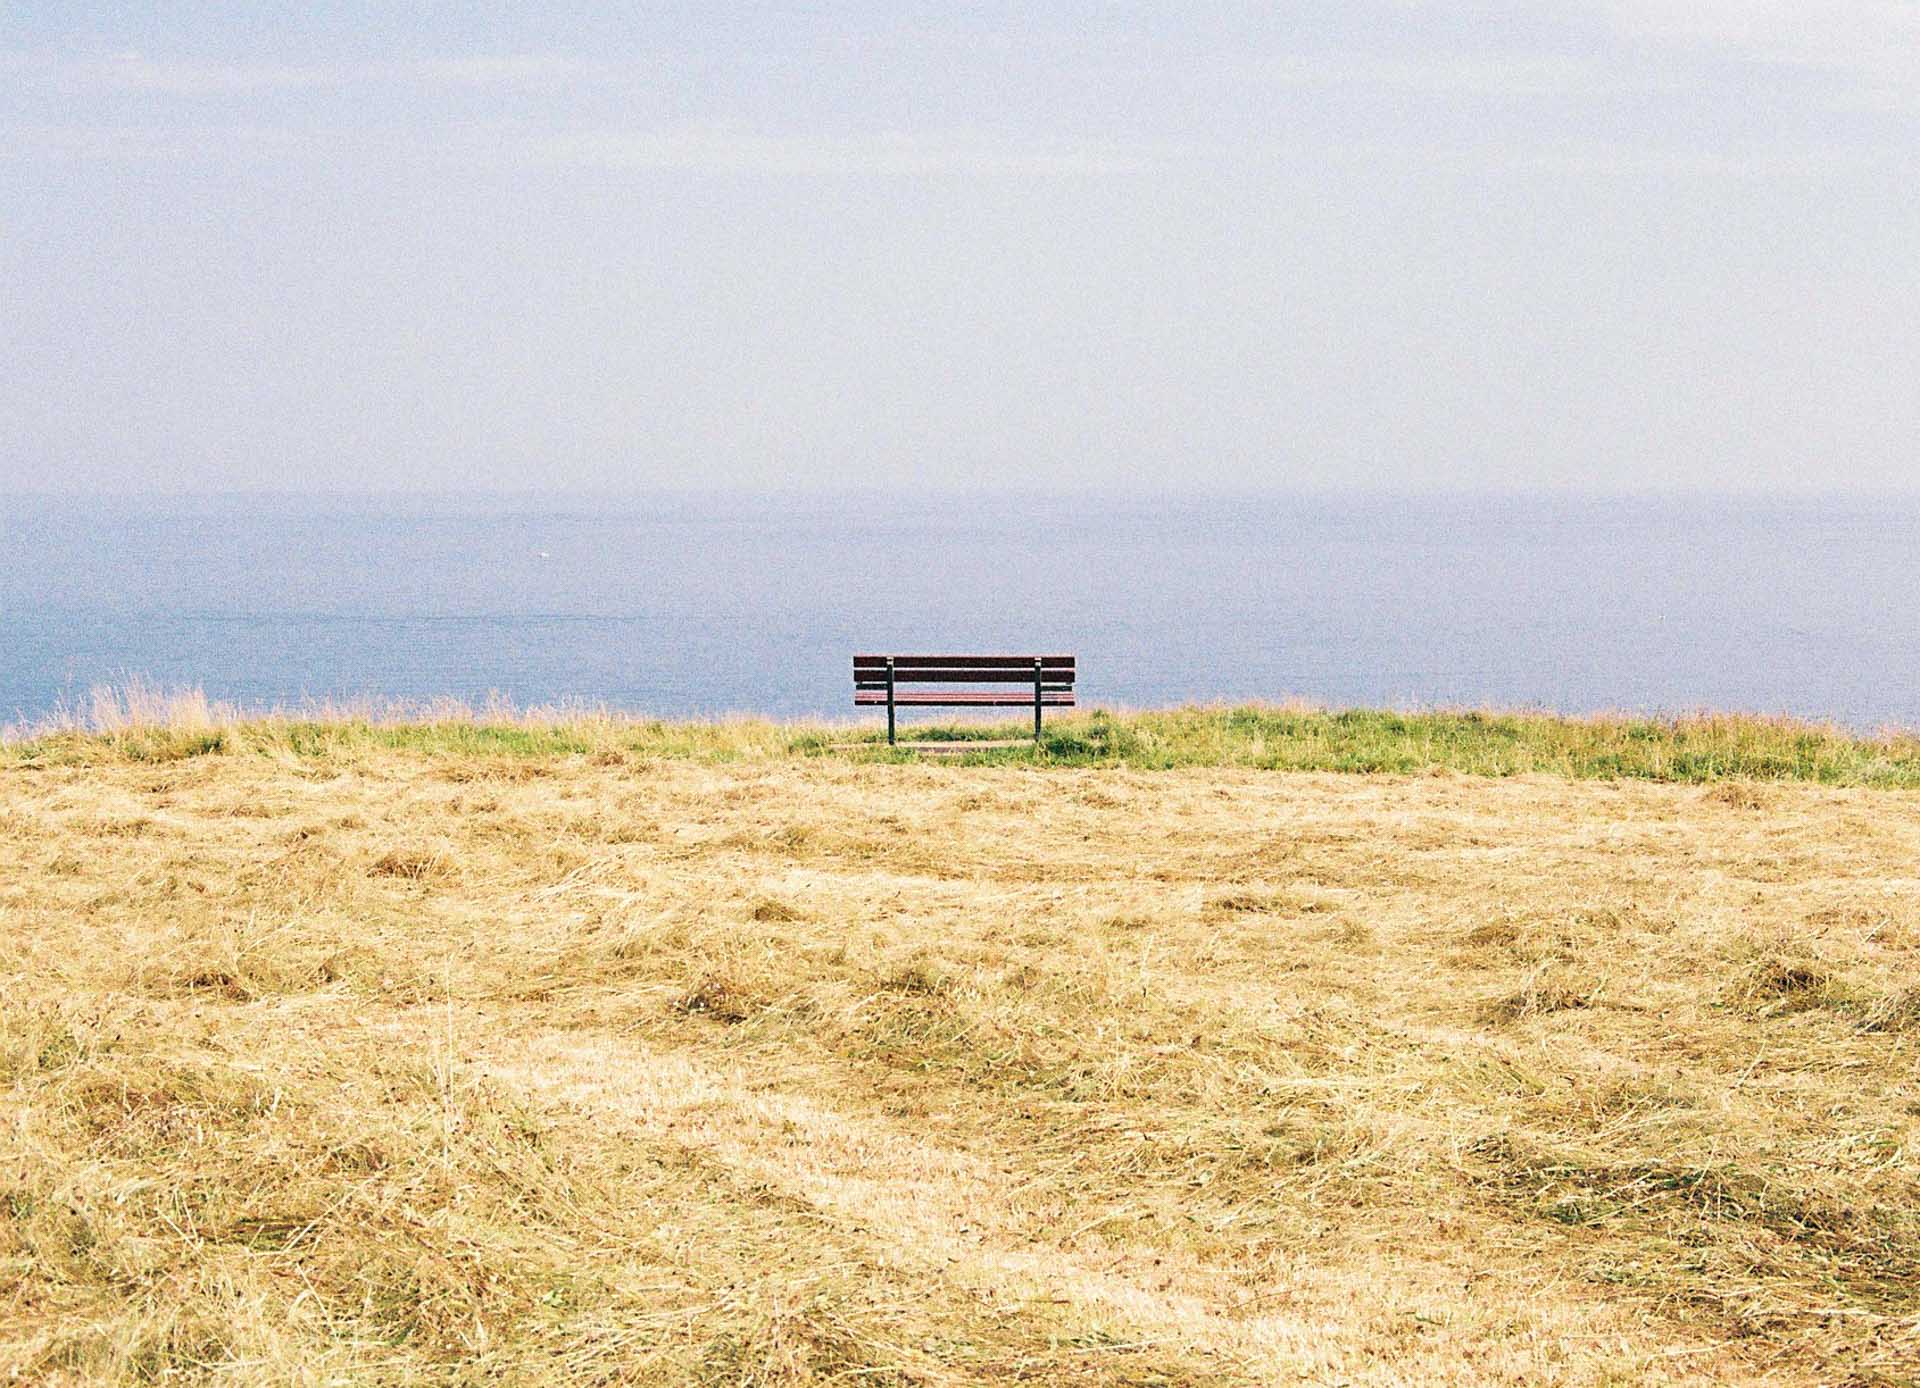
This was one of the first shots I took after committing to shooting on film all summer.
We were in Fowey, Cornwall, experiencing some rare and much appreciated British sun. I had packed my gear and walked through Readymoney Cove, heading up above St Catherine’s Castle and onto the South West Coast Path.
As I neared the end of the initial ascent I was greeted with a truly blessed view – sunshine and blue water as far as I could see. I sat on this bench for a moment and drank in how lucky I was.
I took this picture shortly after, and I think it perfectly captures the serenity of that place.
You can see more of my shots from Cornwall, here.
Camera: Pentax SFXn
Lens: SMC Pentax-DA 50mm F1.8
Film: Kodak Gold 200
7 - Hugh Wedderburn
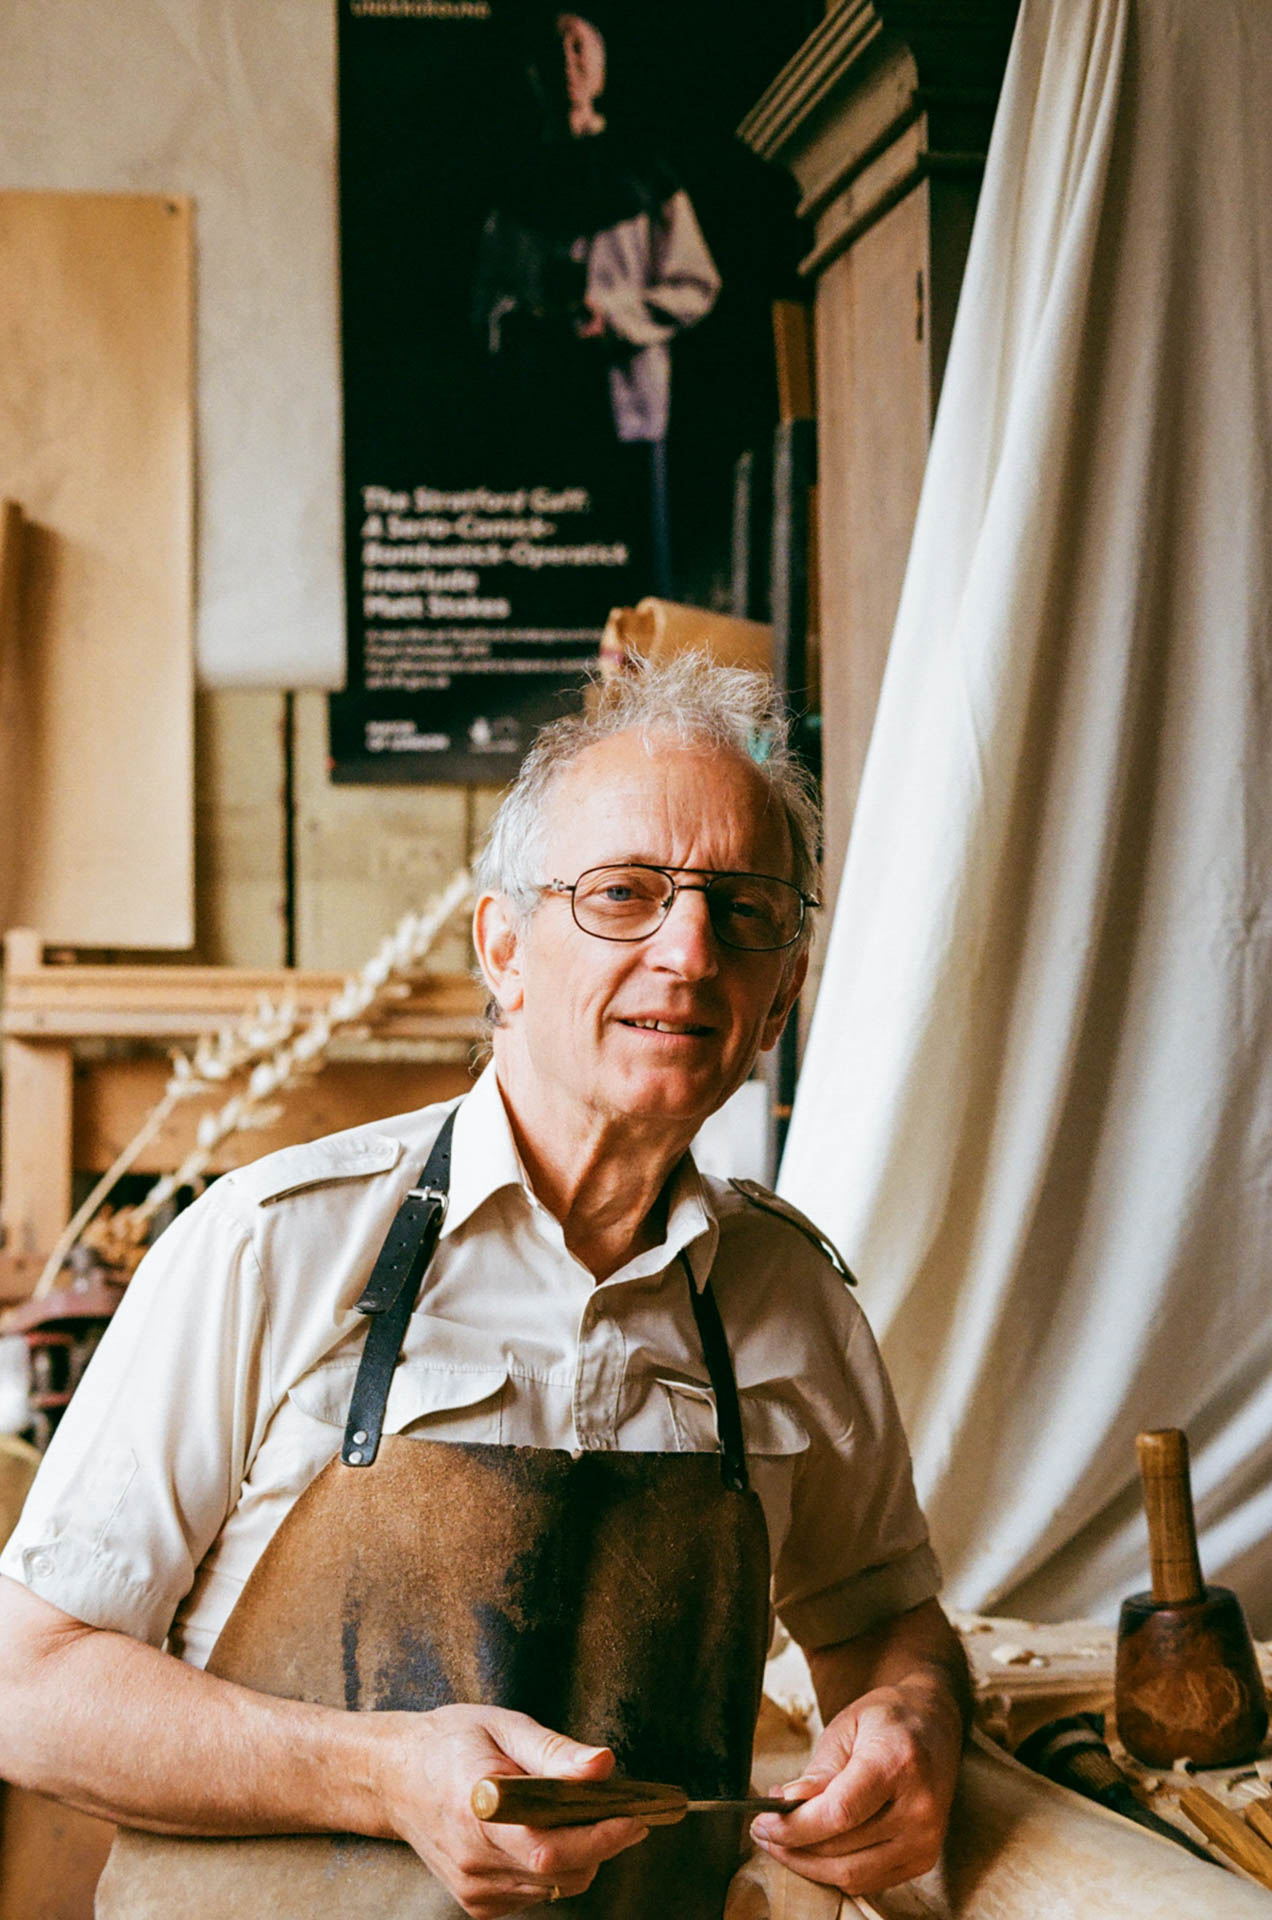
This portrait marks a real moment in time for me, where I pushed myself out of my comfort zone to pursue a photography project.
I was spending a couple of weeks in London around the Borough Market area and, whilst surveying the local area on a morning walk, had stumbled across a beautiful and intriguing scene…
Through large sunlit windows I could see a workbench covered in wood shavings; tools of all shapes and sizes lined the walls; painted and sketched ornate design plans scattered across a desk; and in the far end, lingering in shadow, oddly shaped sculptures.
As I walked away I thought to myself that I would love to be able to shoot in there.
The thought stuck. When I returned back in the evening I sat with my laptop and attempted to find out what this workshop was for and, more importantly, who ran it.
After some digging, I came across Hugh Wedderburn – a master wood carver, and I was determined to do something I’d never done before and reach out to this stranger.
I wrote a letter and posted it through the letterbox. Two days later, I was in the workshop with two rolls of film, bumbling and nervous, watching a true master at work.
Here is the full gallery, if you’re interested!
Camera: Pentax SFXn
Lens: SMC Pentax-DA 50mm F1.8
Film: Kodak Gold 200
8 - Morning Mist at Fowey Harbour
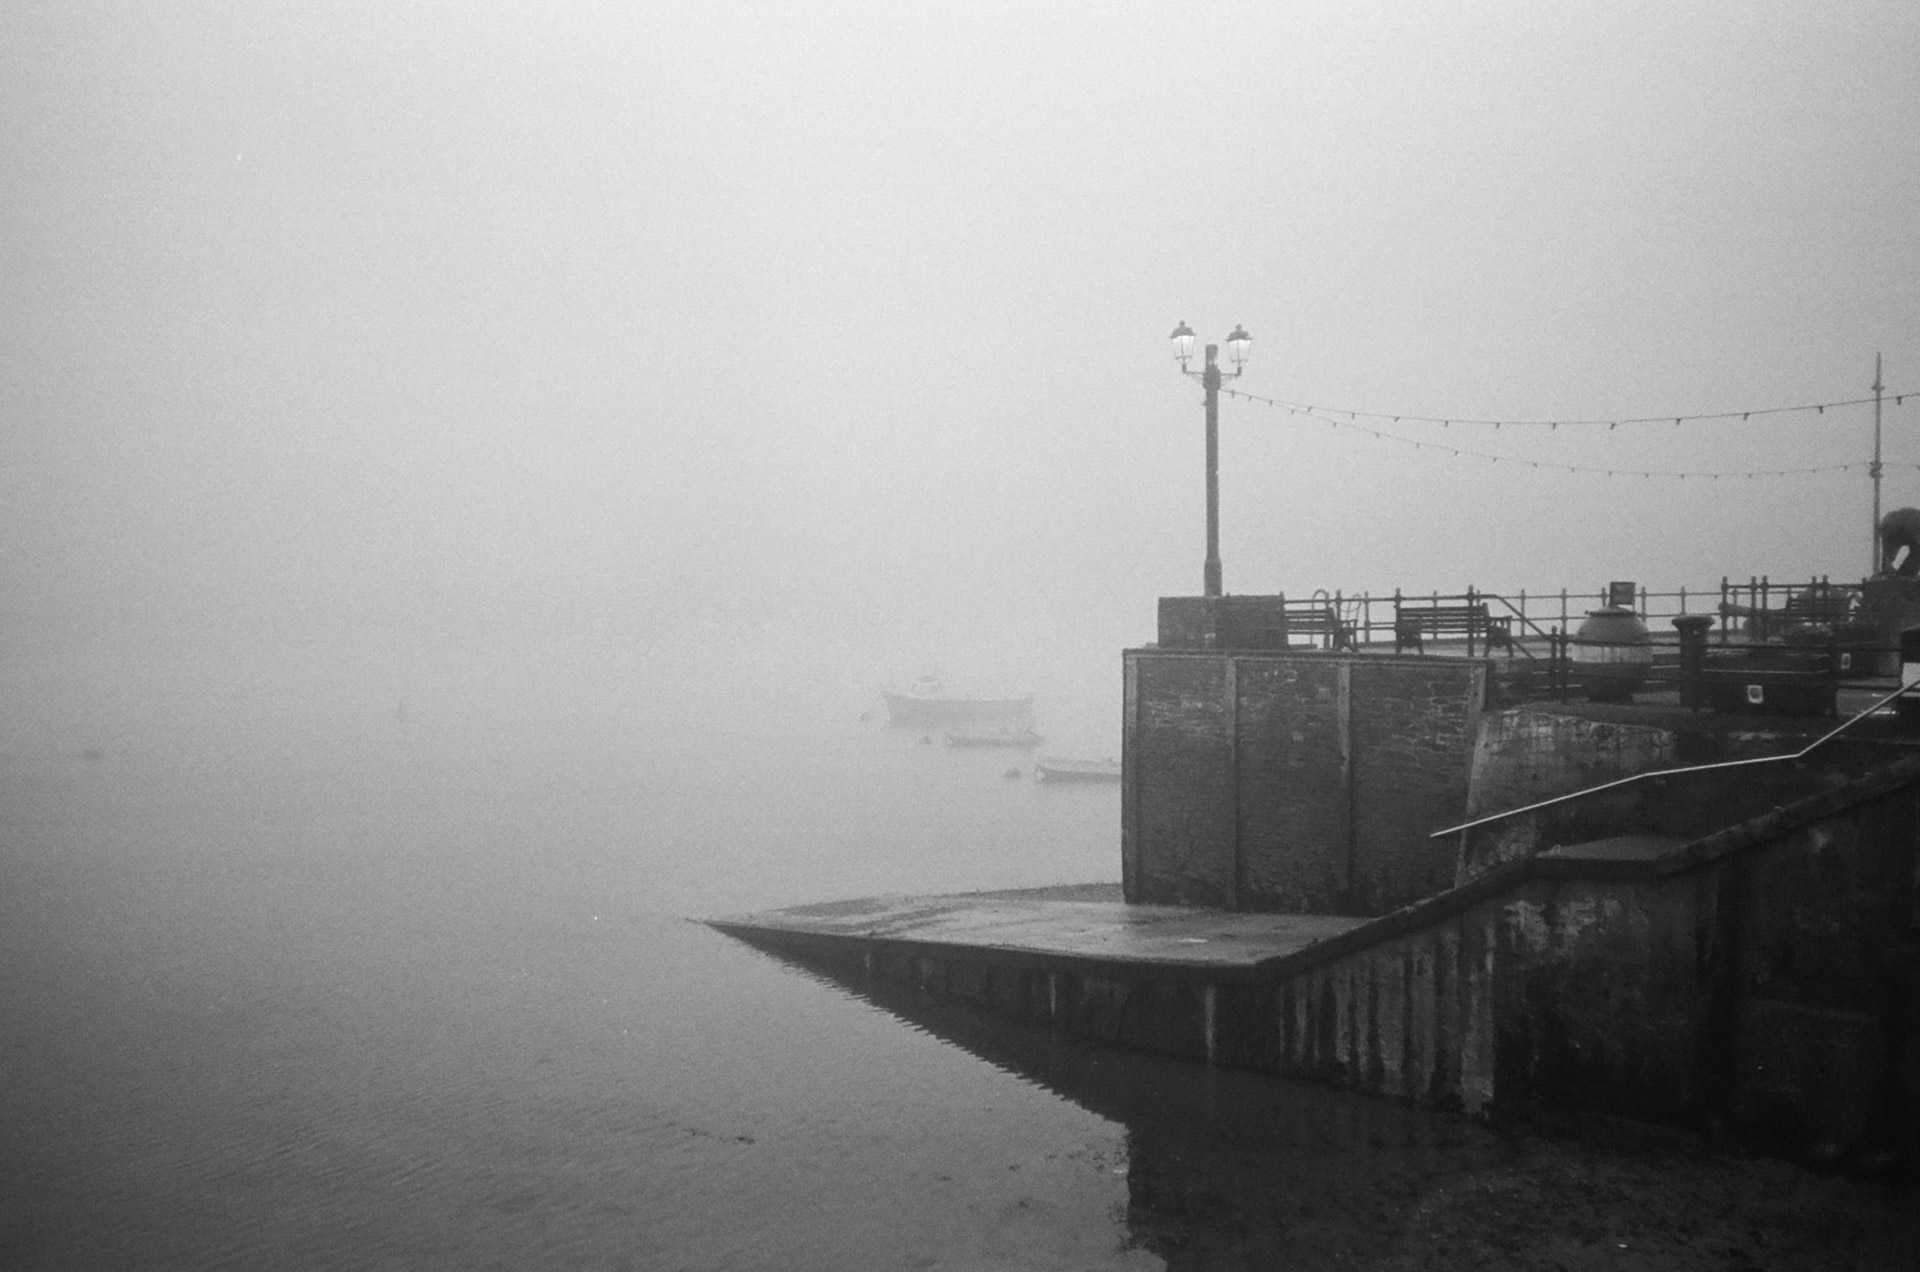
This photo was recently featured on Domino Film Photo’s “Behind the Photo” series alongside the following caption:
“The night before this photo was taken I told my girlfriend that I had reached a point where I felt I had to pour myself fully into my photography.
I could not explain why – I just knew.
At 5.00am I awoke, grabbed my camera and walked, alone, around the scenic village of Fowey, Cornwall.
As I neared the harbour the village was swallowed by a thick shroud of sea-mist. I sat for a while in that cosmic blanket, freezing, listening to water I couldn’t see, content that I was embarking on a journey of real personal significance.
I waited until the first dregs of sunlight summoned the courage to appear and took this photo. The first of many, many more from a Summer that changed my life.”
Camera: Pentax SFXn
Lens: SMC Pentax-DA 50mm F1.8
Film: Ilford HP5 Plus 400
9 - Three Fishermen

I was lucky enough to head to the Italian Lakes toward the end of my time in Bergamo, and we spent a full day exploring the delights of Lecco.
Whilst walking around the perimeter of the lake, I was struck by a golden statue of Saint Nicolas, the patron saint of Lecco and protector of sailors and boatmen, standing tall amidst the waters.
Next to him, a small boat idled over and they began to fish the waters. Beyond the obvious Christian symbology of fish, fishing, and the Ichthys, I thought the scene was visually stunning.
Camera: Pentax SFXn
Lens: SMC Pentax-DA 50mm F1.8
Film: Kodak Gold 200
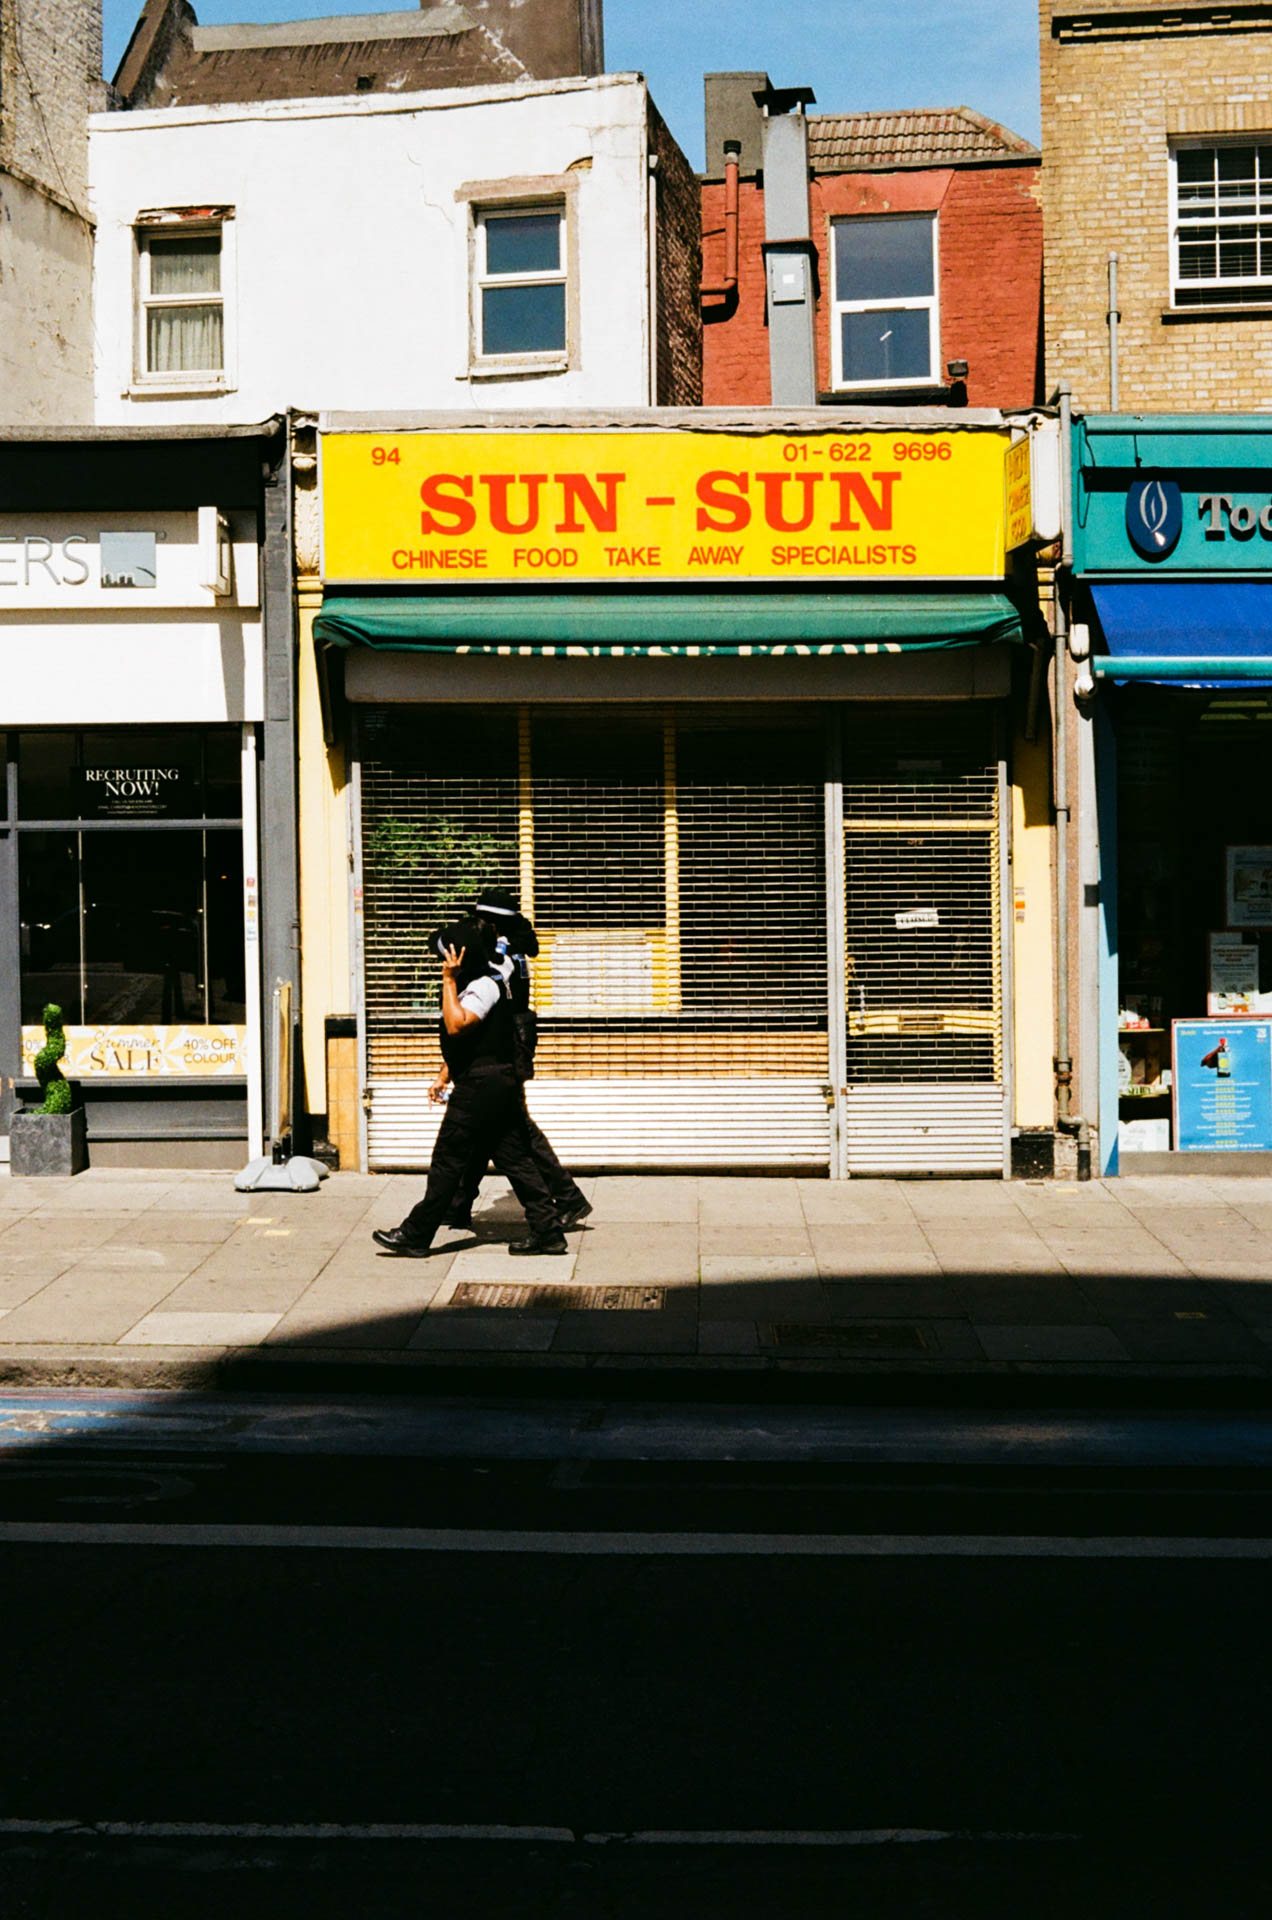
10 - Heading Somewhere
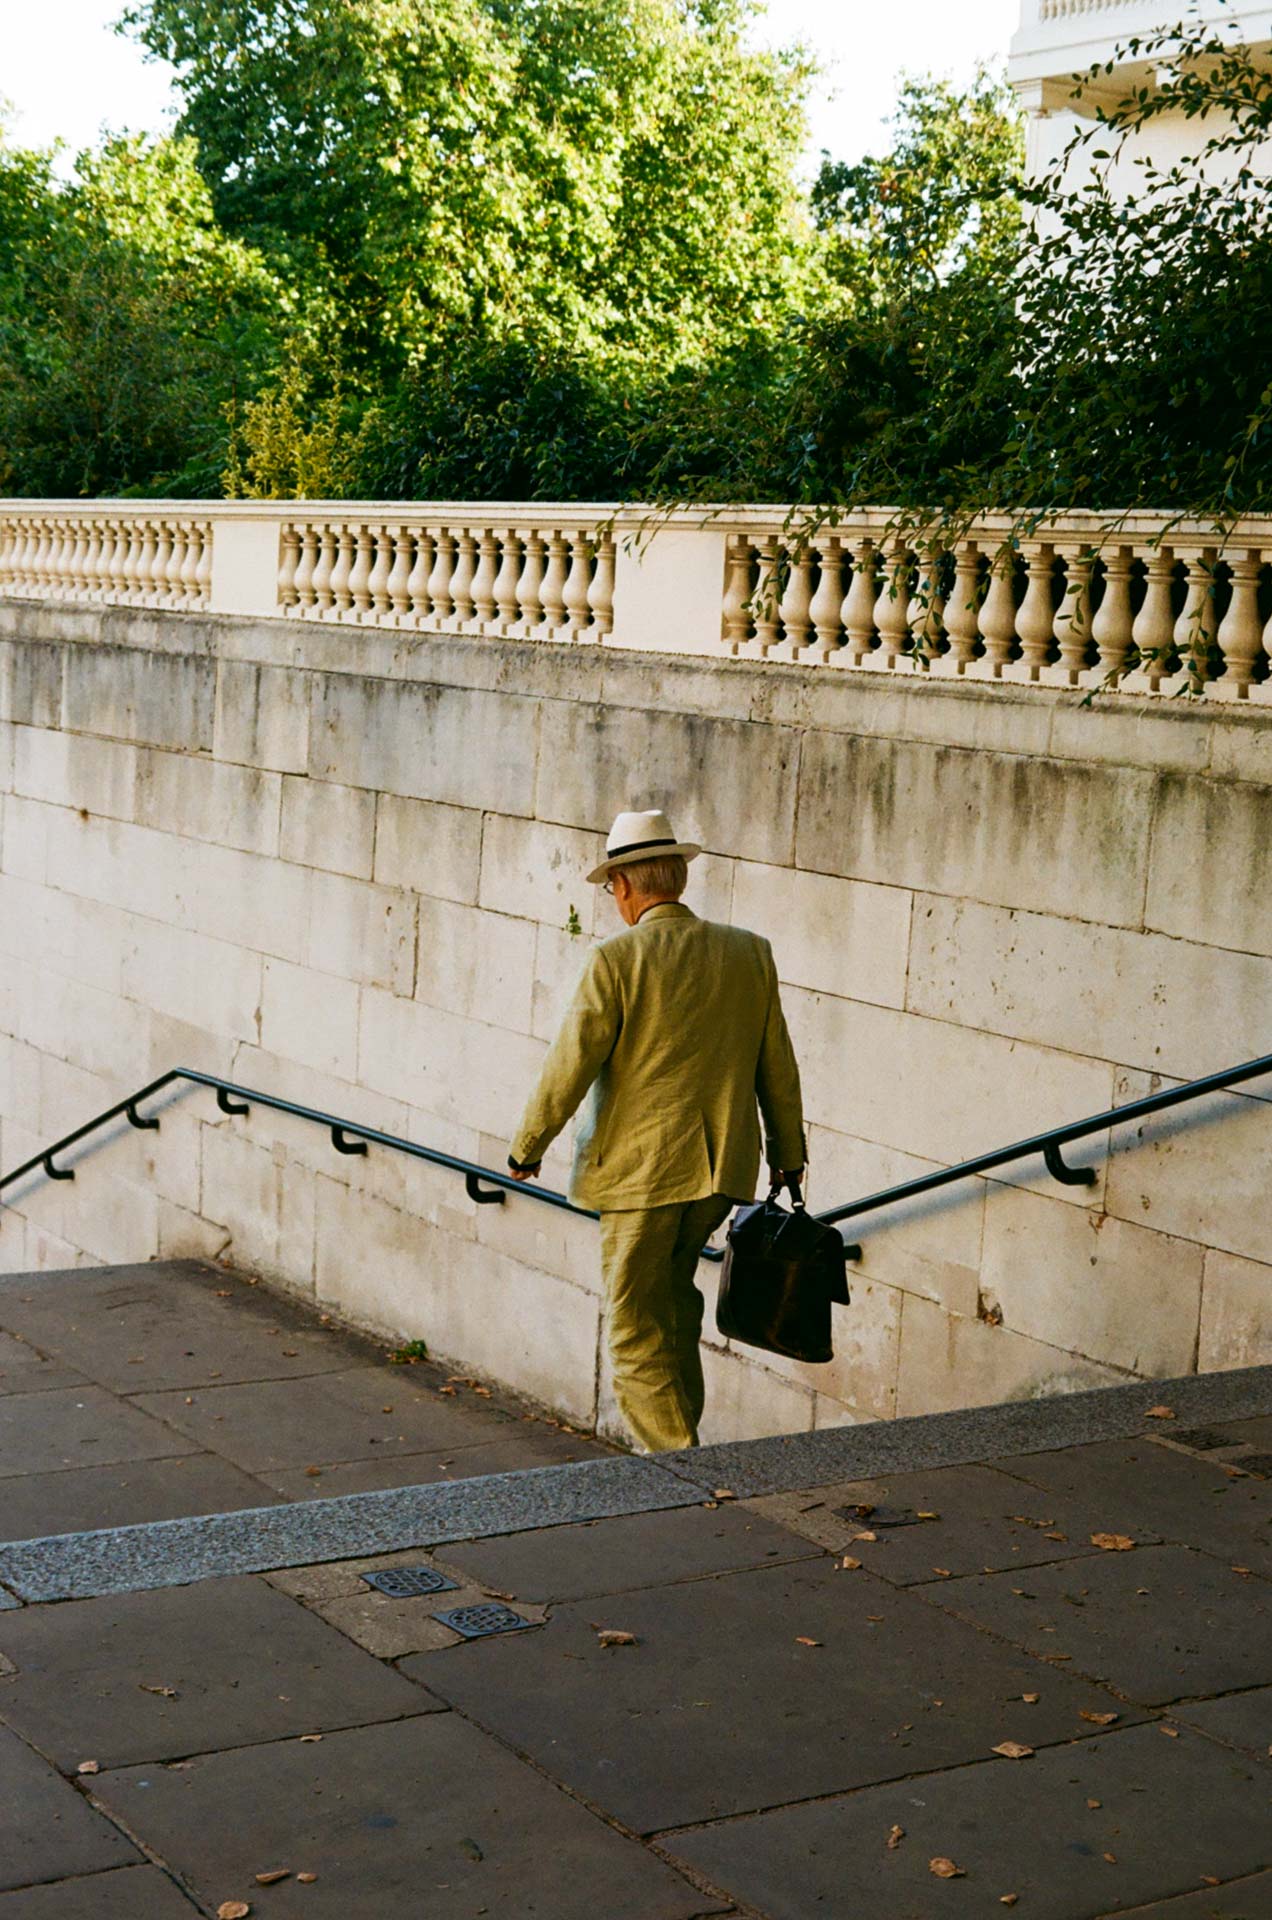
There’s not much to say about this one beyond that it was one of my favourite shots from my London trip.
Hailing from the Peak District, shooting so much street photography and capturing the perversely dense levels of humanity living in such a place was a real thrill, and challenge.
The rest of my London shots can be seen in my gallery here.
Camera: Pentax SFXn
Lens: SMC Pentax-DA 50mm F1.8
Film: Kodak Gold 200
11 - Coffee on Lamb's Conduit Street

Lamb’s Conduit street is one of my favourite streets to visit when I head to London. My cousin, Jonny, took me there when I was 15 and we spent the afternoon eating overpriced food, drinking overpriced coffee, and browsing the selections on offer at overpriced shops.
I wanted to take my girlfriend there whilst in London, as well as take some shots around the area.
This photograph is one of my favourites as I like the composition and the way the waiter adds some motion to an otherwise quite still scene.
I also enjoy the fact that, after taking this shot, me and my girlfriend realise that the lady is actually Cathy Newman, the news presenter on Channel 4, making me an accidental paparazzi…
Camera: Pentax SFXn
Lens: SMC Pentax-DA 50mm F1.8
Film: Ilford HP5 Plus 400
12 - Millhouses Mirror
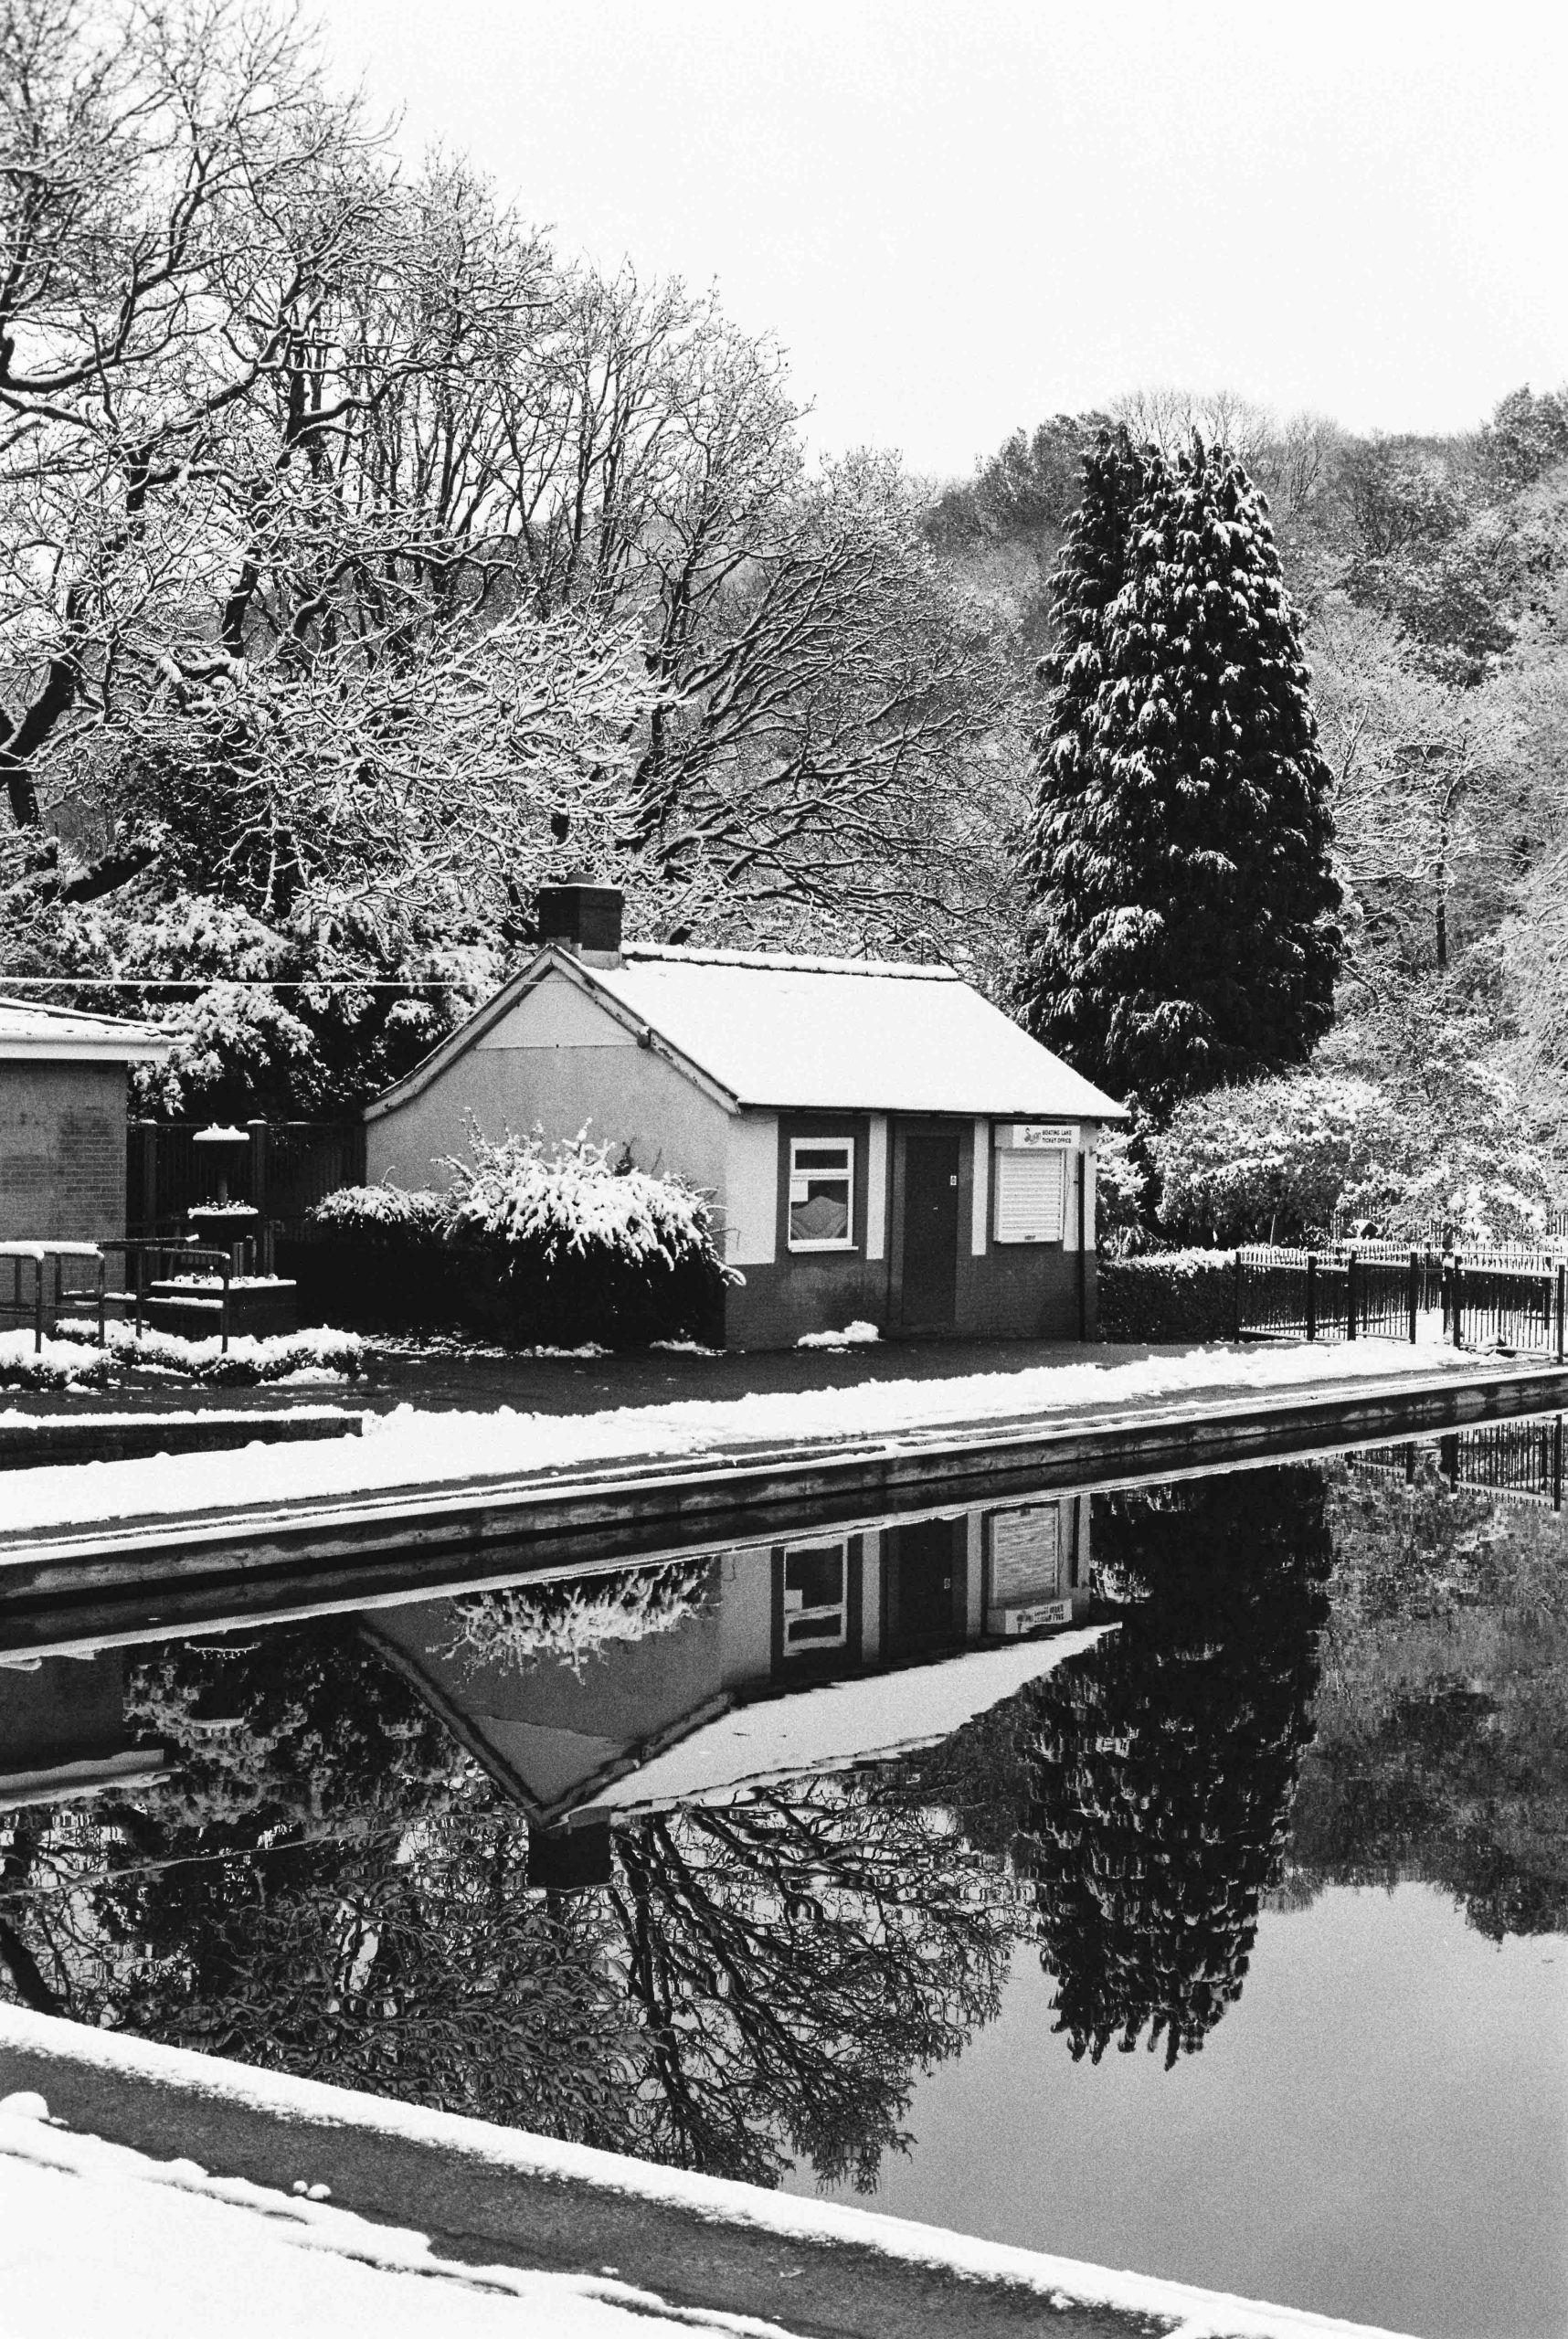
This is from the last roll of film I got back from 2024 and shows Millhouses Park after our first real bought of Winter snowfall.
I really enjoy the reflection from the water and the way the snow came out in black and white.
I am determined, after spending much of summer away on various trips, to shoot much more of Sheffield and dedicate myself to documenting what I can, whilst I can.
This photo, for me, resembles that commitment – I have a gallery dedicated to Sheffield where I plan to collect images in an ongoing series.
Camera: Pentax SFXn
Lens: SMC Pentax-DA 50mm F1.8
Film: Ilford HP5 Plus 400
I'm Excited to See What 2025 Brings...
Looking back on these images has made me incredibly thankful for the opportunities I have had to travel, shoot, and practice my craft.
I managed to visit some truly spectacular places, mostly with my wonderful girlfriend and the friends and family I love the most.
2024 will forever be the year that I truly fell in love with the medium of film photography. I hope 2025 brings me more of the same – I want to learn more, shoot more, travel more, and turn this into something special.
Thank you to everyone who has been involved in this journey so far. Follow me on Instagram to keep up with what I get up to!
A Guide to the Different Types of Film Used in Film Photography
The Different Types of Film Used in Film Photography
Quick Summary
Film photography is an art form built on variety and creative expression, and one of the most exciting elements is the vast selection of film types available to photographers.
It can also be, to the beginner film photographer, the most intimidating!
Each type of film offers unique characteristics, from colour rendering to grain structure, meaning that the type of film you choose can significantly impact your final image (as well as your bank account…)
So, this is a blog for beginners all about film types and will hopefully give you an understanding of the differences between film types and the ability to make informed decisions when selecting film stocks for your projects.

Key Takeaways:
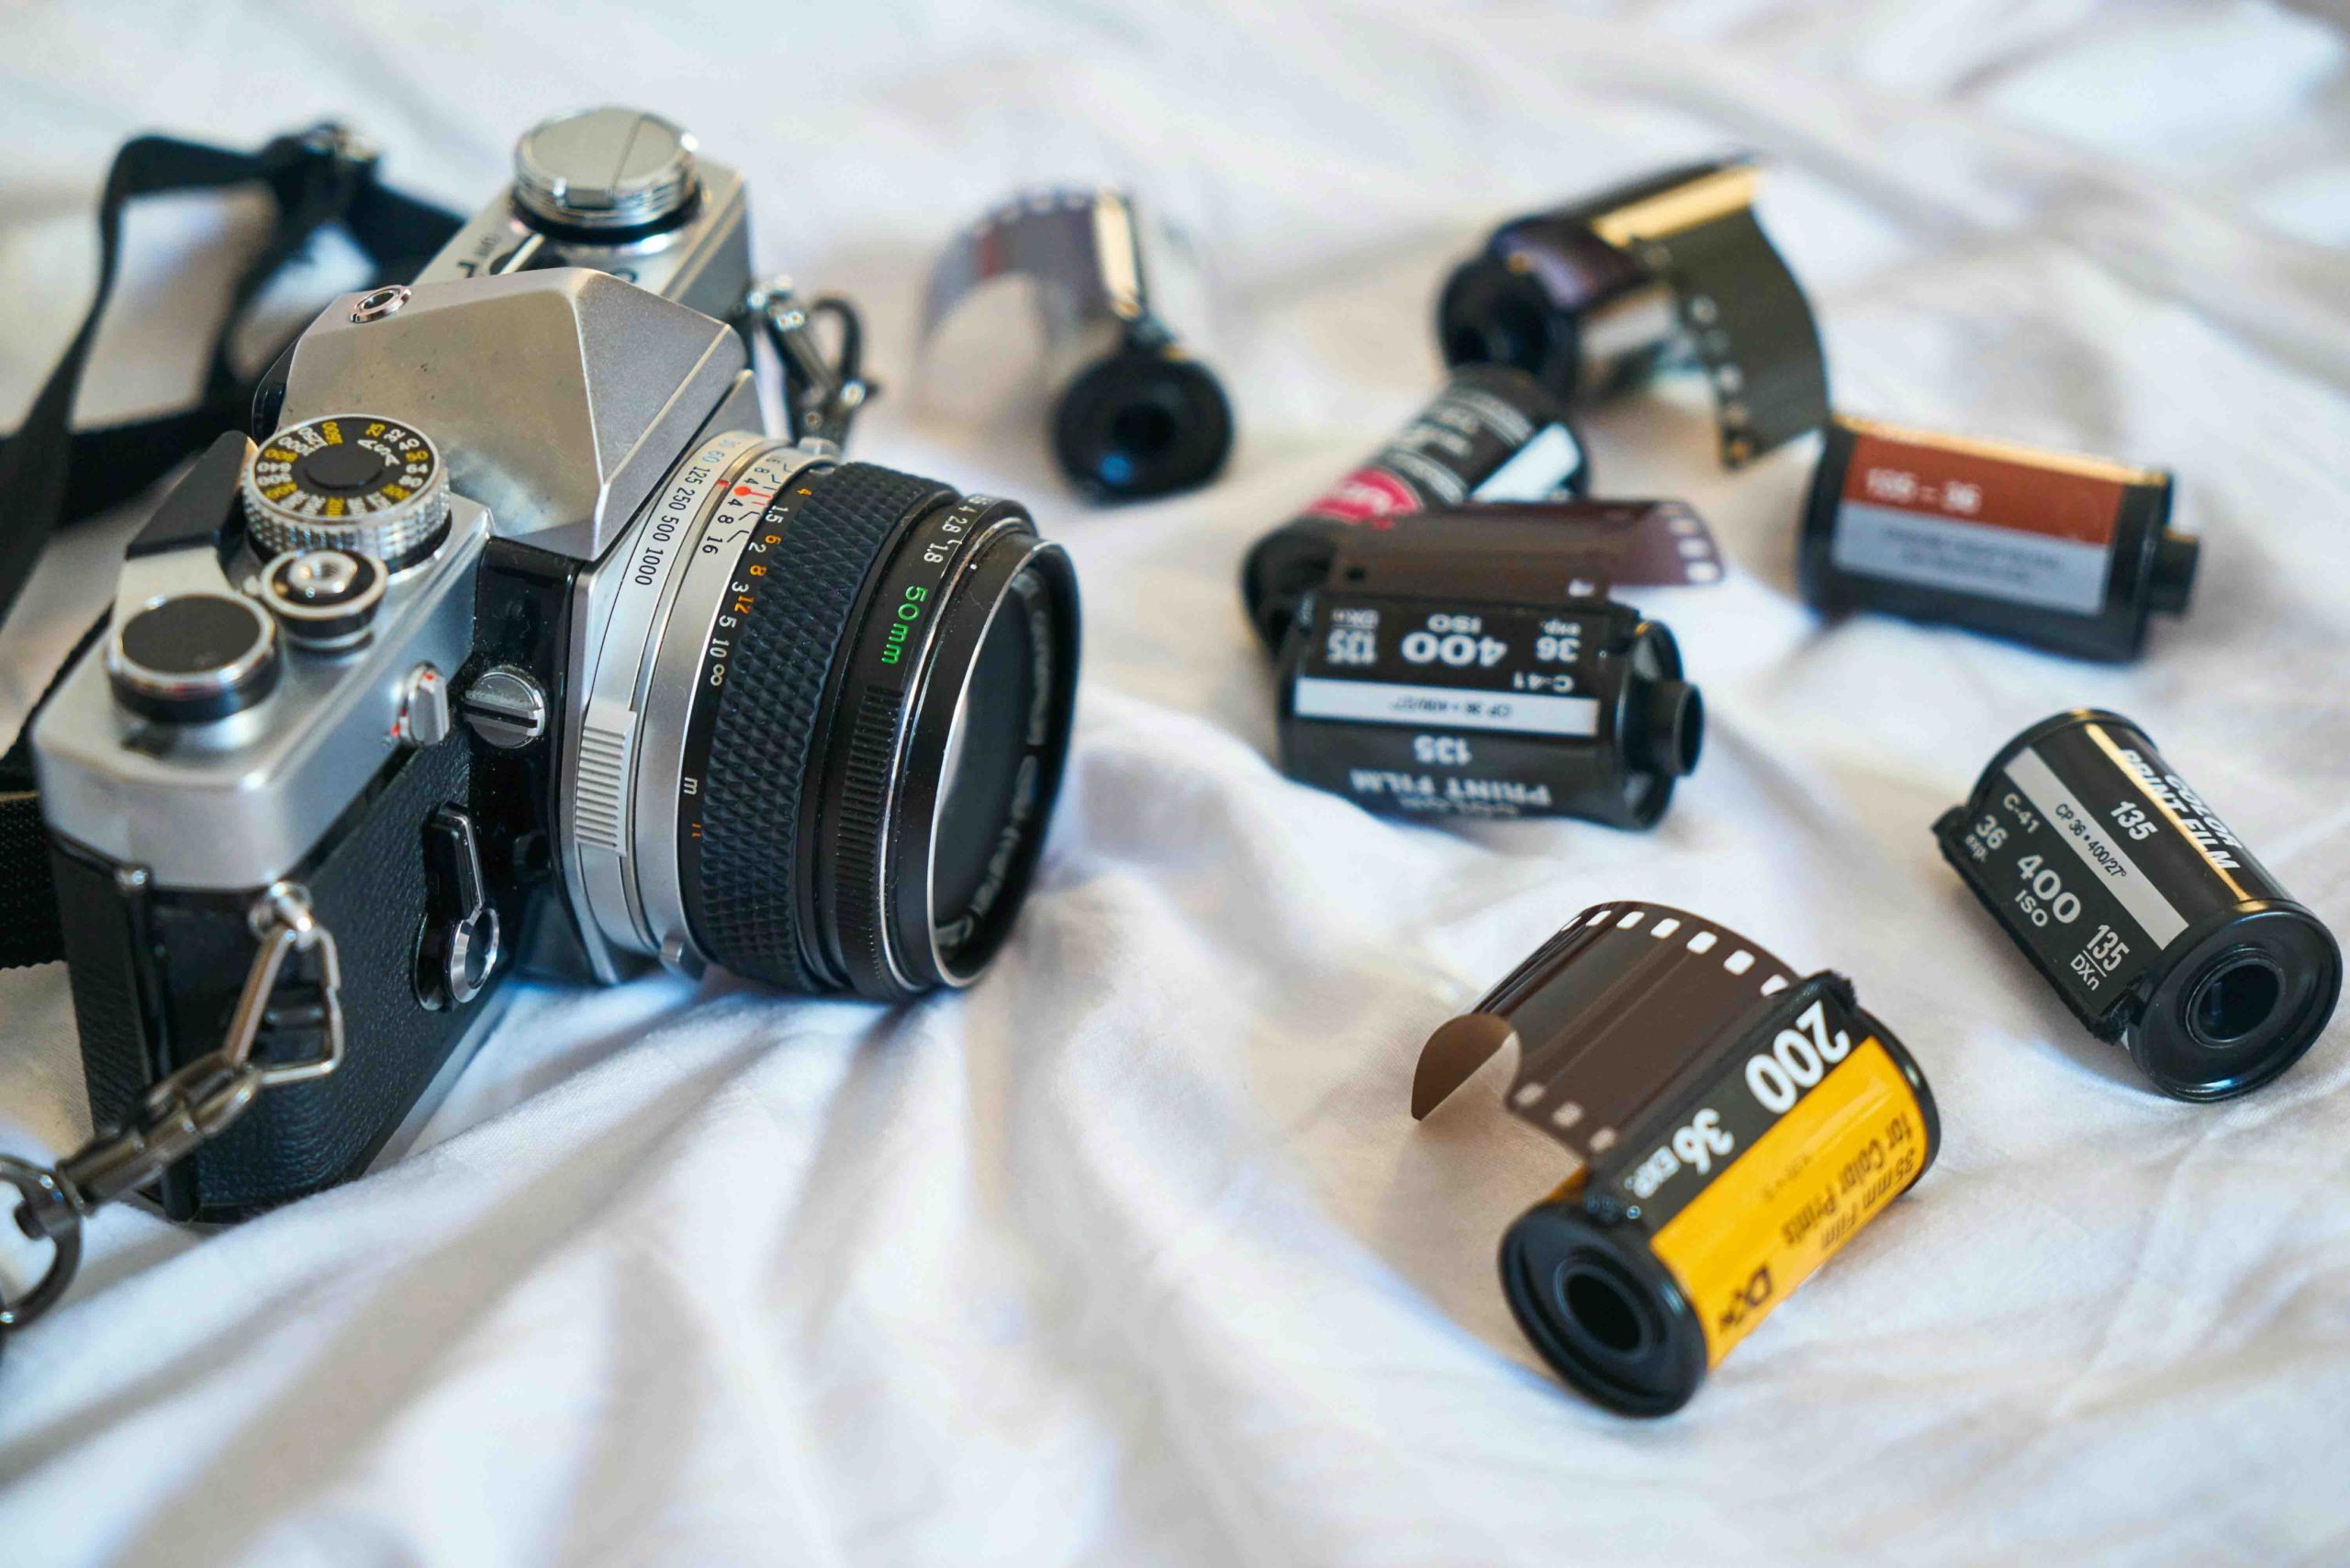
- Film comes in 35mm, medium, and large format
- 35mm film is the most common format for beginners, offering affordability, availability, and ease of use with 24-36 exposures per roll.
- 120 (medium format) film captures higher resolution images and greater detail but comes with fewer exposures and a steeper learning curve, as well as higher costs.
- Large format film delivers the highest image quality and resolution but is expensive, complex, and not suitable for beginners.
- Colour negative film is versatile, forgiving, and widely available, making it ideal for general photography and beginners.
- Black and white film offers a classic look and is easier to develop at home, making it a great choice for creative experimentation.
Film Formats Explained
A good place to start is by understanding the different formats available. Film format refers to the size of the film used, and different cameras are built for different formats.
Here are the three most common film formats in photography:
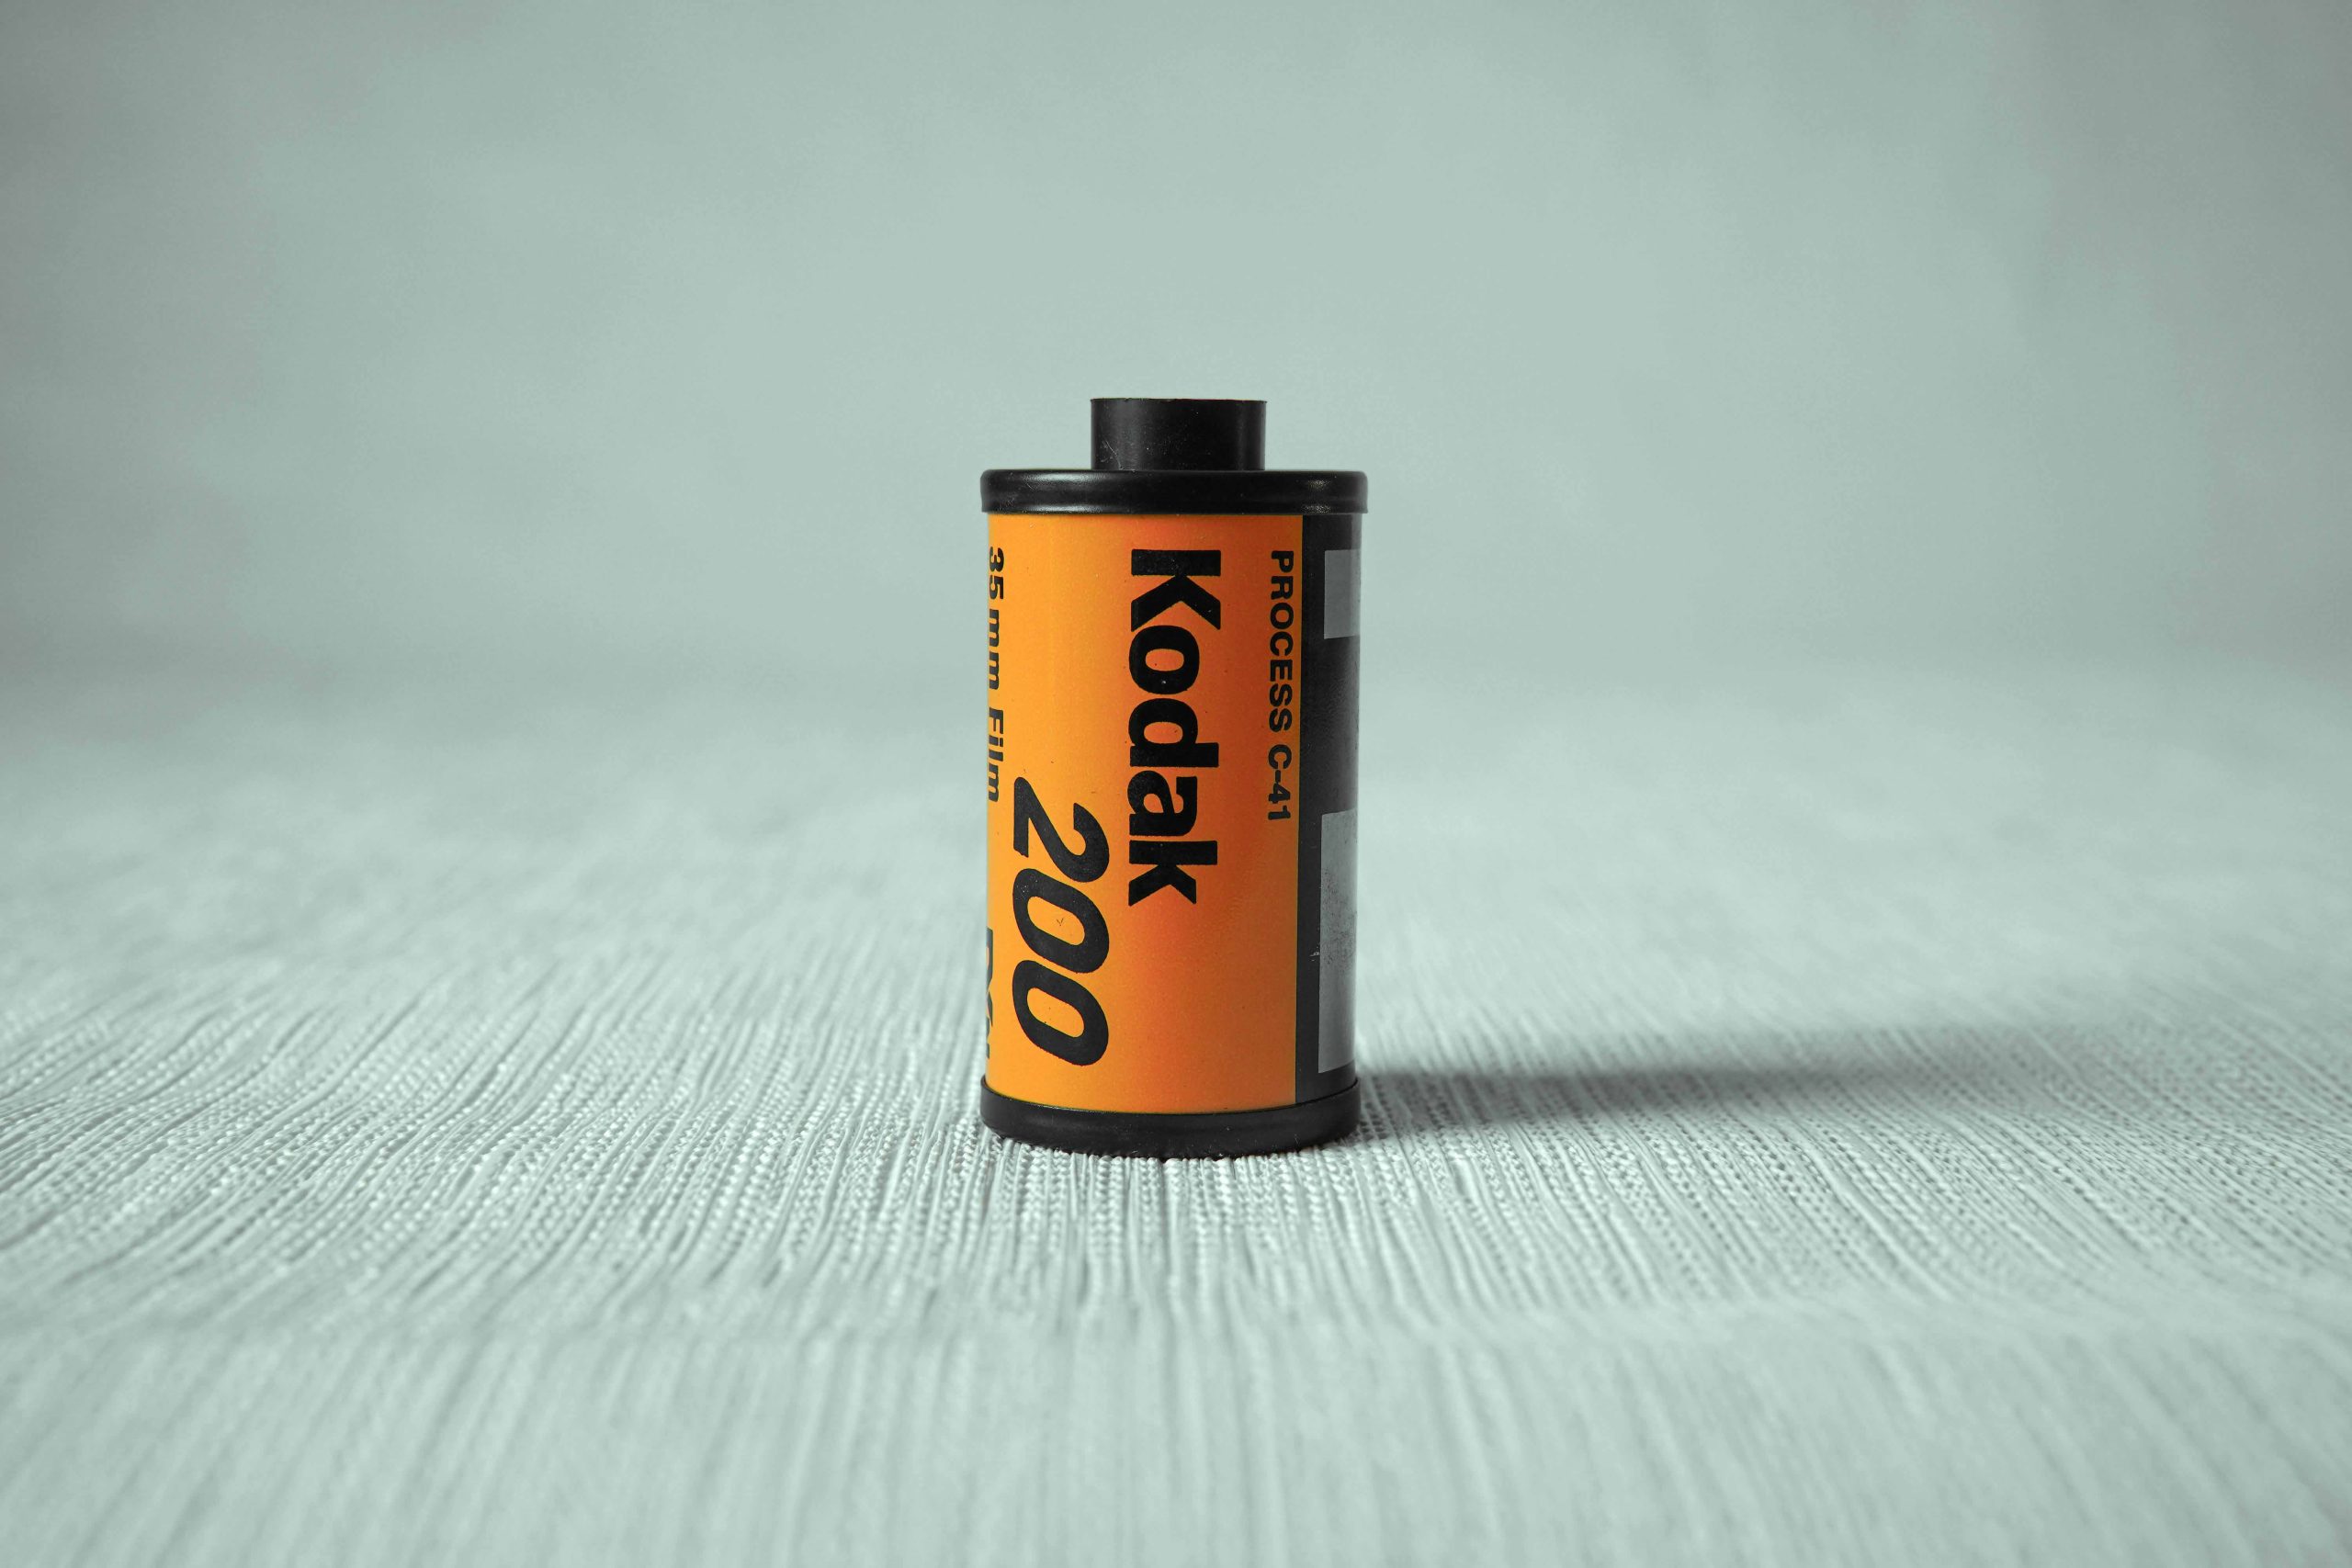
1. 35mm Film
- This is the most widely used film format, ideal for beginners due to its availability, affordability, and wide selection. It’s used in 35mm cameras, which are compact, easy to carry, and more affordable than larger format cameras.
- 35mm film produces a standard rectangular image with a typical frame size of 24mm x 36mm.
- Best For: General photography, street photography, and everyday shooting. It’s definitely my recommendation for those just starting out due to its simplicity and ease of use.
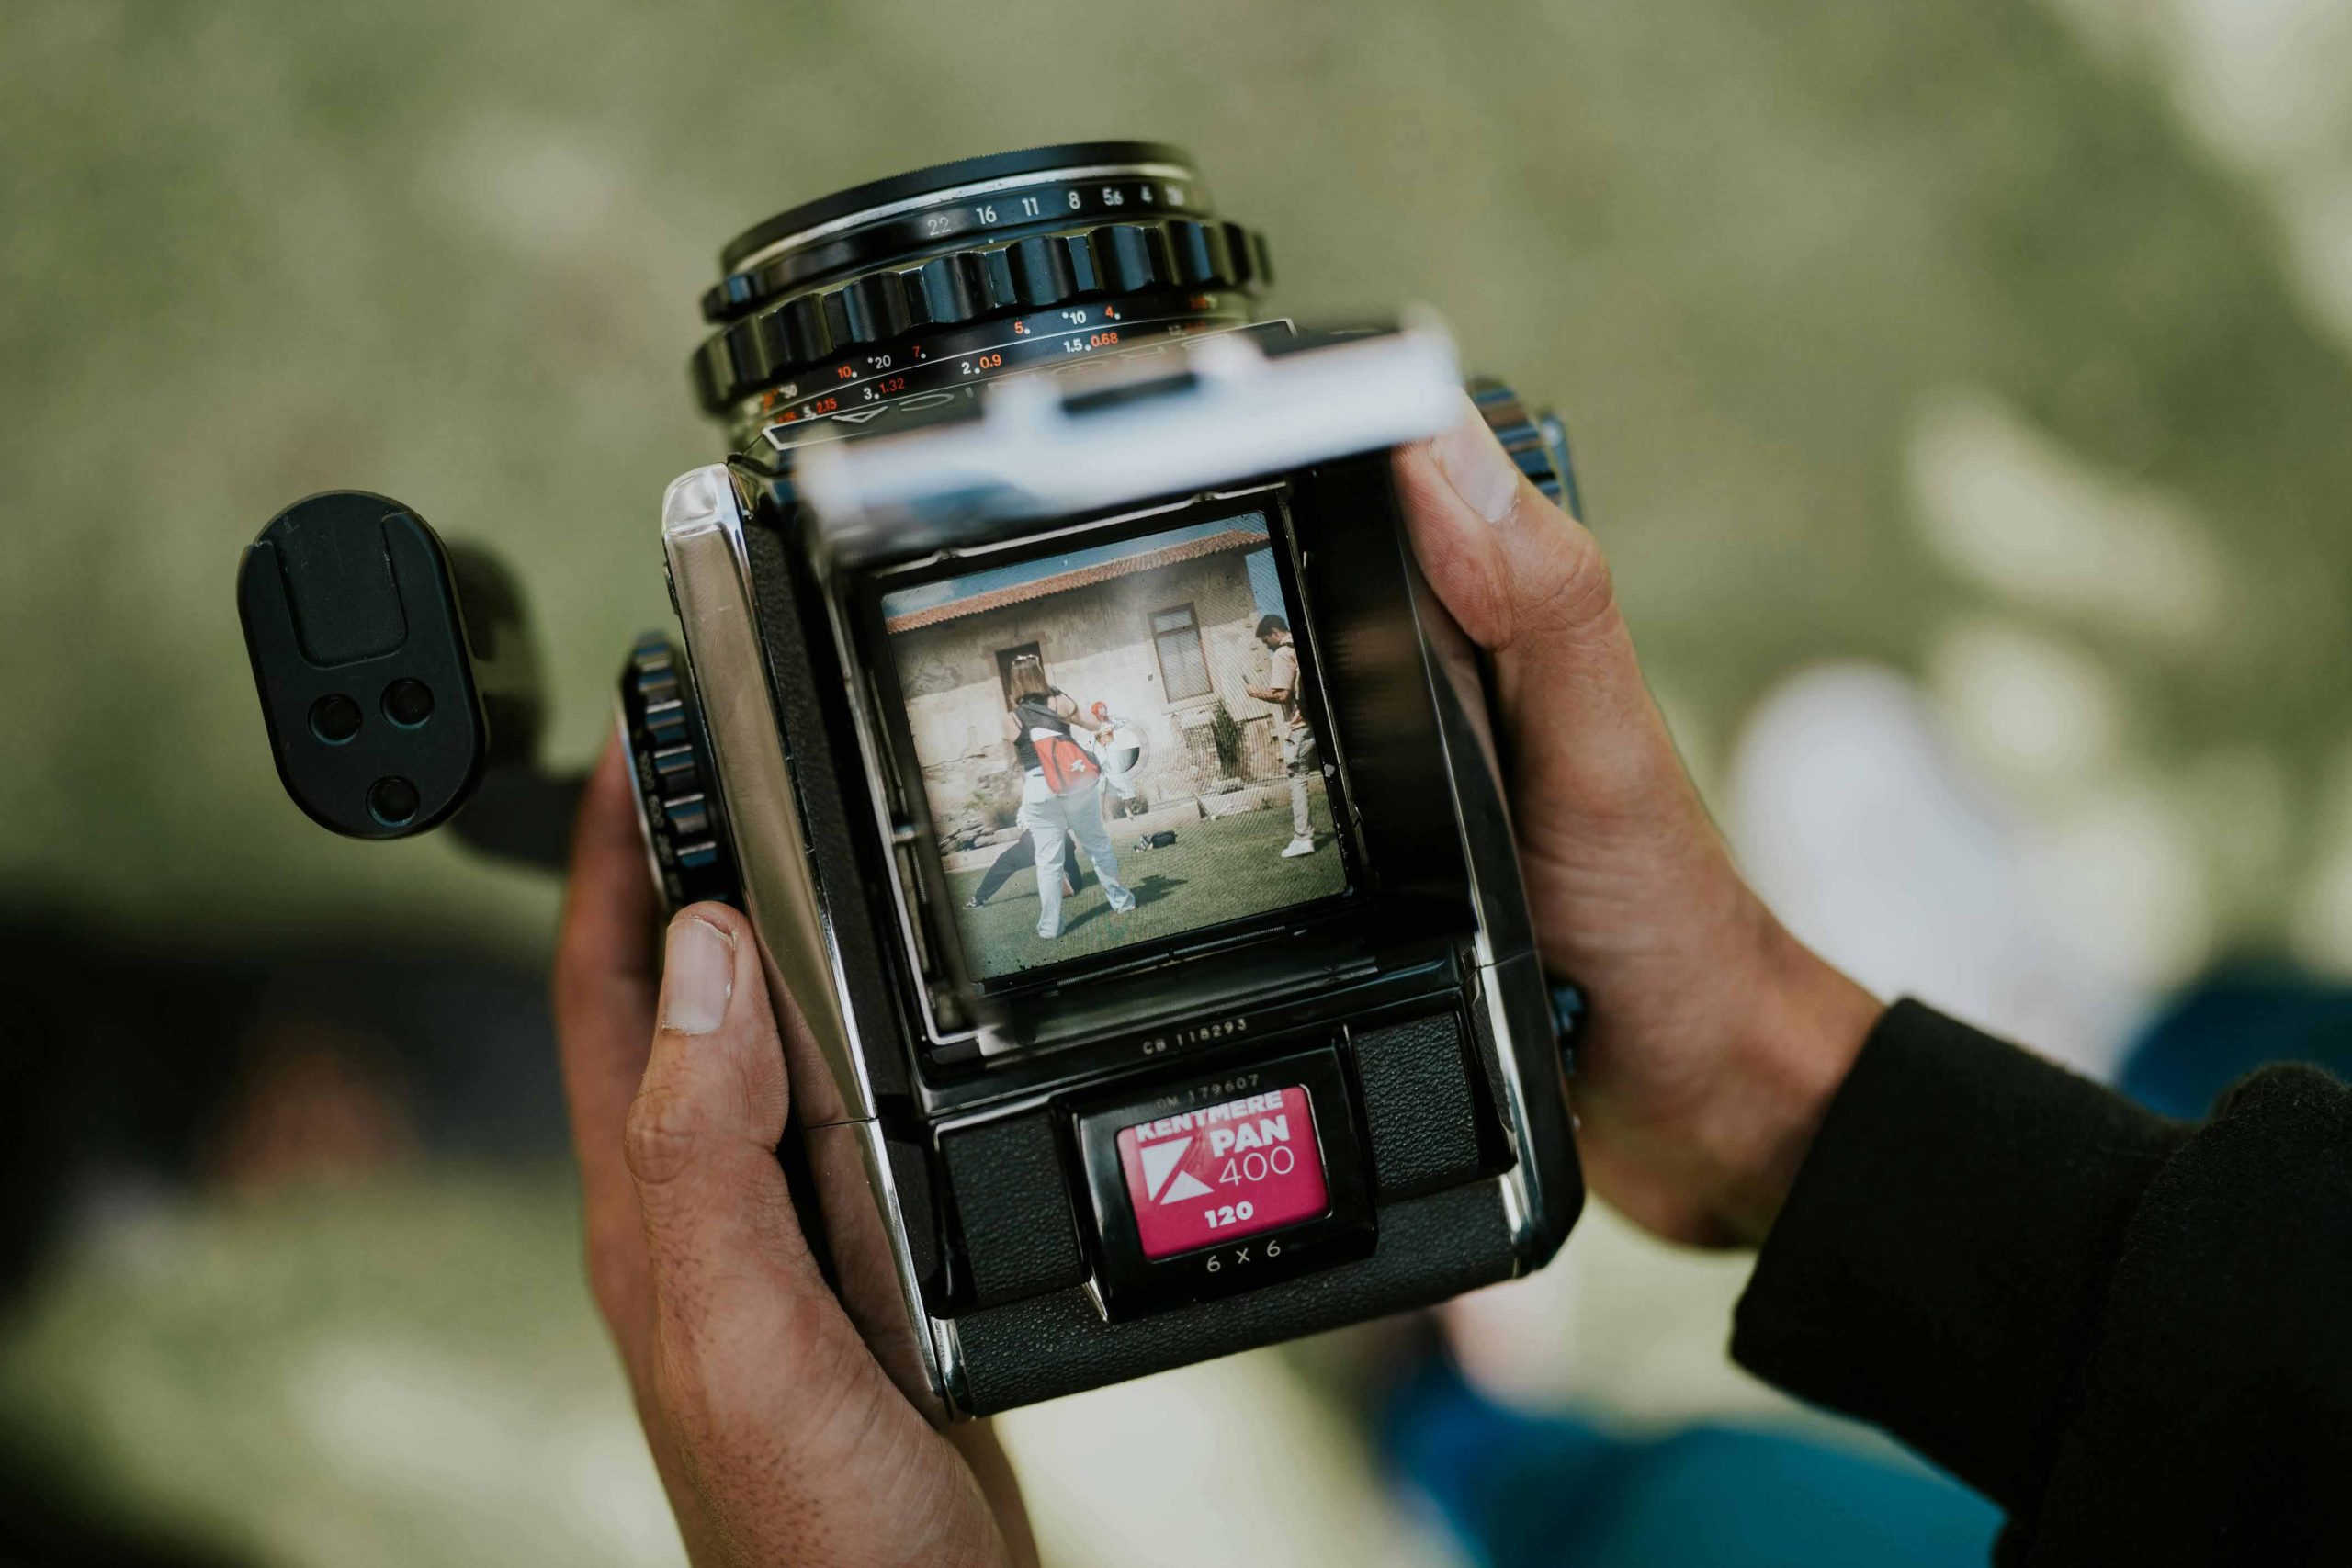
2. 120 Film (Medium Format)
- 120 film is larger than 35mm and used in medium format cameras. It captures more detail due to its larger negative size, which results in higher resolution images.
- The frame size varies depending on the camera (6×4.5, 6×6, 6×7, or even 6×9), producing rich detail and sharpness.
- Best For: Portraits, landscapes, or any scenario where image quality is a priority. However, it’s less forgiving for beginners due to higher cost and a more limited number of shots per roll (not to mention medium format cameras themselves!)
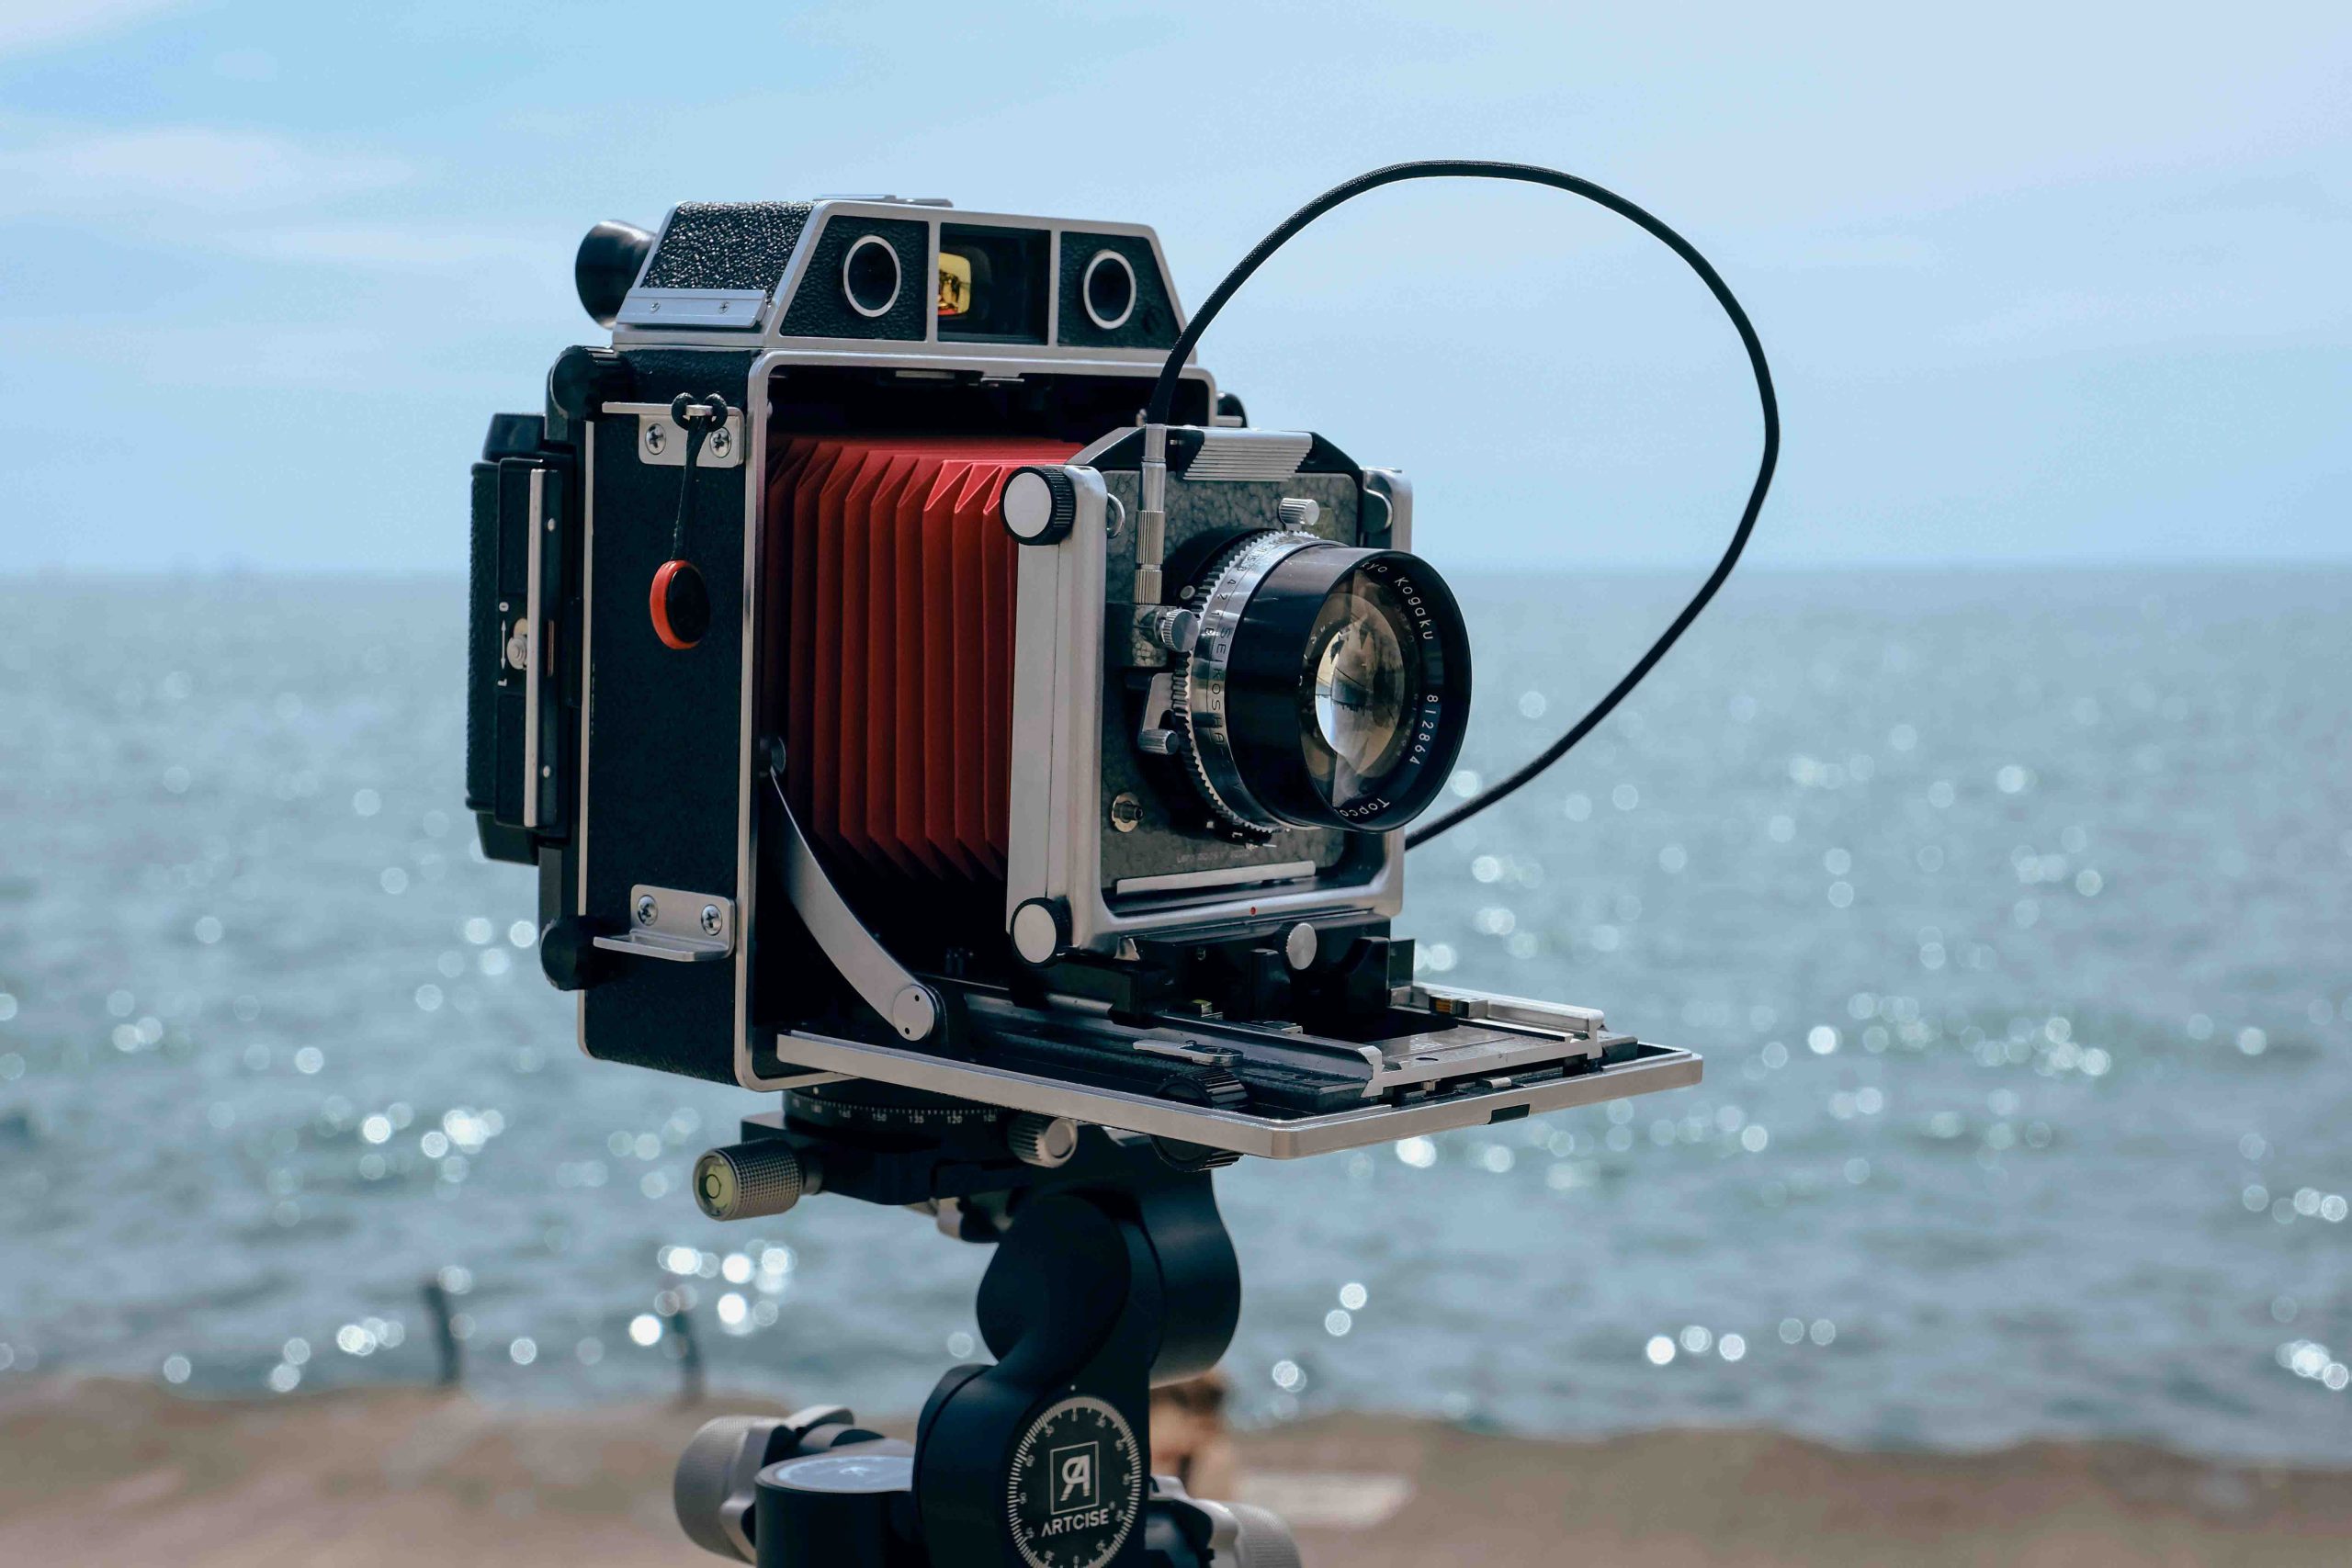
3. Large Format Film
- Large format film is typically sheet film rather than roll film, with sizes like 4×5 inches or 8×10 inches. It’s used in large format cameras, often by professional photographers or those seeking extremely high resolution.
- Large negatives offer unmatched detail, tonal range, and resolution, but large format cameras are bulky and more challenging to use.
- Best For: Fine art photography, architectural photography, and large-scale prints where image detail is critical.
Which Format is Best for Beginners?
For most beginners, 35mm film is the best choice. It’s cost-effective, easy to find online and in your local camera shop, and comes in a wide variety of film stocks.
The smaller size of 35mm film also means you get more exposures per roll (typically 24 or 36), making it great for practicing without breaking the bank.
If you’re looking for a challenge and want to explore more detailed images, 120 film (medium format) can be a fun step up once you’re more comfortable with the basics. However, large format film is generally not recommended for beginners due to its complexity and cost.
6 common Film types Used in Film Photography
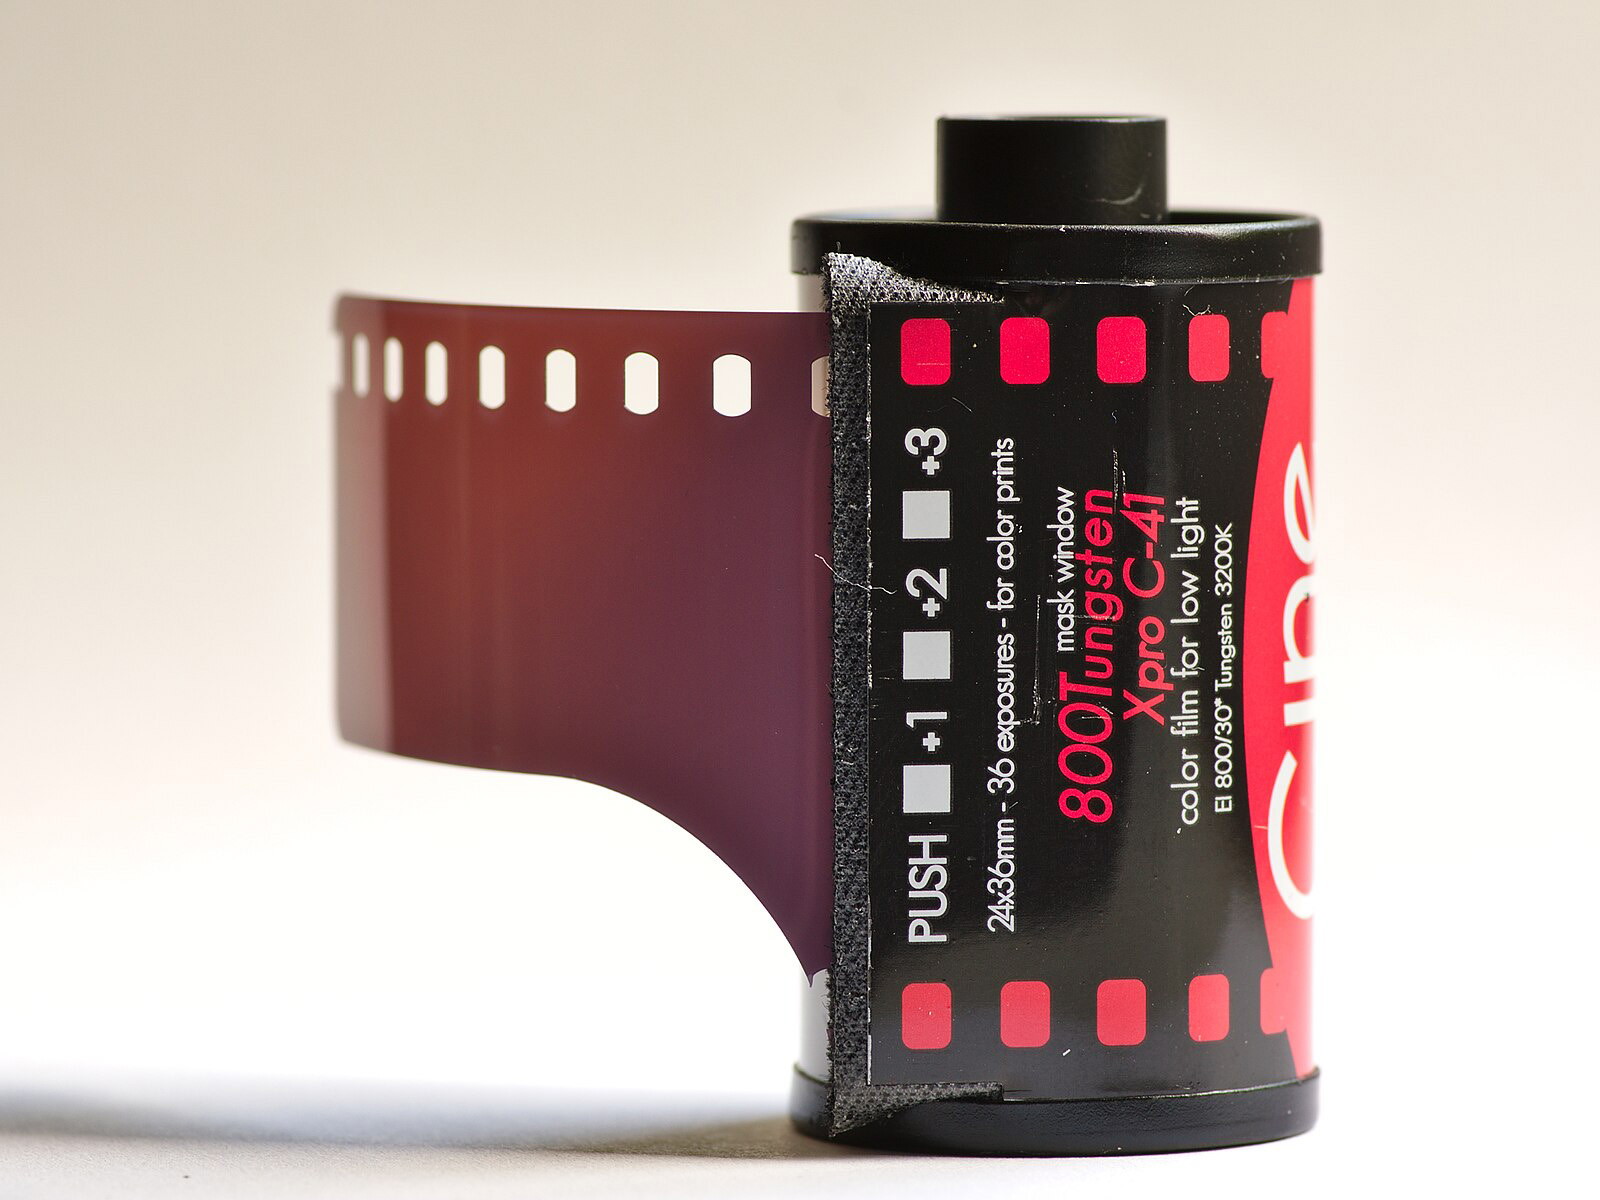
1. Color Negative Film (C-41)
Colour negative film is the most common type of film used today.
This type of film is known for its versatility and ease of use. When you take a picture with this type of film, it produces a negative image (hence the name) which is then inverted during the printing or scanning process to create a positive, true-to-life colour photograph.
Characteristics:
- Dynamic Range: One of the key strengths of colour negative film is its wide dynamic range, meaning it can capture details in both shadows and highlights.
- Exposure Latitude: Colour negative film is very forgiving with exposure, meaning if you over- or under-expose a shot slightly, you’ll still end up with a usable image (one of the reasons it’s great for beginners!)
- Popular Film Stocks: Kodak Gold 200, Kodak Portra, Kodak Ektar, and Fuji Pro 400H.
Best For:
- Portraits, landscapes, and everyday photography.
- Great for beginners due to its exposure flexibility, availability and cheaper initial cost and processing fees.
Take a look at the gallery below – these are all taken on colour negative 35mm film…


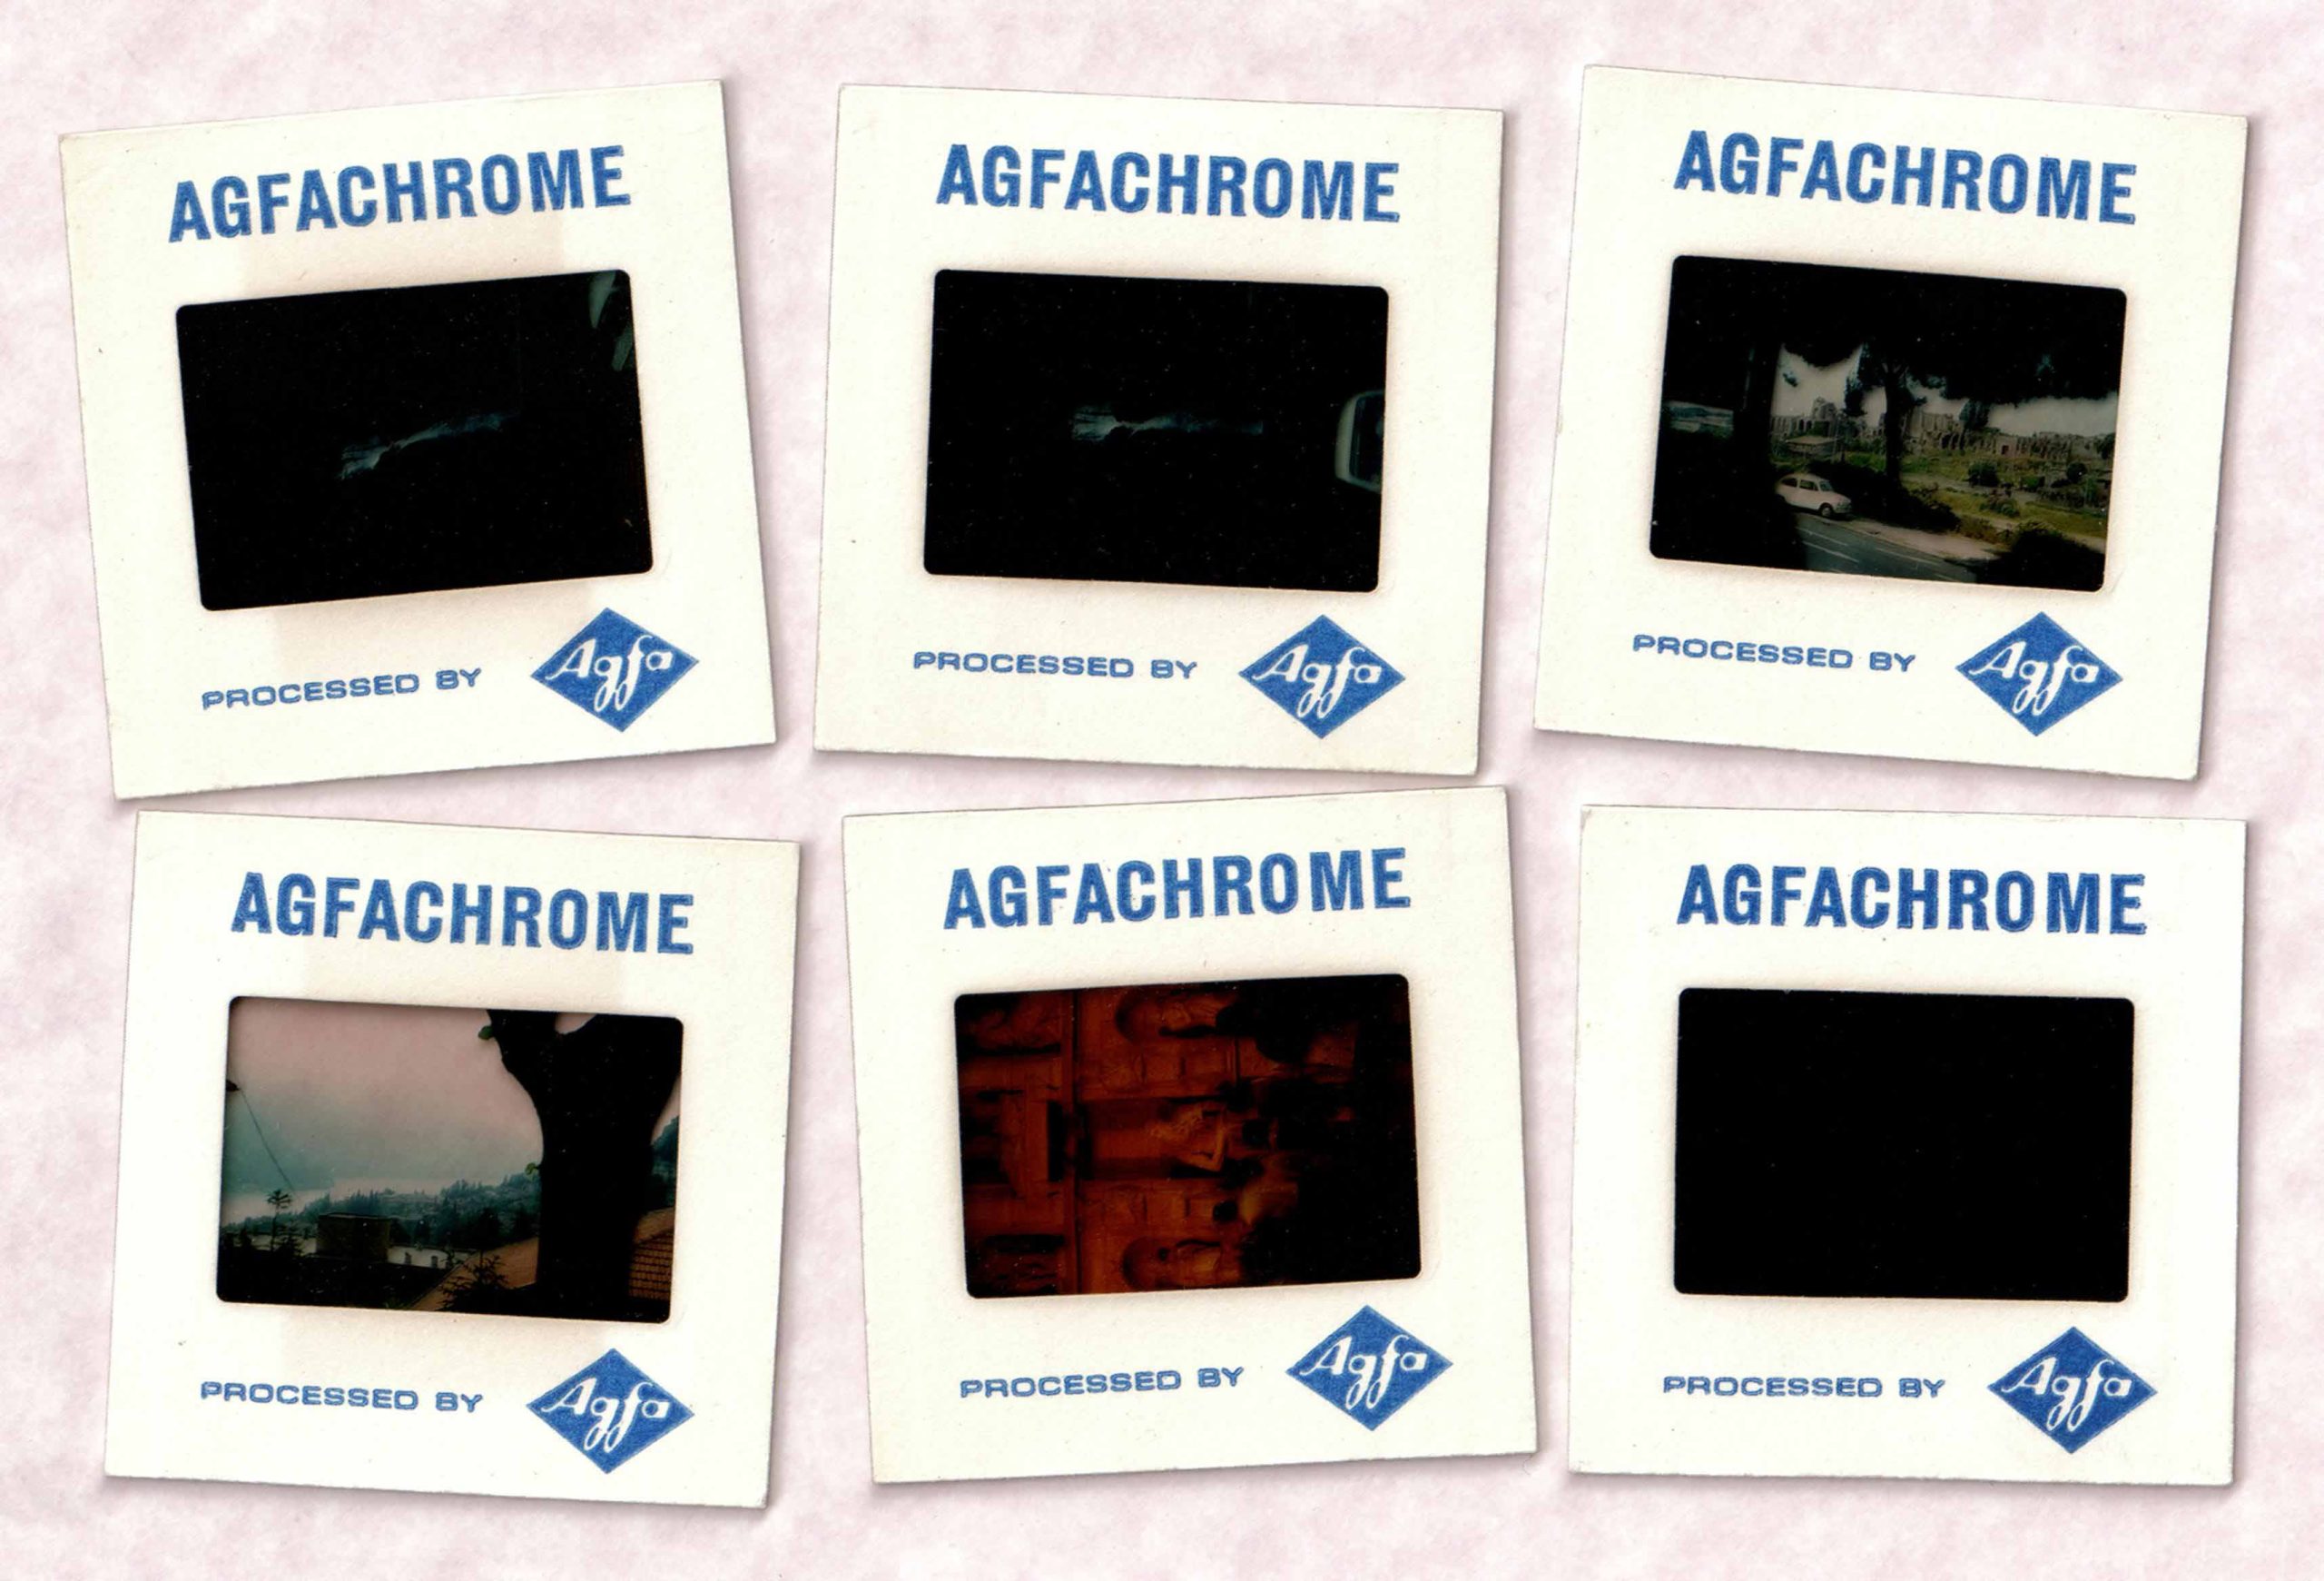
2. Slide Film (E6)
Slide film, also known as transparency or reversal film, creates a positive image directly on the film, meaning what you see is what you get. This film type is prized for its vibrant colours and sharpness but is more difficult to work with due to its limited exposure latitude.
Characteristics:
- Vivid Colours: Slide film tends to have much richer colours and more contrast than colour negative film, making it great for vibrant scenes.
- Limited Exposure Latitude: With slide film, precise exposure is crucial. There’s much less room for error compared to colour negative film.
- Popular Film Stocks: Fuji Velvia, Kodak Ektachrome, and Fuji Provia.
Best For:
- Nature and landscape photography, where colour vibrancy and sharpness are key.
- Professionals and advanced photographers who want more control and precision.
3. Black and White Film
Black and white film strips away colour and produces images that can often be more timeless and emotive in their appearance. It’s also easier to develop at home, making it a great choice for hobbyists who want to explore the development process.
Characteristics:
- Contrast: Black and white film tends to emphasise contrasts and tones, leading to moody, dramatic images.
- Grain: Different black and white films offer different grain structures, from fine and smooth to coarse and prominent.
- Popular Film Stocks: Ilford HP5 Plus, Kodak Tri-X, and Ilford Delta.
Best For:
- Portraits, street photography, and artistic projects.
- Photographers looking to experiment with film development at home.
- Beginners are often recommended to start on black and white – there are pros and cons for this, but it does force you to learn contrast and composition without being able to rely on colour to “save” a bad shot!
4. Cine Film (Motion Picture Film)
Cine film is motion picture film repurposed for still photography. This type of film has a unique aesthetic, with softer colour rendering and a cinematic quality, often requiring special processing known as ECN-2.
Characteristics:
- The colour tones and contrast levels resemble those seen in films, offering a distinct and nostalgic look.
- Cine film often requires a different process (ECN-2), though many labs now offer simplified processing options (especially if you live in major cities like London…)
- Popular Film Stocks/Brands: Kodak Vision3 series (such as Vision3 500T), which is one of the most popular cine films; CineStill (CineStill works with Eastman Kodak to produce modified versions of Kodak’s motion picture cinema emulsions).
Best For:
- Photographers seeking a distinctive, film-like aesthetic with a soft, cinematic palette.
- Street photography, creative portraiture, and experimental projects.
5. Instant Film
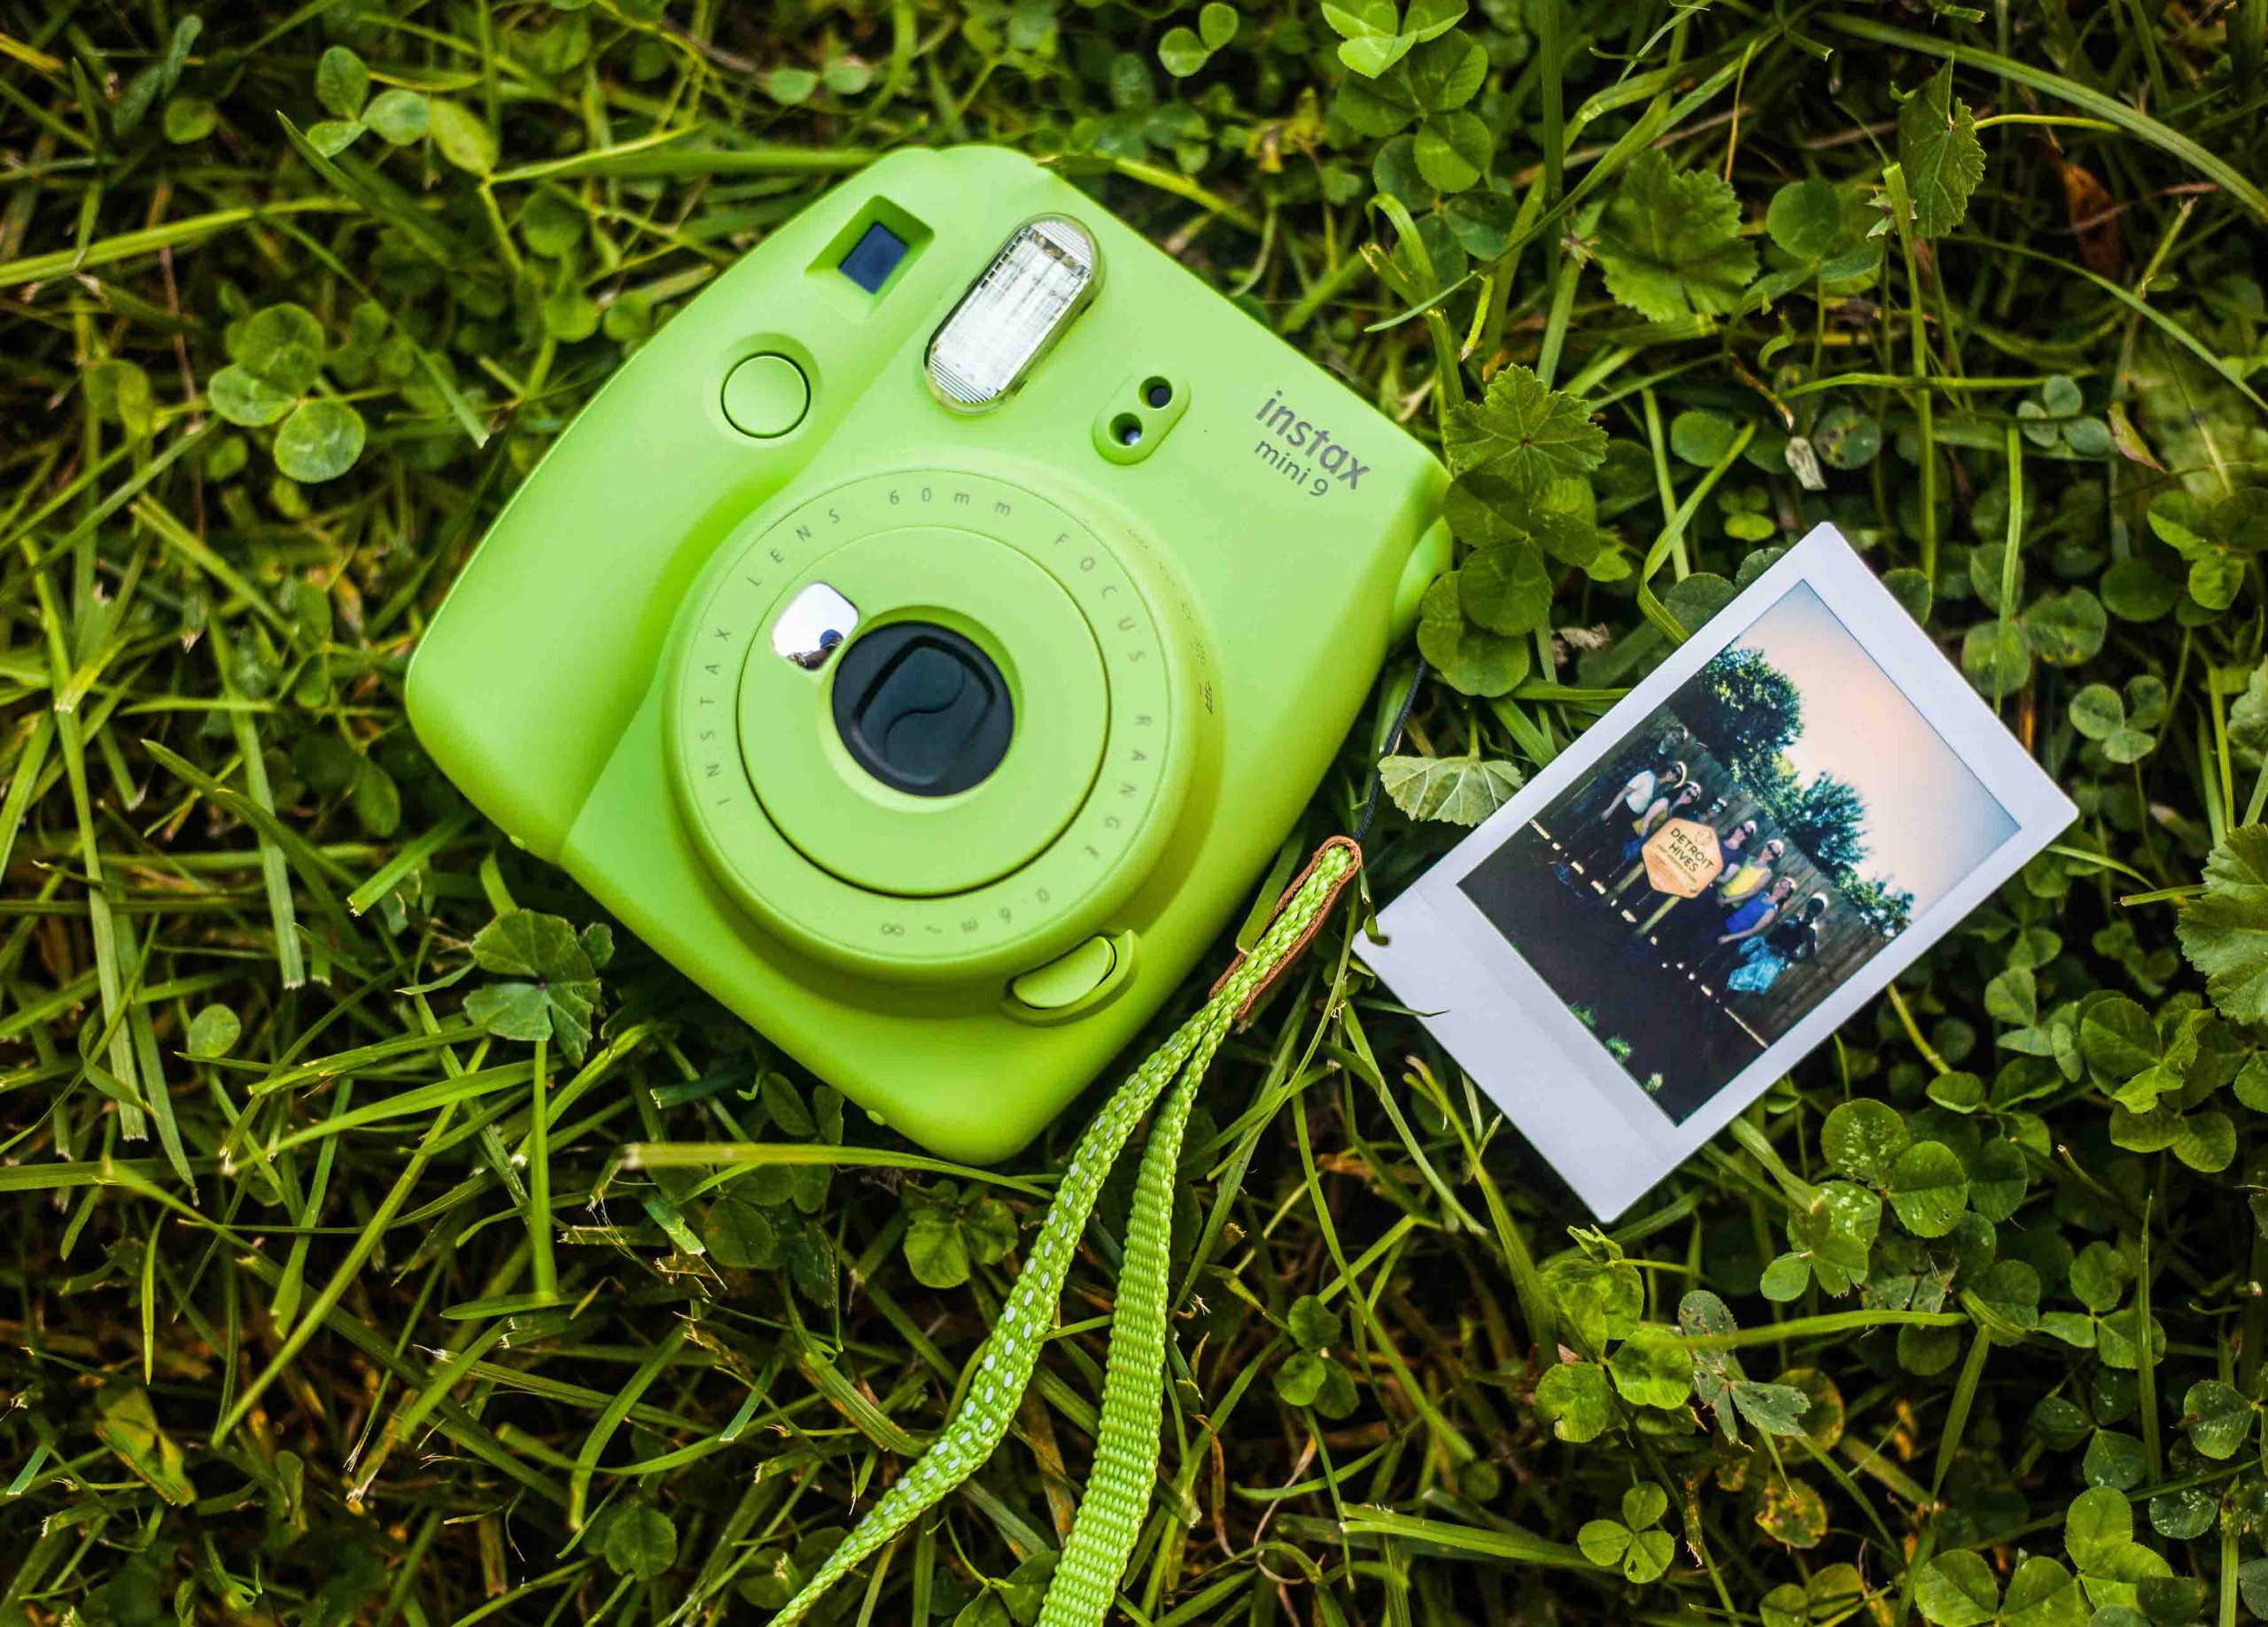
Instant film gives you a tangible photo almost immediately after taking the shot. The magic of watching your image develop in front of your eyes has captivated photographers for decades, with brands like Polaroid and Fujifilm Instax being the most well-known examples.
Characteristics:
- Unique Look: Instant film often has a slightly washed-out, dreamy quality with soft colours and distinctive textures.
- Immediate Results: Instant film is perfect for sharing moments and creating physical memories instantly – I tend to use this most for family events and parties!
- Popular Film Stocks: Polaroid Originals (for classic Polaroid cameras) and Fujifilm Instax (for Instax Mini, Wide, and Square cameras) – note that older Polaroids, such as my Spectra AF, won’t have film directly available and you may have to rely on third party film.
Best For:
- Casual photography, parties, and events where you want to instantly share the results.
- Creative projects that play with the nostalgic, tactile nature of instant film.
6. Infrared Film
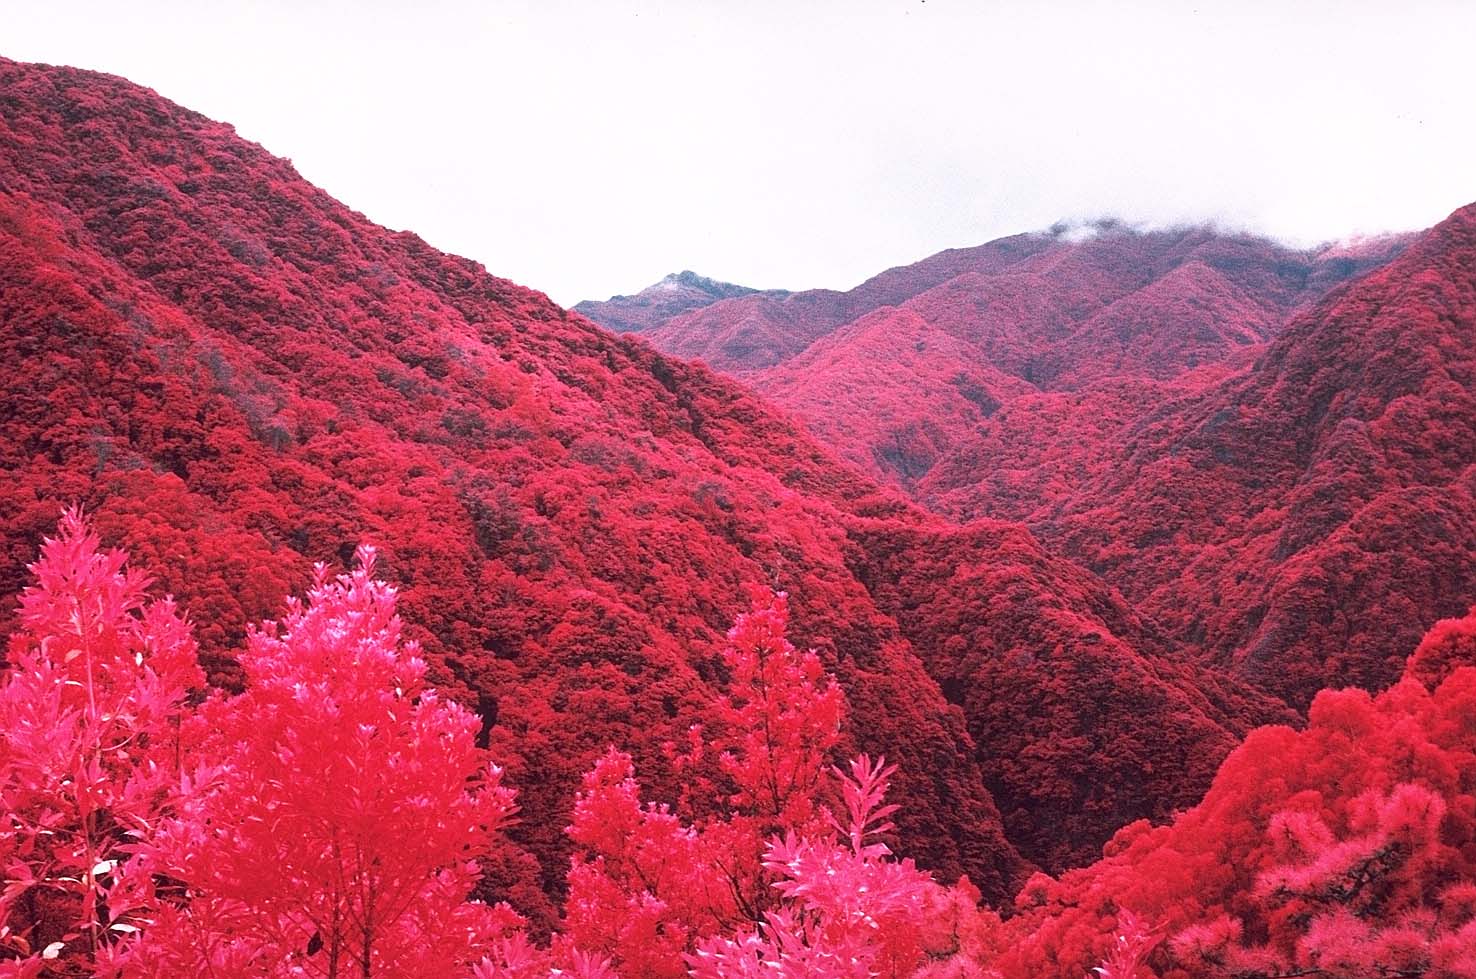
Infrared film is a more experimental type of film that captures light in the infrared spectrum, which is invisible to the naked eye. This produces surreal, dreamlike images with glowing whites and dark skies.
Characteristics:
- Otherworldly Aesthetic: Vegetation often appears white or light pink, while skies can become dramatically dark, creating an almost ethereal effect.
- Experimental Process: Infrared film requires specific filters and handling, making it best suited for photographers who enjoy experimental photography.
- Popular Film Stocks: Rollei Superman 200, Ilford SFX 200.
Best For:
- Fine art photography, landscapes, and experimental photographers.
- Projects where you want to create something surreal and unconventional.
Recommended Film Stock for Beginners
If you’re new to film photography, there are definitely some recommendations I have for a starting point…
- Kodak Gold 200: This is a classic colour negative film that’s affordable, forgiving with exposure, and offers warm, pleasing colours. It’s great for sunny outdoor shots and delivers high-quality results with minimal effort – pretty much every shot in my gallery in colour is on Kodak Gold 200.
- Ilford HP5 Plus 400: If you’re interested in black and white photography, Ilford HP5 Plus is a fantastic option. Its high ISO of 400 makes it ideal for low light or overcast conditions, and it has a classic, gritty look that adds mood to your photos. It is my favourite B/W film stock – here are shots taken on Ilford HP5 Plus.
- Kodak Portra 400: A slightly more expensive option, but Kodak Portra 400 is worth it for its exceptional dynamic range and ability to handle a wide range of lighting conditions. It’s known for producing beautiful skin tones, making it perfect for portraits.
Considerations When Choosing Film
- Film Speed (ISO): When selecting film, pay attention to the film speed, which determines how sensitive the film is to light. Lower ISO films (e.g. ISO 100) are great for bright outdoor conditions, while higher ISO films (e.g. ISO 800 or 1600) are better for low light or indoor photography. If you’d like to know more about this, see my blog on the exposure triangle.
- Grain: Grain size varies by film type and speed. Higher ISO films tend to have more pronounced grain, which can add texture and mood to your photos.
- Developing Requirements: Some films, like slide film or cine film, require specific processes, while others can be processed in the more widely available C-41 chemicals.
- Cost: This one is pretty self explanatory – #staybrokeshootfilm is a movement for a reason, but if you take a look you’ll see why I mainly stick to Ilford HP5 and Kodak Gold for day-to-day 35mm shooting!
In Conclusion...
Each type of film offers something unique, allowing you to experiment with different looks and styles, but there are definitely more suited for beginners than others.
Whatever you end up shooting, make sure you log what film and what settings you use so you can see what works and learn from your successes, and failures, with every exposure!
Let me know your favourite film in the comments below and I’ll try and shoot a roll if I haven’t already!
Rollei 35 - Walkthrough and How to Load Film
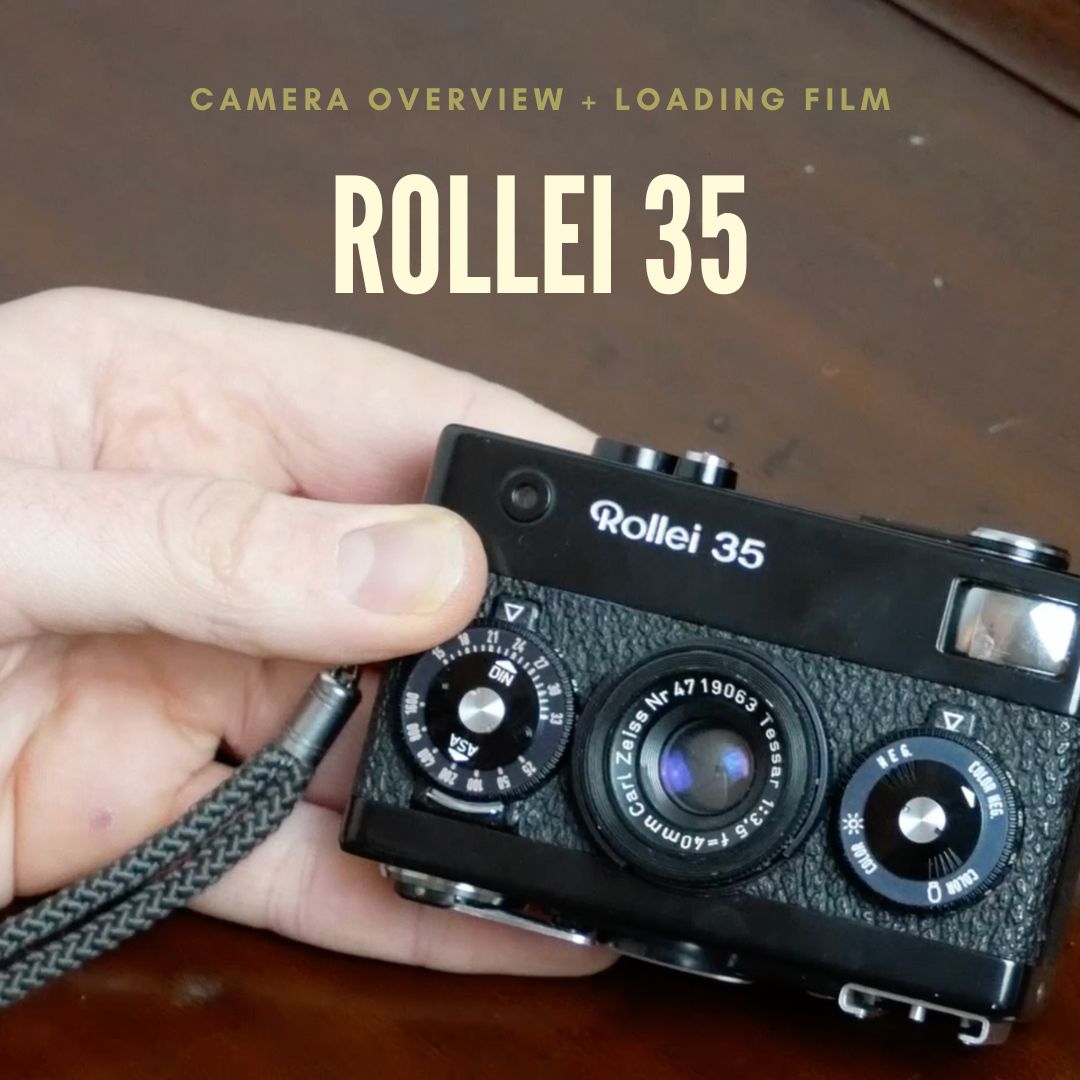
Rollei 35 Walkthrough & How to Load Film
Quick Summary
In this video, I break down the features of the Rollei 35 and show you how to set your desired aperture, ISO and shutter speed.
I also show provide a full tutorial on how to load film into the Rollei 35.
This video uses an original German production Rollei 35, but if yours was made in Singapore or is a different model (Rollei 35T, 35TE, 35SE) fear not, this video should still get you confident with settings and loading film so you can go out and use this fantastic camera!
Key Takeaways:
- Each dial on the front has two different purposes.
- The lens lock has some nuance to it – you have to ensure you have “cocked” the film advance leaver before the lens lock will release.
- The light cell placement can cause issues when shooting if you don’t plan to meter with an app or light meter.
- The battery placement means if it dies you have to finish your roll before being able to replace it.
- Never force anything!!
- This is an amazing and compact camera that I absolutely love – hopefully you do too!
The Rollei 35 is a thing of beauty...
The Rollei 35 is one of the most iconic compact film cameras ever made, and for good reason. Introduced in the 1960s, it was the smallest full-frame 35mm camera in the world at the time. It’s a real marvel of German engineering and design and I’m yet to find anything else like it.
A Compact Camera with Full Features
What makes the Rollei 35 so interesting is its perfect balance between portability and functionality. Despite its compact size, the camera doesn’t compromise on quality and wields a high-quality Carl Zeiss (or Schneider lens, depending on the model) which delivers stunningly sharp images.
Its collapsible lens makes it ultra-portable, which is ideal for me when shooting b. It’s certainly nicer to lug about than my Pentax SFXn.
The charm of the Rollei 35 lies in its quirky, yet efficient, design.
Unlike most film cameras, the viewfinder is on the far left side of the body, and the shutter speed and aperture dials are located at the bottom of the camera.
It takes a little getting used to, but for many photographers, myself included, this unique design adds to the charm and intrigue of using the camera.
Hopefully the above video helps you get out there and using your Rollei!
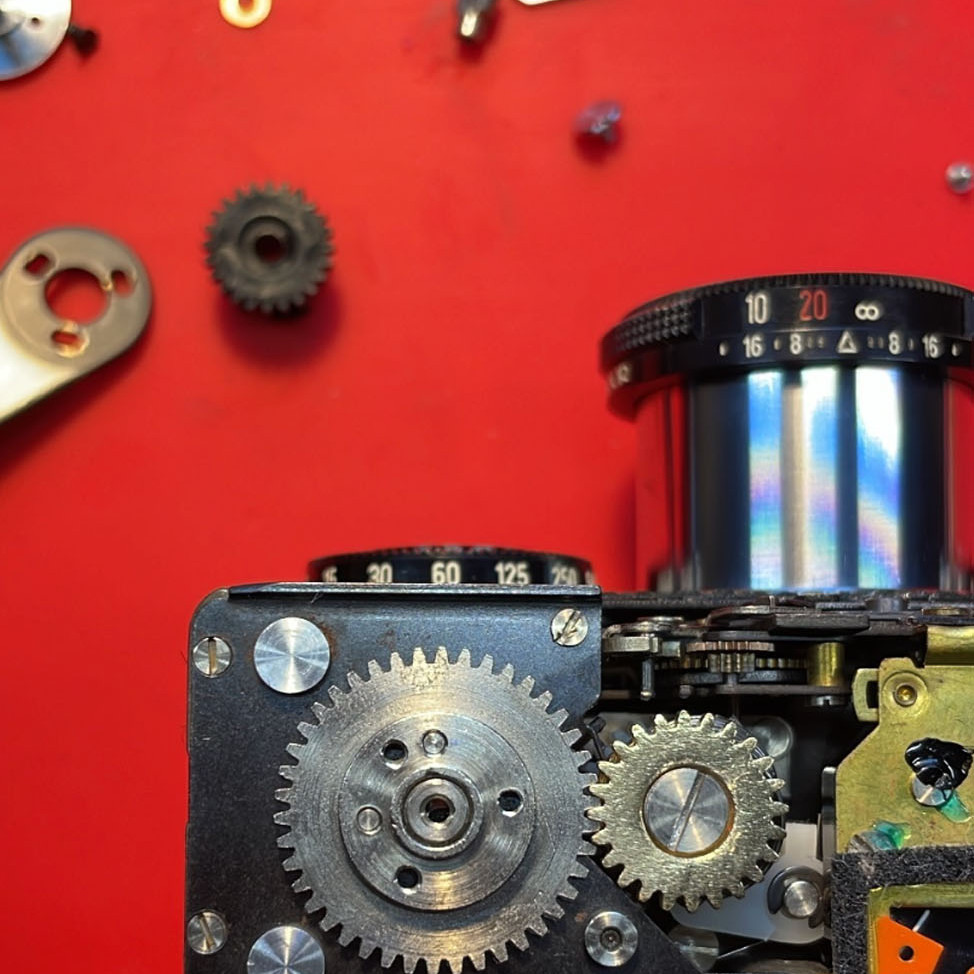
If You Need Your Rollei 35 Repairing...
I would thoroughly recommend Dan Ho if you’re in the UK and need a Rollei 35 repaired – he took my camera in when nobody else could figure out the issue and sorted it at a very competitive price.
Mine had an issue with a plastic gear that had become brittle and snapped – Dan replaced it with a brass one and it’s working like a dream.
Couldn’t recommend him enough!!
5 Essential Things Every Film Photographer Needs To Know
5 Essentials Every Film Photography Beginner Should Know
Quick Summary
If you’re new to the world of film, it’s easy to feel lost in a sea of information. I distinctly remember feeling incredibly overwhelmed when I got my first analogue camera and started to try and figure out what I needed to know to get out there and shooting some film.
This is my attempt to make that easy for you – In this guide, I am going to break down five essential things every film photography beginner should know.
Whether you’re picking up your first camera or simply curious about the medium, these tips will give you a solid foundation to help you create beautiful, analog images..
Key Takeaways:
- Life gets easier once you understand the basics of the exposure triangle.
- The Sunny 16 rule will help you get shooting without metering for light.
- Metering for light will help you expose for high contrast and unstable conditions.
- Logging your shots will help you learn.
- Embrace mistakes – they’re how you can learn in the first place!
1 – Learn the Exposure Triangle
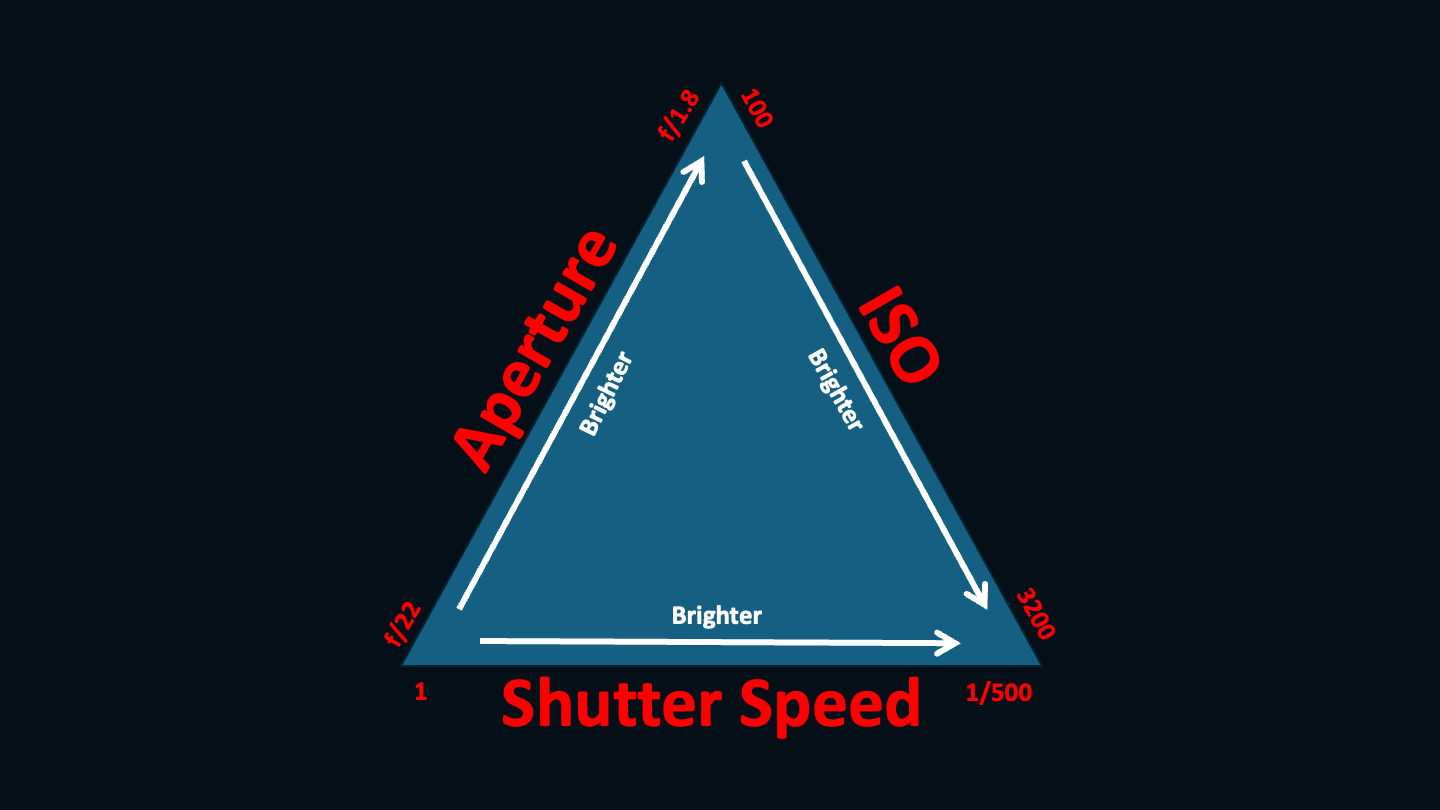
Film photography is a mad alchemy of chemicals and light – within this process, you have 3 main variables that underpin every photo you take: aperture, ISO and shutter speed. Together, these form the exposure triangle, a fundamental concept in both film and digital photography.
Understanding these three variables is essential for any aspiring photographer. By mastering the exposure triangle, you’ll not only feel more confident in your shooting but also gain the ability to make creative and informed decisions.
Put simply: aperture controls the depth of field, ISO affects your film’s sensitivity to light, and shutter speed dictates how long your film is exposed to light. The interplay between these three factors determines the final look of your image and, once wielded with confidence, can unlock your creative potential with a camera.
Mastering the exposure triangle will help you achieve better control over your shots and understand the ‘why’ behind your choices. If you want to break away from automatic shooting modes, use a fully manual film camera, and have more creative freedom, this knowledge is key.
I’ve written a full guide to the exposure triangle which you can read here – hopefully it breaks this down into something simple and digestible!
2 – Learn the Sunny 16 Rule

Once you’ve grasped the basics of the exposure triangle, it’s time to put that knowledge into practice with the ‘Sunny 16’ rule.
This is a tried-and-true method that helps photographers estimate correct exposure without relying on a light meter. It’s particularly useful if your camera’s light meter is broken (a common issue with vintage film cameras), or if you’re shooting without access to a digital light meter or app.
The Sunny 16 rule is also invaluable for fast-paced shooting, like street photography. When you’re moving quickly and trying to capture spontaneous moments, the last thing you want to do is fiddle around with your light meter and risk missing the shot.
Here’s how the rule works: If you’re shooting in bright, sunny conditions, set your aperture to f/16 and your shutter speed to the reciprocal of your film’s ISO.
For example, if you’re shooting Kodak Gold 200 film, set your shutter speed to 1/200 or the closest equivalent your camera allows. If you can’t match the ISO exactly, err on the side of caution by choosing a slightly slower speed to avoid underexposure.
As lighting conditions change, you can adjust the aperture accordingly. For instance, if it becomes slightly cloudy, drop to f/11. In full overcast conditions, f/5.6 might be appropriate, and you could go as wide as f/4 at sunrise or sunset.
As someone who lives in the north of England, I think I get to use “sunny 16” about 6 days a year, and spend the rest of it between f/11 and f/5.6…
The Sunny 16 rule is a great way to build confidence in shooting without a light meter. Just remember that it works best in stable lighting conditions, and be mindful of shadows cast by buildings or other objects.
Also, don’t forget to log your exposure settings in your analogue book so you can reflect on what worked and what didn’t (see below!)
For a more in-depth explanation of the Sunny 16 rule, here’s my dedicated guide!
3 – Learn to Use an Analogue Book
One of the biggest differences between digital and film photography is the lack of instant feedback. With digital, every shot is accompanied by metadata: aperture, shutter speed, ISO, and more.
You can immediately review your settings and adjust or, when editing later, know what settings to use again down the line.
In film photography, however, once the shot is taken, none of that helpful metadata is saved.
This is where an analogue book (or any method of recording your shooting details) becomes invaluable. You can use anything from a dedicated app to a simple notebook to log key information such as your camera settings, shooting conditions, and personal notes.
The key is consistency. Whenever you take a shot, jot down the following: film stock, camera model, date, time, location, shot number, lighting conditions, shutter speed, aperture, and any relevant notes.
By keeping track of this information, you can compare your log to the developed film and learn from your successes or mistakes.
I know this might sound tedious, but it’s actually a lovely thing to look back on and is absolutely vital if you’re wanting to progress your understanding and ability.
Personally, I love the tactile feel of using a pocket-sized notebook to record my notes while shooting. It’s always in my camera bag, ready for quick updates.
If you’d like to know more about this, here’s a dedicated guide to film photo metadata logging.
4 – Learn How to Use a Light Metering App
Light metering apps are a lifesaver when you’re shooting with a manual film camera that lacks a built-in light meter or has a faulty one.
These apps help you calculate the correct exposure settings for any given lighting condition, giving you the ability to shoot more confidently.
There are many free and paid light metering apps available for both iOS and Android. Some popular examples include “myLightMeter” and “Light Meter – lite.”
My personal favourite is “Lghtmtr” – it’s free and ridiculously simple. Being able to tap and view/adjust the type of exposure I am after is so useful!
These apps allow you to input certain parameters, like your desired aperture or shutter speed, and will suggest the other necessary settings to achieve a proper exposure.
A key tip when using a light meter app is to decide which variable is most important for your shot. For example, if you’re taking a portrait and want a shallow depth of field, you’ll want to prioritise aperture.
Once you lock in your desired f-stop, the app will calculate the correct shutter speed and ISO to match. This is where the exposure triangle comes into play – understanding how these elements interact will make your use of the app even more effective.
5 – Accept Failure and Mistakes
Film photography is a learning process, and mistakes are inevitable. But don’t be disheartened! Every overexposed frame, every blurry shot, every roll of film that didn’t quite turn out how you imagined is an opportunity to learn and grow as a photographer.
The beauty of film photography lies not only in its results but also in the journey. Some of the most beautiful images can come from what you might initially consider a “mistake.” For instance, light leaks, unexpected grain, or even slight underexposures can add character and mood to a photo that would be impossible to replicate digitally.
The key is to embrace these moments as part of your development. Use your analogue book to document your process and analyse where things went wrong and why. Over time, this reflective practice will make you a better, more intuitive photographer. In the end, it’s all about learning from those experiences and allowing yourself the freedom to experiment.
Get out and shoot your shot!
Film photography is a rewarding but sometimes challenging journey, filled with nuances that take time to master. Please stick with it – I promise it’s worth it in the end.
Remember, each shot is a learning experience, and the beauty of film is in its unpredictability. Keep shooting, keep learning, and most importantly, have fun with your camera. Ultimately, that’s all that matters.
How to Make Your Own Film Photo Metadata Log Book
How to Use a Film Photography Log Book
Quick Summary
For many of us, the allure of film photography lies in the tactile nature of the process – the sound of the shutter, the winding of the film, and the anticipation of seeing your images once developed.
However, unlike in digital photography, metadata such as exposure settings, time, and even location is NOT recorded automatically, and once you’ve shot – it’s lost!
It’s therefore up to you to document these details. This is where the log book comes in – in this blog I break down how to easily set one up and why it’s important to do so!
Key Takeaways:
- You need to find a way that works for you, whether that’s a physical notebook or digital alternative.
- You need to track a variety of metadata such as film stock, camera, lens, conditions, aperture, shutter speed and ISO in order to learn from your shots.
- Consistency is key and will really help you progress with your understanding of how to create under different conditions.
- If you don’t know about the aperture, ISO and shutter speed, this will be harder for you. Luckily, I’ve got a dedicated guide to the exposure triangle.
Why Keeping a Film Photography Log Book is Important
Put simply, a log book helps you understand what worked and what didn’t during your shoots.
When you receive your developed photos back, being able to look at your settings and decisions for each frame can be invaluable for learning. Without this reference, you might struggle to understand why a shot was underexposed, why a specific depth of field was achieved, or why the final image didn’t match your expectations.
If, for example, you’re just tackling the Sunny 16 rule, logging your data will help you understand what works for different conditions.
By tracking each shot’s details, you’ll begin to see patterns emerge and identify what conditions or settings produce your favourite images, as well as what changes you should make next time.
This, like much of photography in general, is a process of trial, error, and reflection and is vital to you growing your skillset when wielding your film camera.
Best Methods for Logging Your Shots
When it comes to keeping a film photography log book, there’s no single way to do it. Different photographers prefer different approaches depending on their style and shooting preferences. Here are a few popular methods:
1. Traditional Notebooks
For many photographers, including myself, the simplicity of a pen and paper is hard to beat. Small, pocket-sized notebooks are a great option because they’re easy to carry around and provide plenty of room to jot down the information you need – I also like the ability of making little notes or sketches in the margins.
I typically use a small Muji notebook – they’re perfect for me!
There’s something satisfying about physically writing down the details of each shot. A small notebook fits perfectly in most camera bags, and for someone that’s trying to get away from digital when he can, it’s what I like using!
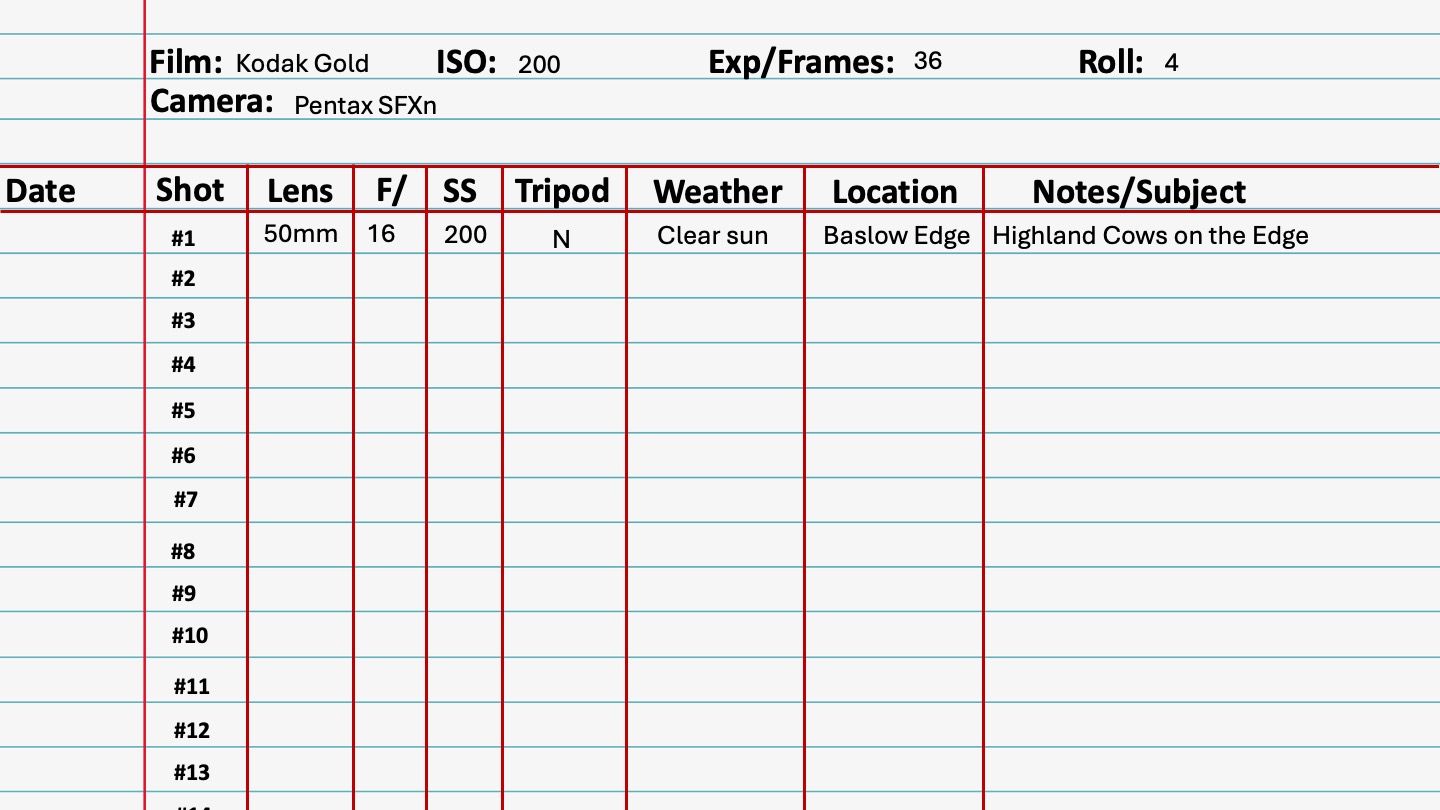
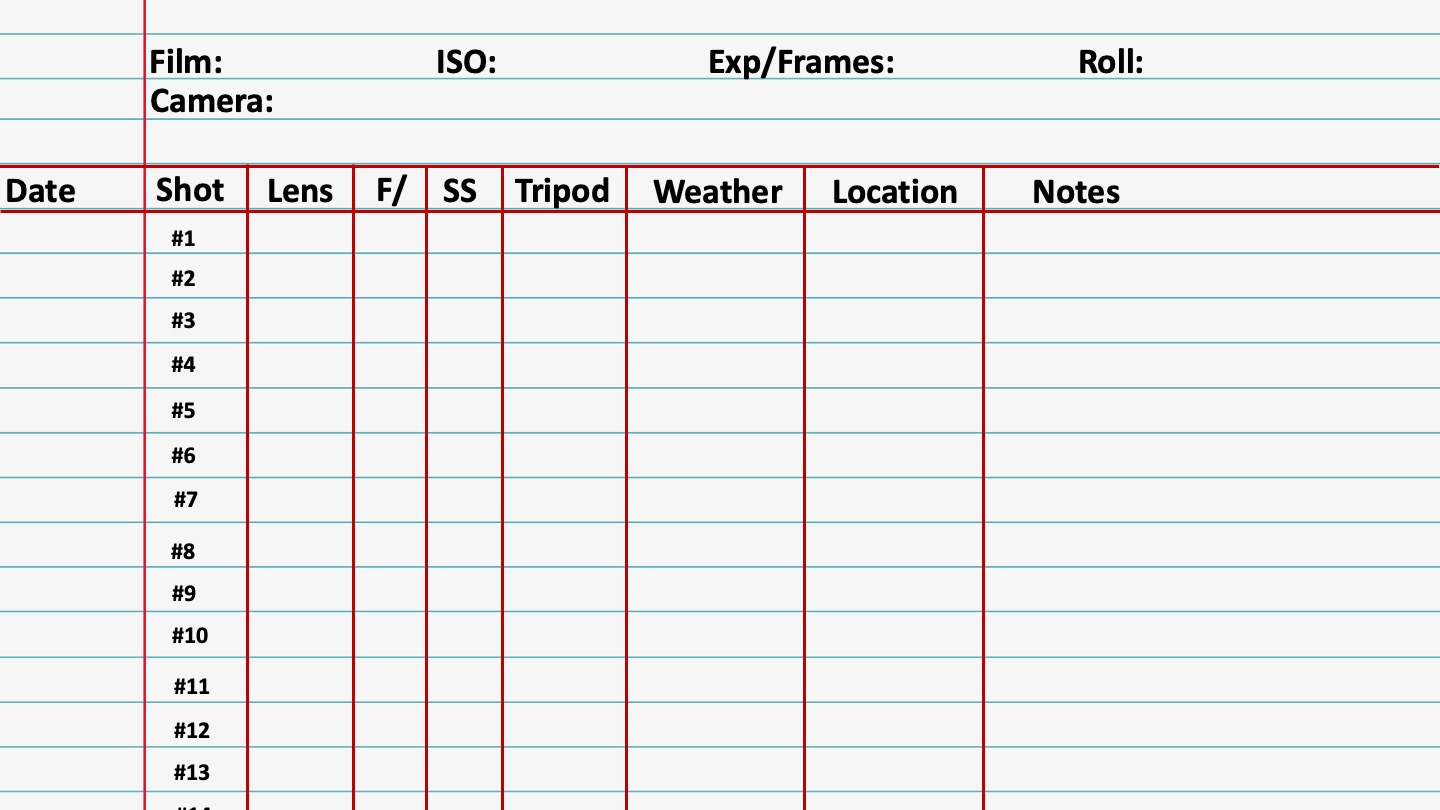
Here’s a digital mockup of how I layout my own analogue notebook…
2. Dedicated Log Books
If you prefer a more structured approach, there are pre-printed film photography log books available. These come with columns or spaces for all the relevant data, meaning you don’t have to think about what to record — just fill in the blanks. Some even include additional sections for notes on lighting, composition, or shooting conditions, which can help provide a comprehensive overview of your photography session.
I tend to avoid these as they can be very expensive for what they are and you’re forced into using someone else’s system, which might not fit your own.
3. Digital Note-Taking Apps
If you’re more of a digital native, apps like Notion, Evernote, or even a simple spreadsheet can be perfect for logging your shots.
These methods allow you to add more detail, upload reference images, and even sync your notes across devices, so you’ll always have access to your log – I can definitely see the appeal here.
If I’m honest, the humble iPhone Notes app has been a great backup when I’ve left my notebook at home, so I’d recommend that for ultimate simplicty.
What Data Should You Log?
Whether you’re using a notebook, app, or dedicated log book, the most important part is consistency. To make the most out of this practice, be diligent in recording the following information:
1. Film Stock
This is the foundation for understanding the results of your images. Recording what film stock you used helps you determine how different brands and ISO speeds perform under various conditions.
2. Camera, Lens and Tripod
The camera and lens choice also plays a key role in the look of your image. Different lenses affect depth of field and sharpness, so it’s important to log exactly which gear you’re using if you’re flitting between glass.
I tend to use the same lens for a full roll of film, so I occasionally leave this off if I know it won’t be necessary.
It’s also important to note if you use a tripod, however if this isn’t something you do regularly, you could remove this column!
3. Date, Time, and Location
Knowing when and where you took the shot can be crucial in understanding lighting conditions. The time of day impacts natural light, and the location could include environmental factors that affect your final image.
For example, if I am out in the Peak District in the open under bright sunny conditions, then head into a shaded woodland area, it would dramatically impact my exposure.
4. Shutter Speed, Aperture, and ISO
These three settings make up the exposure triangle, and logging them is essential to evaluating your exposure decisions. Over time, you’ll begin to see how different combinations of shutter speed, aperture, and ISO create varying effects in your images.
5. Shot Number
It’s a good idea to record the number of each shot as you go along. This allows you to easily cross-reference your log book with your developed images once you receive them from the lab (and remember how many shots you have left!)
6. Lighting Conditions
You don’t always have control over the lighting, but it’s important to note whether conditions were sunny, overcast, or artificial. This helps you later understand how the lighting impacted your shot and can assist in planning for future shoots.
If you’d like to know how you can shoot in different conditions without metering for light, check out my blog on the Sunny 16 Rule.
7. Additional Notes
If there were specific challenges, like tricky shadows, unexpected movement, or if you were experimenting with a new technique, make a note of it. These personal reflections will help you learn and grow from each shoot.
I also add, for example, a column for “Distance” if I am shooting with a camera like my Rollei 35 which has zone based focusing (meaning you set the distance from 3ft to infinity in various increments).
Take a look at the below example for a log book entry for a roll of Kodak Gold 200 shot on a Pentax SFXn on a sunny day…
Why Consistency Matters
The key to successfully using a film photography log book is consistency. If you forget to jot down details here and there, it can make it much harder to learn from your mistakes or recreate the conditions of your best shots.
Try to make logging your shots a habit after each frame or at least at the end of each roll.
Using a film photography log book is one of the simplest and most effective ways to improve your skills. By understanding exactly what went into each shot, you’ll develop a deeper appreciation for the craft and grow more confident in your decision-making. Over time, your log book will become a valuable reference point, helping you unlock your full creative potential and continually improve your film photography.
Happy shooting!
The Sunny 16 Rule Explained for Film Photography
The Sunny 16 Rule Explained for Film Photography
Quick Summary
The Sunny 16 Rule is one of the most well-known methods for estimating exposure without needing a light meter. It’s a simple, tried-and-true technique that can help you get properly exposed shots in bright daylight.
In this guide, I break down exactly what the Sunny 16 Rule is, how to apply it, and the considerations you need to keep in mind.
When you’re starting out with film photography, especially if you’re working with older cameras that may not have reliable light meters, understanding the basics of exposure is crucial.
If you haven’t already, check out my guide to the exposure triangle first – this breaks down each element of exposure and will help you get to grips with necessary terminology.
Key Takeaways:
- The Sunny 16 Rule dictates that you set your aperture to f/16 on a clear sunny day and set your shutter speed to the reciprocal of your ISO
- This is great for shooting without a light meter or app or when shooting in stable conditions
- You can adjust your aperture to reflect changes to conditions and continue to use the rule (such as f/8 for cloudy conditions)
- There are considerations you need to be aware of such as being aware of shadow and contrast, and it is always good to track your metadata so you can learn from what does and doesn’t work.
- Learning the elements of the exposure triangle will help you greatly in understanding Sunny 16.
What Is the Sunny 16 Rule?
The Sunny 16 Rule is a simple exposure rule of thumb that works best under bright, sunny conditions. It allows you to correctly expose your shots by adjusting your settings without needing to rely on a light meter.
The rule is based on the idea that, in direct sunlight, you can set your aperture to f/16 and your shutter speed as the reciprocal of your film’s ISO.
For example, if you’re shooting with ISO 200 film like Kodak Gold 200, your shutter speed would be 1/200 (or as close to that as your camera allows).
Likewise, if you’re using ISO 400 film, your shutter speed would be 1/400. With these settings, you should get a properly exposed image in clear, sunny conditions.
It’s a fantastic fallback technique that all film photographers should know, especially for situations where your camera’s light meter may not be working, or you simply want a quick, reliable way to set your exposure.
I tend to use this most when shooting street photography on a fully manual camera. This is because I want to be able to shoot spontaneous subjects and events as they unfold before me, and simply wouldn’t have time to meter for these and still get chance to take the shot.

The Sunny 16 Rule in Practice
To break it down:
- Aperture: Set your aperture to f/16 when in clear sunny conditions or the corresponding value to the conditions you are in.
- Shutter Speed: Set your shutter speed to the reciprocal of your ISO, or closest your camera settings allow. For example:
ISO 100 → Shutter speed: 1/100 (or nearest depending on your camera)
ISO 200 → Shutter speed: 1/200 (or nearest depending on your camera)
ISO 400 → Shutter speed: 1/400 (or nearest depending on your camera)
Adjusting for Other Conditions
The Sunny 16 Rule can be modified for different lighting conditions by adjusting the aperture.
Here are some common adjustments:
- f/16: Direct sunlight
- f/11: Slightly cloudy but still bright
- f/8: Overcast
- f/5.6: Heavy cloud cover or open shade
- f/4: Sunrise or sunset
Remember that changing your aperture will also change your depth of field. A smaller aperture (e.g., f/16) gives you a deeper depth of field, where more of the scene will be in focus, while a larger aperture (e.g., f/4) creates a shallower depth of field, which is great for isolating your subject.
This is covered in more detailed in my guide to the exposure triangle.
How to Change Your Settings on a Film Camera
When applying the Sunny 16 Rule, you’ll be adjusting two key settings: aperture and shutter speed. The process may vary slightly depending on your camera, but here’s the general workflow:
- Aperture: On most cameras, you can adjust your aperture via a ring on the lens itself. Turn the ring to the correct f-stop (e.g., f/16 for bright sunlight, f/8 for overcast).
- Shutter Speed: This is typically adjusted via a dial on the top or side of your camera. Set it to the reciprocal of your ISO (e.g., ISO 100 = 1/100 shutter speed).
- ISO: The ISO is dictated by the film you’re using. It’s important to remember that film ISO is fixed, unlike digital cameras, so once you’ve chosen your roll of film, you’ll be working with that ISO for the entire roll. Be mindful of this when planning your shoot and choosing your film stock.
In practice, if you’re shooting on a sunny day with ISO 100 film, you would set your aperture to f/16 and adjust the shutter speed to 1/100. If it becomes a bit cloudy, you would drop the aperture to f/11 or even f/8 and adjust accordingly.
Considerations and Nuances of the Sunny 16 Rule
While the Sunny 16 Rule is a great quick reference, it’s not without its limitations. Here are some important considerations to keep in mind when using the rule:
1. Stable Conditions Required
The rule assumes consistent, stable lighting conditions. If you’re shooting in a setting where clouds are constantly moving, or there are harsh shadows cast by buildings, trees, or other structures, the Sunny 16 Rule may not give you accurate exposures.
In such cases, you may need to use a light meter app to ensure the correct exposure or adjust your settings on the fly to accommodate changes in lighting.

2. Watch for Shadows
If your subject is in shadow or partially shaded, the Sunny 16 Rule will not be accurate. For example, if you’re shooting a scene where your subject is standing under the shadow of a tree, or you’re photographing in a narrow alley where parts of the scene are shaded, you’ll need to adjust the settings to compensate for the lower light levels.
I had trouble with this in London this summer – although it was beautifully sunny, the high buildings were casting long shadows on the street and causing havoc with my exposures.
This is why it’s crucial to evaluate the scene carefully before relying solely on the Sunny 16 Rule. Shadows can trick your exposure, so be prepared to adjust as needed.
3. Depth of Field and Creative Choices
Changing the aperture doesn’t just affect exposure, but also the depth of field. A higher f-stop (like f/16) will give you a greater depth of field, meaning more of the image will be in focus from foreground to background. This is great for landscapes, but less desirable if you’re going for a portrait with a beautifully blurred background.
So, while the Sunny 16 Rule is helpful for getting your exposure right, remember that your creative choices matter too. You might prefer to open the aperture wider for artistic reasons, and when you do, make sure to adjust your shutter speed accordingly.
4. Log Your Metadata by Hand
Unlike digital photography, film doesn’t record any metadata about your settings. That’s why it’s useful to carry a small notebook or use an app to log your settings for each shot. Record details like your aperture, shutter speed, film stock, and conditions, so that when you get your film developed, you can learn from any mistakes or successes.
This process helps you refine your technique over time, and it’s especially helpful when you’re relying on the Sunny 16 Rule and need to fine-tune based on your results.
Here is my dedicated guide to creating a film photography log book!
When the Sunny 16 Rule Isn’t Ideal
While the Sunny 16 Rule is a fantastic tool for sunny, predictable conditions, there are many situations where it may fall short:
- Low-light or indoor shooting: When you’re shooting in low light, the Sunny 16 Rule isn’t going to work well. You’ll need a light meter to help you get the correct exposure, as manual adjustments based on visual estimation won’t be accurate enough.
- Highly variable lighting conditions: If you’re shooting a scene with quickly changing light, such as during golden hour or when clouds are rapidly moving, the Sunny 16 Rule can be too rigid. In these cases, a light meter can save you from constant adjustment.
- High-contrast scenes: Scenes with a lot of contrast (like shooting into the sun or scenes with both bright highlights and deep shadows) will also require a more careful approach than the Sunny 16 Rule offers. Here, spot metering or more advanced light metering techniques are necessary.
For those situations, I highly recommend using a dedicated light meter or a reliable light metering app.

It’s going to take some time to get used to it…
The Sunny 16 Rule is a simple and effective way to estimate exposure without relying on a light meter, especially in bright, sunny conditions. It’s a great rule to have in your back pocket as a film photographer, particularly if you enjoy shooting with vintage cameras or in situations where you may not have access to modern metering technology.
That said, it’s important to recognise its limitations and be prepared to adapt when necessary. By understanding the nuances and practising with different settings, you’ll be able to shoot confidently and make the most of this classic exposure rule.
Understanding the Exposure Triangle – A guide for Beginner Film Photographers
Exposure Triangle Explained: A Complete Guide for Film Photography
Quick Summary
If you’re new to the world of film photography, one of the most fundamental concepts you need to grasp is that of the exposure triangle. This blog post breaks down each element (ISO, Shutter Speed and Aperture) and how these work together to create a well exposed shot.
Key Takeaways:
- The exposure triangle consists of three critical elements that work together to control how much light reaches the film: aperture, shutter speed, and ISO (sometimes called ASA).
- Balancing these three aspects is the key to achieving well-exposed images and avoiding your shot coming out too bright (overexposed) or too dark (underexposed).
- Understanding each element will also empower you to make decisions to achieve certain creative effects in your work.
- This blog breaks down each part of the exposure triangle and how they interact with one another to shape your final image.
- Once you understand these, you should familiarise yourself with the Sunny 16 Rule – here’s a dedicated blog just for that!
Mastering Aperture: Controlling Light and Focus
Aperture refers to the opening in your lens that allows light to pass through and reach the film. This is measured in f-stops, such as f/1.8, f/4, or f/11, which are the numbers you’ll likely see on your lens or when reading descriptions of lenses.
Somewhat confusingly, the smaller the f-stop number, the larger the opening (aperture) and therefore more light is let in. Conversely, a higher f-stop number means a small aperture and less light entering the lens.
I find that aperture is often the thing that people struggle to understand, so I’ll share with you the analogy that helped me grasp it better…
Think of aperture like the pupil of your eye. When you’re in a dark room, your pupil expands to let in more light so you can see better. This is similar to a large aperture (low f-stop), which lets in more light to expose your film in low-light conditions.
On the other hand, when you step outside into bright sunlight, your pupil constricts (gets smaller) to reduce the amount of light entering your eye.
This is like using a small aperture (high f-stop), which limits the light entering your lens to prevent overexposure in bright conditions.
Just like your eye adjusts its pupil size to control how much light you see, your camera’s aperture adjusts to control how much light reaches the film, affecting the overall exposure and focus of your image.
Like all elements of the exposure triangle, it’s important to log what aperture you use so you can learn from your own shots – find out how to make an analogue photography log book here.
The Impact Aperture has on Exposure:
- A larger aperture (e.g. f/1.8) allows more light in and is much better for dealing with low-light conditions. However, this also reduces your depth of field. This means only a small portion of your image will be in focus, making larger apertures perfect for portraiture or any shot where you’d like your subject sharp against a blurred background.
- A smaller aperture (e.g. f/11 or f/16) allows less light in, and is more suited for brighter daylight conditions. This increases your depth of field, so much more of your image will be in focus and therefore typically makes the most sense for landscape or architectural photography.
It is worth reiterating that beyond just controlling light, aperture is an immensely powerful creative tool in photography and dictates how much of your shot is in focus.
Once understood and wielded correctly, this can really help you match your final exposure to the creative vision you have for the shot at hand.
Look at the below photographs.
The portrait image was taken with a larger aperture to give a blurred background effect, whilst the woodland shot was taken with a smaller aperture to ensure the scene was in focus.


Shutter Speed: Freezing Motion or Embracing Blur
Shutter speed is relatively self explanatory and refers to how long your camera’s shutter stays open when you press the shutter release button to take a shot. This dictates how much light is able to hit the film.
Shutter speed is measured in fractions of a second – if you pick up your camera and look you’ll see numbers like 1/250 or 1/30, and sometimes shutter speed is displayed without the ‘1/’ – so 1/250 just becomes 250.
A faster shutter speed (e.g. 1/1000s) means that the shutter opens and closes quickly, allowing less light in that a shutter speed of, say, 1/30, which would keep the shutter open longer and therefore let more light in.
The Impact Shutter Speed has on Exposure:
- A faster shutter speed will let in less light, but it will also “freeze” motion. This means it’s super useful for action shots or capturing any fast-moving subjects (such as sports, wildlife, automotive, etc). It is also particularly useful when you’re shooting handheld and want to avoid blur from camera shake. A faster shutter speed would also be typically used in bright sunlight to avoid overexposing your image.
- A slower shutter speed allows more light in but may result in motion blur. This can be used intentionally to capture movement, such as with flowing waterfalls or light trails, or any time you want to convey motion in your image. I would definitely recommend, if this appeals to you, to use a tripod and either your camera’s self timer function or a shutter release cable to avoid camera shake!
Using a slower shutter speed when shooting indoors, at night, or anywhere with low light conditions will allow enough light in to properly expose your film – just beware of introducing unwanted blur from camera shake.
I used a fast shutter speed in the shot below to capture the wave before it crashed!
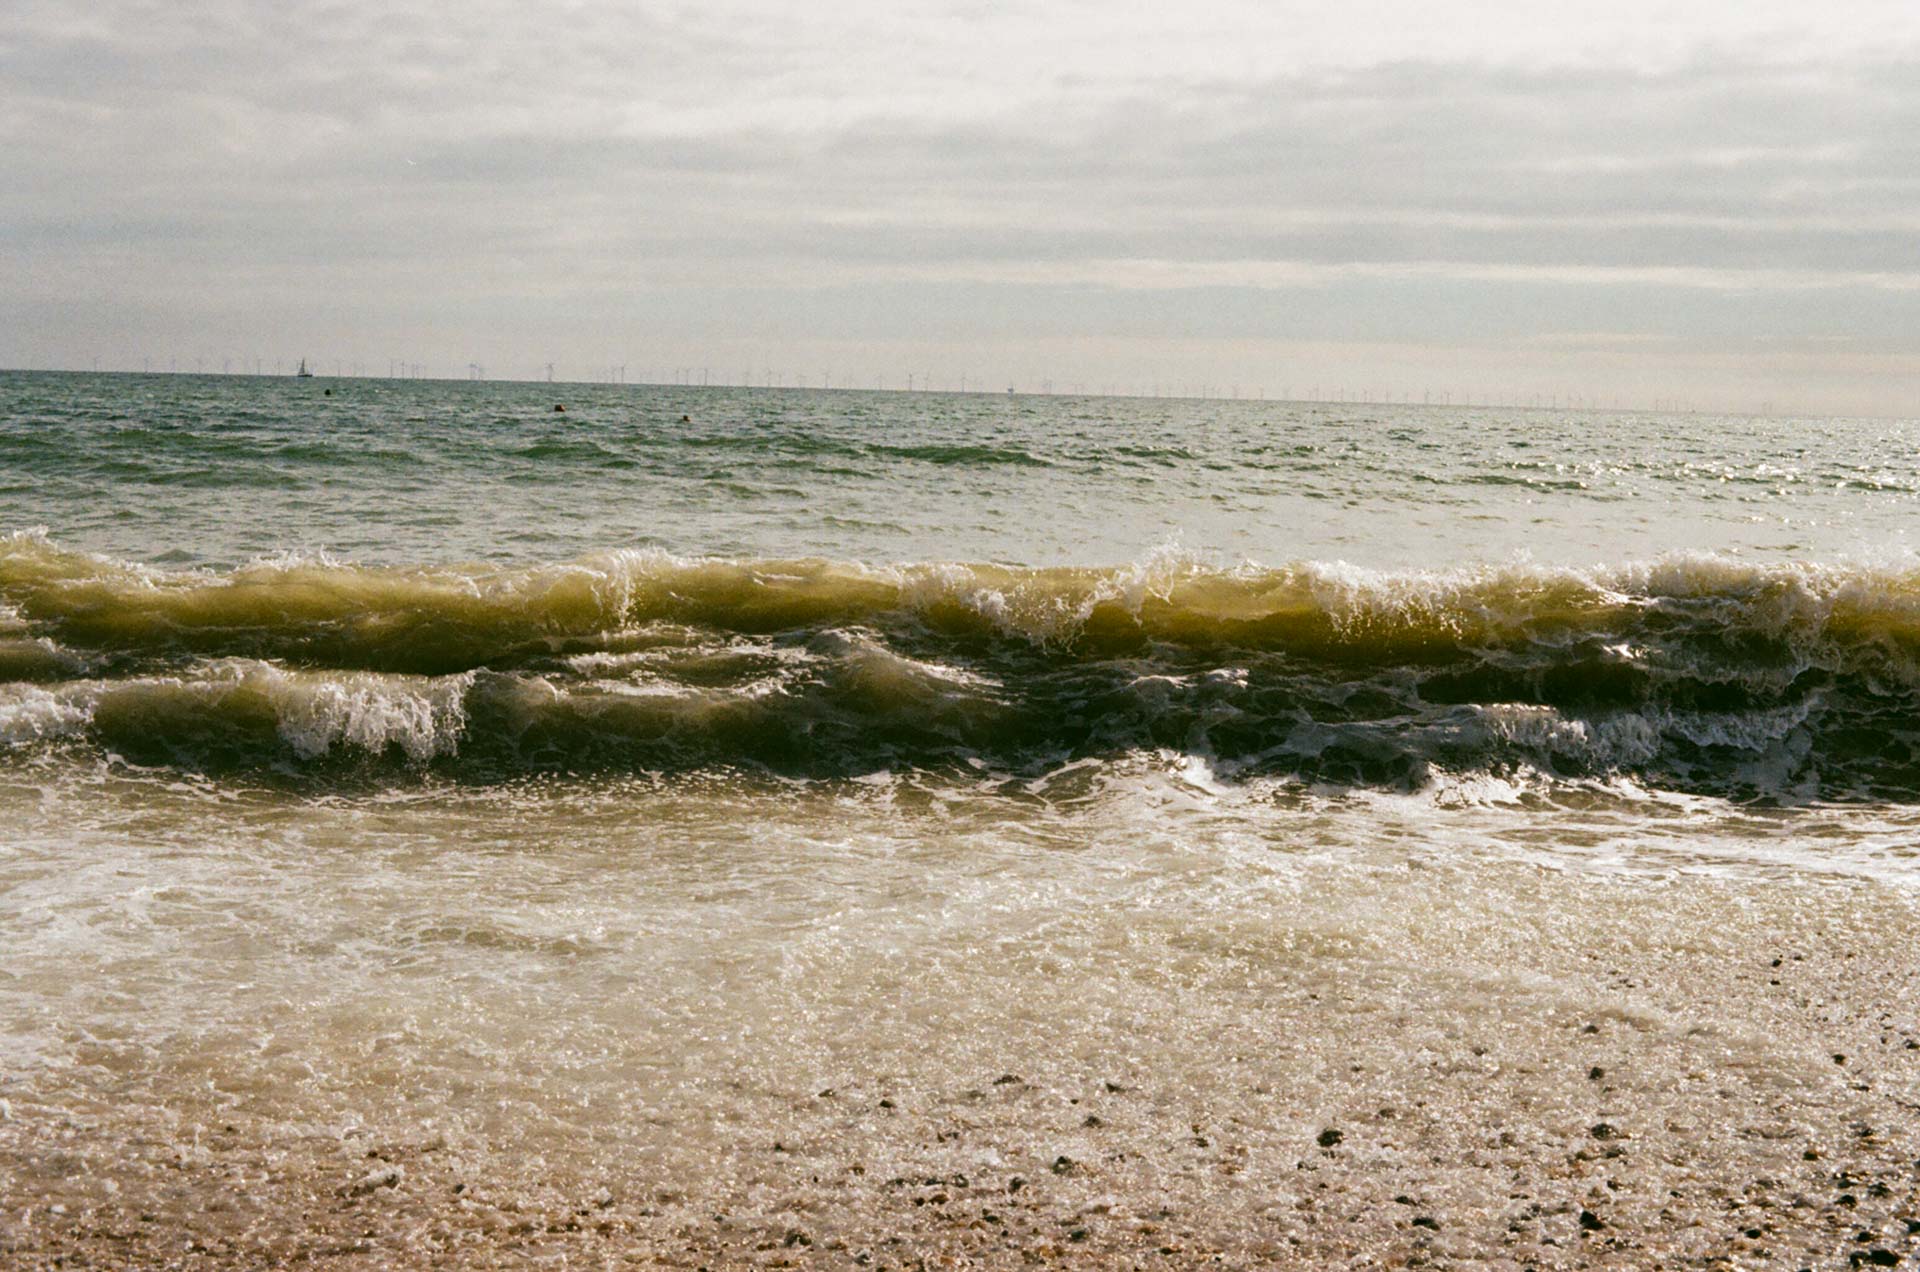
ISO Sensitivity: Finding the Right Light for Your Film
ISO and ASA are the same thing are refers to your film’s sensitivity to light.
ISO stands for International Organisation for Standardisation, which is the body that standardised the sensitivity ratings for film and digital sensors.
ASA stands for American Standards Association, which was the earlier system used to measure the sensitivity of photographic film before ISO became the standard. The numbers between ASA and ISO were the same, but ISO replaced ASA to create a globally unified system for measuring sensitivity.
In essence, both terms refer to the same concept—light sensitivity—but ISO is the modern term, while ASA is the older one.
When you’re using a digital camera, ISO is a setting you can change shot to shot, but with film photography the ISO is dictated by type of film you’re using. There are circumstances where you may choose to alter this by tricking your camera into thinking it’s shooting with a different ISO, such as when shooting expired film, but we don’t need to cover that here.
Lower ISO values, such as ISO 100 or 200, mean the film is less sensitive to light and therefore would be more suited to daylight or brighter conditions. A very famous and common example would be Kodak Gold 200 film stock.
Higher ISO values, such as ISO 800 or 1600, mean that the film is more sensitive to light and therefore would be more suited to low light conditions and night photography. You may see that a lot of low light film photography online uses film stock like Cinestill 800T.
The Impact ISO has on Exposure:
- Low ISO Film (e.g. Kodak Gold 200) is ideal for bright, well-lit conditions. It produces finer grain (or less “noise”) and creates sharp, clean images. Whilst certainly possible to use in low light, low ISO film will struggle to capture enough light without the help of slower shutter speeds or a wider aperture.
- High ISO Film (e.g. Cinestill 800T ) is more sensitive to light and works better in darker conditions. However, the trade-off is that higher ISO film introduces more grain, which can give your images a distinct, gritty look. Some photographers love this aesthetic, but it’s something to be aware of when choosing your film.
Just to elaborate slightly on grain, as I’m aware I’ve just thrown that in without much explanation… The grainier look of high-ISO film can be used creatively, especially in low-light situations or when you’re looking for a certain mood in your photos.
It’s great for documentary or street photography when the extra grain adds to the atmosphere. On the other hand, low-ISO film gives you crisp, clear images, perfect for bright, daylight scenes like landscapes or portraits in good light.
Since you can’t change the ISO once you’ve loaded your film, choose your film carefully based on your shooting environment. If you’re going to be shooting mostly outdoors during the day, stick with lower ISO film. But if you’re shooting indoors or in low light, go for a higher ISO film, or plan to use a tripod and wider aperture.
How the Exposure Triangle Works Together
Now, if if I’ve done my job correctly, you should have a good understanding of each element. It’s important to see how they work together as a system and how changing one element affects the others.
For example…
- If you open your aperture (lower f-stop), you’re letting in more light. To maintain the same exposure, you might need to use a faster shutter speed to let in less light or lower your ISO to make the film less sensitive.
- If you slow your shutter speed, allowing more light in, you might need to close your aperture (higher f-stop) or use a lower ISO film to avoid overexposure.
- If you’re using high ISO film (e.g., ISO 800), you’re increasing the film’s sensitivity to light. To prevent overexposure, you might need a faster shutter speed or a smaller aperture.
The key is balance. If you change one part of the triangle, you need to compensate with another to achieve a proper exposure. This balance is where the artistry of photography comes in – I always recommend that you start with what is creatively the most important element and then go from there.
Say, for example, that it’s important for your shot that you have a shallow depth of field to capture a portrait, or that you want to capture motion blur to show headlights in the rain – you know you would need to adjust the rest of the elements to compensate for this creative choice.
You should learn to log your shooting settings so that you can learn from your successes and mistakes – find out how I log my film photography metadata here.
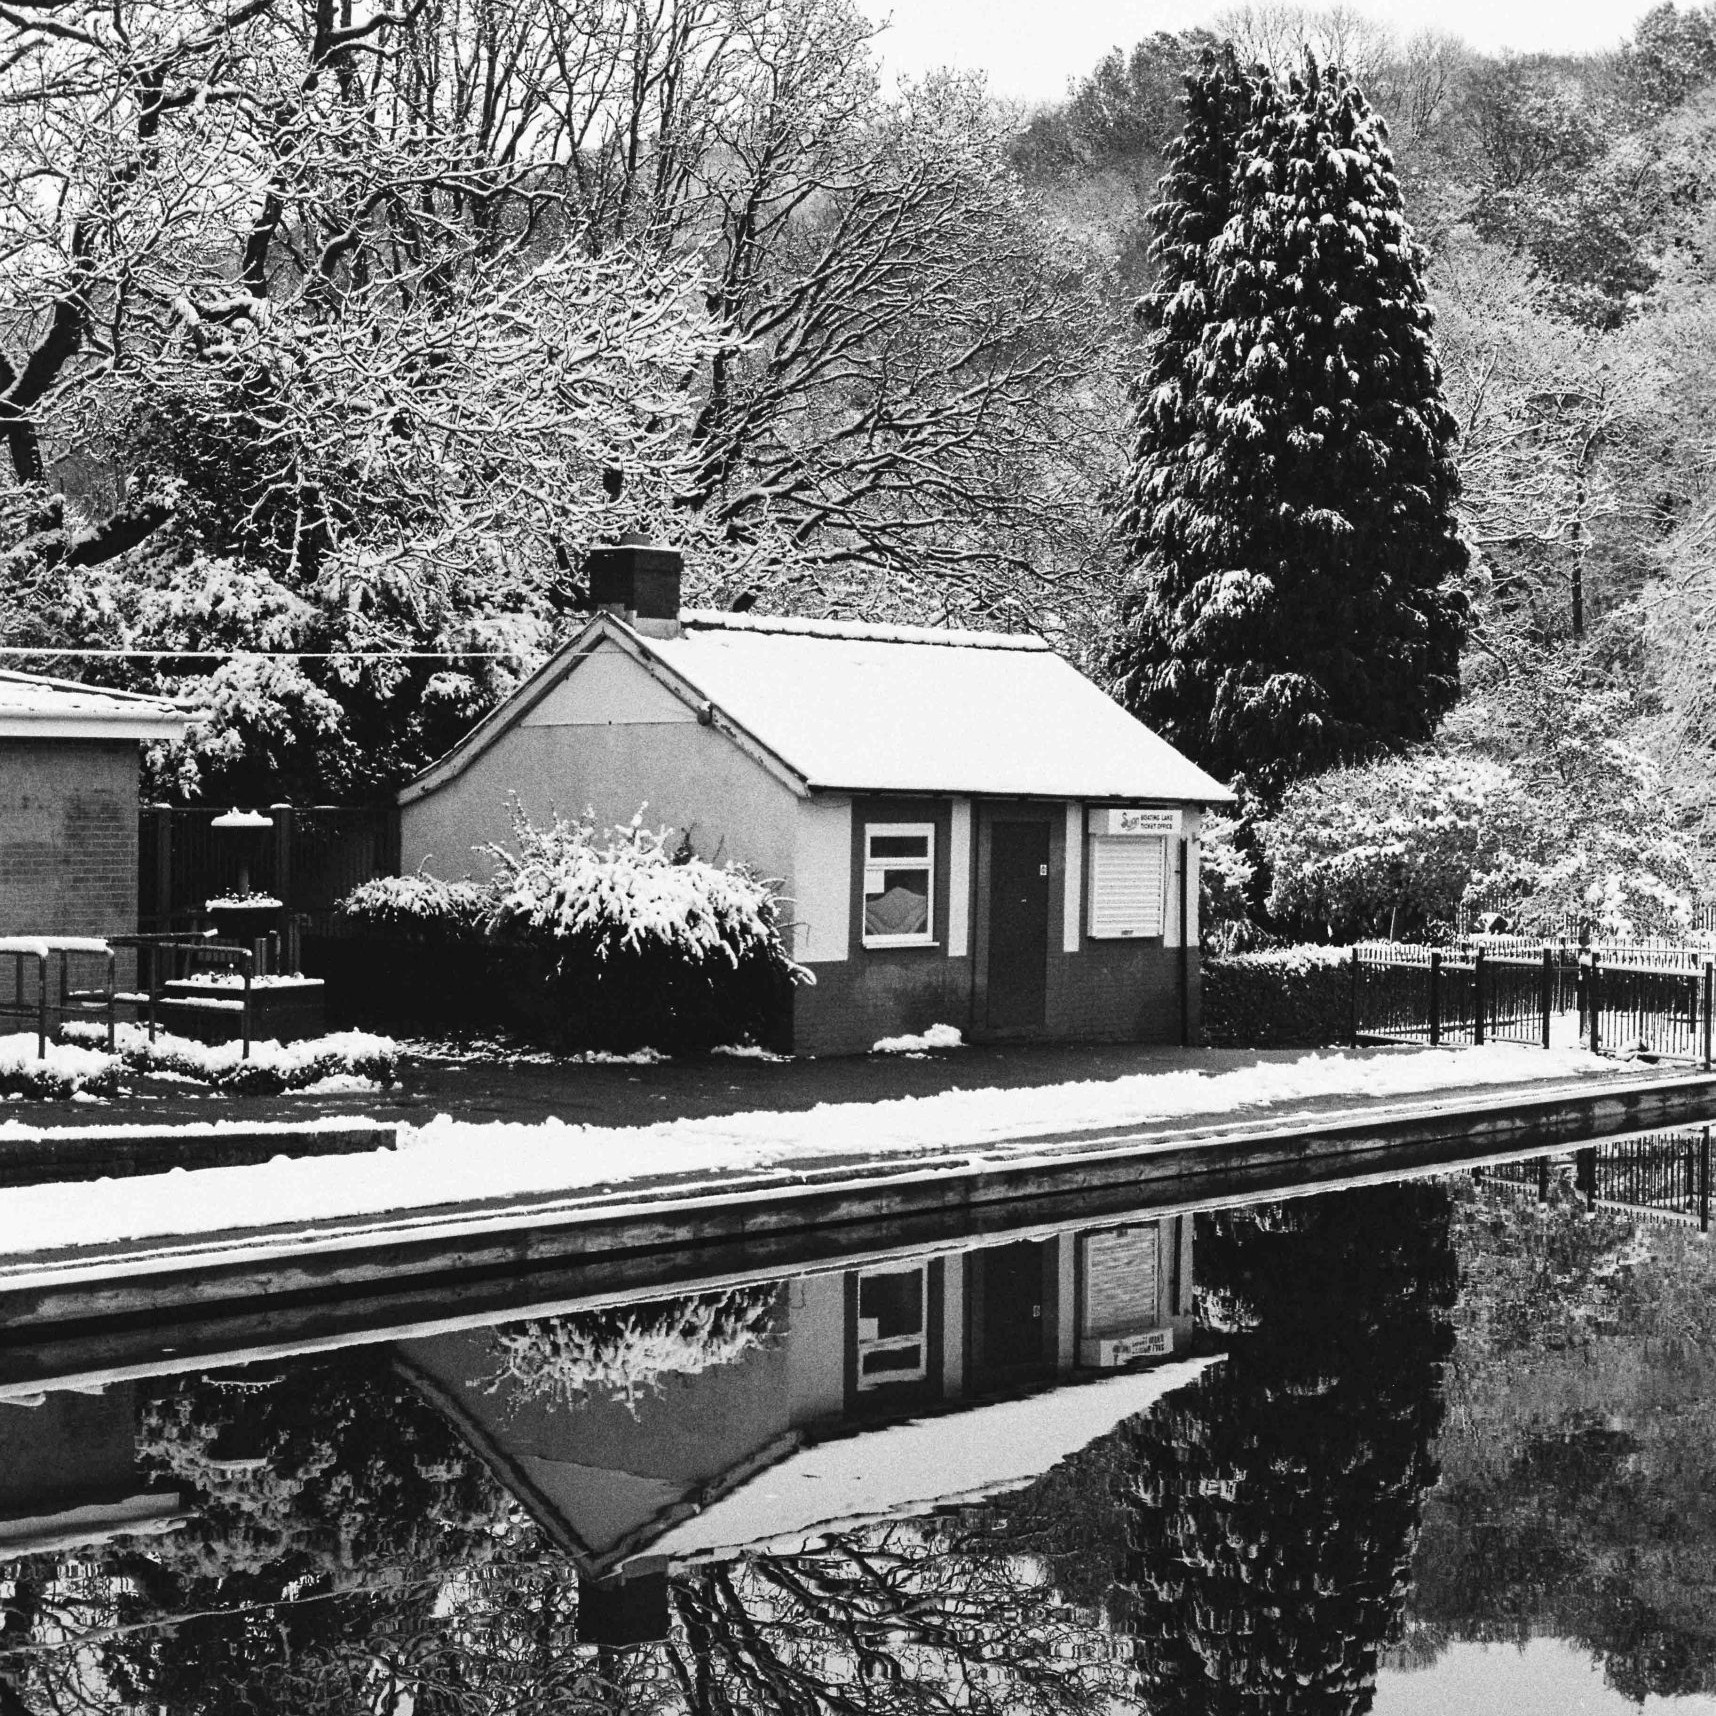
Stick With It – It’s Worth The Struggle!
Understanding and mastering the exposure triangle is one of the most important steps toward becoming a skilled film photographer. It’s learned best through trial and error – but stick with it, it will help you execute any creative vision for a shot.
If you have access to a digital camera, I would definitely recommend shooting on manual mode and experimenting with different variables so you get used to how these interact with one another without having to wait for film to be processed or incurring the cost of film itself!
Photography is both a science and an art, and knowing how to control light through the exposure triangle is the foundation that will help you take your craft to the next level.
Now that you know about aperture, ISO and shutter speed, you should check out the Sunny 16 Rule!
I hope this helps get you out there shooting!